DMC-G3K&G3W&G3EB-VQT3N48_eng.book 1 ページ 2011年4月29日 金曜日 午後12時48分 Basic Operating Instructions Digital Camera/ Lens Kit/Double Zoom Lens Kit/Body Model No. DMC-G3K/DMC-G3W DMC-G3 Before use, please read these instructions completely. More detailed instructions on the operation of this camera are contained in “Operating Instructions for advanced features (PDF format)” in the supplied CD-ROM. Install it on your PC to read it. Web Site: http://www.panasonic-europe.
DMC-G3K&G3W&G3EB-VQT3N48_eng.book 2 ページ 2011年4月29日 金曜日 午後12時48分 Dear Customer, We would like to take this opportunity to thank you for purchasing this Panasonic Digital Camera. Please read these Operating Instructions carefully and keep them handy for future reference. Please note that the actual controls and components, menu items, etc. of your Digital Camera may look somewhat different from those shown in the illustrations in these Operating Instructions. Carefully observe copyright laws.
DMC-G3K&G3W&G3EB-VQT3N48_eng.book 3 ページ 2011年4月29日 Caution for AC mains lead ∫ IMPORTANT For your safety, please read the following text carefully. This appliance is supplied with a moulded three pin mains plug for your safety and convenience. A 5-ampere fuse is fitted in this plug. Should the fuse need to be replaced please ensure that the replacement fuse has a rating of 5-ampere and that it is approved by ASTA or BSI to BS1362. Check for the ASTA mark Ï or the BSI mark Ì on the body of the fuse.
DMC-G3K&G3W&G3EB-VQT3N48_eng.book 4 ページ 2011年4月29日 金曜日 午後12時48分 ∫ About the battery charger CAUTION! • DO NOT INSTALL OR PLACE THIS UNIT IN A BOOKCASE, BUILT-IN CABINET OR IN ANOTHER CONFINED SPACE. ENSURE THE UNIT IS WELL VENTILATED. TO PREVENT RISK OF ELECTRIC SHOCK OR FIRE HAZARD DUE TO OVERHEATING, ENSURE THAT CURTAINS AND ANY OTHER MATERIALS DO NOT OBSTRUCT THE VENTILATION VENTS. • DO NOT OBSTRUCT THE UNIT’S VENTILATION OPENINGS WITH NEWSPAPERS, TABLECLOTHS, CURTAINS, AND SIMILAR ITEMS.
DMC-G3K&G3W&G3EB-VQT3N48_eng.book 5 ページ 2011年4月29日 金曜日 午後12時48分 Information for Users on Collection and Disposal of Old Equipment and used Batteries These symbols on the products, packaging, and/or accompanying documents mean that used electrical and electronic products and batteries should not be mixed with general household waste.
DMC-G3K&G3W&G3EB-VQT3N48_eng.book 6 ページ 2011年4月29日 金曜日 午後12時48分 Contents Information for Your Safety...............................................................................................2 Accessories ......................................................................................................................7 Names and Functions of Components ...........................................................................11 About the Lens.....................................................
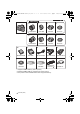
DMC-G3K&G3W&G3EB-VQT3N48_eng.book 7 ページ 2011年4月29日 金曜日 午後12時48分 Accessories Check that all the accessories are supplied before using the camera. Product numbers correct as of June 2011. These may be subject to change. 1 Digital Camera Body (This is referred to as camera body in these operating instructions.) 2 Interchangeable Lens “LUMIX G VARIO 14 –42 mm/F3.5 – 5.6 ASPH./MEGA O.I.S.” (This is referred to as lens in these operating instructions.
DMC-G3K&G3W&G3EB-VQT3N48_eng.book 8 ページ 2011年4月29日 金曜日 午後12時48分 DMC-G3W DMC-G3K 1 2 3 H-FS014042 6 11 DMW-BLD10E 15 DE-A94A 16 VKF4385 4 5 VYC1009 7 H-FS045200 10 VYF3201 8 VQT3N48 (ENG) VFC4315 9 VYC0986 VYF3201 VFC4315 12 13 K2CT3YY00034 K1HY08YY0016 K1HY08YY0015 17 18 VFF0806 VFC4634 or VFC4717 3 ¢1 Supplied in DMC-G3K only (lens kit product) ¢2 Supplied in DMC-G3W only (double zoom lens kit product) ¢3 This product number is DMC-G3W London Olympic Model only.
DMC-G3K&G3W&G3EB-VQT3N48_eng.book 9 ページ 2011年4月29日 金曜日 午後12時48分 Sales and Support Information Customer Care Centre • For customers within the UK: 0844 844 3852 • For customers within Ireland: 01 289 8333 • Visit our website for product information www.panasonic.co.uk • E-mail: customer.care@panasonic.co.
DMC-G3K&G3W&G3EB-VQT3N48_eng.
DMC-G3K&G3W&G3EB-VQT3N48_eng.book 11 ページ 2011年4月29日 金曜日 午後12時48分 Names and Functions of Components ∫ Camera body 1 Sensor 2 Flash 3 Self-timer indicator/ AF Assist Lamp 4 Lens fitting mark 5 Mount 6 Lens lock pin 7 Lens release button 1 2 4 5 3 6 7 8 9 10 11 12 13 14 15 16 17 18 [LVF/LCD] button 8 9 10 11 12 13 14 15 Diopter adjustment dial Viewfinder Playback button Motion picture button Camera ON/OFF switch Rear dial [DISP./Fn1] button Eye Cup Touch panel/LCD monitor [Q.
DMC-G3K&G3W&G3EB-VQT3N48_eng.book 12 ページ 2011年4月29日 金曜日 午後12時48分 21 Shoulder strap eyelet • Be sure to attach the shoulder strap when using the camera to ensure that you will not drop it.
DMC-G3K&G3W&G3EB-VQT3N48_eng.book 13 ページ 2011年4月29日 金曜日 午後12時48分 ∫ Lens H-FS014042 (LUMIX G VARIO 14– 42 mm/F3.5 – 5.6 ASPH./MEGA O.I.S.) H-FS045200 (LUMIX G VARIO 45 –200 mm/F4.0 – 5.6/ MEGA O.I.S.) 42 38 38 39 40 41 42 43 44 45 39 40 41 42 43 44 38 39 41 40 45 43 44 Tele Lens surface Focus ring Wide Zoom ring Contact point Lens fitting mark [O.I.S.
DMC-G3K&G3W&G3EB-VQT3N48_eng.book 14 ページ 2011年4月29日 金曜日 午後12時48分 Touch Panel This touch panel is a type that detects pressure. Touch the screen Drag To touch and release the touch panel. A movement without releasing the touch panel. Use this to perform tasks such as selecting icons or images displayed on the touch panel. • When selecting features using the touch This is used to move the AF area, operate the slide bar, etc. This can also be used to move to the next image during playback, etc.
DMC-G3K&G3W&G3EB-VQT3N48_eng.book 15 ページ 2011年4月29日 金曜日 午後12時48分 About the Lens ∫ Micro Four Thirds™ mount specification lens This unit can use the dedicated lenses compatible with the Micro Four Thirds System lens mount specification (Micro Four Thirds mount). ∫ Four Thirds™ mount specification lens Lens with the Four Thirds mount specification can be used by using the mount adaptor (DMW-MA1; optional).
DMC-G3K&G3W&G3EB-VQT3N48_eng.book 16 ページ 2011年4月29日 金曜日 午後12時48分 Attaching/Detaching the Lens • Check that the camera is turned off. • Change lenses where there is not a lot of dirt or dust. Attaching a lens to the camera body Turn the lens rear cap A and the body cap B in the direction of the arrow to detach them. • Do not put your hands inside the mount. Align the lens fitting marks C (red marks) on the camera body and the lens and then rotate the lens in the direction of the arrow until it clicks.
DMC-G3K&G3W&G3EB-VQT3N48_eng.book 17 ページ 2011年4月29日 金曜日 午後12時48分 Detaching a lens from the camera body Attach the lens cap. While pressing on the lens release button D, rotate the lens toward the arrow until it stops and then remove. • Always attach the body cap to the camera body so that dirt or dust does not get inside. • Attach the lens rear cap so that the lens contact point does not get scratched.
DMC-G3K&G3W&G3EB-VQT3N48_eng.book 18 ページ 2011年4月29日 金曜日 午後12時48分 Attaching the Lens Hood In bright sunlight or backlight, the lens hood will minimise lens flare and ghosting. The lens hood cuts off excess lighting and improves the picture quality. To attach the lens hood (flower shape) that came with the interchangeable lens (H-FS014042) Insert the lens hood into the lens with the short sides at the top and bottom, and turn in the direction of the arrow until it stops. A Fitting to the mark.
DMC-G3K&G3W&G3EB-VQT3N48_eng.book 19 ページ 2011年4月29日 金曜日 午後12時48分 Attaching the Shoulder Strap • We recommend attaching the shoulder strap when using the camera to prevent it from dropping. Pass the shoulder strap through the shoulder strap eyelet on the camera body. A: Shoulder strap eyelet Pass the end of the shoulder strap through the ring in the direction of the arrow and then pass it through the stopper. Pass the end of the shoulder strap through the hole on the other side of the stopper.
DMC-G3K&G3W&G3EB-VQT3N48_eng.book 20 ページ 2011年4月29日 金曜日 午後12時48分 Charging the Battery ∫ About batteries that you can use with this unit The battery that can be used with this unit is DMW-BLD10E. It has been found that counterfeit battery packs which look very similar to the genuine product are made available to purchase in some markets. Some of these battery packs are not adequately protected with internal protection to meet the requirements of appropriate safety standards.
DMC-G3K&G3W&G3EB-VQT3N48_eng.book 21 ページ 2011年4月29日 金曜日 午後12時48分 ∫ Charging time Charging time Approx. 120 min • The indicated charging time is for when the battery has been discharged completely. The charging time may vary depending on how the battery has been used. The charging time for the battery in hot/cold environments or a battery that has not been used for a long time may be longer than normal.
DMC-G3K&G3W&G3EB-VQT3N48_eng.book 22 ページ 2011年4月29日 金曜日 午後12時48分 ∫ Recording motion pictures (when using the LCD monitor) – [AVCHD] (Recording with picture quality set to [FSH]) When the interchangeable lens (H-FS014042) is used Recordable time Approx. 110 min Actual recordable time Approx. 55 min When the interchangeable lens (H-FS045200) is used Recordable time Approx. 100 min Actual recordable time Approx.
DMC-G3K&G3W&G3EB-VQT3N48_eng.book 23 ページ 2011年4月29日 金曜日 午後12時48分 Inserting and Removing the Card (optional)/ the Battery • Check that this unit is turned off. • We recommend using a Panasonic card. Slide the release lever in the direction of the arrow and open the card/battery door. • Always use genuine Panasonic batteries (DMW-BLD10E). • If you use other batteries, we cannot guarantee the quality of this product.
DMC-G3K&G3W&G3EB-VQT3N48_eng.book 24 ページ 2011年4月29日 金曜日 午後12時48分 About the Card About cards that can be used with this unit The following cards which conform to the SD video standard can be used with this unit. (These cards are indicated as card in the text.) Remarks SD Memory Card (8 MB to 2 GB) SDHC Memory Card (4 GB to 32 GB) SDXC Memory Card (48 GB, 64 GB) • Use a card with SD Speed Class¢ with “Class 4” or higher when recording motion pictures in [AVCHD].
DMC-G3K&G3W&G3EB-VQT3N48_eng.book 25 ページ 2011年4月29日 金曜日 午後12時48分 Setting Date/Time (Clock Set) The clock can be setup with the following procedure at the time of purchase. Change the clock setting in [CLOCK SET] of the [SETUP] menu. For details, read the PDF. • The clock is not set when the camera is shipped. Turn the camera on. • The status indicator 1 lights when you turn this unit on. ON OFF Touch [CLOCK SET]. Touch the items you wish to set (Year/Month/ Day/Hours/Minutes), and set using [3]/[4].
DMC-G3K&G3W&G3EB-VQT3N48_eng.book 26 ページ 2011年4月29日 金曜日 Selecting the Recording Mode ∫ To select a Recording Mode with the mode dial Switching the mode by rotating the mode dial. Align a desired mode with part A. • Rotate the mode dial slowly and surely to adjust to each mode. ∫ To select Intelligent Auto Mode Press [¦]. • [¦] button will light up when it is switched to Intelligent Auto Mode. • The Recording Mode selected by the mode dial is disabled while the [¦] button is lit.
DMC-G3K&G3W&G3EB-VQT3N48_eng.book 27 ページ 2011年4月29日 金曜日 午後12時48分 ∫ Basic Intelligent Auto Mode The subjects are recorded using settings automatically selected by the camera. Programme AE Mode The subjects are recorded using your own settings. ∫ Advanced Aperture-Priority AE Mode The shutter speed is automatically determined by the aperture value you set. Shutter-Priority AE Mode The aperture value is automatically determined by the shutter speed you set.
DMC-G3K&G3W&G3EB-VQT3N48_eng.book 28 ページ 2011年4月29日 金曜日 Recording Mode: Taking a Still picture • Set the drive mode to [ ] by pressing 4( ). Selecting the Recording Mode. Press the shutter button halfway to focus. A Aperture value B Shutter speed • Aperture value and shutter speed are displayed. (It will flash in red if the correct exposure is not achieved, except when set to flash.
DMC-G3K&G3W&G3EB-VQT3N48_eng.book 29 ページ 2011年4月29日 金曜日 午後12時48分 Recording Mode: ñ Taking Pictures using the Automatic Function (Intelligent Auto Mode) The camera will set the most appropriate settings to match the subject and the recording conditions so we recommend this mode for beginners or those who want to leave the settings to the camera and take pictures easily. • The following functions are activated automatically.
DMC-G3K&G3W&G3EB-VQT3N48_eng.book 30 ページ 2011年4月29日 金曜日 午後12時48分 Scene Detection When the camera identifies the optimum scene, the icon of the scene concerned is displayed in blue for 2 seconds, after which its colour changes to the usual red.
DMC-G3K&G3W&G3EB-VQT3N48_eng.book 31 ページ 2011年4月29日 金曜日 午後12時48分 Recording using Intelligent Auto Plus Mode The brightness and colour optimally set by the camera can be easily matched to your preferences. This mode is useful for those who would like the settings made by the camera to match their preferences but do not like dealing with detailed settings. Press [MENU/SET] when in Intelligent Auto Mode. Select [iA MODE] and then press [MENU/SET]. Press 1 to select [ [MENU/SET].
DMC-G3K&G3W&G3EB-VQT3N48_eng.book 32 ページ 2011年4月29日 金曜日 午後12時48分 Recording Mode: Taking Pictures with Defocus Control Function You can easily set the blurriness of the background while checking the screen. Touch [ × ] to display the setting screen. • When using the viewfinder, press the rear dial several times to display the Defocus Control setting screen. Touch the slide bar to set. • Setting can also be performed by rotating the rear dial. Recording of pictures or motion pictures.
DMC-G3K&G3W&G3EB-VQT3N48_eng.book 33 ページ 2011年4月29日 金曜日 午後12時48分 Recording Mode: Taking Pictures with Your Favourite Settings (Programme AE Mode) The camera automatically sets the shutter speed and the aperture value according to the brightness of the subject. You can take pictures with greater freedom by changing various settings in [REC] menu. Set the mode dial to [ ]. Note • The shutter speed is automatically set between about 20 seconds and 1/4000th of a second in the following cases.
DMC-G3K&G3W&G3EB-VQT3N48_eng.book 34 ページ 2011年4月29日 金曜日 午後12時48分 Recording Mode: Recording Motion Pictures This can record full high definition motion pictures compatible with the AVCHD format or motion pictures recorded in Motion JPEG. Audio will be recorded in stereo. The functions available when recording motion pictures differ according to the lens you are using, and the operational sound of the lens may be recorded. Recording of motion picture appropriate for each mode is possible.
DMC-G3K&G3W&G3EB-VQT3N48_eng.book 35 ページ 2011年4月29日 金曜日 午後12時48分 Playing Back Pictures/Motion Pictures Playing Back Pictures Press [(]. Forward or rewind the image by dragging the screen horizontally. Forward: drag from right to left Rewind: drag from left to right • It is also possible to forward or rewind the image by pressing 2/1 of the cursor button. • Speed of picture forwarding/rewinding changes depending on the playback status.
DMC-G3K&G3W&G3EB-VQT3N48_eng.book 36 ページ 2011年4月29日 金曜日 午後12時48分 Playing Back Motion Pictures • This unit was designed to play motion pictures using the AVCHD and QuickTime Motion JPEG formats that were taken with this model (only). • Motion pictures in AVCHD format that can be played back on this unit are [AVCHD] motion pictures that were recorded with this unit, AVCHD format (including [AVCHD Lite]) motion pictures recorded with Panasonic digital cameras (LUMIX) only. Press [(].
DMC-G3K&G3W&G3EB-VQT3N48_eng.book 37 ページ 2011年4月29日 金曜日 午後12時48分 ∫ Operations performed during Motion Picture Playback 1 Display control panel by touching screen. • If no operation is performed for 2 seconds, it will return to original status. 2 Operate control panel by touching.
DMC-G3K&G3W&G3EB-VQT3N48_eng.book 38 ページ 2011年4月29日 Deleting Pictures Once deleted, pictures cannot be recovered. Press [(]. To delete a single picture Select the picture to be deleted, and then touch [ ]. Touch [DELETE SINGLE]. • Confirmation screen is displayed. Picture is deleted by selecting [YES].
DMC-G3K&G3W&G3EB-VQT3N48_eng.book 39 ページ 2011年4月29日 金曜日 午後12時48分 Setting the Menu This camera offers menu selections that allow you to customize its operation to maximise your picture taking experience. In particular, the [SETUP] menu contains some important settings relating to the camera’s clock and power. Check the settings of this menu before proceeding to use the camera.
DMC-G3K&G3W&G3EB-VQT3N48_eng.book 40 ページ 2011年4月29日 金曜日 午後12時48分 Press [MENU/SET] to display the menu. Select the menu item by pressing 3/4 or by rotating the rear dial. • Select the item at the very bottom, and press 4 or rotate the rear dial right to move to the next screen. or Press [MENU/SET] or the rear dial. • Depending on the menu item, its setting may not appear or it may be displayed in a different way. Select the settings by pressing 3/4 or by rotating the rear dial.
DMC-G3K&G3W&G3EB-VQT3N48_eng.book 41 ページ 2011年4月29日 金曜日 午後12時48分 ∫ Switching to other menus e.g.: Switching to the [SETUP] menu from [REC] menu 1 Press 2. A Menu toggle icon 2 A Press 4 or rotate the rear dial to select the [SETUP] menu icon [ ]. or 3 Press 1 or the rear dial. • Select a menu item next and set it.
DMC-G3K&G3W&G3EB-VQT3N48_eng.book 42 ページ 2011年4月29日 金曜日 午後12時48分 Recording Mode: Compensating the Exposure Use this function when you cannot achieve appropriate exposure due to the difference in brightness between the subject and the background. Look at the following examples. Underexposed Compensate the exposure towards positive. Properly exposed Overexposed Compensate the exposure towards negative. Press the rear dial to switch to Exposure Compensation operation.
DMC-G3K&G3W&G3EB-VQT3N48_eng.book 43 ページ 2011年4月29日 金曜日 午後12時48分 Recording Mode: ±´² Taking Pictures by Specifying the Aperture/ Shutter Speed Aperture-priority AE Set the aperture value to a higher number when you want a sharp focus background. Set the aperture value to a lower number when you want a soft focus background. Set the mode dial to [ ]. Rotate the rear dial to set the aperture value.
DMC-G3K&G3W&G3EB-VQT3N48_eng.book 44 ページ 2011年4月29日 金曜日 午後12時48分 Manual Exposure Mode Determine the exposure by manually setting the aperture value and the shutter speed. The Manual Exposure Assistance appears on the lower portion of the screen to indicate the exposure. Set the mode dial to [²]. Rotate the rear dial to set the aperture and shutter speed. • It will switch between aperture setting operation and shutter speed setting operation every time the rear dial is pressed.
DMC-G3K&G3W&G3EB-VQT3N48_eng.book 45 ページ 2011年4月29日 金曜日 午後12時48分 Reading the Operating Instructions (PDF format) More detailed instructions on the operation of this camera are contained in “Operating Instructions for advanced features (PDF format)” in the supplied CD-ROM. Install it on your PC to read it. ∫ For Windows Turn the PC on and insert the CD-ROM containing the Operating Instructions (supplied). Select the desired language and then click [Operating Instructions] to install.
DMC-G3K&G3W&G3EB-VQT3N48_eng.book 46 ページ 2011年4月29日 金曜日 午後12時48分 Specifications Digital Camera Body (DMC-G3): Information for your safety Power Source: DC 8.4 V Power Consumption: 3.1 W (When recording with LCD Monitor) [When the Interchangeable lens (H-FS014042) is used] 3.3 W (When recording with LCD Monitor) [When the Interchangeable lens (H-FS045200) is used] 1.9 W (When playing back with LCD Monitor) [When the Interchangeable lens (H-FS014042) is used] 2.
DMC-G3K&G3W&G3EB-VQT3N48_eng.book 47 ページ 2011年4月29日 金曜日 午後12時48分 Minimum Illumination Approx. 9 lx (when i-Low light is used, the shutter speed is 1/25th of a second) [When the Interchangeable lens (H-FS014042) is used] Approx. 12 lx (when i-Low light is used, the shutter speed is 1/25th of a second) [When the Interchangeable lens (H-FS045200) is used] Shutter speed B (Bulb) (Max. approx.
DMC-G3K&G3W&G3EB-VQT3N48_eng.
DMC-G3K&G3W&G3EB-VQT3N48_eng.book 49 ページ 2011年4月29日 金曜日 午後12時48分 Battery Charger (Panasonic DE-A94A): Information for your safety Input: AC 110 V to 240 V, 50/60 Hz, 0.2 A Output: DC 8.4 V, 0.65 A Battery Pack (lithium-ion) (Panasonic DMW-BLD10E): Information for your safety Voltage/capacity: 7.
DMC-G3K&G3W&G3EB-VQT3N48_eng.book 50 ページ 2011年4月29日 金曜日 午後12時48分 Interchangeable Lens (H-FS014042) “LUMIX G VARIO 14 –42 mm/F3.5 –5.6 ASPH./MEGA O.I.S.” Focal length f=14 mm to 42 mm (35 mm film camera equivalent: 28 mm to 84 mm) Aperture type 7 diaphragm blades/circular aperture diaphragm Aperture range F3.5 (Wide) to F5.6 (Tele) Minimum aperture value F22 Lens construction 12 elements in 9 groups (1 aspherical lens) In focus distance 0.3 m (0.
DMC-G3K&G3W&G3EB-VQT3N48_eng.book 51 ページ 2011年4月29日 金曜日 午後12時48分 Interchangeable Lens (H-FS045200) “LUMIX G VARIO 45– 200 mm/F4.0 – 5.6/MEGA O.I.S.” Focal length f=45 mm to 200 mm (35 mm film camera equivalent: 90 mm to 400 mm) Aperture type 7 diaphragm blades/circular aperture diaphragm Aperture range F4.0 (Wide) to F5.6 (Tele) Minimum aperture value F22 Lens construction 16 elements in 13 groups (no aspherical lens) In focus distance 1.0 m (3.
DMC-G3K&G3W&G3EB-VQT3N48_eng.book 52 ページ 2011年4月29日 金曜日 午後12時48分 • G MICRO SYSTEM is a lens exchange type digital camera system of LUMIX based on a Micro Four Thirds System standard. • Micro Four Thirds™ and Micro Four Thirds Logo marks are trademarks or registered trademarks of Olympus Imaging Corporation, in Japan, the United States, the European Union and other countries.