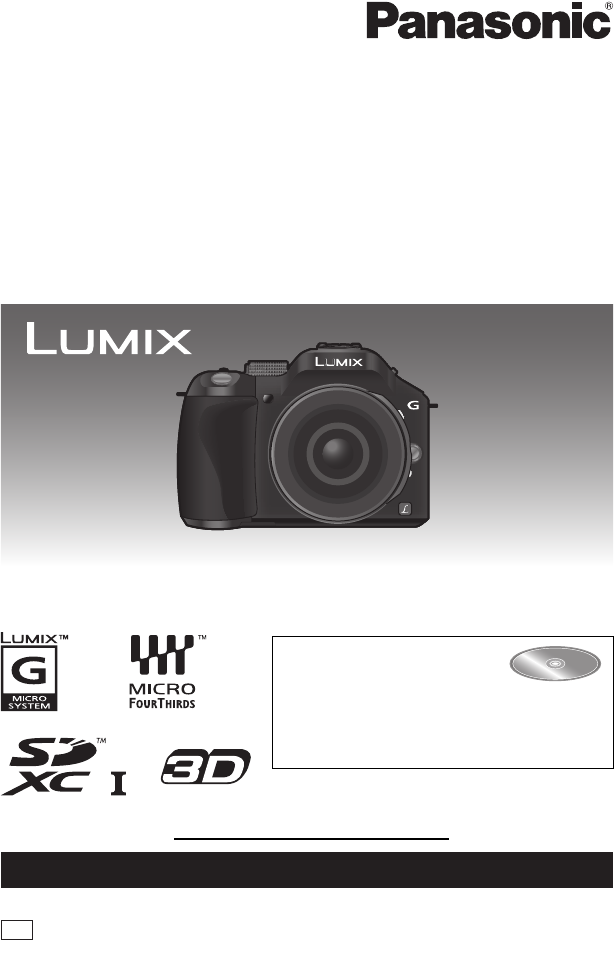
DMC-G5X&G5K&G5PP-VQT4G94_eng.book 1 ページ 2012年6月22日 金曜日 午前8時24分 Basic Owner’s Manual Digital Camera/ Lens Kit/Body Model No. DMC-G5X/DMC-G5K DMC-G5 Before connecting, operating or adjusting this product, please read the instructions completely. More detailed instructions on the operation of this camera are contained in “Owner’s Manual for advanced features (PDF format)” in the supplied CD-ROM. Install it on your PC to read it. Register online at www.panasonic.com/register (U.S.
DMC-G5X&G5K&G5PP-VQT4G94_eng.book 2 ページ 2012年6月22日 金曜日 午前8時24分 Dear Customer, Thank you for choosing Panasonic! You have purchased one of the most sophisticated and reliable products on the market today. Used properly, we’re sure it will bring you and your family years of enjoyment. Please take time to fill in the information below. The serial number is on the tag located on the underside of your camera. Be sure to retain this manual as your convenient camera information source.
DMC-G5X&G5K&G5PP-VQT4G94_eng.book 3 ページ 2012年6月22日 金曜日 午前8時24分 ∫ Product identification marking Product Location Digital Camera Bottom Battery charger Bottom THE FOLLOWING APPLIES ONLY IN THE U.S.A. FCC Note: This equipment has been tested and found to comply with the limits for a Class B digital device, pursuant to Part 15 of the FCC Rules. These limits are designed to provide reasonable protection against harmful interference in a residential installation.
DMC-G5X&G5K&G5PP-VQT4G94_eng.book 4 ページ 2012年6月22日 金曜日 午前8時24分 ∫ About the battery pack CAUTION Battery pack (Lithium ion battery pack) • Use the specified unit to recharge the battery pack. • Do not use the battery pack with equipment other than the specified unit. • Do not get dirt, sand, liquids, or other foreign matter on the terminals. • Do not touch the plug terminals (i and j) with metal objects. • Do not disassemble, remodel, heat or throw into fire.
DMC-G5X&G5K&G5PP-VQT4G94_eng.book 5 ページ 2012年6月22日 金曜日 午前8時24分 ∫ Cautions for Use • Do not use any other USB connection cables except the supplied one or a genuine Panasonic USB connection cable (DMW-USBC1: optional). • Always use a genuine Panasonic HDMI mini cable (RP-CDHM15, RP-CDHM30: optional). Part numbers: RP-CDHM15 (1.5 m) (5 feet), RP-CDHM30 (3.0 m) (10 feet) • Always use a genuine Panasonic AV cable (DMW-AVC1: optional). • Always use a genuine Panasonic remote shutter (DMW-RSL1: optional).
DMC-G5X&G5K&G5PP-VQT4G94_eng.book 6 ページ 2012年6月22日 金曜日 午前8時24分 Contents Information for Your Safety ............................................................................................. 2 Care of the camera ........................................................................................................... 7 Standard Accessories ...................................................................................................... 8 Names and Functions of Components .......................
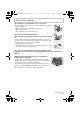
DMC-G5X&G5K&G5PP-VQT4G94_eng.book 7 ページ 2012年6月22日 金曜日 午前8時24分 Care of the camera Do not subject to strong vibration, shock, or pressure. • The lens, LCD monitor, or external case may be damaged if used in the following conditions. It may also malfunction or image may not record if you: – Drop or hit the camera. – Press hard on the lens or the LCD monitor. This camera is not dust/drip/water proof. Avoid using the camera in places with a lot of dust, water, sand, etc.
DMC-G5X&G5K&G5PP-VQT4G94_eng.book 8 ページ 2012年6月22日 金曜日 午前8時24分 Standard Accessories Check that all the accessories are supplied before using the camera. Product numbers correct as of August 2012. These may be subject to change. Digital Camera Body (This is referred to as camera body in this Owner’s Manual.
DMC-G5X&G5K&G5PP-VQT4G94_eng.
DMC-G5X&G5K&G5PP-VQT4G94_eng.
DMC-G5X&G5K&G5PP-VQT4G94_eng.book 11 ページ 2012年6月22日 22 Focus distance reference mark 23 Flash open lever 24 Stereo microphone • Be careful not to cover the microphone with 金曜日 午前8時24分 22 23 24 25 26 27 28 your finger. Doing so may make sound difficult to record. 25 26 27 28 29 Hot shoe Mode dial Shutter button 29 30 31 32 33 Function lever Speaker • Be careful not to cover the speaker with your finger.
DMC-G5X&G5K&G5PP-VQT4G94_eng.book 12 ページ 2012年6月22日 金曜日 午前8時24分 ∫ Lens H-PS14042 1 2 1 2 3 4 5 6 7 H-FS014042 3 4 1 5 6 7 4 5 Lens surface Zoom lever Focus lever Contact point Lens fitting mark Focus ring Zoom ring Touch screen This touch screen is a type that detects pressure. Touch the screen To touch and release the touch screen. Drag A movement without releasing the touch screen. Use this to perform tasks such as selecting icons or images displayed on the touch screen.
DMC-G5X&G5K&G5PP-VQT4G94_eng.book 13 ページ 2012年6月22日 金曜日 午前8時24分 Changing the Lens • Check that the camera is turned off. Attaching the lens Preparations: Remove the lens rear cap from the lens, and the body cap from the camera. Align the lens fitting marks A (red marks) and then rotate the lens in the direction of the arrow until it clicks. • Do not press the lens release button B when you attach a lens. Detaching the lens Preparations: Attach the lens cap.
DMC-G5X&G5K&G5PP-VQT4G94_eng.book 14 ページ 2012年6月22日 金曜日 午前8時24分 Attaching the Shoulder Strap • We recommend attaching the shoulder strap when using the camera to prevent it from dropping. 1 Pass the shoulder strap through the shoulder strap eyelet on the camera body. A: Shoulder strap eyelet 2 Pass the end of the shoulder strap through the ring in the direction of the arrow and then pass it through the stopper. 3 Pass the end of the shoulder strap through the hole on the other side of the stopper.
DMC-G5X&G5K&G5PP-VQT4G94_eng.book 15 ページ 2012年6月22日 金曜日 午前8時24分 Charging the Battery ∫ About batteries that you can use with this unit The battery that can be used with this unit is DMW-BLC12PP. Charging • The battery is not charged when the camera is shipped. Charge the battery before use. • Charge the battery with the charger indoors. 1 Attach the battery paying attention to the direction of the battery. 2 Connect the charger to the electrical outlet.
DMC-G5X&G5K&G5PP-VQT4G94_eng.book 16 ページ 2012年6月22日 金曜日 午前8時24分 Inserting and Removing the Card (optional)/ the Battery • Check that this unit is turned off. • We recommend using a Panasonic card. 1 Slide the release lever in the direction of the arrow and open the card/battery door. • Always use genuine Panasonic batteries (DMW-BLC12PP). • If you use other batteries, we cannot guarantee the quality of this product.
DMC-G5X&G5K&G5PP-VQT4G94_eng.book 17 ページ 2012年6月22日 金曜日 午前8時24分 About the Card About cards that can be used with this unit The following cards which conform to the SD video standard can be used with this unit. (These cards are indicated as card in the text.) Remarks SD Memory Card (8 MB to 2 GB) • Use a card with SD Speed Class¢ with “Class 4” or higher when recording motion pictures. • SDHC Memory Card can be used with SDHC Memory Card or SDXC Memory Card compatible equipment.
DMC-G5X&G5K&G5PP-VQT4G94_eng.book 18 ページ 2012年6月22日 金曜日 午前8時24分 Setting Date/Time (Clock Set) • The clock is not set when the camera is shipped. 1 Turn the camera on. • The status indicator 1 lights when you turn this unit on. ON OFF 2 Touch [Clock Set]. 3 Touch the items you wish to set (Year/Month/ Day/Hours/Minutes), and set using [ ]/[ ]. • You can continue to switch the settings by continuously touching [ • Touch [ ]/[ ].
DMC-G5X&G5K&G5PP-VQT4G94_eng.book 19 ページ 2012年6月22日 金曜日 午前8時24分 Selecting the Recording Mode ∫ To select a Recording Mode with the mode dial Select the mode by rotating the mode dial. • Rotate the mode dial slowly to select the desired mode A. ∫ To select Intelligent Auto Mode Press [¦]. • [¦] button will light up when it is switched to Intelligent Auto Mode. • The Recording Mode selected by the mode dial is disabled while the [¦] button is lit.
DMC-G5X&G5K&G5PP-VQT4G94_eng.book 20 ページ 2012年6月22日 金曜日 午前8時24分 Taking a Still picture Applicable modes: 1 Select the Recording Mode. 2 Press the shutter button halfway to focus. A Aperture value B Shutter speed • Aperture value and shutter speed are displayed. (It will flash in red if the correct exposure is not achieved, except when set to flash.) • When the image is correctly focused, the picture will be taken, since the [Focus Priority] is set initially to [ON]. 3 3.
DMC-G5X&G5K&G5PP-VQT4G94_eng.book 21 ページ 2012年6月22日 金曜日 午前8時24分 Taking Pictures using the Automatic Function (Intelligent Auto Mode) Recording Mode: In this mode, the camera makes the optimal settings for the subject and scene, so we recommend it when you wish to leave the settings to the camera and record without thinking about them. Press [¦]. • [¦] button will light up when it is switched to Intelligent Auto Mode.
DMC-G5X&G5K&G5PP-VQT4G94_eng.book 22 ページ 2012年6月22日 金曜日 午前8時24分 Recording using Intelligent Auto Plus Mode Recording Mode: The brightness and color optimally set by the camera can be easily matched to your preferences. This mode is useful if you do not like dealing with detailed settings but like the settings made automatically by the camera to match your preferences. 1 Press [MENU/SET] when in Intelligent Auto Mode. 2 Touch [iA MODE]. 3 Select [ ] and then touch [Set].
DMC-G5X&G5K&G5PP-VQT4G94_eng.book 23 ページ 2012年6月22日 金曜日 午前8時24分 ∫ Adjusting color 1 Touch [ 2 Touch [ ] to display the setting screen. • The settings screen can also be displayed from the ]. recording screen by pressing cursor button 1. 3 Drag the slide bar to set. • This will adjust the color of the image from a reddish color to a bluish color. • Setting can also be performed by rotating the rear dial. • Touch [ ] again to return to the recording screen.
DMC-G5X&G5K&G5PP-VQT4G94_eng.book 24 ページ 2012年6月22日 金曜日 午前8時24分 Recording Motion Picture Applicable modes: 1 Start recording by pressing the motion picture button. A Elapsed recording time B Available recording time • Recording of motion picture appropriate for each mode is possible. • The recording state indicator (red) C will flash while recording motion pictures. 2 A C 3s Stop the recording by pressing the motion picture button again.
DMC-G5X&G5K&G5PP-VQT4G94_eng.book 25 ページ 2012年6月22日 金曜日 午前8時24分 Compensating the Exposure Applicable modes: Use this function when you cannot achieve appropriate exposure due to the difference in brightness between the subject and the background. Look at the following examples. 1 Press the rear dial to switch to Exposure Compensation operation. 2 Rotate the rear dial to compensate the exposure. 250 125 60 Compensate the exposure towards positive. 15 5.6 +5 A Properly exposed 30 4.
DMC-G5X&G5K&G5PP-VQT4G94_eng.book 26 ページ 2012年6月22日 金曜日 午前8時24分 Using the function button You can assign recording functions, etc. to specific buttons and icons. To use those functions, press [Fn1], [Fn2] or [Fn3] or touch [Fn4] or [Fn5]. • To use [Fn1], set the [AF/AE LOCK / Fn1] of the ロヷョバロヤュ モョバモユチロヰヤレ ョㄏピ ョㄏヒ [Custom] menu to [Fn1]. • To use [Fn3], set the [LVF/LCD / Fn3] of the [Custom] menu to [Fn3].
DMC-G5X&G5K&G5PP-VQT4G94_eng.book 27 ページ 2012年6月22日 金曜日 午前8時24分 Taking Pictures that match the Scene being recorded (Scene Guide Mode) Recording Mode: If you select a scene to suit the subject and recording conditions with reference to the example images, the camera will set optimal exposure, color, and focus, allowing you to record in a manner appropriate to the scene. 1 Set the mode dial to [ 2 Drag the example images to select a screen. ].
DMC-G5X&G5K&G5PP-VQT4G94_eng.book 28 ページ 2012年6月22日 金曜日 午前8時24分 Taking Pictures with different image effects (Creative Control Mode) Recording Mode: This mode records with additional image effects. You can set the effects to add by selecting example images and checking them on the screen. 1 Set the mode dial to [ 2 Touch the example image to select image effects (filters). ]. • The image effect of the selected example image will be applied in a preview display A.
DMC-G5X&G5K&G5PP-VQT4G94_eng.book 29 ページ 2012年6月22日 金曜日 午前8時24分 Playing Back Pictures/Motion Pictures Playing Back Pictures 1 Press [(]. 2 Forward or rewind the image by dragging the screen horizontally. Forward: drag from right to left Rewind: drag from left to right Playing Back Motion Pictures This unit was designed to play motion pictures using the AVCHD, MP4 and QuickTime Motion JPEG formats.
DMC-G5X&G5K&G5PP-VQT4G94_eng.book 30 ページ 2012年6月22日 金曜日 午前8時24分 Deleting Pictures Once deleted, pictures cannot be recovered. To delete a single picture 1 In Playback Mode, select the picture to delete and touch [ ]. 2 Touch [Delete Single]. 'HOHWH 6LQJOH 'HOHWH 0XOWL • Confirmation screen is displayed. Pictures are deleted by selecting [Yes]. 'HOHWH $OO To delete multiple pictures (up to 100) or all the pictures 1 In Playback Mode, touch [ 2 Touch [Delete Multi] or [Delete All]. ].
DMC-G5X&G5K&G5PP-VQT4G94_eng.book 31 ページ 2012年6月22日 金曜日 午前8時24分 Switching the display of the LCD Monitor Press [DISP.] to change.
DMC-G5X&G5K&G5PP-VQT4G94_eng.book 32 ページ 2012年6月22日 金曜日 午前8時24分 Setting the Menu 1 Press [MENU/SET]. • The top menu screen is displayed. 2 Touch the menu icon. 3 Touch the menu item. • The page can be changed by touching [ 4 ]/[ ]. Touch the Setting to set. • Depending on the menu item, its setting may not appear or it may be displayed in a different way. A brief description appears when you touch a menu item/option in steps 3 and 4. – It will be set when you release your finger.
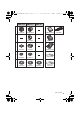
DMC-G5X&G5K&G5PP-VQT4G94_eng.book 33 ページ 2012年6月22日 金曜日 午前8時24分 Setting the Quick Menu By using the Quick Menu, some of the menu settings can be easily found. • The features that can be adjusted using Quick Menu are determined by the mode or a display style the camera is in. 1 Press [Q.MENU] to display the Quick Menu. 2 Touch the menu item. ヲハヮユワヶ A AFS 3.5 60 3 Touch the setting. 4 Touch [Exit] to exit menu once the setting is completed.
DMC-G5X&G5K&G5PP-VQT4G94_eng.book 34 ページ 2012年6月22日 金曜日 午前8時24分 Types of menus ∫ [Rec] Menu This menu lets you set the aspect ratio, number of pixels and other aspects of the pictures you are recording. • [Photo Style], [Focus Mode], [Metering Mode], [i.Dynamic], [i.Resolution] and [Digital Zoom] are common to both the [Rec] menu and [Motion Picture] menu. Changing these settings in one of these menus is reflected in other menu.
DMC-G5X&G5K&G5PP-VQT4G94_eng.book 35 ページ 2012年6月22日 金曜日 午前8時24分 [Digital Zoom] Increases the Tele effect. The higher the level of magnification, the greater the degradation in image quality. [Electronic Shutter] The electronic shutter can reduce the picture blur. [Burst Rate] Sets the burst speed for burst recording. [Auto Bracket] Sets single/burst recording, correction width and recording sequence for Auto Bracket recording. [Self Timer] Sets the time until recording for self-timer recording.
DMC-G5X&G5K&G5PP-VQT4G94_eng.book 36 ページ [Flkr Decrease] 2012年6月22日 金曜日 午前8時24分 The shutter speed can be fixed to reduce the flicker or striping in the motion picture. ∫ [Custom] Menu Operation of the unit, such as displaying of the screen and button operations, can be set up according to your preferences. Also, it is possible to register the modified settings. [Cust.Set Mem.] Registers the current camera settings as custom set.
DMC-G5X&G5K&G5PP-VQT4G94_eng.book 37 ページ 2012年6月22日 金曜日 午前8時24分 [Pinpoint AF Time] Sets the time for which the screen is enlarged when the shutter button is pressed halfway with Auto Focus Mode set to [ ]. [AF Assist Lamp] AF assist lamp will illuminate the subject when the shutter button is pressed half-way making it easier for the camera to focus when recording in low light conditions. [AF+MF] You can set the focus manually after the automatic focus has finished.
DMC-G5X&G5K&G5PP-VQT4G94_eng.book 38 ページ 2012年6月22日 金曜日 午前8時24分 ∫ Setup Menu This menu lets you perform the clock settings, select the operating beep tone settings and set other settings which make it easier for you to operate the camera. [Clock Set] Setting Date/Time. [World Time] Sets the times for the region where you live and your holiday destination. [Travel Date] Departure date and return date of the trip as well as the name of the travel destination can be set.
DMC-G5X&G5K&G5PP-VQT4G94_eng.book 39 ページ 2012年6月22日 金曜日 午前8時24分 [Sensor Cleaning] Dust reduction to blow off the debris and dust that have affixed to the front of the imaging device is performed. [Format] The card is formatted. ∫ [Playback] Menu This menu lets you set the Protection, Cropping or Print Settings, etc. of recorded pictures. [2D/3D Settings] Switches the playback method for 3D images. [Slide Show] Selects the type etc. of the images and plays back in order.
DMC-G5X&G5K&G5PP-VQT4G94_eng.book 40 ページ 2012年6月22日 金曜日 午前8時24分 Reading the Owner’s Manual (PDF format) More detailed instructions on the operation of this camera are contained in “Owner’s Manual for advanced features (PDF format)” in the supplied CD-ROM. Install it on your PC to read it. ∫ For Windows 1 Turn the PC on and insert the CD-ROM containing the Owner’s Manual (supplied). 2 Select the desired language and then click [Owner’s Manual] to install.
DMC-G5X&G5K&G5PP-VQT4G94_eng.book 41 ページ 2012年6月22日 金曜日 午前8時24分 About the supplied software The supplied CD-ROM includes the following software. Install the software on to your computer before use. • PHOTOfunSTUDIO 8.2 PE (Windows XP/Vista/7) This software allows you to acquire pictures to the PC, and also categorize these acquired pictures by their recording date or the model name of the camera used. You can resize pictures and add effects to the pictures.
DMC-G5X&G5K&G5PP-VQT4G94_eng.book 42 ページ 2012年6月22日 金曜日 午前8時24分 Installing supplied software • Before inserting the CD-ROM, close all running applications. 1 Check the environment of your PC. • Operating environment of “PHOTOfunSTUDIO 8.
DMC-G5X&G5K&G5PP-VQT4G94_eng.book 43 ページ 2012年6月22日 金曜日 午前8時24分 Specifications Specifications are subject to change without notice. Digital Camera Body (DMC-G5): Information for your safety Power Source: DC 8.4 V Power Consumption: 2.9 W (When recording with LCD Monitor) [When the Interchangeable lens (H-PS14042) is used] 3.0 W (When recording with LCD Monitor) [When the Interchangeable lens (H-FS014042) is used] 2.
DMC-G5X&G5K&G5PP-VQT4G94_eng.book 44 ページ 2012年6月22日 金曜日 午前8時24分 Minimum Illumination Approx. 9 lx (when i-Low light is used, the shutter speed is 1/30th of a second) [When the Interchangeable lens (H-PS14042) is used] Approx. 9 lx (when i-Low light is used, the shutter speed is 1/30th of a second) [When the Interchangeable lens (H-FS014042) is used] Shutter speed B (Bulb) (Max. approx.
DMC-G5X&G5K&G5PP-VQT4G94_eng.
DMC-G5X&G5K&G5PP-VQT4G94_eng.book 46 ページ 2012年6月22日 金曜日 午前8時24分 Dimensions Approx. 119.9 mm (W)k83.2 mm (H)k70.8 mm (D) [4.72q (W)k3.28q(H)k2.79q (D)] (excluding the projecting parts) Mass (weight) Approx. 396 g/0.87 lb [with the card and battery] Approx. 346 g/0.76 lb (camera body) Approx. 491 g/1.08 lb [with the Interchangeable lens (H-PS14042), card and battery] Approx. 561 g/1.
DMC-G5X&G5K&G5PP-VQT4G94_eng.book 47 ページ 2012年6月22日 金曜日 午前8時24分 Interchangeable Lens (H-PS14042) “LUMIX G X VARIO PZ 14 –42 mm/F3.5– 5.6 ASPH./POWER O.I.S.” Focal length f=14 mm to 42 mm (35 mm film camera equivalent: 28 mm to 84 mm) Aperture type 7 diaphragm blades/circular aperture diaphragm Aperture range F3.5 (Wide) to F5.6 (Tele) Minimum aperture value F22 Lens construction 9 elements in 8 groups (4 aspherical lenses, 2 ED Lens) Nano surface coating Yes In focus distance 0.2 m (0.
DMC-G5X&G5K&G5PP-VQT4G94_eng.book 48 ページ 2012年6月22日 金曜日 午前8時24分 Interchangeable Lens (H-FS014042) “LUMIX G VARIO 14 –42 mm/F3.5 –5.6 ASPH./MEGA O.I.S.” Focal length f=14 mm to 42 mm (35 mm film camera equivalent: 28 mm to 84 mm) Aperture type 7 diaphragm blades/circular aperture diaphragm Aperture range F3.5 (Wide) to F5.6 (Tele) Minimum aperture value F22 Lens construction 12 elements in 9 groups (1 aspherical lens) In focus distance 0.3 m (0.
DMC-G5X&G5K&G5PP-VQT4G94_eng.
DMC-G5X&G5K&G5PP-VQT4G94_eng.
DMC-G5X&G5K&G5PP-VQT4G94_eng.book 51 ページ 2012年6月22日 金曜日 午前8時24分 Digital Camera Accessory Order Form (For USA and Puerto Rico Customers) Please photocopy this form when placing an order. 1. Digital Camera Model # 2. Items Ordered Accessory # Description Price Each Quantity Total Price $6.95 Shipping & Handling Subtotal Your State & Local Sales Tax Total 3.
DMC-G5X&G5K&G5PP-VQT4G94_eng.book 52 ページ 2012年6月22日 金曜日 午前8時24分 Limited Warranty (ONLY FOR U.S.A.
DMC-G5X&G5K&G5PP-VQT4G94_eng.book 53 ページ 2012年6月22日 金曜日 午前8時24分 Mail-In Service For assistance in the U.S.A. and Puerto Rico in obtaining repairs, please ship the product prepaid to: Panasonic Exchange Center 4900 George McVay Drive Suite B McAllen, TX 78503 panacare@us.panasonic.com When shipping the unit, carefully pack, include all supplied accessories listed in the Owner's Manual, and send it prepaid, adequately insured and packed well in a carton box.
DMC-G5X&G5K&G5PP-VQT4G94_eng.book 54 ページ 2012年6月22日 金曜日 午前8時24分 THERE ARE NO EXPRESS WARRANTIES EXCEPT AS LISTED UNDER “LIMITED WARRANTY COVERAGE”. THE WARRANTOR IS NOT LIABLE FOR INCIDENTAL OR CONSEQUENTIAL DAMAGES RESULTING FROM THE USE OF THIS PRODUCT, OR ARISING OUT OF ANY BREACH OF THIS WARRANTY. (As examples, this excludes damages for lost time, travel to and from the servicer, loss of or damage to media or images, data or other memory or recorded content.
DMC-G5X&G5K&G5PP-VQT4G94_eng.
DMC-G5X&G5K&G5PP-VQT4G94_eng.book 56 ページ 2012年6月22日 金曜日 午前8時24分 • G MICRO SYSTEM is a lens exchange type digital camera system of LUMIX based on a Micro Four Thirds System standard. • Micro Four Thirds™ and Micro Four Thirds Logo marks are trademarks or registered trademarks of Olympus Imaging Corporation, in Japan, the United States, the European Union and other countries.