
Operation Manual
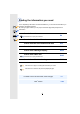
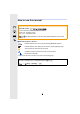

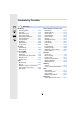

Table Of Contents
- Finding the information you need
- How to use this manual
- Contents
- Contents by Function
- 1. Before Use
- 2. Getting Started/Basic Operations
- Attaching the Shoulder Strap
- Charging the Battery
- Inserting/Removing the Battery
- Inserting/Removing the Card (Optional)
- Card Information
- Attaching/Removing the Lens
- Opening the Monitor/Adjusting the Monitor
- Setting Date/Time (Clock Set)
- Basic Operations
- Tips for taking good pictures
- Using the Viewfinder
- Shutter button (Taking pictures)
- Motion picture button (Recording motion pictures)
- Mode dial (Selecting a Recording Mode)
- Front Dial/Rear Dial
- Cursor buttons/[MENU/SET] button
- [DISP.] button (Switching the displayed information)
- Touch screen (Touch operations)
- Taking Pictures Using the Touch Function
- Setting menu items
- Calling frequently-used menus instantly (Quick Menu)
- Assigning frequently used functions to the buttons (function buttons)
- Entering Text
- 3. Recording Modes
- Taking Pictures using the Automatic Function (Intelligent Auto Mode)
- Taking Pictures with Automatically Adjusted Aperture and Shutter Speed (Programme AE Mode)
- Taking Pictures by Specifying the Aperture/ Shutter Speed
- Taking Pictures that match the Scene being recorded (Scene Guide Mode)
- Taking Pictures with different image effects (Creative Control Mode)
- Recording motion pictures with manually set aperture value/shutter speed (Creative Video Mode)
- Registering your preferred settings (Custom Mode)
- 4. Focus, Brightness (Exposure) and Colour tone Settings
- 5. 4K Photo and Drive Settings
- Select a Drive Mode
- Taking Pictures using Burst Mode
- Recording 4K Photos
- Selecting pictures from 4K burst file and saving
- Controlling Focus After Recording (Post Focus/Focus Stacking)
- Taking Pictures with the Self-timer
- Taking Pictures with Time Lapse Shot/Stop Motion Animation
- Taking Pictures While Adjusting a Setting Automatically (Bracket Recording)
- 6. Stabiliser, Zoom and Flash
- 7. Recording Motion Pictures
- 8. Playing Back and Editing Images
- 9. Using Menu Functions
- 10. Using the Wi-Fi function
- What you can do with the Wi-Fi function
- Wi-Fi function
- Controlling with a Smartphone/Tablet
- Installing the smartphone/tablet app “ Image App ”
- Connecting to a smartphone/tablet
- Taking images via a smartphone/tablet (remote recording)
- Playing back images in the camera
- Saving images stored in the camera
- Sending images in the camera to an SNS
- Adding location information to images stored in the camera from a smartphone/tablet
- Combining motion pictures recorded with Snap Movie according to your preference on a smartphone/tablet
- Displaying pictures on a TV
- Sending images
- Sending images to a smartphone/tablet
- Printing Wirelessly
- Sending images to AV device
- Sending images to PC
- Using Web services
- Registering to the “LUMIX CLUB”
- About Connections
- [Wi-Fi Setup] Menu
- 11. Connecting to other equipment
- 12. Others

2
Finding the information you need
In this “Operating Instructions for advanced features”, you can find the information you
need from the following pages.
By clicking a page number, you can jump to the linked page and quickly find the
information.
Search from “Contents”
Click this icon to jump to “Contents”.
P4
Search from the list of function names P9
Search from the list of buttons and dials P14
Search from the list of screens and icons P311
Search from “Message Display” P318
Search from “Menu list”
Click this icon to jump to “Menu list”.
P185
Search from “Troubleshooting” P320
Click this icon to jump to “Finding the information you need”.
Click this icon to return to the previously displayed page.
For details on how to use this manual, see the next page.
P3
Wi-Fi
R
function
P249