DMC-GX7C&GX7K&GX7EB-VQT5B09_eng.book 1 ページ 2013年7月16日 火曜日 午後2時12分 Basic Operating Instructions Digital Camera/ Lens Kit/Body Model No. DMC-GX7C/DMC-GX7K DMC-GX7 Please read these instructions carefully before using this product, and save this manual for future use. More detailed instructions on the operation of this camera are contained in “Operating Instructions for advanced features (PDF format)” in the supplied CD-ROM. Install it on your PC to read it. Web Site: http://www.panasonic-europe.
DMC-GX7C&GX7K&GX7EB-VQT5B09_eng.book 2 ページ 2013年7月16日 火曜日 午後2時12分 Dear Customer, We would like to take this opportunity to thank you for purchasing this Panasonic Digital Camera. Please read these Operating Instructions carefully and keep them handy for future reference. Please note that the actual controls and components, menu items, etc. of your Digital Camera may look somewhat different from those shown in the illustrations in these Operating Instructions. Carefully observe copyright laws.
DMC-GX7C&GX7K&GX7EB-VQT5B09_eng.book 3 ページ 2013年7月16日 火曜日 午後2時12分 Declaration of Conformity (DoC) Hereby, “Panasonic Corporation” declares that this product is in compliance with the essential requirements and other relevant provisions of Directive 1999/5/EC. Customers can download a copy of the original DoC to our R&TTE products from our DoC server: http://www.doc.panasonic.
DMC-GX7C&GX7K&GX7EB-VQT5B09_eng.book 4 ページ 2013年7月16日 火曜日 午後2時12分 ∫ Cautions for Use • Do not use any other USB connection cables except the supplied one or a genuine Panasonic USB connection cable (DMW-USBC1: optional). • Use a “High Speed HDMI mini cable” with the HDMI logo. Cables that do not comply with the HDMI standards will not work. “High Speed HDMI mini cable” (Type C –Type A plug, up to 3 m (9.8 feet) long) • Always use a genuine Panasonic AV cable (DMW-AVC1: optional).
DMC-GX7C&GX7K&GX7EB-VQT5B09_eng.book 5 ページ 2013年7月16日 火曜日 午後2時12分 Disposal of Old Equipment and Batteries Only for European Union and countries with recycling systems These symbols on the products, packaging, and/or accompanying documents mean that used electrical and electronic products and batteries must not be mixed with general household waste.
DMC-GX7C&GX7K&GX7EB-VQT5B09_eng.book 6 ページ Contents Information for Your Safety................. 2 Preparation Reading the Operating Instructions (PDF format) ......................................... 8 Care of the camera .............................. 9 Accessories........................................ 10 Names and Functions of Components ....................................... 12 Preparation ......................................... 16 • Changing the Lens ........................
DMC-GX7C&GX7K&GX7EB-VQT5B09_eng.book 7 ページ Setting the Light Sensitivity.............. 52 Select a Drive Mode ........................... 53 Taking Pictures using Burst Mode..... 54 Taking Pictures using Auto Bracket................................................ 56 Taking Pictures with the Self-timer .... 57 Optical Image Stabiliser .................... 58 • Using the Optical Image Stabiliser function of a lens........................... 59 • Using the Optical Image Stabiliser function of this unit .....
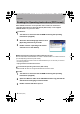
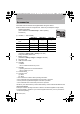
DMC-GX7C&GX7K&GX7EB-VQT5B09_eng.book 8 ページ 2013年7月16日 火曜日 午後2時12分 Preparation Reading the Operating Instructions (PDF format) More detailed instructions on the operation of this camera are contained in “Operating Instructions for advanced features (PDF format)” in the supplied CD-ROM. Install it on your PC to read it. ∫ For Windows 1 2 3 Turn the PC on and insert the CD-ROM containing the Operating Instructions (supplied).
DMC-GX7C&GX7K&GX7EB-VQT5B09_eng.book 9 ページ 2013年7月16日 火曜日 午後2時12分 Preparation Care of the camera Do not subject to strong vibration, shock, or pressure. • The lens, monitor, or external case may be damaged if used in the following conditions. It may also malfunction or image may not be recorded if you: – Drop or hit the camera. – Press hard on the lens or the monitor. This camera is not dust/drip/water proof. Avoid using the camera in places with a lot of dust, water, sand, etc.
DMC-GX7C&GX7K&GX7EB-VQT5B09_eng.book 10 ページ 2013年7月17日 水曜日 午後7時44分 Preparation Accessories Check that all the accessories are supplied before using the camera. Product numbers correct as of August 2013. These may be subject to change. Digital Camera Body (This is referred to as camera body in these operating instructions.
DMC-GX7C&GX7K&GX7EB-VQT5B09_eng.
DMC-GX7C&GX7K&GX7EB-VQT5B09_eng.
DMC-GX7C&GX7K&GX7EB-VQT5B09_eng.book 13 ページ 2013年7月16日 火曜日 午後2時12分 Preparation 27 Stereo microphone • Be careful not to cover the microphone with 27 28 29 30 31 32 your finger. Doing so may make sound difficult to record. 28 Hot shoe (Hot shoe cover) • Keep the Hot Shoe Cover out of reach of children to prevent swallowing.
DMC-GX7C&GX7K&GX7EB-VQT5B09_eng.
DMC-GX7C&GX7K&GX7EB-VQT5B09_eng.book 15 ページ 2013年7月16日 火曜日 午後2時12分 Preparation Touch screen Touch panel of this unit is capacitive. Touch the panel directly with your bare finger. ∫ Touch To touch and release the touch screen. Use for selecting items or icons. • When selecting features using the touch screen, be sure to Fn5 Fn6 Fn7 touch the centre of the desired icon. Fn8 Fn9 ∫ Drag A movement without releasing the touch screen. This is used to move the AF area, operate the slide bar, etc.
DMC-GX7C&GX7K&GX7EB-VQT5B09_eng.book 16 ページ 2013年7月16日 火曜日 午後2時12分 Preparation Preparation • Check that the camera is turned off. Changing the Lens • Change lenses where there is not a lot of dirt or dust. • Do not press the lens release button A when you attach a lens. ∫ Detaching the lens 1 2 Attach the lens cap. While pressing on the lens release button A, rotate the lens toward the arrow until it stops and then remove.
DMC-GX7C&GX7K&GX7EB-VQT5B09_eng.book 17 ページ 2013年7月16日 火曜日 午後2時12分 Preparation Charging the Battery The battery that can be used with this unit is DMW-BLG10E. 1 2 Attach the battery paying attention to the direction of the battery. Connect the AC mains lead. • The [CHARGE] indicator A lights up and charging begins. ∫ About the [CHARGE] indicator The [CHARGE] indicator turns on: The [CHARGE] indicator is turned on during charging.
DMC-GX7C&GX7K&GX7EB-VQT5B09_eng.book 18 ページ 2013年7月16日 火曜日 午後2時12分 Preparation Inserting/Removing the Battery • Always use genuine Panasonic batteries (DMW-BLG10E). • If you use other batteries, we cannot guarantee the quality of this product. • Being careful about the battery orientation, insert all the way until you hear a locking sound and then check that it is locked by lever A. Pull the lever A in the direction of the arrow to remove the battery.
DMC-GX7C&GX7K&GX7EB-VQT5B09_eng.book 19 ページ 2013年7月16日 火曜日 午後2時12分 Preparation Formatting the card (initialisation) Format the card before recording a picture with this unit. Since data cannot be recovered after formatting, make sure to back up necessary data in advance. Select [Format] in the [Setup] menu. (P21) • Confirmation screen is displayed. It is executed when [Yes] is selected. Setting Date/Time (Clock Set) • The clock is not set when the camera is shipped. 1 Turn the camera on.
DMC-GX7C&GX7K&GX7EB-VQT5B09_eng.book 20 ページ 2013年7月19日 金曜日 午後2時6分 Preparation Adjust the angle of the monitor/viewfinder Adjust the angle of the monitor/viewfinder. • Be careful not to catch your finger, etc. in the monitor/viewfinder. • When adjusting the angle of the monitor/viewfinder, be careful not to apply too much force, as this may cause damage or malfunction. • When not using this unit, close the monitor/viewfinder completely back to the original position.
DMC-GX7C&GX7K&GX7EB-VQT5B09_eng.book 21 ページ 2013年7月16日 火曜日 午後2時12分 Preparation Setting the Menu Setting menu items 1 Press [MENU/SET]. Menu Description of settings [Rec] This menu lets you set the aspect ratio, number of pixels and other aspects of the pictures you are recording. [Motion Picture] This menu lets you set the [Rec Format], [Rec Quality], and other aspects for motion picture recording.
DMC-GX7C&GX7K&GX7EB-VQT5B09_eng.book 22 ページ 2013年7月16日 火曜日 午後2時12分 Preparation 2 3 Press 3/4 of the cursor button to select the menu item and press [MENU/SET]. Press 3/4 of the cursor button to select the setting and press [MENU/SET]. • Depending on the menu item, its setting may not appear or it may be displayed in a different way. ∫ Close the menu Press [ ] or press the shutter button halfway. ∫ Switching to other menus e.g.: Switching to the [Setup] menu from [Rec] menu. 1 Press 2.
DMC-GX7C&GX7K&GX7EB-VQT5B09_eng.book 23 ページ 2013年7月16日 火曜日 午後2時12分 Preparation Calling frequently-used menus instantly (Quick Menu) By using the Quick Menu, some of the menu settings can be easily found. • The features that can be adjusted using Quick Menu are determined by the mode or a display style the camera is in. [Q.MENU]/[Fn1] button can be used in two ways, as [Q.MENU] or as [Fn1] (function 1). At the time of purchase, it is initially set to [Q.MENU].
DMC-GX7C&GX7K&GX7EB-VQT5B09_eng.book 24 ページ 2013年7月16日 火曜日 午後2時12分 Basic Assigning frequently used functions to the buttons (function buttons) You can assign frequently-used functions to particular buttons or icons. ロヷョバョㄏフ ョㄏヒ ヲハヮユワヶ Fn5 Fn6 Fn5 Fn6 Fn7 Fn7 Fn8 Fn9 Fn8 Fn9 ョㄏビ 1 ョㄏピ Select the menu. [MENU] > [Custom]>[Fn Button Set] 2 3 4 Press 3/4 to select [Setting in REC mode] or [Setting in PLAY mode] and then press [MENU/SET].
DMC-GX7C&GX7K&GX7EB-VQT5B09_eng.book 25 ページ 2013年7月16日 火曜日 午後2時12分 Basic Taking a Still picture • Set the drive mode to [ 1 2 ] (single) by pressing 4( ). Select the Recording Mode. (P27) Press the shutter button halfway to focus. A Aperture value B Shutter speed • Aperture value and shutter speed are displayed. (It will flash in red if the correct exposure is not achieved, except when set to flash.
DMC-GX7C&GX7K&GX7EB-VQT5B09_eng.book 26 ページ 2013年7月16日 火曜日 午後2時12分 Basic Recording Motion Picture This camera can record full high definition motion pictures compatible with the AVCHD format or motion pictures recorded in MP4. Audio will be recorded in stereo. Item 1 Format [AVCHD] This data format is suitable for when playing back on a high-definition TV, etc. [MP4] This data format is suitable for when playing back on a PC, etc. Start recording by pressing the motion picture button.
DMC-GX7C&GX7K&GX7EB-VQT5B09_eng.book 27 ページ 2013年7月16日 火曜日 午後2時12分 Basic Selecting the Recording Mode Select the mode by rotating the mode dial. • Rotate the mode dial slowly to select the desired mode A. Intelligent Auto Mode (P33) The subjects are recorded using settings automatically selected by the camera. Intelligent Auto Plus Mode (P33) Allows you to adjust the brightness and colour hue when in Intelligent Auto Mode.
DMC-GX7C&GX7K&GX7EB-VQT5B09_eng.book 28 ページ 2013年7月16日 火曜日 午後2時12分 Basic Switching the Information Displayed on the recording screen Press [DISP.] to change.
DMC-GX7C&GX7K&GX7EB-VQT5B09_eng.book 29 ページ 2013年7月16日 火曜日 午後2時12分 Basic Playing Back Pictures/Motion Pictures Playing Back Pictures 1 Press [(]. 2 Press 2/1. 2: Play back the previous picture 1: Play back the next picture 1/98 Using the Playback Zoom Rotate the rear dial right. 1k 2k 4k 8k 16k • When you change the magnification, the zoom position indication A appears for about 1 second. A 2.
DMC-GX7C&GX7K&GX7EB-VQT5B09_eng.book 30 ページ 2013年7月16日 火曜日 午後2時12分 Basic Playing Back Motion Pictures This unit was designed to play motion pictures using the AVCHD, MP4 and QuickTime Motion JPEG formats. In Playback Mode, select a picture with the motion picture icon ([ ]), and then press 3 to play back. A 12s A Motion picture recording time • After playback starts, the elapsed playback time is displayed on the screen.
DMC-GX7C&GX7K&GX7EB-VQT5B09_eng.book 31 ページ 2013年7月16日 火曜日 午後2時12分 Basic Changing the information displayed on the playback screen Press [DISP.] to switch the monitor screen. ュリヴヱハ • Screen will switch as follows: 4:3 L 1/98 98 0 WB ISO AWB 200 AFS P F1.7 60 STD. 0 ISO200 '(& F1.7 60 0 200 AWB 60 F1.
DMC-GX7C&GX7K&GX7EB-VQT5B09_eng.book 32 ページ 2013年7月16日 火曜日 午後2時12分 Basic Deleting Pictures Once deleted, pictures cannot be recovered. To delete a single picture 1 In Playback Mode, select the picture to delete and then press [ ]. • The same operation can be performed by touching [ 2 ョㄏビ ]. Press 3 to select [Delete Single] and then press [MENU/SET]. 'HOHWH 6LQJOH 'HOHWH 0XOWL • Confirmation screen is displayed. 'HOHWH $OO Picture is deleted by selecting [Yes].
DMC-GX7C&GX7K&GX7EB-VQT5B09_eng.book 33 ページ 2013年7月16日 火曜日 午後2時12分 Recording Taking Pictures using the Automatic Function (Intelligent Auto Mode) Recording Mode: When you wish to leave settings to the camera and record without thinking about them, use Intelligent Auto Plus Mode or Intelligent Auto Mode, which makes optimal settings for the subject and scene.
DMC-GX7C&GX7K&GX7EB-VQT5B09_eng.book 34 ページ 2013年7月16日 火曜日 午後2時12分 Recording Taking a picture with a blurred background (Defocus Control) Recording Mode: You can easily set the blurriness of the background while checking the screen. 1 Press the rear dial to display the setting screen. • Each time the rear dial is pressed in Intelligent Auto Plus Mode, the camera switches between brightness setting operation, Defocus Control operation, and normal operation.
DMC-GX7C&GX7K&GX7EB-VQT5B09_eng.book 35 ページ 2013年7月16日 火曜日 午後2時12分 Recording Taking Pictures with Your Favourite Settings (Programme AE Mode) Recording Mode: The camera automatically sets the shutter speed and the aperture value according to the brightness of the subject. You can take pictures with greater freedom by changing various settings in the [Rec] menu. 1 2 3 Set the mode dial to [ ]. Press the shutter button halfway and display the aperture value and shutter speed value on the screen.
DMC-GX7C&GX7K&GX7EB-VQT5B09_eng.book 36 ページ 2013年7月16日 火曜日 午後2時12分 Recording Taking Pictures by Specifying the Aperture/ Shutter Speed Recording Mode: Aperture-Priority AE Mode Set the aperture value to a higher number when you want a sharp focus background. Set the aperture value to a lower number when you want a soft focus background. 1 2 Set the mode dial to [ ]. Set the aperture value by rotating the rear dial or the front dial.
DMC-GX7C&GX7K&GX7EB-VQT5B09_eng.book 37 ページ 2013年7月16日 火曜日 午後2時12分 Recording Manual Exposure Mode Determine the exposure by manually setting the aperture value and the shutter speed. The Manual Exposure Assistance appears on the lower portion of the screen to indicate the exposure. 1 2 Set the mode dial to [ ]. A Rotate the rear dial to set the shutter speed, and rotate the front dial to set the aperture value.
DMC-GX7C&GX7K&GX7EB-VQT5B09_eng.book 38 ページ 2013年7月16日 火曜日 午後2時12分 Recording ∫ About [B] (Bulb) If you set the shutter speed to [B], the shutter stays open while the shutter button is pressed fully (up to about 120 seconds). The shutter closes if you release the shutter button. Use this when you want to keep the shutter open for a long time to take pictures of fireworks, a night scene etc. • When you take pictures with the shutter speed set to [B], noise may become visible.
DMC-GX7C&GX7K&GX7EB-VQT5B09_eng.book 39 ページ 2013年7月16日 火曜日 午後2時12分 Recording Taking Pictures that match the Scene being recorded (Scene Guide Mode) Recording Mode: If you select a scene to suit the subject and recording conditions with reference to the example images, the camera will set optimal exposure, colour, and focus, allowing you to record in a manner appropriate to the scene. 1 2 Set the mode dial to [ ]. Press 2/1 to select the scene.
DMC-GX7C&GX7K&GX7EB-VQT5B09_eng.book 40 ページ 2013年7月16日 火曜日 午後2時12分 Recording Taking Pictures with different image effects (Creative Control Mode) Recording Mode: This mode records with additional image effects. You can set the effects to add by selecting example images and checking them on the screen. 1 2 Set the mode dial to [ ]. Press 3/4 to select the image effects (filters). A • The image effect of the selected example image will be applied in a preview display A.
DMC-GX7C&GX7K&GX7EB-VQT5B09_eng.book 41 ページ 2013年7月16日 火曜日 午後2時12分 Recording Registering your preferred settings (Custom Mode) Recording Mode: You can register the current camera settings as custom settings. If you then record in Custom Mode, you can use the registered settings. • Initial setting of the Programme AE Mode is registered as the custom settings initially.
DMC-GX7C&GX7K&GX7EB-VQT5B09_eng.book 42 ページ 2013年7月16日 火曜日 午後2時12分 Recording Recording using registered custom set You can easily call up the settings you have registered using [Cust.Set Mem.]. Set the mode dial to [ ] or [ • The custom set registered for [ 1 ]. ] or [ Set the mode dial to [ ] is called up. ]. • The custom set registered for [ ], [ ] or [ ] is called up. The most recently used custom set is called up. • To change a custom set > To steps 2 and 3.
DMC-GX7C&GX7K&GX7EB-VQT5B09_eng.book 43 ページ 2013年7月16日 火曜日 午後2時12分 Recording Adjusting the Picture Quality by Adding an Effect [Photo Style] Applicable modes: 6 effects can be selected to match the image you wish to record. It is possible to adjust the items such as colour or picture quality of the effect to your desire. [MENU] > [Rec]>[Photo Style] Settings [Standard] ¢ Description of settings This is the standard setting. [Vivid] Brilliant effect with high saturation and contrast.
DMC-GX7C&GX7K&GX7EB-VQT5B09_eng.book 44 ページ 2013年7月17日 水曜日 午前11時54分 Recording ∫ Adjusting the picture quality • Picture quality cannot be adjusted in the Intelligent Auto Plus Mode. 1 2 Press 2/1 to select the type of Photo Style. • In Scene Guide Mode, you cannot select the photo style. Press 3/4 to select the items, and then press 2/1 to adjust.
DMC-GX7C&GX7K&GX7EB-VQT5B09_eng.book 45 ページ 2013年7月16日 火曜日 午後8時27分 Recording Adjusting Bright/Dark Portions [Highlight Shadow] Applicable modes: You can adjust the brightness of bright and dark portions on an image while checking the brightness on the screen. 1 Select the menu. [MENU] > [Rec]>[Highlight Shadow] 2 Press 2/1 to select the item. Item ヤヒ 3 Description of settings (Standard) A state with no adjustments is set.
DMC-GX7C&GX7K&GX7EB-VQT5B09_eng.book 46 ページ 2013年7月16日 火曜日 午後8時27分 Recording Adjusting the White Balance Applicable modes: In sunlight, under incandescent lights or in other such conditions where the colour of white takes on a reddish or bluish tinge, this item adjusts to the colour of white which is closest to what is seen by the eye in accordance with the light source. 1 2 Press 1 ( ). Select the White Balance by rotating the rear dial. WB 3 AWB Press the rear dial to set.
DMC-GX7C&GX7K&GX7EB-VQT5B09_eng.book 47 ページ 2013年7月16日 火曜日 午後2時12分 Recording Setting the number of pixels Applicable modes: Set the number of pixels. The higher the numbers of pixels, the finer the detail of the pictures will appear even when they are printed onto large sheets. [MENU] > [Rec]>[Picture Size] When the aspect ratio is [4:3]. Settings When the aspect ratio is [3:2].
DMC-GX7C&GX7K&GX7EB-VQT5B09_eng.book 48 ページ 2013年7月16日 火曜日 午後2時12分 Recording Taking Pictures with Auto Focus Applicable modes: This allows the focusing method that suits the positions and number of the subjects to be selected. 1 2 3 4 Set the focus mode lever to [AF]. Set [AFS/AFF/AFC] in the [Custom] menu to [AFS], [AFF] or [AFC]. (P49) Press 2 ( ). Press 2/1 to select AF Mode and then press [MENU/SET].
DMC-GX7C&GX7K&GX7EB-VQT5B09_eng.book 49 ページ 2013年7月16日 火曜日 午後2時12分 Recording About the focus mode (AFS/AFF/AFC) Applicable modes: 1 Select the menu. [MENU] > [Custom]>[AFS/AFF/AFC] 2 Press 3/4 to select item, and press [MENU/ SET]. • Select focus mode according to the movement of the subject and the scene you are recording. • The set focus mode will be assigned to [AF] of the focus mode lever.
DMC-GX7C&GX7K&GX7EB-VQT5B09_eng.book 50 ページ 2013年7月16日 火曜日 午後2時12分 Recording Taking Pictures with Manual Focus Applicable modes: Use this function when you want to fix the focus or when the distance between the lens and the subject is determined and you do not want to activate Auto Focus. 1 2 Set the focus mode lever to [MF]. Use the focus lever or focus ring on the lens to achieve focus.
DMC-GX7C&GX7K&GX7EB-VQT5B09_eng.book 51 ページ 2013年7月16日 火曜日 午後2時12分 Recording • If the front dial or rear dial is rotated, the display can be enlarged/reduced up to approximately 3 to 6 times when the enlarged display is in a windowed display or up to approximately 3 to 10 times when the enlarged display is in a full screen display. The rear dial enlarges/reduces the size at a rate of 1 time, and the front dial enlarges/reduces it at a rate of 0.1 times.
DMC-GX7C&GX7K&GX7EB-VQT5B09_eng.book 52 ページ 2013年7月16日 火曜日 午後2時12分 Recording Compensating the Exposure Applicable modes: Use this function when you cannot achieve appropriate exposure due to the difference in brightness between the subject and the background. 1 2 Press the rear dial to switch to Exposure Compensation operation. Rotate the rear dial to compensate the exposure.
DMC-GX7C&GX7K&GX7EB-VQT5B09_eng.book 53 ページ 2013年7月16日 火曜日 午後2時12分 Recording Select a Drive Mode Applicable modes: Selecting the drive mode allows you to switch the operation, such as burst recording or the self-timer, for when you press the shutter button. 1 2 Press 4 ( ). Press 2/1 to select the drive mode, and then press [MENU/SET]. 1 2 3 4 H 31/3 0RUH VHWWLQJV Drive mode Description of settings 1 [Single] (P25) When the shutter button is pressed, only one picture is recorded.
DMC-GX7C&GX7K&GX7EB-VQT5B09_eng.book 54 ページ 2013年7月16日 火曜日 午後2時12分 Recording Taking Pictures using Burst Mode Applicable modes: Pictures are taken continuously while the shutter button is pressed. • Pictures taken with a burst speed of [SH] will be recorded as a single burst group. 1 2 Press 4 ( ). Press 2/1 to select the burst icon ([ etc.), and then press 3. ], H 31/3 0RUH VHWWLQJV 3 Select the burst speed with 2/1, and then press [MENU/SET].
DMC-GX7C&GX7K&GX7EB-VQT5B09_eng.book 55 ページ 2013年7月16日 火曜日 午後2時12分 Recording [SH]¢2 (Super high speed) Burst speed (pictures/ second) Electronic shutter [ON] [M] (Middle speed) [L] (Low speed) 10 4 2 5 4 2 None Available Available 40 Electronic shutter [OFF] Live View during Burst Mode ¢1 [H] (High speed) None With RAW files — Without RAW files Max. 80 9¢3, 4 Depends on the capacity of the card¢4 ¢1 Number of recordable pictures ¢2 The electronic shutter will operate.
DMC-GX7C&GX7K&GX7EB-VQT5B09_eng.book 56 ページ 2013年7月16日 火曜日 午後2時12分 Recording Taking Pictures using Auto Bracket Applicable modes: Maximum of 7 pictures will be recorded with different exposure settings following the Exposure Compensation range every time the shutter button is pressed. 1 2 Press 4 ( ). Press to 2/1 to select the Auto Bracket icon ([ 3 1/3 ], etc.), and then press 3. H 31/3 0RUH VHWWLQJV 3 Press 2/1 to select the compensation range, and then press [MENU/SET].
DMC-GX7C&GX7K&GX7EB-VQT5B09_eng.book 57 ページ 2013年7月16日 火曜日 午後2時12分 Recording Taking Pictures with the Self-timer Applicable modes: 1 2 Press 4 ( ). Press 2/1 to select the self-timer icon ([ 10 ], etc.), and then press 3. H 31/3 0RUH VHWWLQJV 3 Press 2/1 to select the time setting for the self-timer, and then press [MENU/SET]. Item 10 10 2 Description of settings Picture is taken 10 seconds after shutter is pressed.
DMC-GX7C&GX7K&GX7EB-VQT5B09_eng.book 58 ページ 2013年7月16日 火曜日 午後8時58分 Recording Optical Image Stabiliser The camera detects jitter during recording and automatically corrects it, so you can record images with reduced jitter. There are two types of Optical Image Stabilisers, the one built into a lens and the one built into this unit. The Optical Image Stabiliser of either a lens or this unit will be enabled.
DMC-GX7C&GX7K&GX7EB-VQT5B09_eng.book 59 ページ 2013年7月16日 火曜日 午後8時27分 Recording Using the Optical Image Stabiliser function of a lens Applicable modes: A lens based on the Micro Four Thirds System standard/Four Thirds System standard equipped with the Optical Image Stabiliser function is required. (P58) 1 Select the menu. [MENU] > [Rec]>[Stabilizer]>[Operation Mode] 2 Press 3/4 to select the item and then press [MENU/SET].
DMC-GX7C&GX7K&GX7EB-VQT5B09_eng.book 60 ページ 2013年7月16日 火曜日 午後2時12分 Recording Using the Optical Image Stabiliser function of this unit Applicable modes: If your lens does not support the Optical Image Stabiliser function or is not based on the Micro Four Thirds System standard/Four Thirds System standard, the Optical Image Stabiliser of this unit can be used. (P58) • The Optical Image Stabiliser of this unit works only when taking pictures.
DMC-GX7C&GX7K&GX7EB-VQT5B09_eng.book 61 ページ 2013年7月16日 火曜日 午後2時12分 Recording Setting the focal length of a lens • When a lens based on the Micro Four Thirds System standard/Four Thirds System standard is in use, a focal length is set automatically. • If your lens is based on the Micro Four Thirds System standard/Four Thirds System standard but does not have a communication function with the camera, set the focal length of the lens. Preparations: Set the [Shoot w/o Lens] to [ON].
DMC-GX7C&GX7K&GX7EB-VQT5B09_eng.book 62 ページ 2013年7月16日 火曜日 午後2時12分 Recording Taking Pictures with the Zoom Applicable modes: ∫ Types of zooms and recording magnification Feature Recording magnification Optical Zoom Different depending on the lens used. Picture quality No deterioration Extra Tele Conversion Digital Zoom (P85) (EX) (P85) When taking still pictures: Max. 2k¢1 When selecting [2k] When recording motion When selecting [4k] pictures: 2.
DMC-GX7C&GX7K&GX7EB-VQT5B09_eng.book 63 ページ 2013年7月16日 火曜日 午後2時12分 Recording Taking pictures by using the flash Applicable modes: ∫ Open/Close the built-in flash Taking a picture using the flash becomes possible by opening the built-in flash. A To open the flash Slide the flash open lever. B To close the flash Press the flash until it clicks. • Make sure to close the built-in flash when it is not in use. • The flash setting is fixed to [Œ] while the flash is closed.
DMC-GX7C&GX7K&GX7EB-VQT5B09_eng.book 64 ページ 2013年7月16日 火曜日 午後2時12分 Playback/Editing Switching the Playback Method Displaying multiple screens (Multi Playback) Rotate the rear dial left. 1 screen 12 screens 30 screens Calendar screen display • It is possible to switch the playback screen by touching the 1/98 following icons. –[ ]: 1 screen –[ ]: 12 screens –[ ]: 30 screens – [ CAL ]: Calendar screen display • The screen can be switched gradually by dragging the screen up or down.
DMC-GX7C&GX7K&GX7EB-VQT5B09_eng.book 65 ページ 2013年7月16日 火曜日 午後2時12分 Playback/Editing Using Playback Functions With this menu, you can use various playback functions such as cropping and other editing of recorded images, protect settings, etc. Creating Still Pictures from a Motion Picture You can create a single still picture from a recorded motion picture. 1 2 Press 3 to pause motion picture playback. Press [MENU/SET]. • The same operation can be performed by touching [ ].
DMC-GX7C&GX7K&GX7EB-VQT5B09_eng.book 66 ページ 2013年7月16日 火曜日 午後2時12分 Wi-Fi/NFC What you can do with the Wi-FiR function What you can do Controlling with a Smartphone/Tablet Recording with a smartphone. Saving images stored in the camera. Sending images to an SNS. Easy connection, easy transfer You can use easily by pressing and holding [Wi-Fi] or by using the NFC function.
DMC-GX7C&GX7K&GX7EB-VQT5B09_eng.book 67 ページ 2013年7月16日 火曜日 午後2時12分 Wi-Fi/NFC Controlling with a Smartphone/Tablet You can remotely operate the camera using a smartphone/tablet. You need to install “Panasonic Image App” (referred to as “Image App” from this point on) on your smartphone/tablet. Installing the smartphone/tablet app “Panasonic Image App” The “Image App” is an application provided by Panasonic. For AndroidTM apps OS Installation procedure For iOS apps Android 2.2~Android 4.2¢ iOS 5.
DMC-GX7C&GX7K&GX7EB-VQT5B09_eng.book 68 ページ 2013年7月16日 火曜日 午後2時12分 Wi-Fi/NFC Connecting to a smartphone/tablet A connection can be easily established by pressing and holding [Wi-Fi] or by using the NFC function. Preparations: • Install the “Image App” in advance. (P67) 1 Press and hold [Wi-Fi]. • The information (SSID and password) required for directly connecting your smartphone/tablet to this unit is displayed.
DMC-GX7C&GX7K&GX7EB-VQT5B09_eng.book 69 ページ 2013年7月16日 火曜日 午後2時12分 Wi-Fi/NFC Connecting to a smartphone/tablet by using the NFC function Using the NFC “Near Field Communication ” function, you can easily transfer data necessary for a Wi-Fi connection between this camera and the smartphone/tablet. ∫ Compatible models This function can be used with the NFC compatible device with Android (OS version 2.3.3 or higher).
DMC-GX7C&GX7K&GX7EB-VQT5B09_eng.book 70 ページ 2013年7月16日 火曜日 午後2時12分 Wi-Fi/NFC Taking pictures via a smartphone/tablet (remote recording) 1 2 Connect to a smartphone/tablet. (P68) Select [ ] on the smartphone/tablet. • The recorded images are saved in the camera. • Motion pictures can also be recorded. • Some settings are not available. • The screen differs depending on the operating system.
DMC-GX7C&GX7K&GX7EB-VQT5B09_eng.book 71 ページ 2013年7月16日 火曜日 午後2時12分 Wi-Fi/NFC Transferring images stored in the camera easily A Wi-Fi connection using NFC function is possible by touching the smartphone/tablet to this unit, and you can easily transfer images displayed on the screen. An image can be sent on site immediately after taking it, so you can easily send it to the smartphone/tablet¢ of your family or friend. ¢ Installing the “Image App” is required for use.
DMC-GX7C&GX7K&GX7EB-VQT5B09_eng.book 72 ページ 2013年7月16日 火曜日 午後2時12分 Wi-Fi/NFC Changing the connection method To change the connection method, press [DISP.], and then select the connection method. Connection method Description of settings [Via Network] Connects via a wireless access point. P73 [Direct] Your device connects directly to this unit.
DMC-GX7C&GX7K&GX7EB-VQT5B09_eng.book 73 ページ 2013年7月16日 火曜日 午後2時12分 Wi-Fi/NFC Via the network You can select the method for connecting to a wireless access point. ¢ WPS refers to a function that allows you to easily configure the settings related to the connection and security of wireless LAN devices. To check if the wireless access point you are using is compatible with WPS, refer to the manual of the wireless access point.
DMC-GX7C&GX7K&GX7EB-VQT5B09_eng.book 74 ページ 2013年7月16日 火曜日 午後2時12分 Wi-Fi/NFC If you are not sure about the WPS compatibility (connecting by [Manual Connection]) Search for available wireless access points. • Confirm encryption key of the selected wireless access point if the network authentication is encrypted. • When connecting by [Manual Input], confirm SSID, encryption type, encryption key of the wireless access point you are using. 1 Select the wireless access point you are connecting to.
DMC-GX7C&GX7K&GX7EB-VQT5B09_eng.book 75 ページ 2013年7月16日 火曜日 午後2時12分 Wi-Fi/NFC Direct connection You can select the method for connecting to the device you are using. Select the connection method supported by your device. Connection method [Wi-Fi Direct] [WPS Connection] Description of settings 1 2 3 Set the device to Wi-Fi DirectTM mode. Select [Wi-Fi Direct]. Select the device to connect to. • Read the operating instructions of your device for details.
DMC-GX7C&GX7K&GX7EB-VQT5B09_eng.book 76 ページ 2013年7月16日 火曜日 午後2時12分 About the supplied software About the supplied software The supplied CD-ROM includes the following software. Install the software on to your computer before use. • PHOTOfunSTUDIO 9.2 PE (Windows XP/Vista/7/8) This software allows you to manage images. For example, you can send pictures and motion pictures to a PC and sort them by recording date or model name.
DMC-GX7C&GX7K&GX7EB-VQT5B09_eng.book 77 ページ 2013年7月16日 火曜日 午後2時12分 About the supplied software ∫ Installing supplied software • Before inserting the CD-ROM, close all running applications. 1 Check the environment of your PC. • Operating environment of “PHOTOfunSTUDIO 9.
DMC-GX7C&GX7K&GX7EB-VQT5B09_eng.book 78 ページ 2013年7月17日 水曜日 午後7時55分 Others Monitor Display/Viewfinder Display • The following images are examples of when the display screen is set to [ ] (monitor style) in the monitor. ∫ In recording 4:3 L Card (displayed only during recording) AFS ラュン 8m30s Elapsed recording time¢ Simultaneous recording indicator Peaking AEL 1.
DMC-GX7C&GX7K&GX7EB-VQT5B09_eng.book 79 ページ 2013年7月17日 水曜日 午後7時56分 Others 4:3 L 3 AFS ラュン Name¢1 Number of days that have passed since the departure date¢2 Age¢1 AEL 1.
DMC-GX7C&GX7K&GX7EB-VQT5B09_eng.book 80 ページ 2013年7月16日 火曜日 午後2時12分 Others 50 4:3 L 5 AFS Dial operation guide ラュン White Balance Bracket BKT AWB AEL 1.
DMC-GX7C&GX7K&GX7EB-VQT5B09_eng.book 81 ページ 2013年7月16日 火曜日 午後2時12分 Others Fn5 × Fn6 F Fn7 SS Fn8 ISO Fn9 • Only displayed in the monitor.
DMC-GX7C&GX7K&GX7EB-VQT5B09_eng.book 82 ページ 2013年7月16日 火曜日 午後2時12分 Others ∫ In playback 1 4:3 3 L 1/98 Clear Retouch completed icon SLF 67 '$< Currently retrieving information icon Playback (Motion Pictures) PRQWK GD\V F1.
DMC-GX7C&GX7K&GX7EB-VQT5B09_eng.book 83 ページ 2013年7月16日 火曜日 午後2時12分 Others Detailed information display 60 F1.7 0 WB ISO AWB 200 AFS P STD. '(& 4:3 L s RGB 100-0001 2 1 Recording information Recorded date and time/World Time Intelligent Dynamic Range Control¢1 3 4:3 HDR¢2 Intelligent Resolution L A› Shading Compensation¢2 Picture size/ Aspect Ratio Quality Colour space¢2 100-001 Folder/File number¢1 Histogram display F1.
DMC-GX7C&GX7K&GX7EB-VQT5B09_eng.book 84 ページ 2013年7月16日 火曜日 午後2時12分 Others Menu list [Rec] This menu lets you set the aspect ratio, number of pixels and other aspects of the pictures you are recording. • [Photo Style], [Metering Mode], [Highlight Shadow], [i.Dynamic], [i.Resolution] and [Digital Zoom] are common to both the [Rec] menu and [Motion Picture] menu. Changing these settings in one of these menus is reflected in other menu.
DMC-GX7C&GX7K&GX7EB-VQT5B09_eng.book 85 ページ 2013年7月16日 火曜日 午後2時12分 Others [Stop Motion Animation] A stop motion picture is created by splicing pictures together. [Panorama Settings] Sets the recording direction and image effect for panorama recording. [Electronic Shutter] The shutter sound can be turned off for recording in a quiet environment.
DMC-GX7C&GX7K&GX7EB-VQT5B09_eng.book 86 ページ 2013年7月16日 火曜日 午後2時12分 Others [Motion Picture] This menu lets you set the [Rec Format], [Rec Quality], and other aspects for motion picture recording. • [Photo Style], [Metering Mode], [Highlight Shadow], [i.Dynamic], [i.Resolution] and [Digital Zoom] are common to both the [Rec] menu and [Motion Picture] menu. Changing these settings in one of these menus is reflected in other menu.
DMC-GX7C&GX7K&GX7EB-VQT5B09_eng.book 87 ページ 2013年7月16日 火曜日 午後2時12分 Others [AF/AE Lock Hold] This will set the operation of [AF/AE LOCK] button when taking a picture with fixed focus or exposure. [Shutter AF] Set whether or not the focus is adjusted automatically when the shutter button is pressed halfway. [Half Press Release] The shutter will immediately fire when the shutter button is pressed halfway. [AFS/AFF/AFC] Sets the focus method.
DMC-GX7C&GX7K&GX7EB-VQT5B09_eng.book 88 ページ 2013年7月16日 火曜日 午後2時12分 Others [Constant Preview] You can check the effects of the chosen aperture and shutter speed on the recording screen in Manual Exposure Mode. [Expo.Meter] Set whether or not to display the exposure meter. [Dial Guide] Set whether or not to display the dial operation guide. [LVF Disp.Style] This will set the display style of the viewfinder. [Monitor Disp. Style] This will set the display style of the monitor. [Monitor Info.
DMC-GX7C&GX7K&GX7EB-VQT5B09_eng.book 89 ページ 2013年7月16日 火曜日 午後2時12分 Others [Setup] This menu lets you perform the clock settings, select the operating beep tone settings and set other settings which make it easier for you to operate the camera. You can also configure the settings of Wi-Fi related functions. [Clock Set] Setting Date/Time. [World Time] Sets the times for the region where you live and your holiday destination.
DMC-GX7C&GX7K&GX7EB-VQT5B09_eng.book 90 ページ 2013年7月16日 火曜日 午後2時12分 Others [Language] Set the language displayed on the screen. [Version Disp.] This enables the firmware versions of the camera and lens to be checked. [Exposure Comp. Reset] An exposure value can be reset when the recording mode is changed or the camera is turned off. [Self Timer Auto Off] Sets whether or not to cancel the self-timer when this unit is turned off. [No.Reset] Returns the image file number to 0001.
DMC-GX7C&GX7K&GX7EB-VQT5B09_eng.book 91 ページ 2013年7月16日 火曜日 午後2時12分 Others [Playback] This menu lets you set the Protection, Cropping or Print Settings, etc. of recorded pictures. [2D/3D Settings] Switches the playback method for 3D images. [Slide Show] Selects the type etc. of the images and plays back in order. [Playback Mode] Selects the type etc. of the images and plays back only particular images.
DMC-GX7C&GX7K&GX7EB-VQT5B09_eng.book 92 ページ 2013年7月16日 火曜日 午後2時12分 Others Specifications Specifications are subject to change without notice. Digital Camera Body (DMC-GX7): Information for your safety Power Source: DC 8.4 V Power Consumption: 2.5 W (When recording with LCD Monitor) [When the Interchangeable lens (H-H020A) is used] 2.4 W (When recording with LCD Monitor) [When the Interchangeable lens (H-FS1442A) is used] 1.
DMC-GX7C&GX7K&GX7EB-VQT5B09_eng.book 93 ページ 2013年7月16日 火曜日 午後2時12分 Others Burst recording Burst speed Mechanical shutter: 5 pictures/second (High speed), 4 pictures/second (Middle speed), 2 pictures/second (Low speed) Electronic shutter: 40 pictures/second (Super high speed), 10 pictures/second (High speed), 4 pictures/second (Middle speed), 2 pictures/second (Low speed) Number of recordable pictures Max.
DMC-GX7C&GX7K&GX7EB-VQT5B09_eng.book 94 ページ 2013年7月16日 火曜日 午後2時12分 Others Flash Built-in pop up flash GN 7.0 equivalent (ISO200· m) [GN 5.0 equivalent (ISO100 · m)] Flash range: Approx. 50 cm (1.6 feet) to 11.7 m (38 feet) [When the Interchangeable lens (H-H020A) is mounted, [ISO AUTO] is set] Flash range: Approx. 50 cm (1.6 feet) to 5.
DMC-GX7C&GX7K&GX7EB-VQT5B09_eng.book 95 ページ 2013年7月16日 火曜日 午後2時12分 Others Recording quality Motion pictures Quality [AVCHD] 1920k1080/50p (28 Mbps)/1920k1080/50i (17 Mbps)/ 1920k1080/50i¢ (24 Mbps)/1920k1080/24p (24 Mbps)/ 1280k720/50p (17 Mbps) (¢Sensor output is 25 frames/sec.
DMC-GX7C&GX7K&GX7EB-VQT5B09_eng.book 96 ページ 2013年7月16日 火曜日 午後2時12分 Others Dimensions Approx. 122.6 mm (W)k70.7 mm (H)k54.6 mm (D) [4.83q (W)k2.78q(H)k2.15q (D)] (excluding the projecting parts) Mass Approx. 402 g/0.89 lb [with the card and battery] Approx. 360 g/0.79 lb (camera body) Approx. 489 g/1.08 lb [with the Interchangeable lens (H-H020A), card and battery] Approx. 512 g/1.
DMC-GX7C&GX7K&GX7EB-VQT5B09_eng.book 97 ページ 2013年7月16日 火曜日 午後2時12分 Others Interchangeable Lens H-H020A “LUMIX G 20 mm/F1.7 II ASPH.” H-FS1442A “LUMIX G VARIO 14 –42 mm/F3.5– 5.6 II ASPH./MEGA O.I.S.” Focal length f=20 mm (35 mm film camera equivalent: 40 mm) f=14 mm to 42 mm (35 mm film camera equivalent: 28 mm to 84 mm) Aperture type 7 diaphragm blades/circular aperture diaphragm 7 diaphragm blades/circular aperture diaphragm Aperture range F1.7 F3.5 (Wide) to F5.
DMC-GX7C&GX7K&GX7EB-VQT5B09_eng.
DMC-GX7C&GX7K&GX7EB-VQT5B09_eng.book 99 ページ 2013年7月16日 火曜日 午後2時12分 Others This product incorporates the following software: (1) the software developed independently by or for Panasonic Corporation, (2) the software owned by third party and licensed to Panasonic Corporation, and/or (3) open source software The software categorised as (3) is distributed in the hope that it will be useful, but WITHOUT ANY WARRANTY, without even the implied warranty of MERCHANTABILITY or FITNESS FOR A PARTICULAR PURPOSE.
DMC-GX7C&GX7K&GX7EB-VQT5B09_eng.book 100 ページ 2013年7月16日 火曜日 午後2時12分 • QuickTime and the QuickTime logo are trademarks or registered trademarks of Apple Inc., used under license therefrom. • Windows and Windows Vista are either registered trademarks or trademarks of Microsoft Corporation in the United States and/or other countries. • Android and Google Play are trademarks or registered trademarks of Google Inc. • The Wi-Fi CERTIFIED Logo is a certification mark of the Wi-Fi Alliance.