
Manual


Advanced-Viewing
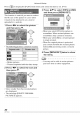
4 Press [MENU/SET]. 6 Press [MENU/SET] twice to close
• Images are resized as follows when you
add the date to the pictures taken with a
resolution of more than [F_M]].
- m aspect ratio --* FffM]
- _ aspect ratio --*
- _ aspect ratio _
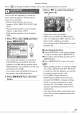
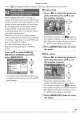
5 Press A/Y to select [YES] or [NO]
and press [MENU/SET].
(Screen when you have chosen an
image taken at [ITMT])
A
©
v
MENU
• The message [DELETE ORIGINAL
PICTURE?[ appears when the picture is
taken with a resolution of [I_M7] or less,
• The image is replaced if you select
[YES], The original image is overwritten
with the resized image that has the date
added,
• Select [NO] to save a new picture with
the date,
• You cannot save over the original picture
if it is protected, Select [NO] to save a
the menu.
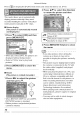
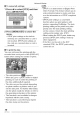
• Pictures that have been date stamped
will be marked with the date stamp
complete indicator _b.
• To confirm the date stamp (B),use
playback zoom (P69),
®
-®
• Note that if you use date stamp and
then specify printing the date when
you order prints or on a printer, both
dates will be printed and may overlap.
• Make sure there is some space available
on the built-in memory or card.
• It is possible to set up to 50 pictures at
one time using [MULTI].
• If protected pictures are included when
you use [MULTI], a message appears
when you select [YES] in step 5 and the
date stamp will not be imprinted on the
protected pictures.
• The date may be cut off with some
........... ....................................................................................................printers.
• Once you have added the date, you will
no longer be able to use the following
functions with the pictures.
- [DATE STAMP]
- Date print setting in [DPOF PRINT]
- [RESIZE]
- [TRIMMING]
76
VQTIC63