Panasonic Operating Instructions High Definition Video Camera _o_e, .o.HDC-SD60P/PC HDC-TM55P/PC HDC-TM60P/PC HDC-HS60P/PC Before connecting, operating or adjusting Spanish Quick Use Guide is included. Guia para rapida consulta en espaSol this product, read the instructions DOLBY _,_'_ TM STEREO DIG|TAL CREATOR H completely. esta incluida.
Things Know /Date of Purchase You Should Dealer Purchased From Thank you for choosing Panasonic! You have purchased one of the most Dealer Add ress sophisticated and reliable products on the market today. Used properly, we're Dealer Phone No. sure it will bring you and your family years of enjoyment. Please take time to Model No. fill in the information on the right. The serial number is on the tag located Serial No. k, on the underside of your camera.
THE FOLLOWING APPLIES ONLY INTHE U.S.A. FCC Note: This equipment has been tested and found to comply with device, pursuant reasonable equipment the limits for a Class B digital limits are designed to provide to Part 15 of the FCC Rules. These protection generates, against harmful interference in a residential installation. This uses, and can radiate radio frequency energy and, if not installed and used in accordance with the instructions, may cause harmful communications.
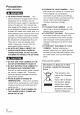
Battery pack (Lithium ion battery pack) • Use the specified unit to recharge the battery pack. • Do not use the battery pack with equipment other than the specified unit. • Do not get dirt, sand, liquids, or other foreign matter on the terminals. • Do not touch the plug terminals (+ and ) with metal objects. • Do not disassemble, remodel, heat or throw into fire. If any electrolyte should come into contact with your hands or clothes, thoroughly with water.
IMPORTANT SAFETY INSTRUCTIONS Read these operating instructions carefully before using the unit. Follow the safety instructions on the unit and the applicable safety instructions listed below. Keep these operating instructions handy for future reference. 1) Read these instructions. 2) Keep these instructions. 3) Heed all warnings. 4) Follow all instructions.
Precautions USE & LOCATION • STORAGE OF YOUR CAMERA and handle your camera • TO AVOID camera SHOCK HAZARD and power supply Your camera contains a sensitive pick-up device which could be damaged by not be exposed to rain or moisture. Do not connect the power supply or operate your camera if it gets wet. Your camera has been designed for outdoor use, however improper handling it • TO CLEAN use strong direct splashing from a pool or even a cup of coffee.
• Indemnity about recorded content Panasonic does not accept any responsibility for damages directly • Handling of HDD [HDC-HS60] This unit is equipped with the built-in 120 GB HDD. While the HDD is capable of storing a large amount of data, there are a few things to look out for.
• Operation may stop in hot or cold environments. The unit is disabled HDD. in order to protect the SD Memory Card, SDHC Memory and SDXC Memory Card Do not use the unit in low atmospheric pressures. The HDD may fail if it is used at altitudes 3000 m (9800 feet) or higher above sea level. of When the unit is transported, turn off the power and be careful not to shake, drop, or detects a falling on the screen when state (a weightless it state).
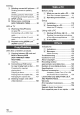
Contents Accessories Quick ............................................ 11 Guide ............................................ 12 Setup [] [] Using Using the menu the Setup screen ............. Menu ............... 43 44 Before using [] Recording (Advanced) Parts identification and handling ...................................... [H DC-SD60]/[H DC-TM55]/ 15 [HDC-TM60] [HDC-HS60] 15 18 ................................. ................................. Setup [] Power supply ..................
Editing [] Deleting scenes/still pictures Dividing a scene to partially delete ........................................... Deleting [] [] personal information ... 87 Before using 88 Protecting scenes/still pictures ..... 90 DPOF setting .............................. 91 [] Relay scene combining [HDC-TM55/HDC-TM60] ............. 92 Watching Video/Pictures on your TV .................................. 94 Connecting with a HDMI mini cable ............................................
Accessories Check the accessories Product numbers correct before using this unit. as of Feb. 2010. These may be subject to change.
Quick Guide • Inserting the battery Install the battery by inserting direction shown in the figure. it in the 1) 2) Open the LCD monitor. Open the SD card cover and insert (remove) the SD card into (from) card slot Q. the • Face the label side _ in the direction shown in the illustration and press it straight in as far as it will go. • Press the center of the SD card and then O Insert the battery until it clicks and locks. • Charging the battery 3) pull it straight out.
• Selecting a mode Operate the mode switch to change mode to _ , O or [_. Selecting a media to record [HDC-TM55/HDC-TM60/HDC-HS60] the 1) 2) Change the mode to Select the menu. 3) Touch the media to record motion : [MEDIA _ Still Picture (-> 36) [] • Playback Recording Recording Mode . I SELECT] pictures or still pictures. • Touch [VIDEO/SD CARD] Motion Picture Mode (-_ 34) or _ or [PICTURE/ SD CARD] to record to the SD card.
• Motion picture/Still picture playback 1) 2) Change the mode to []. Touch the play mode select icon O. (Motion picture • /11: Playback/Pause playback) 4<1: • • : Rewind playback Fast forward playback I1: Stops the playback the thumbnails. and shows • : Displays (-> 79) playback the direct (Still picture playback) • /I I: Slide show (playback 3) Touch the desired media to be played back motion pictures or still pictures. pictures in numerical start/pause.
Parts identification handling 12345 6 1 Power 2 3 Speaker Intelligent 4 [iA/MANUAL] (-) 38) Optical image stabilizer 5 6 [((_))/O.l.S.] (-) 52) Mode switch (-) 29) Battery holder (-) 22) 7 HDMI mini connector 8 (-) 94, 97) USB terminal 9 button [V/I] and (-) 28) auto/Manual [_] AV multi connector (-) 94, 108) button button [HDMI] (-) 102, 117) [AV MULTI] • Use the AV multi cable (only the supplied cable).
18 18 LCD monitor (Touch screen) (-_ 30) 19 • It can open up to 90 _. O Q 20 21 22 23 24 • It can rotate up to 180 ° O towards or 90 ° Q towards Due to limitations technology, the opposite in LCD production there may be some tiny bright or dark spots on the LCD monitor However, this is not a malfunction does not affect the recorded 19 Recording 20 Sub recording (-,) 32) • This button start/stop 16 VQT2M51 (-') 34) button in the same manner start/stop button.
27 28 29 27 Status 28 29 Photoshot button [ O ] (-> 36) Zoom lever [W/T] (In Motion Picture Recording Mode or Still Picture indicator Recording Thumbnail (-> 28) Mode) (-> 51) display switch Volume lever [-VOL+] Mode) (-> 42) [_ 30 DC input terminal (-> 23) • Do not use any other AC adaptors the supplied 31 Grip belt I0_]1 (In Playback except one. 31 O I_ Flip the belt. Adjust the length. l_l Replace the belt.
12 34 5 6 [_)/I] (-_ 28) 1 2 Power button Speaker 3 Intelligent auto/Manual [iA/MANUAL] (-) 38) 4 Optical image stabilizer [((_))/O.l.S.] (-_ 52) 5 6 Mode switch (-) 29) Battery holder (-) 22) 7 HDMI mini connector (-) 94, 97) 8 9 USB terminal [._] (-) 102, 117) AV multi connector [AV MULTI] button button [HDMI] (-) 94, 108) • Use the AV multi cable (only the supplied 10 cable).
18 19 18 LCD monitor (Touch screen) (-_ 30) • It can open up to 90L @ 0 20 21 222324 • It can rotate up to 180 ° O towards the lens or 90 ° 0 towards the opposite direction. Due to limitations in LCD production technology, there may be some tiny bright or dark spots on the LCD monitor screen. However, this is not a malfunction and does not affect the recorded picture.
27 28 29 30 27 Status 28 29 Photoshot button [ O ] (-> 36) Zoom lever [W/T] (In Motion Picture Recording Mode or Still Picture indicator Recording Thumbnail (-) 28) Mode) (-> 51) display switch Volume lever [-VOL-t-] Mode) (-> 42) 30 31 [_ HDD access lamp [ACCESS DC input terminal (-> 23) • Do not use any other AC adaptors the supplied one. 2O VQT2M51 32 Grip belt O Flip the belt. _l Adjust the length. Replace the belt.
Power supply • About batteries that you can use with this unit The battery that can be used with this unit is VW-VBK180/VW-VBK360. • This unit has a function to distinguish the batteries that can be used, and the batteries (VW-VBK180/VW-VBK360) that are compatible with this function. (The batteries that are not compatible It has been found that counterfeit with this function battery packs cannot be used.
• Press the power button to turn off the power. Install the battery by inserting (-_ 28) it in the direction shown in the figure. Removing the battery Be sure to hold down the power button unti the status indicator goes off. Then remove the battery while supporting the unit to prevent it from dropping. Move the battery release lever in the direction indicated by the arrow and remove O Insert the battery and locks.
When this before unit is purchased, the battery using this unit for the first time. Important: • Use the supplied AC adaptor. is not charged. Do not use the AC adaptor Charge the battery of another • Do not use the AC cable with any other equipment as it is designed Also, do not use the AC cable from other equipment with this unit. • The battery • The battery O can also be charged will not be charged device. only for this using a battery charger (VW-BCIOPP; if the power is turned on. unit.
• Charging/Recording time • Temperature: 25 °C (77 '_F)/humidity: 60% Supp!ied VW:VBK360 (optional) [3.6 V/3580 mAh] Supp!ied MW:VBK360 (optional) [3.6 V/3580 mAh] VQT2M51 1 h 45 min 2 h 50 min 55 min HE 1 h 50 min HA 3 h 35 min HG 3 h 40 min HX/HE 3 h 40 min HA/HG/HX 1 h 45 min 1 h 50 min 4 h 50 min battery/ VW-VBK180 (optional) [3.6 V!1790 mAh] 24 HA/HG/HX battery/ VW-VBK180 (optional) [3.
Supplied battery! VW-VBK180 (optional) 2h50min [3,6V/1790 mAh] VW_VBK360 (optional) 4h50min [3.6V/3580 mAh] HDD 1h35min 50min SD 1h35min 1h40min 50min HDD 3h15min lh40min SD • These times are approximations. • The indicated charging time is for when Charging high/low time and recordable temperature. • The actual recordable time vary the battery depending time refers to the recordable 3h20min 1h40min 3h20min 1h45min has been discharged on the usage time when completely.
Recording to a card The unit can record still pictures or motion pictures to an SD card, built-in memory or HDD. To record to an SD card, read the following. This unit (an SDXC compatible device) Memory memory Cards and SDXC Memory card with other equipment, memory cards.
When using anSDcard notfrom Panasonic, orone previously used onother equipment, forthefirsttime onthisunit, format theSDcard. (-)48)When theSDcard isformatted, all oftherecorded data isdeleted. Once thedata isdeleted, itcannot berestored. Caution: Check that the access lamp has gone off. • When this unit is accessing the SD card or bui!t-in memorY , the acces s lamp lights up, 1 2 Open the LCD monitor. Open the SD card cover and insert (remove) the SD card into (from) the card slot O.
Turning the unit on/off You can turn the power on and off using the power monitor. button or by opening and closing the LCD Press the power button to turn on the power. Hold down the power button until the status indicatorgoes off, O The status indicator lights on. Power is turned on when closed.
Selecting a mode Change the mode to recording or playback, Operate the mode switch to change the mode to _ Motion Picture Still Picture [] Playback Recording Recording Mode Mode Mode , O or [_.
Adjusting LCD monitor • Do not touch You can operate by directly touching the LCD monitor (touch screen) with your finger. It is easier to use the stylus pen (supplied) on the LCD monitor with hard pointed tips, such as ball point pens. • Perform the touch screen calibration when the touch location is not recognized is recognized. or wrong (-,) 49) for detailed operation or if it is hard to operate with your fingers. • Touch Touch and release the touch screen to select icon or picture.
Setting When the unit is turned on for the first time, a message will appear. Select [YES] and perform <_ Change the mode to 1 the menu. Select Touch _ using you to set the date and time or O. The date and time function built-in lithium battery. set the desired is driven by a When this unit is purchased, the clock is set. If the time display becomes [- -], the the date or time to be set, then asking steps 2 to 3 below to set the date and time.
Before recording • Basic camera positioning O Q -O I_ Hold the unit with both hands. Put your hand through the grip belt. I_ It is convenient waist level. to use the Sub-recording • When recording, make sure your footing another person or object. Start/Stop button holding is stable and there is no danger • When you are outdoors, record pictures with the sunlight backlit, it will become dark in the recording. • Keep your arms near your body and separate • Do not cover the microphones.
Selecting a media to record [HDC-TM55/HDC-TM60/HDC-HS60] The card, built-in pictures memory, and HDD media can be selected 1 Change the mode to _ 2 Select the menu. : [MEDIA 3 to record motion or O • SELECT] I Touch the media to record motion pictures or still pictures. [ HDC-TM55 }/[ HDC-TM60 } O [VlDEO/SD Q (_ [VIDEO/Built-in [PICTURE/SD CARD] _) [PICTU RE/Built-inMemory] [VlDEO/SD • The media 4 separately or still pictures.
Recording motion pictures 1 Change the mode to _ 2 Open the LCD monitor. 3 . 4==m=_ _=o Press the recording start/stop button to start recording. O When to O. you begin recording, 4 Press the recording start/stop button again to pause recording. • Still pictures can be recorded • The images recorded between II changes while recording the motion picture.
• Screen indications in the Motion Picture Recording O Q Recording Remaining Mode mode time left for recording (When the remaining time is less than 1 minute, [R 0h00m] flashes red.) Q (_ Recording time elapsed Each time the unit is put into recording pause, the counter to "0h00m00s". display will be reset • They are not compatible with devices other than those that support AVCHD: Images cannot be plaYed with equipment that does not SUpport AVCHD (ordinary DVD recorde[s).
Recording still pictures 1 2 3 Change the mode to O • Open the LCD monitor. Press the O button halfway. (For Auto focus only) o& 4 Press the _ button fully. o& Focus indication: O Focus indication O (The white lamp flashes.): Focusing • (The green lamp lights up.): When in focus No mark: Q When focusing is unsuccessful. Focus area (area inside brackets) • If you set the Optical image stabilizer function (-) 52) to [_i/((,_))1 (MODE1), image Stabilizer function will be more effective.
• About the screen indications in • Still Picture Recording When there is a contrasting object ahead behind the subject in the focus area, the About the focusing area or subject may not be focused. If so, move the contrasting object out of the focus area. • Focus area is not displayed following conditions.
Intelligent Auto Mode I VIDEO IIPHOTO J The following modes appropriate for the condition are set just by pointing the unit to what you want to record. Intelligent Press • _3 Portrait When the object )erson Scenery Recording is a auto/Manual button this button to switch Intelligent Please refer to page 74 for details about Manua! Mode. Faces are detected and focused automatically, and the brightness adjusted so it is recorded clearly.
• Auto focus Intelligent Auto Mode When switching to intelligent Auto Mode, the Auto White Balance and Auto Focus operate and automatically and focusing. adjust the color balance The unit focuses automatically. • Auto focus does not work correctly Depending on the brightness of the subject etc., the aperture and shutter speed are Recording distant at the same time automatically brightness.
Motion picture/Still picture playback I VIDEO II PHOTO[ 1 2 3 Change the mode to _. Touch the play mode select icon O. Touch the desired media to be played back motion pictures or still pictures.
4 Touch the scene or the still picture to be played back. • Next (previous) 5 page can be displayed by touching Select the playback operation by touching the operation icon. O Operation • Touch icon. Motion picture _ icon / _ to display/not-display playback 1_/I I: ,4: 1_1_: I: Playback/Pause Rewind playback Fast forward playback Stops the playback and shows the thumbnails. 1_: Displays the direct playback bar.
• Change the thumbnail display • While the thumbnail is displayed, the thumbnail display changes in the following order if the zoom lever or adjust zoom buttons are operated to Q, side or _ side. 20 scenes _ 9 scenes _ 1 scene H Highlight&Time X_ W frame index* (-) motion adjustment picture playback. 80)
Using the menu screen 1 Press the MENU button. 2 Touch the top menu O. 3 4 Touch the desired item to enter the setting. 5 Touch [EXIT] or press the MENU button to exit the menu Touch the submenu O. setting. • About _ After touching guide display _, touching the submenus and items will cause function descriptions and settings confirmation messages to • Next (previous) touching _L}/[_ page can be displayed . by appear.
Using the Setup Menu • The items displayed Select the menu, : [SETUP] The screen shown differ _ desired indications depending on the position or settings of the mode switch. setting are selected I I as [OFF] in the illustration. [_B BH [ON] ,el ] NOV152010 ITa_ |H OhOOmO0_ [_7 _ 1 _,_ Please refer to page 95. Please refer to page 31. It is possible to display and record the time at the travel destination region and the travel destination. 1 Touch [SET WORLD by selecting TIME].
4 (Only when setting theregion ofyour travel destination) Touch [DESTINATION]. • Touch [ENTER]. • When the home region is set for the first time, the screen for selecting home/travel destination appears after setting the home region successively. If the home already been set once, execute the menu operation for Step 1. 5 (Only when setting destination) Touch [_/[_ destination the region to select and • Touch [SUMMER saving time. _ touch of your travel your travel [ENTER].
Theunitisputintorecording pause approx. 1second when thepower isturned onwith the mode setto _ orO. • Depending ontherecording conditions, start timemay belonger than 1second inStill Picture Recording Mode. • IntheQuick power onmode, thezoom magnification becomes 1×. Thisunitisputintorecording pause approx. 0.6seconds after theLCD monitor isreopened.
Touch screen operation, starting and stopping ofrecording andpower on/off canbe confirmed with this sound. u:[]) (Volume low)/u_]))) (Volume 2 Beeps for 4 times When an error occurs.
Please refer topage 95. Setto[YES] forchanging themenu settings back tothedefault condition. • Settings for [MEDIA SELECT]*, [CLOCK * For users who have [ HDC-SD60 Please be aware that if a medium SET] and [LANGUAGE] will not be changed. ), this menu is not displayed. is formatted, then all the data recorded on the medium will be erased and cannot be restored. Back up important data on a PC, DVD disc etc. (-_ 101, 109) • When formatting is complete, touch [EXIT] to exit the message screen.
Theamount ofspace leftontheSDcard canbechecked. (Only when themode isatthe[_ position) • Touch [EXIT] orpress theMENU button toclose theindication. Theamount ofspace leftontheSDcard, thebuilt-in memory andHDD canbechecked. (Only when themode isatthe[] position) • Touching [CHANGE MEDIA] switches theunitbetween thedisplay fortheSDcard and the display forthebuilt-in memory/HDD. • Touch [EXIT] orpress theMENU button toclose theindication.
Thisitem isused tostart theunitdemonstration. (Only when the mode is at the [ HDC-SD60 ) If [DEMO MODE] is switched automatically starts. [ HD C-TM 55 ] / _ _ or 0 position) to [ON] when there is no SD card inserted, / f_"_m_el If [DEMO MODE] is switched to [ON] when there is no SD card inserted connected to the AC adaptor, the demonstration automatically starts. If any operation takes place, the demonstration place for approx.
Zoom in/out function The maximum optical zoom ratio is 25x. The default setting of the [ZOOM MODE] is [i.Zoom 35x]. of 35x during Motion Picture Recording Mode. (-) 61 ) 4_ Change the mode to _ or It can be extended to a maximum O. Zoom lever/Adjust zoom buttons T side: w Close-up W side: T recording (zoom in) Wide-angle recording (zoom out) • The zoom speed varies depending on the range over which the zoom lever is moved.
Optical Image Stabilizer Function I VIDEO IIPHOTO I Optical much. Image Stabilizer 4_ Change the mode can stabilize the image without to O, _ or 0.1.s. decreasing the image quality as Optical image stabilizer button Pressing image the button stabilizer changes (Motion Picture Recording [_ ((_)) _ OFF _ the Optical setting, Mode) (Still Picture Record ing Mode) _1/_2 _ €(_111/€(_2 _ OFF • Switch to Manual Mode before setting the Optical image stabilizer function to off.
AF/AE tracking I VIDEO IIPHOTO I It is possible to set the focus and exposure The focus and exposure will keep following (Dynamic tracking) 4_ Change the mode .t to _ or O to the subject specified on the touch screen. the subject automatically even if it moves. • Touch _. 3 recording. Start • When you touch [RETURN], function will be canceled. • the tracking About target flame • When target lock fails, the target frame blinks in red and then disappears.
Recording with the video light I VIDEO IIPHOTO i The video light enables brightening (_ Change to the mode _ of the images or taken in a dimly-lit place. I1_. Video light button Each time the button is pressed, the indication changes by one setting in the following order. _ _IDA/IDA Always _ Setting on _l])A / IDA : Turns on!off automatically brightness • When canceled according to of the surroundings.
Recording functions of operation icons Select the operation 4_ Change icons to add different the mode to _ or effects 1 Touch _ to display the operation icons on the screen. • Touch • at the bottom right of the screen to change the page and touch _ / _ display/not-display the operation icon. Fade .1 intelligent contrast PRE4_EC PRE-REC control .I, 2 Reduction intelligent Backlight exposure • Select the operation the function. Soft skin mode .
Fade When you start recording, appears. (Fade in) the image/audio (Fade in) When you pause recording, disappears. (Fade out) • The Fade setting • To select the the image/audio is canceled color for gradually when the recording stops. Fade in/out : [RECORD SETUP] [WHITE] or [BLACK] _ • The thumbnails recorded of scenes gradually [FADE (Fade out) COLOR] using fade in become black (or white).
When asmiling face is detected during records a still picture. automatically motion picture recording, the unit The icon changes each time it is touched. _] (ON) _ _ (Face Recognition) _ OFF : : _ The unit records a still picture on detecting a smiling face. Still pictures are only recorded when the face of a person registered using Face Recognition (-> 62) is detected. Cancel the setting. OFF: • During Smile Shot recording, {_]/_ surrounded by a green frame.
Reduces the phenomena • The flash is activated • The red-eye where human eyes tends to appear some people than with others. • When faces are detected in the Intelligent Each time the _ order: red from flashes. 2 times. phenomenon This is for recording become still pictures icon is selected, in certain recording conditions Auto Mode, the Red-Eye using and more with Reduction is set to on. the timer.
Tele macro A more impressive image can be obtained and shading off the background. • The unit can focus • if the magnification • Tele Macro [] on the object only in close-up on the subject at a distance of approx. 70 cm (28"). is 25× or less, then it is automatically set to 25×. Function is canceled when the zoom magnification becomes lower than 25x. Guideline You can check if the image and still pictures. composition.
Recording functions of menus [SCENE MODE] _ When you record images speeds and apertures.
[ZOOM MODE] Set the maximum • Change zoom the mode : [RECORD [Opt.Zoom [LZoom [D.Zoom _ ratio for the Motion to Picture Recording Mode. • !_ • SETUP] _ 25X]: [ZOOM Optical 35x]: MODE] _ Digital • The larger the digital zoom setting I I zoorn (Up to 25×) This zoom function 1500x]: desired allows youto maintain high,definition zoom (Up to 1500X) magnification, the more the image quality is degraded.
HDC-TM55 / HDC-TM60 It is possible to continuously record motion picture to an SD card when there is no space available in the built-in memory. (It allows you to record only to SD card from built-in memory.) • Change the mode : [RECORD to . SETUP] _ [RELAY REC] _ [ON] • _> [_] is displayed on the screen. E> I_ will disappear gone and the recording to the SD card starts. • Relay recording can only be performed once. • Combine the scenes that were relay-recorded into the SD card.
• Registering a face for face recognition [RECORD SETUP] • Up to a maximum 1 Align _ [FACE RECOG.] _ [SET] _ I [SAVE] of 6 people can be registered. the person's face with the guide. • Take a picture of the persons face from the front, ensuring that their hair does not hide the outline of 2 their face, their eyes or their eyebrows. Touch [REC] or press the O button • Touch fully. [ENTER]. • It may not be possible to register a face depending on the recording conditions.
• 1 Changing the information of a registered person Select the menu. [RECORD SETUP] _ [FACE RECOG.] _ [SET] _ 2 Touch the desired item to enter the setting. • Up to 3 face shots can be registered. To additionally or to change/delete the face shot. the registered I [EDIT] register face shots, touch [] or [SET NAME]: Change the name. [PRIORITY]: Focus and exposure will be set in priority according to the registration order setting from the first person.
When aregistered person isdetected byfacerecognition during recording, thename registered forthatperson isdisplayed. • Change the mode to : [RECORD _ or SETUP] _ O. [NAME DISPLAY] _ desired number I [0FF]111]112]113] • Displayed name will disappear after a while. • It is displayed according to the registration order setting • This function is not displayed during recording of yourself from the first person.
[AGS] If the unit continues to be tilted upside down from the normal recording motion pictures, it is automatically • Change the mode to N . : [RECORD • The AGS function recording SETUP] _ may activate a subject right above lAGS] _ horizontal put into recording position [ON] and cause the unit to pause the recording or right below _ You can record bright pictures • Change the mode to • Switch to Manual Mode. • The shutter • This function speed if you are you.
[SHOOTING GUIDE] Message is displayed • Change the mode when this unit is moved to rapidly. _. : [RECORD SETUP] [SHOOTING GUIDE] _ [ON] When "CAMERA PANNING IS TOO FAST." appears, move the unit slowly while recording. • Set to [OFF] to turn off the message indication. • Message will not appear while pausing the recording. (Message pausing the recording if [DEMO MODE] is set to [ON].) • In some recording conditions, messages will appear even if it is may not appear.
[MIC LEVEL] When recording, the input level from the built-in microphones can be adjusted. • Change the mode to _11 • • Switch to Manual Mode. (-) 74) 1 Select the menu. : [RECORD SETUP] _ [MIC LEVEL] _ [AUTO]: AGC is activated; automatically. [SET-I-_]/[SET]: -i-he desired 2 Touch level. [_/[_ to adjust desired I and the recording recording the microphone setting level is adjusted level can beset. input • Touch _ to activate/disactivate AGC.
Adjust thequality oftheimage while recording. Adjust byoutputting toaTVwhile adjusting the quality • Change the mode to _ • Switch to Manual Mode. 1 Select the menu. : [RECORD 2 SETUP] or (-) of the image. O. 74) > [PICTURE ADJUST] I Touch the desired setting items. [EXPOSURE]: Brightness [WB ADJUST]: Picture color balance of the image 3 Touch _/_ to adjust settings. 4 Touch [ENTER]. • Touch [EXIT] or press the MENU button to complete the settings. • _,_:,appears on the screen.
[PICTURE SIZE] The higher the number of pixels, • Change the mode to O • : [PICTURE] _ [PICTURE • The number of recording aspect ratio. (-_ 71) • the higher the clarity of the picture when SIZE] _ desired setting pixels that can be set changes Picture size and Maximum zoom ratio • depending on selected the mode to : [PICTURE] desired setting [] 2592 x 1944 [] 1600x [] -* 1200 screen Picture size in Motion Picture Recording Mode • Change 4:3 printing. iiiii/i!_i! _ _ .
[QUALITY] Selecting • Change l|- = : =Z=: the picture quality. the mode to : [PICTURE] _ Still pictures I_ or O. [QUALITY] with ahigh _ desired setting picture qua!ity I are recorded. Priority is given to the number of still pictures in normal picture quality. recorded: Still pictures are recorded [ASPECT RATIO] This allows you to select the aspect • Change the mode to O.
[HI-SPEED BURST] Recording is done continuously at the rate of 30 or 60 still pictures Use this function to record an object • Change the mode to O • 1 Select the menu. : [PICTURE] [HI-SPEED BURST] 4 _ desired per second. with fast movement. (Only when [Record] setting specifying [OFF]: Cancel is selected in step 3) Touch [REC ALL] or [SELECT]. [REC ALL]: All pictures are stored. [SELECT]: Pictures are stored by 5 the setting. range.
When therecording environment isdark and focusing isdifficult, thevideo light turns onto make focusing easier. • Change the mode to O • • Switch to Manual Mode. (-) 74) I : [PICTURE] _ [AF ASSIST LAMP] _ [AUTO] I • Set the video light to _[DA / E)A or OFF. (-') 54) • When switching to Intelligent Auto Mode, the setting is fixed to [AUTO] and cannot be changed.
Manual recording _ Change the mode to _ Press the iA/MANUAL • _ appears or O. button to switch to Manual Mode. on the screen. _/MANUALO _0cu'_ Focus (-_ 77) 7 White balance SHT""_ Manual ,R,""7 Aperture (-_ 75) shutter speed adjustment (_ 76) (_ 76) Perform the setting by touching the desired item to be set. • Touch I1_ to change _1_ is touched.
I VIDEO IIPHOTO I Automatic white balance function may not reproduce natural colors depending on the scenes or lighting conditions. If so, you can adjust the white balance manually. • Press the iA/MANUAL button to switch to Manual Mode. (-> 74) 1 Touch [WB]. • 2 Touch _/_ to select White balance mode. 1 Select I:_, fill the screen white subject. 2 Touch • Select the optimal mode by confirming color on the screen.
I VIDEO IIPHOTO I Shutter Speed: Adjust itwhen recording fast-moving subjects. Iris: Adjust itwhen thescreen istoobright ortoodark. • Press the iA/MANUAL button / Touch [SHTR] or [IRIS]. 2 Touch _/_ settings. to switch speed will be set to 1/30 when the power closer to 1/8000 is • The shutter speed will be set between 1/2 and 1/2000 in Still Picture Recording Mode. m ,.,..._s Iris/Gain CLOSE _ value: (F16 to F2.0) _ OPEN to 18dB) • Value closer to [CLOSE] image.
I VIDEO IIPHOTO I Ifauto focusing isdifficult due totheconditions, then useManual Focus. • Change the mode to I_ or O. • Press the iA/MANUAL 1 (When MF assist button function to switch is used) Select the menu. 2 3 (-) 74) • When [MF ASSIST] is [OFF], the blue area is not displayed. • The blue display Touch [FOCUS]. images actually does not appear on the recorded. Touch [MF] to change to Manual Focus. • MF appears 4 Mode.
Panasonic Consumer Division of Panasonic Electronics Corporation Company, of North America One Panasonic Way, Secaucus, NJ 07094 Panasonic Canada Inc.