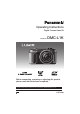
Operating Instructions Digital Camera/Lens Kit Model No. DMC-L1K Before connecting, operating or adjusting this product, please read the instructions completely. For USA assistance, please call: 1-800-272-7033 or send e-mail to : digitalstillcam@panasonic.com For Canadian assistance, please call: 1-800-561-5505 or visit us at www.panasonic.
Before Use Before Use Dear Customer, We would like to take this opportunity to thank you for purchasing this Panasonic Digital Camera. Please read these Operating Instructions carefully and keep them handy for future reference. Information for Your Safety WARNING TO REDUCE THE RISK OF FIRE OR SHOCK HAZARD AND ANNOYING INTERFERENCE, USE ONLY THE RECOMMENDED ACCESSORIES AND DO NOT EXPOSE THIS EQUIPMENT TO RAIN OR MOISTURE. DO NOT REMOVE THE COVER (OR BACK); THERE ARE NO USER SERVICEABLE PARTS INSIDE.
Before Use FCC Note: (U.S. only) This equipment has been tested and found to comply with the limits for a Class B digital device, pursuant to Part 15 of the FCC Rules. These limits are designed to provide reasonable protection against harmful interference in a residential installation. This equipment generates, uses, and can radiate radio frequency energy and, if not installed and used in accordance with the instructions, may cause harmful interference to radio communications.
Before Use -If you see this symbolInformation on Disposal in other Countries outside the European Union This symbol is only valid in the European Union. If you wish to discard this product, please contact your local authorities or dealer and ask for the correct method of disposal. ∫ Care of the camera • Do not strongly shake or bump the camera. The camera may stop operating normally, pictures may not be recorded or the lens may be damaged. • Sand or dust may cause the camera to malfunction.
Before Use ∫ About the Lens • Do not press the lens with excessive force. • Do not leave the camera with the lens facing the sun as it may cause the camera to malfunction. Also, be careful when you leave the camera outside or near a window. • When there is dirt (water, oil, and fingerprints, etc.) on the surface of the lens, the picture may be affected. Lightly wipe the surface of the lens with a soft, dry cloth before and after taking pictures. • Do not place the lens mount facing downwards.
Before Use About These Operating Instructions ∫ About indications in these operating instructions Convenient or helpful information for using the camera is described. ∫ About illustrations of the cursor button In these operating instructions, operations using the cursor button are described with illustrations. e.g.
Contents Before Use Information for Your Safety ....................... 2 About These Operating Instructions ......... 6 Preparation Standard Accessories ............................. 10 Names of the Components ..................... 11 Screen Display........................................ 13 About the Lens........................................ 16 Attaching/Detaching the Lens................. 16 Charging the Battery with the Charger..................................
• [WHITE SET] Resetting the white balance ............. 70 • [COLOR TEMPERATURE SETTING] Setting the color temperature ........... 70 • [WHITE BALANCE ADJUSTMENT] Finely adjusting the white balance ................................... 70 Setting the Light Sensitivity..................... 71 Deciding the Method to Measure Brightness (Metering mode).................................. 72 Menu Settings Setting Frequently Used Functions......... 73 Using the [REC] Mode Menu ..................
Connecting to other equipment Connecting to a PC................................. 98 Printing the Pictures.............................. 100 Playing Back Pictures on a TV Screen ................................. 104 Others Using the External Flash....................... 105 Using the MC Protector/PL Filter .......... 106 Using the Remote Shutter .................... 107 Displaying the Time at the Travel Destination (World Time) .................. 108 • Location candidates for World Time settings...........
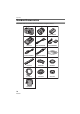
Preparation Preparation Standard Accessories Check that all the accessories are included before using the camera.
Preparation 1 Digital Camera Body (This is referred to as camera body in these operating instructions.) 2 Interchangeable Lens “LEICA D VARIO-ELMARIT 14– 50 mm/ F2.8– 3.5” (This is referred to as lens in these operating instructions.) 3 Battery Pack (This is referred to as battery in these operating instructions.) 4 Battery Charger/AC Adaptor (This is referred to as AC adaptor in these operating instructions.
Preparation 13 14 15 16 17 18 19 20 21 22 23 24 25 26 27 28 29 Focus mode lever (P32, 35, 42, 54, 55) [AFL/AEL] button (P63) Status indicator (P25) Camera ON/OFF switch (P25) Command dial (P33, 37, 38, 40, 47 to 49, 56, 58, 61, 68, 71, 73) 2/4/1/3 Cursor buttons (P27) [MENU/SET] button (P27) Delete button (P45) Aperture stopping down button (P57) [DISPLAY] button (P31, 45, 51, 53) Playback button (P44, 45, 47 to 49, 104) LCD monitor (P14, 31, 45, 50, 51, 53) Flash output adjustment button (P61) Flash butt
Preparation ∫ Lens “LEICA D VARIO-ELMARIT 14–50 mm/ F2.8– 3.5” Screen Display ∫ Viewfinder Display 47 48 1 49 AEL 47 48 49 50 51 52 53 54 55 51 50 52 55 54 53 Focus distance indicator (P42, 55) Aperture ring (P32, 36, 38) Lens fitting mark (P16) Contact point Aperture ring button (P32, 36, 38) [O.I.S.
Preparation ∫ Information Display on the LCD Monitor (When taking pictures with the Viewfinder) 1 2 3 4 5 P F 2.
Preparation 16 17 18 19 20 ∫ Playback Display on the LCD Monitor Picture size (P78) Battery indication (P19) High angle mode (P53) AF frame (P54) Focus position (P54) 21 33 32 31 30 22 23 1 2 3 P F2.8 2000 10:00 DEC DEC. 1.
Preparation About the Lens You can use the supplied lens or a lens that is compatible with the lens mount standard for the “Four Thirds System (Four Thirds Mount)” with this unit. If you use a lens other than a dedicated interchangeable lens, auto focus cannot be activated and accurate metering is not possible. Also, some functions will not work. Attaching/Detaching the Lens • Check that the camera is turned off. • Close the flash.
Preparation ∫ Detaching a lens from the camera body • Check that the camera is turned off. 3 Detach the lens cap. 1 Attach the lens cap. 2 Set the [O.I.S.] switch to [OFF]. 3 Press the lens release button D while turning the lens as far as possible in the direction of the arrow to detach it. ∫ Optical image stabilizer The supplied lens has an optical image stabilizer function. The optical image stabilizer function is set for activation when the lens is attached to the camera body. Set the [O.I.S.
Preparation Charging the Battery with the Charger 3 Detach the battery after charging is completed. • The battery is not charged when the camera is shipped. Charge the battery before use. 1 Connect the AC cable. B • Charging is completed when the [CHARGE] indicator B turns off (after about 130 minutes). A • When you connect the AC cable, the [POWER] indicator A lights red. • The battery cannot be charged when the DC cable is connected to the AC adaptor.
Preparation About the Battery (charging/number of recordable pictures) ∫ Battery indication The remaining battery power appears on the screen. The number of recordable pictures when using the LCD monitor (Live View) (The conditions are the same as the CIPA standard.) Number of Approx. 300 pictures recordable pictures (Approx. 150 min) Playback time Playback time • The battery indication turns red and blinks. (The status indicator blinks when the LCD monitor turns off.
Preparation Inserting/Removing the Battery • Check that the camera is turned off. • Close the flash. 1 Slide the release lever in the direction of the arrow (OPEN side) and then open the battery door. E OS CL OPE N • Always use genuine Panasonic batteries (CGR-S603A). 2 Insert: Insert the charged battery fully until it clicks. Remove: Push the lever A in the direction of the arrow to remove. A • Be careful of the direction indicated by the mark [ ] on the battery when inserting the battery.
Preparation Using the AC Adaptor You can use the camera without worrying about battery discharge when it is connected to a PC or printer if you use the AC adaptor. • Check that the camera is turned off. • Close the flash. 1 Connect the AC cable. • Do not use any other AC adaptors except the supplied one. • Do not use any other DC cables except the supplied one. If you use other DC cables, it may cause a malfunction. • The camera becomes warm during use. This is not a malfunction.
Preparation • Do not touch the connection terminals on the back side of the card. • The card may be damaged if it is not fully inserted. 3 1 Close the card door. 2 Slide the card door to the end and then close it firmly. About the Card ∫ Access to the card The card access indication A lights when pictures are being recorded onto the card. P F 5.6 125 STANDARD WB AUTO ISO -2 -1 0 +1 +2 100 CUSTOM SINGLE NORMAL 19 B 2 C A P F5.
Preparation • The reading/writing speed of an SD Memory Card and an SDHC Memory Card is fast. Both types of cards are equipped with a Write-Protect switch D that prevents writing and formatting the card. (If the switch is slid to the [LOCK] side, it is not possible to write or delete data on the card and format it. When the switch is slid to the other side, these functions become available.) SD Memory Card D 2 Please confirm the latest information on the following website. http://panasonic.co.
Preparation ∫ Temporarily storing the lens hood 1 Turn the lens hood in the direction of the arrow to detach it. • If any accessories are lost, customers in the USA should contact Panasonic’s parts department at 1 800 833-9626 and customers in Canada should contact 1 800 561-5505 for further information about obtaining replacement parts. Attaching the Strap 1 Pass the strap through the hole at the strap eyelet. 2 Reverse the lens hood and then attach it in the same way as shown previously.
Preparation Attaching the Eyepiece Turning the Camera On Cap Set the camera ON/OFF switch to When taking pictures with your eye removed from the Viewfinder, light may enter the Viewfinder and affect the exposure and focus. Attach the eyepiece cap so that light does not enter the Viewfinder and prevent accurate exposure when taking pictures with Live View (P50) or the Self-timer (P67) and when using the remote shutter. (DMW-RSL1; optional) (P107) 1 Slide the eye cup from the bottom to detach it.
Preparation Setting Date/Time (Clock Set) ∫ Initial setting The clock is not set so the following screen appears when you turn the camera on. ON OFF A B PLEASE SET THE CLOCK CLOCK SET SET MENU A: [MENU/SET] button B: Cursor buttons 2 Press 3/4/2/1 to select the date and time. :A :B CLOCK SET 00 : 00 JAN . 11 . 2006 M/D/Y A: B: SET CANCEL EXIT MENU Time at the home area Time at the travel destination (P108) 2/1: Select the desired item. 3/4: Set the display order for the date and time.
Preparation About the Setup Menu • Set items as required. (Refer to P28 to 30 for each menu item.) • The following example shows how to set [BEEP]. • Select [RESET] to return the settings to the initial settings at the time of purchase. (P29) 1 Press [MENU/SET] and then press 2. REC FILM MODE PICT.SIZE QUALITY RAW REC. ASPECT 1/3 OFF EXIT SELECT MENU SET MENU 2 Press 4 to select the [SETUP] menu icon [ ] and then press 1. 1/3 SET UP CLOCK SET WORLD TIME n0 MONITOR AUTO REVIEW 5 MIN.
Preparation [CLOCK SET] Press [ MENU ] to display the [SETUP] menu SET and select the item to set. (P27) Change date and time. (P26) [WORLD TIME] Press [ MENU ] to display the [SETUP] menu SET and select the item to set. (P27) [ ]: The local time at the travel destination area is set. [ ]: The time at your home area is set. • Refer to P108 for information about setting [WORLD TIME]. [MONITOR] Press [ MENU ] to display the [SETUP] menu SET and select the item to set.
Preparation [BEEP] Press [ MENU SET ] to display the [SETUP] menu and select the item to set. (P27) Set the volume of the focus confirmation beep, the self-timer beep, and the alarm beep. [ ]: No beep [ ]: Soft beep [ ]: Loud beep [NO.RESET] Press [ MENU SET ] to display the [SETUP] menu and select the item to set. (P27) Set this when you want the file number of the next recording to start from 0001. (The folder number is updated and the file number starts from 0001.
Preparation • There may be white saturated areas if the distance between the camera and the subject is too close when taking pictures with the flash. If [HIGHLIGHT] is set to [ON] in this case, these white saturated areas appear blinking in black and white. [VIDEO OUT] Press [ MENU SET ] to display the [SETUP] menu and select the item to set. (P27) [NTSC]: Video output is set to NTSC system. [PAL]: Video output is set to PAL system. • Video output is available in playback mode only.
Basic Basic Before Taking Pictures With the Viewfinder Tips for taking good pictures • Hold the camera gently with both hands, keep your arms still at your side and stand with your feet slightly apart. • When taking pictures, make sure your footing is stable and there is no danger of colliding with another person, a ball etc. • Make sure the camera does not shake when you press the shutter button. • Do not cover the AF assist lamp, IR sensor etc. with your fingers or other objects.
Basic Matching the Focus and the Exposure Automatically (AF: Auto Focus/Program AE mode [ 3 Rotate the aperture ring to [A], while pressing the aperture ring button B. ]) The camera automatically sets the aperture value and the shutter speed according to the brightness of the subject. • Remove the lens cap. • Turn the camera on. (P25) ]. • Set the drive mode lever to [ A P STANDARD A WB AUTO ISO -2 -1 0 +1 +2 100 SINGLE CUSTOM NORMAL 19 B • The mode becomes program AE mode [ ].
Basic • The camera focuses on any of 3 focus area points- left, right or center - in the AF frame and a lamp (AF-LED display) lights where the subject is focused. You can change the setting for the AF frame and the AF-LED display in the [CUSTOM] menu. (P84) • Refer to P33 for information about Program shift. • The focus range is 29 cm (0.95 feet) to ¶. (when the supplied lens is attached) • If the ISO sensitivity is set to [ISO100] and the aperture value is set to F2.
Basic ∫ Example of program shift when using the supplied lens 1 (A) 2 3 4 5 6 7 8 9 10 11 12 13 14(Ev) 2 15 2.8 16 4 17 5.6 18 8 19 11 20 16 22 1 1/2 1/4 1/8 1/15 1/30 1/60 1/125 1/250 1/500 1/1000 1/2000 (B) (A): Aperture value (B): Shutter speed 1 Program shift amount 2 Program shift line chart • If the exposure is not adequate when the shutter button is pressed halfway, the aperture value and the shutter speed on the LCD monitor (information display screen) turn red.
Basic ∫ Preventing jitter (camera shake) • Be careful of jittering when pressing the shutter button. • We recommend using a tripod. Also, be careful how you hold the camera (P31). Using the self-timer (P67) or the remote shutter (DMW-RSL1; optional) (P107) prevents jittering caused by pressing the shutter button when you are using a tripod. • Shutter speed will be slower particularly in the following cases. Keep the camera still from the moment the shutter button is pressed until the picture is taken.
Basic Aperture-priority AE [ ] Set the aperture value to a higher number when you want a sharp focus background. Set the aperture value to a lower number when you want a soft focus background. 1 Rotate the shutter speed dial to [A]. 8 15 4 2-60/B s 30 A 125 250 60 500 1000000 4 A 2 Rotate the aperture ring to set the aperture value. A • If you press the shutter button halfway when the exposure is not adequate, the aperture value and the shutter speed turn red.
Basic 2 Rotate the shutter speed dial to set the shutter speed. 4 8 2-6 /B 0s 15 B A 1000 4000 30 250 125 60 500 ON OFF B: [2-60s/B] to [1000-4000] S 1000 STANDARD WB AUTO ISO −2 −1 0 +1 +2 100 CUSTOM SINGLE NORMAL 19 • The mode becomes Shutter-priority AE mode [ ]. • If the shutter speed dial is set to [2-60s/ B] or [1000-4000], press 3/4 or rotate the command dial C to set the shutter speed.
Basic Manual Exposure [ ] the command dial D to set the shutter speed. Determine the exposure by manually setting the aperture value and the shutter speed. M F 22 1000 STANDARD WB ISO 1 Set the aperture value and the shutter speed. Rotate the aperture ring to set the aperture value. A B A: [2.8] to [22] • When changing from [A], rotate the aperture ring while pressing the aperture ring button B. Rotate the shutter speed dial to set the shutter speed.
Basic ∫ Manual Exposure Assistance The exposure is adequate. Set to faster shutter speed or larger aperture value. Set to slower shutter speed or smaller aperture value. • The manual exposure assistance is an approximation. We recommend checking the pictures using Auto Review. ∫ About [B] (Bulb) If you set the shutter speed to [B], the shutter stays open while the shutter button is pressed fully (up to about 8 minutes). The shutter closes if you release the shutter button.
Basic Compensating the Exposure Use this function when you cannot achieve appropriate exposure due to the difference in brightness between the subject and the background. Look at the following examples. ∫ If you are using [FUNC.2] to compensate the exposure ([FUNC.2] is set for compensating the exposure at the time of purchase.) 1 Press [FUNC.2] A. P STANDARD WB -2 AUTO ISO -1 0 +1 +2 100 Under exposed CUSTOM SINGLE NORMAL A 19 B P ISO100 0 -2 Compensate the exposure towards positive.
Basic • The exposure compensation value is displayed on the LCD monitor when taking pictures with Live View. Refer to P50 for information about Live View. 3 Press the shutter button halfway to set the selected exposure. • You can also set the selected exposure by doing the following: – Pressing [FUNC.2] – Not operating the camera for a few seconds ∫ If you are using the command dial only to compensate the exposure If you set [DIREC. EX. COMP.
Basic Taking Pictures with Manual Focus ∫ Technique for Manual focus 2 1 1 Use this function when you want to fix the focus or when the distance between the lens and the subject is determined and you do not want to activate auto focus. 3 1 1 Set the focus mode lever to [MF]. AFS AFC MF AFL AEL 2 Rotate the focus ring to focus on the subject. A • The focus indication lights when the focus ring rotate to focus on the subject. The focus area is fixed to the AF frame on the center of the screen.
Basic • If the distance between the camera and the subject is beyond the focus range of the camera, the picture may not be properly focused even if the focus indication lights. • The available flash range is about 2.5 m (8.2 feet) to 7.0 m (23.0 feet) (Wide) (When the ISO sensitivity is set to [AUTO].). We recommend setting the flash to Forced OFF [ ] when you take pictures at close range. • If you are taking close-up pictures – We recommend using a tripod and the self-timer.
Basic Playing Back Pictures 1 Press [ ]. P F5.6 125 ISO100 1/19 100 _ 0001 10 2 Press 2/1 to select the picture. P F5.6 125 ISO100 ∫ To finish playback Press [ ] again or press the shutter button halfway. 1/19 100 _ 0001 10 2: Play back the previous picture 1: Play back the next picture • The first recorded picture will be displayed after the last recorded picture. • When [ROTATE DISP.] is set to [ON], pictures recorded by holding the camera vertically are played back vertically.
Basic Changing the Information Displayed on the playback screen Deleting Pictures Press [ Press [DISPLAY] to switch the monitor screen. ]. P F5.6 125 ISO100 1/19 100 _ 0001 10 A ∫ To delete a single picture B A: [DISPLAY] button B: LCD monitor • The [DISPLAY] button is not activated when the menu screen is displayed. You can only select Normal display or No display in playback zoom (P47) and during a slide show (P89).
Basic ∫ To delete [MULTI DELETE]/ [ALL DELETE] 4 Press [ 1 Press [ 5 Press 3 to select [YES] and then press [MENU/SET]. ] twice. 2 Press 3/4 to select [MULTI DELETE] or [ALL DELETE] and then press [MENU/SET]. ]. (Screen when selecting [MULTI DELETE]) MULTI DELETE DELETE THE PICTURES YOU MARKED? MULTI/ALL DELETE YES11 NO MULTI DELETE ALL DELETE SELECT SELECT SET MENU MENU SET CANCEL • If you select [MULTI DELETE], perform steps 3 onwards.
Basic Using the Playback Zoom 1 Press [ ]. 2 Rotate the command dial A downwards to enlarge the picture. 2X 4X CANCEL A DELETE B • 1a>2a>4a>8a>16a • When you rotate the command dial upwards after enlarging a picture, the magnification becomes lower. When you rotate the command dial downwards, the magnification becomes higher. • When you change the magnification, the zoom position indication B appears for about 1 second so that you can check the position of the enlarged section.
Basic Displaying Multiple Screens ∫ Examples of 25 screens DEC.1.2006 1/30 (Multi Playback) 1 Press [ CAL ]. 2 Rotate the command dial A upwards to display multiple screens. (Screen when 9 screens are displayed) DEC. 1.2006 1/14 A CANCEL MENU • 1 screen>9 screens>25 screens> Calendar screen display (P49) • After multiple screens are displayed, rotate the command dial further upwards to display 25 screens and the calendar screen (P49).
Basic Displaying Pictures by Recording Date (Calendar Playback) You can display pictures by recording date using the calendar playback function. 1 Press [ ]. 2 Rotate the command dial A upwards to display the calendar screen. SUN MON TUE WED THU FRI SAT 1 2 3 4 5 6 7 8 9 10 11 12 13 14 15 16 17 18 19 20 21 22 24 25 26 27 28 29 2006 31 DAY MONTH 23 30 12 SET A 5 Press 3/4/2/1 to select a picture and then press [MENU/ SET].
Advanced Advanced Switching to Live View You can also take pictures while looking at the LCD Monitor by using it as a Viewfinder. This is called Live View. This is useful if you want to check the composition of the subject on the LCD Monitor when taking close-up pictures, using a tripod etc. Press [LIVE VIEW] to switch the setting.
Advanced Tips for taking good pictures with Live View C P F5.6 125 ISO100 STD A 19 D P F5.6 • Hold the camera gently with both hands, keep your arms still at your side and stand with your feet slightly apart. • Make sure the camera does not shake when you press the shutter button. • Do not cover the AF assist lamp, IR sensor etc. with your fingers or other objects. • If the LCD monitor screen is difficult to see because of light from the sun etc.
Advanced ∫ Histogram A histogram is a graph that displays brightness along the horizontal axis (black to white) and the number of pixels at each brightness level on the vertical axis. It allows you to easily check a picture’s exposure. 1 When the values are distributed evenly, the exposure is proper and the brightness is well-balanced. 2 When the values are concentrated on the left, the picture is under exposed. 3 When the values are concentrated on the right, the picture is over exposed.
Advanced Recording a picture with the camera held high above your head (High angle mode) The LCD monitor becomes easier to see when recording a picture with the camera held high above your head if the camera is held as shown in the following illustration. This is useful when you cannot get close to the subject because there is a person in the way. Press [DISPLAY] A for 1 second. A B P ISO100 STD P • If you press [DISPLAY] for 1 second, high angle mode is activated.
Advanced Auto focus when taking pictures with Live View 1 Set the focus mode lever to [AFS]. (P32) AFS AFC MF AFL AEL 2 Aim the AF frame D to the point you want to focus on and then press the shutter button halfway. A B P F5.6 C 125 D • When you press the shutter button halfway, the mirror goes down and then goes up to enable the camera to focus. At this time, the same sound is heard as when the shutter button is pressed fully. However a picture is not taken.
Advanced Manual focus when taking pictures with Live View 1 Set the focus mode lever to [MF]. ∫ Technique for Manual focus 2 1 1 3 1 AFS AFC MF AFL AEL 2 Rotate the focus ring to focus on the subject. A 1 Rotate the focus ring. 2 Rotate it a little more. 3 Finely focus on the subject by rotating the focus ring slowly in reverse.
Advanced 3 Press [MENU/SET] to magnify the MF assist screen. MENU SET CANCEL MENU • Rotate the focus ring to focus on the subject. • The enlarged area can be moved by pressing 3/4/2/1. 4 Press [MENU/SET] to close MF assist. P ISO100 MENU SET 19 STD • The screen returns to the previous screen. ∫ Changing the magnification 1 Press [MENU/SET] and then press 2. REC FILM MODE PICT.SIZE QUALITY RAW REC.
Advanced • The MF assist disappears in the following cases. – About 10 seconds after you stop pressing 3/4/2/1 or rotating the focus ring or the command dial – When the shutter button is pressed halfway • The MF assist returns to the center of the screen when the camera is turned off and then on again. • You cannot use MF assist when using the digital zoom.
Advanced Taking Pictures using the Built-in Flash ∫ Open the flash Press the [ OPEN] button A. B • This camera is compatible with bounce flash so the flash opens and closes in two steps. Refer to P62 for information about the bounce flash. • Be sure to close the flash when not in use. ∫ Switching to the appropriate flash setting Set the flash to match the recording. 1 Press [ ] D.
Advanced 3 Press the shutter button halfway to set the selected flash setting. • You can also set the selected flash setting by doing the following: – Pressing [ ] – Not operating the camera for a few seconds : AUTO The flash is automatically activated when the recording conditions make it necessary. : AUTO/Red-eye reduction¢ The flash is automatically activated when the recording conditions make it necessary.
Advanced ∫ The available flash range to take pictures (when the supplied lens is attached) The available flash settings for the built-in flash differ depending on the ISO sensitivity setting. ISO sensitivity the available flash range to take pictures Wide Tele AUTO 2.5 m (8.2 feet) to 7.0 m (23.0 feet) 1.0 m (3.3 feet) to 5.6 m (18.4 feet) ISO100 2.5 m (8.2 feet) to 3.5 m (11.5 feet) 1.0 m (3.3 feet) to 2.8 m (9.2 feet) ISO200 2.5 m (8.2 feet) to 5.0 m (16.4 feet) 1.0 m (3.3 feet) to 4.0 m (13.
Advanced • When you take a picture beyond the available flash range, the exposure may not be adjusted properly and the picture may become bright or dark. • The white balance may not be properly adjusted if the flash level is insufficient. (P68) • If you repeat taking a picture, it may not actually be taken even if the flash is activated. Take a picture after the access indication disappears. • The red-eye reduction effect differs between people.
Advanced 3 Press the shutter button halfway to set the selected flash output. • You can also set the selected flash output by doing the following: – Pressing [ ] – Not operating the camera for a few seconds 2 Aim the flash at a ceiling or other reflective surface and take a picture. 73x • The flash output setting is memorized even if the camera is turned off. Bounce flash Bounce flash is a technique where the light from the flash is reflected off a ceiling or wall.
Advanced Fixing the Focus and the Exposure (AF/AE Lock) This is useful when you want to take a picture of a subject outside the AF frame or the contrast is too strong and you cannot achieve appropriate exposure. 3 While pressing [AFL/AEL], move the camera as you compose the picture and then press the shutter button fully. F AEL 1 Aim the AF frame at the subject. A F: Viewfinder Display ∫ Fixing the focus or the exposure only 1 Press [MENU/SET].
Advanced When [AE] is selected (Fixing the exposure only) 1 Fill the screen with the object that you want to take a picture of. 2 Press and hold [AFL/AEL] to fix the exposure. • The aperture value and the shutter speed light when the exposure matches. • If you release [AFL/AEL], [AF/AE LOCK] is canceled. 3 While pressing [AFL/AEL], move the camera as you compose the picture. 4 Press the shutter button halfway to focus on the subject and then press it fully.
Advanced ∫ Burst speed Burst speed (pictures/ second) (High) (Low) 3 2 • The burst speed is constant regardless of the transfer speed of the card. • The burst speeds indicated are when the shutter speed is faster than 1/60 and the flash is not activated. • The burst mode speed may become slower depending on the following settings.
Advanced Taking Pictures using Auto Bracket ∫ Changing the settings for [NO./STEP] and [SEQUENCE] in auto bracket In this mode, up to 5 pictures are recorded in the selected exposure compensation range each time the shutter button is pressed. You can select the picture with the desired exposure among different exposures. 2 Press 3/4 to select [AUTO BRACKET] and then press 1. 1 Set the drive mode lever to [ 1 Press [MENU/SET]. ]. P AUTO BRACKET NO.
Advanced • [SEQUENCE] (When taking 5 pictures) – [0/`/_/``/__] (5 pictures are taken. The first picture is taken at 0 EV. The next 4 pictures are taken at `1 EV, _1 EV, `2 EV and then _2 EV.) – [``/`/0/_/__] (5 pictures are taken. The first picture is taken at `2 EV. The next 4 pictures are taken at `1 EV, 0 EV, _1 EV and then _2 EV) 5 Press [MENU/SET] twice to close the menu. • You can also press the shutter button halfway to close the menu.
Advanced ∫ Changing the time setting for the self-timer 1 Press [MENU/SET]. 2 Press 3/4 to select [SELF-TIMER] and then press 1. 3 Press 3/4 to select [10 SEC.] or [2 SEC.] and then press [MENU/ SET]. 3/3 REC EX. OPT. ZOOM OFF OFF D.ZOOM 10 SEC. SELF-TIMER AF ASSIST LAMP 2 SEC. MODE1 OIS MODE SELECT SET MENU Adjusting the White Balance This function allows you to reproduce a white color close to real life in pictures recorded under sunlight, halogen lighting etc.
Advanced [AUTO] for auto setting (auto white balance) [ ] (Daylight) for recording outdoors on a bright day [ ] (Cloudy) for recording outdoors on a cloudy day [ ] (Shade) for recording outdoors in the shade [ ] (Halogen) for recording under halogen lighting [ ] (Flash) for recording with the flash only [ ] (White set 1) [ ] (White set 2) [ ] (Color temperature setting) for using the preset white balance ∫ Auto white balance The available white balance range is shown in the following illustra
Advanced [WHITE SET] Resetting the white balance Use this to set the white balance manually. 1 Select [ ] or [ ] with step 2 on P68 and then press 3. temperature becomes low the picture becomes reddish. (P69) 1 Select [ ] with step 2 on P68 and then press 3. P STANDARD AUTO SET WB P ISO STANDARD AUTO 100 SINGLE SET CUSTOM NORMAL WB ISO 19 100 SINGLE CUSTOM NORMAL 19 2 Aim the camera at a sheet of white paper, or an object that is white etc.
Advanced 2 Press 3/4/2/1 to finely adjust the white balance and then press [MENU/SET]. WB ADJUST. G AUTO A B M ADJUST. SET MENU MENU SET 2: A (AMBER: ORANGE TINT) 1: B (BLUE: BLUISH) 3: G_ (GREEN: GREENISH) 4: M` (MAGENTA: REDDISH) • If you finely adjust the white balance to A (amber), the white balance icon on the LCD monitor will change to orange. If you finely adjust the white balance to B (blue), the white balance icon on the LCD monitor will change to blue.
Advanced ISO sensitivity 100 1600 Use in bright places (e.g. outdoors) Suitable Not suitable Use in dark places Not suitable Suitable Shutter speed Slow Fast Noise Less Increased • To avoid picture noise, we recommend reducing the ISO sensitivity before taking pictures. • The ISO sensitivity cannot be set to [AUTO] in Aperture-priority AE, Shutter-priority AE or Manual exposure.
Menu Settings Menu Settings ∫ Setting frequently used functions to the buttons [FUNC.1] and [FUNC.2] Setting Frequently Used Functions You can set two frequently used functions to the buttons [FUNC.1] and [FUNC.2]. This is convenient as you do not need to select the item from a menu. • When you use a lens with no aperture ring, [FUNC.1] is fixed for aperture setting. 1 Press [FUNC.1] A or [FUNC.2] B. (when [PICT.
Menu Settings ∫ Functions that can be set to the buttons [FUNC.1] and [FUNC.2] • [EXPOSURE]¢1 (P40) – [EXPOSURE] • [FILM MODE] (P76) – STD [STANDARD] – DYN [DYNAMIC] – NATUR [NATURE] – SMOOTH [SMOOTH] – STD [STANDARD] – DYN [DYNAMIC] – SMO [SMOOTH] – MY 1 [MY FILM1] – MY 2 [MY FILM2] • [PICT.SIZE]¢2 (P78) – L (L/Super Fine) – L (L/Fine) – L (L/Standard) – M (M/Super Fine) – M (M/Fine) – M (M/Standard) – S (S/Super Fine) – S (S/Fine) – S (S/Standard) • [RAW REC.
Menu Settings Using the [REC] Mode Menu Increase the variety of pictures you can take by setting color effect, picture adjustment etc. • The following example shows how to set [D.ZOOM] when taking pictures with Live View. (Refer to P76 to P83 for each menu item.) • Select [RESET] in the [SETUP] menu to return the menu settings to the initial settings at the time of purchase. (P29) 1 Press [MENU/SET]. 2 Press 3/4 to select the menu item. REC FILM MODE PICT.SIZE QUALITY RAW REC. ASPECT SELECT 1/3 REC EX.
Menu Settings [FILM MODE] Setting the color tone of the picture to be recorded Press [ MENU SET ] to display the [REC] mode menu and select the item to set. (P75) Every type of film for film cameras has its own color tone and contrast characteristics. In film mode, you can select the color tone of the pictures from 7 types in the same way as you would select different films for film cameras. Select different settings in film mode to match the recording situation and your picture of the recording.
Menu Settings ∫ Adjusting each film mode to the desired setting 1 Press 1 several times on the screen shown in step 2 on page 76. [CONTRAST] [_] Increases the difference between the brightness and the darkness in the picture. [`] Decreases the difference between the brightness and the darkness in the picture. [_] The picture is sharply defined. [`] The picture is softly focused. [_] The colors in the picture become vivid. [`] The colors in the picture become natural.
Menu Settings [PICT.SIZE]/[QUALITY] Setting a picture size and quality that match your use of the pictures MENU SET Press [ ] to display the [REC] mode menu and select the item to set. (P75) A digital picture is made of numerous dots called pixels. Although you cannot see the difference on the camera’s screen, the more the pixels the finer the picture will be when it is printed on a large piece of paper or displayed on a computer monitor.
Menu Settings • If you set [EX. OPT. ZOOM] (P80) to [ON] when taking pictures with Live View, [EZ] is displayed on the screen when the picture size is set to a size other than the maximum picture size for each aspect ratio. “EZ” is an abbreviation of “Extended optical Zoom”. (P80) • Refer to P120 for information about the number of recordable pictures. [RAW REC.] Recording a RAW file simultaneously Press [ MENU SET ] to display the [REC] mode menu and select the item to set.
Menu Settings [EX. OPT. ZOOM] Enlarging a picture with no picture quality deterioration (When taking pictures with Live View only) Press [ MENU SET ] to display the [REC] mode menu and select the item to set. (P75) Normally you can take pictures with a maximum focal length of 50 mm (35 mm film camera equivalent: 100 mm) using the supplied lens. However, if you set [EX. OPT.
Menu Settings [D.ZOOM] Further extending the zoom (When taking pictures with Live View only) Press [ MENU SET ] to display the [REC] mode menu and select the item to set. (P75) You can further enhance the zoom magnification that you had when using the optical zoom (this includes when using the extended optical zoom), by 2a or 4a with the digital zoom. You can take pictures with a maximum focal length of 200 mm (35 mm film camera equivalent: 400 mm) with the supplied lens.
Menu Settings [AF ASSIST LAMP] Focusing in low light conditions becomes easier MENU SET Press [ ] to display the [REC] mode menu and select the item to set. (P75) Illuminating the subject makes it easier for the camera to focus when recording in low light conditions that make focusing difficult. A [ON] If the AF assist lamp A is set to [ON], it turns on when you press the shutter button halfway in dark places etc. The effective range of the AF assist lamp is about 1.5 m (4.92 feet) to about 3.0 m (9.
Menu Settings [AUTO BRACKET] Taking Pictures using Auto Bracket Press [ MENU SET ] to display the [REC] mode menu and select the item to set. (P75) In this mode, up to 5 pictures are recorded in the selected exposure compensation range each time the shutter button is pressed. You can set the number of pictures recorded, the compensation range of the exposure and the bracket order. Refer to P66 for more information.
Menu Settings Using the [CUSTOM] Menu You can change the settings for each function using the [CUSTOM] menu. You can then save these settings for future use. (P87) • Set items as required. (Refer to P85 to P87 for each menu item.) • The following example shows how to set [LCD AUTO]. • Select [RESET] in the [SETUP] menu to return the settings to the initial settings at the time of purchase. (P29) 1 Press [MENU/SET] and then press 2. REC FILM MODE PICT.SIZE QUALITY RAW REC.
Menu Settings ∫ About the menu screen items • There are 4 menu screens in the [CUSTOM] menu (1/4, 2/4, 3/4 and 4/4). 1/4 2/4 1 /4 CUSTOM CUSTOM SET 2 /4 CUST. SET MEMORYCUSTOM LCD AUTO OFF FUNC.1 SET OFF 3/4 CUSTOM ON AF FRAME FUNC.2 SET FOCUS PRIORITY ON OFF DIREC. EX. COMP. AF_MF ON CUSTOM AF/AE LOCK HOLD COLOR SPACE SELECT REFRESH LONG ON SHUTTER NRPIXEL OFF AF-LED NO RELEASE MIRROR UP ON SELECT WITHOUT LENS DISPLAY SET 3/4 MENU MENU SELECT EXIT SELECT [CUST. SET MEM.
Menu Settings [CENTER]: The camera focuses on the subject in the AF frame on the center of the screen. [SELECT]: If you press 2/1, you can select the AF frame setting with Auto Focus-auto, left fix, center fix or right fix. • If you set [AUTO], the focus position is not predetermined. It is set to a position automatically determined by the camera at the time of focusing. If you want to determine the focus position to take pictures, select a setting other than [AUTO].
Menu Settings [LONG SHUTTER NR] Press [ MENU ] to display the [CUSTOM] menu SET and select the item to set. (P84) This removes picture noise when the shutter speed becomes slower to take pictures of night scenery etc. If you set [ON], the countdown screen is displayed when the shutter button is pressed. Do not move the camera at this time. After the countdown is finished, [PLEASE WAIT...] is displayed for the same time as the selected shutter speed for signal processing.
Menu Settings 2 Press 3/4 to select [CUSTOM SET 1], [CUSTOM SET 2] or [CUSTOM SET 3] and then press [MENU/SET]. CUST.SET MEM. CUSTOM SET 1 CUSTOM SET 2 CUSTOM SET 3 CANSEL SELECT SET MENU MENU SET (Only when there are previously saved settings.) CUST.SET MEM. OVER WRITE CURRENT CAMERA STATUS AS CUSTOM SET 1 ? YES NO SET MENU 2 Press [MENU/SET]. 3 Press 3/4 to select the menu item and then press 1. PLAY SLIDE SHOW FAVORITE ROTATE DISP.
Menu Settings ∫ About the menu screen items • There are 2 menu screens in the [PLAY] mode menu (1/2 and 2/2). • If none of the pictures have [ ] displayed, you cannot select [ ] even if [FAVORITE] is set to [ON]. 2 Press 3 to select [START] and then press [MENU/SET]. 1/2 2/2 PLAY SLIDE SHOW FAVORITE ROTATE DISP. ROTATE DPOF PRINT SELECT 1/2 (Screen when [ALL] is selected) 2/ 2 PLAY OFF PROTECT ON RESIZE TRIMMING ASPECT CONV. FORMAT SELECT EXIT ALL SLIDE SHOW START DURATION MENU 2 SEC.
Menu Settings • Power save mode is not activated during a slide show. (However, the setting for power save mode is fixed to [10 MIN.] while pausing a slide show or playing back a [MANUAL] slide show.) [FAVORITE] Setting your favorite pictures MENU SET Press [ ] to display the [PLAY] mode menu and select the item to set. (P88) You can do the following if a mark has been added to pictures and they have been set as favorites. • Delete all the pictures not set as favorites.
Menu Settings [ROTATE DISP.]/[ROTATE] To display the picture rotated Press [ MENU SET ] to display the [PLAY] mode menu and select the item to set. (P88) This mode allows you to automatically display pictures vertically if they were recorded holding the camera vertically or rotate pictures manually in 90° steps. ∫ Rotate display (The picture is automatically rotated and displayed.) 1 Press 4 to select [ON] and then press [MENU/SET]. PLAY SLIDE SHOW FAVORITE ROTATE DISP.
Menu Settings • When [ROTATE DISP.] is set to [ON], pictures recorded holding the camera vertically are played back vertically (rotated). • If you take pictures when aiming the camera up or down, it may not be possible to display the pictures vertically. (P31) • The picture may be slightly blurred when the camera is connected to the TV with the video cable (supplied) and played back vertically.
Menu Settings ∫ Multi setting 1 Press 2/1 to select the picture to print and then press 3/4 to set the number of prints. ∫ To print the date After setting the number of prints, set/ cancel printing with the recording date by pressing [DISPLAY]. DPOF SET THIS B C DPOF SET MULTI 100-0001 1/19 1 DATE 1 7 8 9 10 11 12 COUNT SELECT 1 COUNT SELECT DATE DISPLAY EXIT MENU • The number of prints icon [ ]B appears. • Repeat the above procedure. (You cannot set all the pictures at one time.
Menu Settings [PROTECT] Preventing accidental erasure of pictures Press [ MENU SET ] to display the [PLAY] mode menu and select the item to set. (P88) You can set protection for pictures you do not want to be deleted by mistake. Press 3/4 to select [SINGLE], [MULTI] or [CANCEL] and then press [MENU/SET]. 2/2 PLAY PROTECT SINGLE MULTI RESIZE CANCEL TRIMMING ASPECT CONV. FORMAT SELECT SET MENU C 2 MENU SET ∫ Single setting 1 Press 2/1 to select the picture and then press 4 to set/cancel.
Menu Settings 2 Press 2/1 to select the size and then press 4. RISIZE 100-0001 1/19 SELECT RESIZE EXIT MENU • Sizes smaller than the recorded picture are displayed. Aspect Ratio • When you want to reduce the size of a picture to attach it to an e-mail or upload it to a website, use the software “PHOTOfunSTUDIO-viewer-” on the CD-ROM (supplied) to change the size. • It may not be possible to resize pictures recorded with other equipment.
Menu Settings 4 Press shutter button. • The message [DELETE ORIGINAL PICTURE?] appears. 5 Press 3/4 to select [YES] or [NO] and then press [MENU/SET]. TRIMMNG DELETE ORIGINAL PICTURE? YES NO CANCEL SELECT SET MENU MENU SET • The picture is overwritten when you select [YES]. The trimmed pictures cannot be restored when they are overwritten. • A trimmed picture is newly created when you select [NO]. • When the original picture is protected, you cannot overwrite it.
Menu Settings 3 Press 2/1 to determine the horizontal position and then press the shutter button to set. ADJUST SET : SHUTTER EXIT MENU • Use 3/4 to set the frame position for pictures rotated vertically. • The message [DELETE ORIGINAL PICTURE?] appears. 4 Press 3/4 to select [YES] or [NO] and then press [MENU/SET]. [FORMAT] Initializing the card Press [ MENU SET ] to display the [PLAY] mode menu and select the item to set. (P88) It is not usually necessary to format a card.
Connecting to other equipment Connecting to other equipment Connecting to a PC You can acquire recorded pictures to a PC by connecting the camera and the PC. The software [LUMIX Simple Viewer] or [PHOTOfunSTUDIO-viewer-] (for Windows®) on the CD-ROM (supplied) allows you to easily acquire pictures recorded with the camera to a PC, print them and send them by e-mail. If you use “Windows 98/98SE”, install the USB driver and then connect it to the computer.
Connecting to other equipment [Macintosh] The drive is displayed on the screen. • The drive is displayed as [NO_NAME] or [Untitled]. ∫ Folder Composition Folders are displayed as shown in the following illustration. ≥ SD MemoryCard ≥SDHC MemoryCard ≥MultiMediaCard DCIM 100_PANA 1 100_PANA P1000001.JPG 2 3 4 P1000002.JPG P1000999.
Connecting to other equipment Printing the Pictures • Do not use any other USB connection cables except the supplied one. • Do not disconnect the USB connection cable while [ACCESS] is displayed. • If battery power is exhausted while the camera and the PC are communicating, the recorded data may be damaged. Use a battery with sufficient battery power (P19) or the AC adaptor.
Connecting to other equipment 1 Turn on the camera and the printer. 2 Connect the camera to a printer via the USB connection cable (supplied). • Align the [1] mark on the USB connection cable and the [ ] mark on the terminal of the adaptor when connecting. • Hold the USB connection cable at C and insert straight in or take straight out. 3 Press 4 to select [PictBridge (PTP)] and then press [MENU/SET]. USB MODE PC PictBridge(PTP) SET 1 Press 3 to select [SINGLE PICTURE] and then press [MENU/SET].
Connecting to other equipment ∫ Setting date printing, the number of prints, the paper size and the page layout Select and set each item in step 3. • Items not supported by the printer are displayed in gray and cannot be selected. • When you want to print pictures in a paper size or a layout which is not supported by the camera, set [PAPER SIZE] or [PAGE LAYOUT] to [ ] and then set the paper size or the layout on the printer. (For details, refer to the operating instructions of the printer.
Connecting to other equipment 3 Disconnect the USB connection cable after printing. ∫ Setting the date printing with the DPOF print in advance We recommend setting DPOF date printing with [DPOF PRINT] (P93) in advance when the printer supports it. If you select [DPOF PICTURE], printing starts and the recording date is printed.
Connecting to other equipment Playing Back Pictures on a TV Screen ∫ Playing back pictures using the Video cable (supplied) • Set the aspect of the TV on the camera. (P30) • Turn the camera and the TV off. 1 B V OUT / REMOTE USB A 1 Connect the video cable A to the [V OUT/REMOTE] socket on the camera. • Hold the video cable at B and insert straight in or take straight out. 2 Connect the video cable to the video input socket on the TV.
Others Others Using the External Flash 3 Rotate the command dial E to switch the flash settings. P If you use an external flash, the available flash range increases compared to the camera’s built in flash. STANDARD WB ISO AUTO 100 SINGLE ∫ Using the dedicated flash (DMW-FL500; optional) CUSTOM NORMAL E 19 1 Attach the dedicated flash to the hot shoe A and then turn on the camera and the dedicated flash.
Others • You can set the aperture value, the shutter speed and the ISO sensitivity on the camera even when attaching the external flash. • Some commercial external flashes have synchro terminals with high-voltage or reversed polarity. Using such external flashes may cause a malfunction or the camera may not operate normally. Be sure to use Panasonic’s external flash (DMW-FL500).
Others • You cannot attach the MC protector and the PL filter at the same time. • If the MC protector/PL filter are tightened too much, you may not be able to remove them. Do not tighten them too much. • When taking pictures with the flash using the MC protector or PL filter, vignetting effect may occur. • If the MC protector/PL filter are dropped, they may be destroyed. Be careful not to drop them when attaching them to the camera.
Others Displaying the Time at the Travel Destination (World Time) If you set your home area and the travel destination area when traveling abroad etc., the local time at the travel destination area can be displayed on the screen and recorded on the pictures taken. • Select [CLOCK SET] to set the current date and time in advance. (P26) 1 Press [MENU/SET] and then press 2. REC FILM MODE PICT.SIZE QUALITY RAW REC. ASPECT SELECT 1/3 MENU SET OFF EXIT WORLD TIME DESTINATION HOME 10:00 DEC. 1.
Others ∫ Finishing setting the home area • If you are setting the home area for the first time, the screen returns to the screen shown in step 1 of “Setting the home area [HOME]” after you press [MENU/ SET] to set your home area. Press 2 to return to the screen shown in step 3 and then press [MENU/SET] to close the menu. • If you are setting the home area for the second time etc., the screen returns to the screen shown in step 3 after you press [MENU/SET] to set your home area.
Others Location candidates for World Time settings Offset from GMT Listed location name -11 Midway Islands Samoa -10 Hawaii Honolulu -9 Alaska Anchorage -8 Vancouver Seattle -7 Denver Phoenix -6 Chicago Houston -5 Toronto New York Miami -4 Caracas Manaus La Paz Sao Paulo Buenos Aires -3:30 Newfoundland -3 Rio de Janeiro -2 Fernando de Noronha Tahiti Los Angeles Mexico City Lima -1 Azores 0 London Casablanca +1 Berlin Paris Rome Madrid +2 Helsinki Athens Cai
Others Cautions for Use ∫ Optimal use of the camera Take care not to drop or knock the unit or put a lot of pressure on it. • Take care not to drop or knock the bag that you inserted the unit in as it may strongly shock the unit. • A strong shock may break the lens, screen or outer case and cause the camera to malfunction. Keep the camera as far away as possible from electromagnetic equipment (such as microwave ovens, TVs, video games etc.).
Others About dirt on the image sensor This camera features an interchangeable lens system so dirt may get inside the camera body when changing lenses. Depending on the recording conditions, dirt on the image sensor may appear on the recorded picture. Do not change lenses where there is a lot of dust, and always attach the body cap when a lens is not attached to the camera, so that dirt or dust does not get inside the camera body. Remove any dirt on the body cap before attaching it.
Others Dispose of unusable battery. • Batteries have a limited life. • Do not throw batteries into fire because it may cause an explosion. • Unusable batteries should be discarded in accordance with battery recycling laws. Call the RBRC hotline at 1-800-822-8837 for information. Do not allow battery terminals to come into contact with metal objects (such as necklaces, hairpins etc.). • This can cause short circuiting or heat generation and you may be badly burned if you touch a battery.
Others Message Display Confirmation messages or error messages will be displayed on the screen in some cases. The major messages are described below as examples. [THIS MEMORY CARD IS PROTECTED] The Write-Protect switch on the SD Memory Card or the SDHC Memory Card is slid to the [LOCK] side. Slide it to the other side to unlock it. (P23, 94, 97) [NO VALID PICTURE TO PLAY] Record a picture or insert a card with a recorded picture and then play it.
Others Troubleshooting If you return the menu settings to the initial settings at the time of purchase, the condition may improve. Select [RESET] in the [SETUP] menu. (P29) ∫ Battery and power source 1: The camera cannot be operated even when it is turned on. • Is the battery inserted correctly? Is the AC adaptor connected correctly? • Is the battery sufficiently charged? – Charge the battery or use one that has been sufficiently charged. 2: The LCD monitor turns off while the camera is turned on.
Others 6: The recorded picture is blurred. The optical image stabilizer is not effective. • The shutter speed will become slower and the optical image stabilizer function may not work properly when taking pictures especially in dark places. In this case, we recommend holding the camera firmly with both hands when taking pictures (P31, 51). We recommend using a tripod and the self-timer (P67) when taking pictures with a slow shutter speed. 7: The recorded picture looks rough. Noise appears on the picture.
Others 4: Noise appears on the LCD monitor. • In dark places, noise may appear to maintain the brightness of the LCD monitor. This does not affect the pictures you are recording. ∫ Flash 1: The flash is not activated. • Is the flash closed? – Press the [ OPEN] button to open the flash. (P58) 2: The flash is activated 2 times. • The flash is activated 2 times. The interval between the first and second flash is longer when AUTO/Red-eye reduction [ ], Forced ON/Red-eye reduction [ ] or Slow sync.
Others ∫ TV, PC and printer 1: The picture does not appear on the television. • Is the camera connected to the TV correctly? • Set the TV input to external input mode. 2: The display areas on the TV screen and the camera’s LCD monitor are different. Depending on the TV model, the area display may be smaller so the picture may be stretched horizontally or vertically and the top and bottom or left and right of the picture may be cut off when it is displayed.
Others 5: The camera becomes warm. • The surface of the camera may become warm during use. This does not affect the performance or quality of the camera. 6: The clock is reset. • If you do not use the camera for a long time, the clock may be reset. When the message [PLEASE SET THE CLOCK] appears, set the clock again. (P26) • When you take a picture before setting the clock, [0:00 0. 0. 0] is recorded. 7: Colors appear on the picture which were not found in the actual scene.
Others Others Number of recordable pictures • The number of recordable pictures is an approximation. (These vary depending on the recording conditions and the type of card.) • The number of recordable pictures depends on the subjects. • The numbers in brackets are when [RAW REC.] is set to [ON]. Aspect ratio Picture size : 3136k2352 pixels (7.
Others Aspect ratio Picture size : 2560k1712 pixels (4.5M EZ) : 2048k1360 pixels (2.
Others Specifications Digital Camera Body (DMC-L1): Power Source: Power Consumption: Information for your safety DC 8.4 V 2.2 W (When taking pictures with the Viewfinder) 3.8 W (When taking pictures with Live View) 2.2 W (When playing back) ) Camera effective pixels: 7,500,000 pixels Image sensor: 4/3q Live MOS sensor, total pixel number 7,940,000 pixels Primary color filter Digital zoom: Max.
Others Flash: Flash synchronization speed: Recording media: Picture size Still picture: Quality: Recording file format: Interface Digital: Analog video: Terminal [USB]: [V OUT/REMOTE]: [DC IN]: Dimensions: Built-in pop up flash Flash range: Approx. 2.5 m (8.2 feet) to 7.0 m (23.0 feet) (Supplied lens attached, Wide, When the ISO sensitivity is set to [AUTO].) AUTO, AUTO/Red-eye reduction, Forced ON, Forced ON/ Red-eye reduction, Slow sync., Slow sync.
Others Interchangeable Lens “LEICA D VARIO-ELMARIT 14– 50 mm/F2.8– 3.5” (L-ES014050) Focal length f=14 mm to 50 mm (35 mm film camera equivalent: 28 mm to 100 mm) Aperture type 7 leaf shutters/iris diaphragm Aperture range F2.8 (Wide) to F3.5 (Tele) Lens construction 16 elements in 12 groups (2 aspherical lenses) In focus distance 0.29 m (0.95 feet) to ¶ (from the focus distance reference line) Optical image stabilizer Available Mount “Four Thirds Mount” Max. diameter 78.1 mm (3.
Others Digital Camera Accessory System Accessory# Description Figure CGR-S603A Lithium Ion Battery DMW-FL500 Flash DMW-LMCH72 MC Protector DMW-LPL72 PL Filter (Circular Type) DMW-RSL1 Remote Shutter DMW-BAL1 Leather Bag DMW-SSTL1 Shoulder Strap RP-SDR04GU1K RP-SDK02GU1A RP-SDR02GU1A RP-SDK01GU1A RP-SDH01GU1A RP-SDR01GU1A RP-SDK512U1A RP-SDR512U1A RP-SDH256U1A RP-SDR256U1A RP-SD128BU1A RP-SD064BPPA 4 GB SDHC Memory Card 2 GB SD Memory Card 2 GB SD Memory Card 1 GB SD Memory Card 1 GB SD Me
Others Digital Camera Accessory Order Form (For USA Customers) Please photocopy this form when placing an order. 1. Digital Camera Model # 2. Items Ordered Accessory # Description Price Each Quantity Total Price Subtotal Your State & Local Sales Tax Shipping & Handling 6.95 Total Enclosed 3. Method of payment (check one) Check of Money Order enclosed (NO C.O.D.
Others Request for Service Notice (For USA Only) Please photocopy this form when making a request for service notice. In the unlikely event this product needs service. include your proof of purchase. Request for Service Notice: • Please (Failure to do so will delay your repair.) (USA Only) • To further speed your repair, please provide an explanation of what wrong with the unit and any symptom it is exhibiting.
Others Limited Warranty (For USA Only) PANASONIC CONSUMER ELECTRONICS COMPANY, DIVISION OF PANASONIC CORPORATION OF NORTH AMERICA One Panasonic Way, Secaucus, New Jersey 07094 PANASONIC PUERTO RICO, INC. Ave. 65 de Infantería, Km. 9.
Others Carry-In or Mail-In Service For Carry-In or Mail-In Service in the United States call 1-800-272-7033. For assistance in Puerto Rico call Panasonic Puerto Rico, Inc. (787)-750-4300 or fax (787)-768-2910. This warranty ONLY COVERS failures due to defects in materials or workmanship, and DOES NOT COVER normal wear and tear or cosmetic damage.
Others Customer Services Directory (For USA Only) For Product Information, Operating Assistance, Literature Request, Dealer Locations, and all Customer Service inquiries please contact: 1-800-272-7033, Monday-Friday 8:30am-8pm EST. Web Site: http://www.panasonic.com/consumersupport You can purchase parts, accessories or locate your nearest servicenter by visiting our Web Site.
Others Others Index Display Set ............................................. 87 DPOF Print ............................................92 Dust Reduction Function .......................25 A E AC Adaptor ........................ 18, 19, 98, 100 Adjusting the flash output ...................... 61 AF Assist Lamp ...................................... 82 AF Frame ............................................... 85 AFC ........................................................ 35 AF-LED .....................
Others LCD monitor ........................................... 14 Lens ....................................................... 16 Lens Cap ............................................... 17 Lens Hood ............................................. 23 Lens rear cap ......................................... 16 Live View ............................................... 50 LONG SHUTTER NR ............................ 87 M MANUAL ................................................ 89 Manual exposure ................
Others Others Spanish Quick Use Guide/Guía rápida en español • Cárguela antes del uso. • Compruebe que la cámara esté apagada. • Cierre el flash. 3 1 Cierre la tapa de la batería. 2 Desplace la palanca de desenganche en la dirección de la flecha (lado CLOSE) y, luego, ciérrela firmemente. 1 ∫ Preparaciones 1 Conecte el cable CA. 2 E OS CL OPE N 4 Desplace la tapa de la tarjeta para abrirla. • Cuando el cable de CC está conectado a un adaptador de CA la batería no puede ser cargada.
Others 6 1 Cierre la tapa de la tarjeta. 2 Desplace la tapa de la tarjeta hasta el fin, luego ciérrela firmemente. 1 Ajuste la palanca del modo del enfoque a [AFS]. AFS AFC MF 2 AFL AEL • AFS es la abreviación de “Auto Focus Single”. El enfoque se fija cuando pulsa a mitad el botón del obturador. 2 Gire el disco de la velocidad de obturación hacia [A]. 8 15 4 2-60/B s 30 A 1000000 4 125 500 A 250 ∫ Grabación • Quite la tapa del objetivo. • Encienda la cámara.
Others 4 Dirija el encuadre AF C hacia el punto que quiere enfocar, luego pulse a mitad el botón del obturador. G 2 Pulse 2/1 para seleccionar la imagen. P F5.6 125 ISO100 ED 1/19 100 _ 0001 10 C F G: Visualización del visor • Puede comprobar el valor de la abertura D y la velocidad de obturación visualizados E. • Una vez que el sujeto esté enfocado, la cámara emite un bip y se enciende la indicación del enfoque F .
Panasonic Consumer Electronics Company, Division of Panasonic Corporation of North America One Panasonic Way, Secaucus, NJ 07094 Panasonic Puerto Rico, Inc. Ave. 65 de Infantería, Km. 9.5, San Gabriel Industrial Park, Carolina, Puerto Rico 00985 Panasonic Canada Inc. 5770 Ambler Drive, Mississauga, Ontario, L4W 2T3 C 2006 Matsushita Electric Industrial Co., Ltd.