Owner’s Manual for advanced features Digital Camera Model No. DMC-TS3 Before connecting, operating or adjusting this product, please read the instructions completely.
Contents Recording Before Use Care of the camera ...................................5 (Important) About the Waterproof/ Dustproof and Anti-shock Performance of the Camera......................8 Standard Accessories .............................13 Names of the Components .....................14 Attaching the Strap..................................16 Preparation Charging the Battery ...............................17 • Charging ...........................................
Taking Pictures that Match the Scene Being Recorded (Scene Mode)..........................................69 • [Portrait] ............................................69 • [Soft Skin]..........................................70 • [Transform]........................................70 • [Self Portrait] .....................................70 • [Scenery] ...........................................70 • [Panorama Assist] .............................71 • [Night Portrait] ...................................
Playback/Editing Creating Still Pictures from a Motion Picture ............................116 Various methods to playback ................117 • [Slide Show] ....................................118 • [Filtering Play] .................................120 • [Calendar] .......................................122 Using the [Playback] Mode menu .........123 • [Upload Set] ....................................123 • [Title Edit] ........................................125 • [Place-Name Edit] ........................
Before Use Please be sure to read “(Important) About the Waterproof/Dustproof and Anti-shock Performance of the Camera” (P8) before using this unit underwater to prevent the unit from being mishandled, which may cause water to seep in.
Before Use ∫ When inner side of the lens is fogged (condensation) It is not a malfunction or failure of the camera. It may be caused by the environment in which the camera is used. What to do when inner side of the lens is fogged • Turn off the power and open the side door in a place with constant ambient temperature, away from high temperatures, humidity, sand and dust.
Before Use About the GPS About the location name information of this unit Please read the “User License Agreement for Location Name data” on P167 before using. When [GPS Setting] is set to [ON], GPS function will operate even when the power is turned off. • Electromagnetic waves etc. from this unit may affect other electronic devices, so set [GPS Setting] to [OFF] or [ ] and turn the power of the unit off during plane takeoff or landing, or in an area where use is prohibited.
Before Use (Important) About the Waterproof/Dustproof and Anti-shock Performance of the Camera Waterproof/Dustproof Performance This camera’s waterproof/dustproof rating complies with the “IPX8” and “IP6X” ratings. Provided the care and maintenance guidelines described in this document are strictly followed, this camera can operate underwater, to a depth not exceeding 12 m (40 feet) for a time not exceeding 60 minutes. (¢1) Anti-shock Performance This camera also complies with “MIL-STD 810F Method 516.
Before Use ∫ About the [Precautions] demonstration display • [Precautions] is displayed when the power is turned on for the first time after purchase, with the side door completely closed. • Please check beforehand to maintain the waterproof performance. 1 2 Press 2 to select [Yes], and press [MENU/SET]. • It will automatically skip to the clock setting screen if [No] is selected before it starts. Press 2/1 to select the picture.
Before Use Check before using underwater Do not open or close the side door in places with sand and dust, close to water, or with wet hands. Sand or dust adhering may cause water leaks. 1 Check that there are no foreign objects on the inner side of the side door. • If there is any foreign object, such as lint, hair, sand, etc., on the surrounding area, water will leak within a few seconds causing malfunction. • Wipe it off with a dry soft cloth if there is any liquid.
Before Use Using the camera underwater • Use the camera underwater at a depth of up to 12 m (40 feet) with the water temperature between 0 oC and 40 oC (32 oF to 104 °F). • Do not use for scuba diving (Aqualung). • Do not use the camera at a depth of over 12 m (40 feet). • Do not use it in the hot water over 40 oC (104 °F) (in the bath or hot spring). • Do not use the camera underwater not longer than 60 minutes continuously. • Do not open or close the side door.
Before Use 2 Drain water by holding the camera upside down and shaking it lightly a few times. • After using the camera at the seaside or under water, or after washing it, water will remain at the speaker site of the camera for a while and it may cause lower sound or sound distortion. • Fasten the strap firmly to prevent the camera from dropping. 3 Wipe off water drops on the camera with a dry soft cloth and dry the camera in a shaded area which is well ventilated.
Before Use Standard Accessories Check that all the accessories are supplied before using the camera. • Supplied accessories are not waterproof (excluding strap). • Keep the Brush out of reach of children to prevent swallowing. • The accessories and their shape will differ depending on the country or area where the camera was purchased. For details on the accessories, refer to Basic Owner’s Manual. • Battery Pack is indicated as battery pack or battery in the text.
Before Use Names of the Components 1 2 3 Flash (P58) Self-timer indicator (P62)/ AF Assist Lamp (P108)/LED light (P114) Lens (P6, 178) 4 5 6 7 8 9 10 11 LCD monitor (P54, 157) Speaker (P47) Zoom button (P55) Playback button (P34) [MODE] button (P29) [MENU/SET] button (P44) [Q.MENU] (P45)/Delete (P42)/Cancel button [DISP.
Before Use 13 14 15 16 17 18 Motion picture button (P36) Shutter button (P30, 39) Camera [OFF/ON] button (P27) GPS antenna (P83) Microphone GPS status indicator 13 1415 16 17 18 19 Tripod receptacle 19 20 [HDMI] socket (P140, 142) 21 [AV OUT/DIGITAL] socket (P139, 147, 150, 153) 20 ロヰヤレ 22 Strap eyelet (P16) • Be sure to attach the strap when using the camera to ensure that you will not drop it.
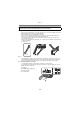
Before Use Attaching the Strap Run the strap through the strap eyelet on the camera. • If the strap cord is loose, it may snag when the side door is opened or closed. Since damage or leaks may result, be sure to attach the cord firmly, checking that it is not snagged in the side door. Insert your hand following the arrow, then adjust the length. Note • Attach the strap correctly following the procedure.
Preparation Preparation Charging the Battery ∫ About batteries that you can use with this unit It has been found that counterfeit battery packs which look very similar to the genuine product are made available to purchase in some markets. Some of these battery packs are not adequately protected with internal protection to meet the requirements of appropriate safety standards. There is a possibility that these battery packs may lead to fire or explosion.
Preparation ∫ About the [CHARGE] indicator The [CHARGE] indicator turns on: The [CHARGE] indicator A is turned on during charging. The [CHARGE] indicator turns off: The [CHARGE] indicator A will turn off once the charging has completed without any problem. • When the [CHARGE] indicator flashes – The battery temperature is too high or too low. It is recommended to charge the battery again in an ambient temperature of between 10 oC to 30 oC (50 °F to 86 °F).
Preparation Approximate operating time and number of recordable pictures ∫ Battery indication The battery indication is displayed on the LCD monitor. • The indication turns red and blinks if the remaining battery power is exhausted. Recharge the battery or replace it with a fully charged battery. ∫ Recording still pictures Number of recordable pictures Approx. 310 pictures Recording time Approx.
Preparation ∫ Recording motion pictures [AVCHD] [Motion JPEG] (Recording with picture quality (Recording with picture quality set to [FSH]) set to [HD]) Recordable time Approx. 100 min Approx. 110 min Actual recordable time Approx. 50 min Approx. 55 min • These times are for an ambient temperature of 23 oC (73.4 °F) and a humidity of 50%RH. Please be aware that these times are approximate. • Time of recording without using the GPS function.
Preparation Inserting and Removing the Card (optional)/the Battery • Check that this unit is turned off. • Confirm that there is no foreign object. (P10) • We recommend using a Panasonic card. 1:Slide the [LOCK] switch B, and release the lock. ロヰヤレ 2:Slide the release lever A and open the side door. • Always use genuine Panasonic batteries. • If you use other batteries, we cannot guarantee the quality of this product.
Preparation Note • Remove the battery after use. • The battery will be exhausted if left for a long period of time after being charged. • Turn the camera off and wait for the “LUMIX” display on the LCD monitor to clear before removing the card or battery. (Otherwise, this unit may no longer operate normally and the card itself may be damaged or the recorded pictures may be lost.
Preparation Using an AC adaptor (optional) and a DC coupler (optional) instead of the battery ロヰヤレ モヷチヰヶヵチバチュリヨリヵモロ The AC Adaptor (optional) can only be used with the designated Panasonic DC coupler (optional). The AC adaptor (optional) cannot be used by itself. 1 Open the side door A. 2 Insert the DC coupler, being careful of the direction. 3 Plug the AC adaptor into an electrical outlet. 4 Connect the AC adaptor B to the [DC IN] socket C of the DC coupler.
Preparation About the Built-in Memory/the Card The following operations can be performed using this unit. • When a card has not been inserted: Pictures can be recorded in the built-in memory and played back. • When a card has been inserted: Pictures can be recorded on the card and played back. • When using the built-in memory k>ð (access indication¢) • When using the card † (access indication¢) ¢ The access indication lights red when pictures are being recorded on the built-in memory (or the card).
Preparation Note • Do not turn this unit off, remove its battery or card, or disconnect the AC adaptor (optional) when the access indication is lit (when pictures are being written, read or deleted, or the built-in memory or the card is being formatted). Furthermore, do not subject the camera to vibration, impact or static electricity. The card or the data on the card may be damaged, and this unit may no longer operate normally.
Preparation Approximate number of recordable pictures and available recording time ∫ About the display of the number of recordable pictures and available recording time • You can confirm the number of recordable pictures and available recording time by pressing [DISP.] several times. (P54) A Number of recordable pictures B Available recording time B A ∫ Number of recordable pictures • [i99999] is displayed if there are more than 100,000 pictures remaining.
Preparation Setting Date/Time (Clock Set) • The clock is not set when the camera is shipped. Press the [OFF/ON] button. • If the language select screen is not displayed, proceed to step 4. Press [MENU/SET]. Press 3/4 to select the language, and press [MENU/SET]. • [Precautions] is displayed. Be sure to check this so that you can maintain the waterproof performance. [Please set the clock] is displayed by selecting [No] before it starts or by pressing [MENU/SET] after viewing the last screen (12/12).
Preparation Press [MENU/SET] to set. • A setting screen for automatic clock correction is displayed. Select [Yes] to automatically correct the clock, and then press [MENU/SET]. • [GPS Setting] (P84) will be set to [ON], and the clock is automatically corrected to the current time. Press [MENU/SET] in the message display screen. Press 2/1 to select the home area, and then press [MENU/SET].
Basic Basic Selecting the [Rec] Mode Press [MODE]. Press 3/4/2/1 to select the mode. Press [MENU/SET]. ∫ List of [Rec] Modes ! Normal Picture Mode (P30) The subjects are recorded using your own settings. ¦ Intelligent Auto Mode (P39) The subjects are recorded using settings automatically selected by the camera. Sports Mode (P65) Use this mode to take pictures of sporting events, etc.
Basic [Rec] Mode: · Taking Pictures with Your Favorite Settings (Normal Picture Mode) The camera automatically sets the shutter speed and the aperture value according to the brightness of the subject. You can take pictures with greater freedom by changing various settings in [Rec] menu. Press [MODE]. Press 3/4/2/1 to select [Normal Picture], and then press [MENU/SET]. Aim the AF area at the point you want to focus on. Press the shutter button halfway to focus.
Basic Tips for taking good pictures • Be sure to attach the strap when using the camera to ensure that you will not drop it. • Hold the camera gently with both hands, keep your arms still at your side and stand with your feet slightly apart. • Be careful not to move the camera when you press the shutter button. • Do not block the flash and AF Assist Lamp/LED light with your fingers. • Be careful not to block the microphone with your fingers when recording motion pictures.
Basic Focusing Aim the AF area at the subject, and then press the shutter button halfway. When the subject is When the subject focused is not focused Focus Focus indication A On Blinks AF area B White>Green White>Red Sound Beeps 2 times Beeps 4 times A B • AF area is displayed larger during the digital zoom or when it is dark. ∫ About focus range The focus range is displayed when operating the zoom.
Basic ∫ When the subject is not in focus (such as when it is not in the center of the composition of the picture you want to take) 1 2 Aim the AF area at the subject, and then press the shutter button halfway to fix the focus and exposure. Press and hold the shutter button halfway while moving the camera as you compose the picture. • You can repeatedly retry the actions in step 1 before pressing the shutter button fully.
Basic [Playback] Mode: ¸ Playing Back Pictures ([Normal Play]) Press [(]. • Normal Playback is displayed automatically when the power is turned on by pressing and holding the [(] button. Note • This camera complies with the DCF standard “Design rule for Camera File system” established by JEITA “Japan Electronics and Information Technology Industries Association” and with Exif “Exchangeable Image File Format”. Files which do not comply with the DCF standard cannot be played back.
Basic Displaying Multiple Screens (Multi Playback) A Press [W] of the zoom button. 1 screen>12 screens>30 screens>Calendar screen display ヸ A Number of the selected picture and the total number of recorded pictures • Press [T] of the zoom button to return to the previous screen. • Pictures displayed using [ ] cannot be played back. ∫ To return to Normal Playback Press 3/4/2/1 to select a picture and then press [MENU/SET]. Using the Playback Zoom Press [T] of the zoom button.
Basic [Rec] Mode: ñ· ¿ Recording Motion Pictures This can record full high definition motion pictures that are compatible with the AVCHD format or motion pictures recorded in Motion JPEG. Audio will be recorded in monaural. Start recording by pressing the motion picture button. A Available recording time B Elapsed recording time • You can record motion pictures fitting each Recording Mode. • Release the motion picture button right after you press it.
Basic Note • The available recording time displayed on the screen may not decrease regularly. • Depending on the type of the card, the card access indication may appear for a while after recording motion pictures. This is not a malfunction. • The screen may be blacked out momentarily, or the unit may record noise due to static electricity or electromagnetic waves etc. depending on the environment of the Motion Picture Recording.
Basic [Playback] Mode: ¸ Playing Back Motion Pictures • This unit was designed to play motion pictures using the AVCHD and QuickTime Motion JPEG formats that were taken with this model (only). • Motion pictures in AVCHD format that can be played back on this unit are [AVCHD] motion pictures that were recorded with this unit, AVCHD format (including [AVCHD Lite]) motion pictures recorded with Panasonic digital cameras (LUMIX) only.
Basic [Rec] Mode: ñ Taking Pictures Using the Automatic Function (Intelligent Auto Mode) The camera will set the most appropriate settings to match the subject and the recording conditions so we recommend this mode for beginners or those who want to leave the settings to the camera and take pictures easily. • The following functions are activated automatically. – Scene Detection/[Stabilizer]/Intelligent ISO sensitivity control/Face Detection/[Quick AF]/ [i.
Basic Changing the settings Following menus can be set with the Intelligent Auto Mode. Menu Item [Rec] [Picture Size]¢/[Burst]/[Color Mode]¢/[Motion Deblur]/[Face Recog.] [Motion Picture] [Rec Mode]/[Rec Quality]/[LED Light] [GPS/Sensor] [GPS Setting]/[Repositioning]/[GPS Area Select]/[Area Info. Set]/ [My Landmark]/[Altimeter Adjust]/[Calibrate compass] [Setup] [Clock Set]/[World Time]/[Beep]¢/[Language]/[Stabilizer Demo.] • For the setting method of the menu, refer to P44.
Basic Scene Detection When the camera identifies the optimum scene, the icon of the scene concerned is displayed in blue for 2 seconds, after which its color changes to the usual red. When taking pictures ¦ > [i-Portrait] [i-Scenery] [i-Macro] [i-Night Portrait] • Only when [ ] is selected [i-Night Scenery] [i-Sunset] [i-Baby]¢ When recording motion pictures ¦ > [i-Portrait] [i-Scenery] [i-Low Light] [i-Macro] • [¦] is set if none of the scenes are applicable, and the standard settings are set.
Basic [Playback] Mode: ¸ Deleting Pictures Once deleted, pictures cannot be recovered. • Pictures on the built-in memory or the card, that are being played back will be deleted. To delete a single picture Select the picture to be deleted, and then press [ ]. • Confirmation screen is displayed. Picture is deleted by selecting [Yes].
Basic To delete multiple pictures (up to 50) or all the pictures Press [ ]. Press 3/4 to select [Delete Multi] or [Delete All] and then press [MENU/SET]. • [Delete All] > Confirmation screen is displayed. Pictures are deleted by selecting [Yes]. • It is possible to delete all pictures except the ones set as favorite when [All Delete ExceptÜ] is selected with the [Delete All] set. (When [Delete Multi] is selected) Press 3/ 4/2/1 to select the picture, and then press [DISP.] to set. (Repeat this step.
Basic Setting the Menu The camera comes with menus that allow you to choose the settings for taking pictures and playing them back as you like and menus that enable you to have more fun with the camera and use it more easily. In particular, the [Setup] menu contains some important settings relating to the camera’s clock and power. Check the settings of this menu before proceeding to use the camera. Setting menu items Press [MENU/SET]. Press 3/4/2/1 to select menu and then press [MENU/SET].
Basic Press 3/4 to select the menu item and then press [MENU/SET]. A A Menu screen page • It will switch to next page when you reach the bottom. (It will also switch by pressing the zoom button) • Screen at right is an example of selecting [AF Mode] in [Rec] mode Menu. Press 3/4 to select the setting and then press [MENU/SET]. • Depending on the menu item, its setting may not appear or it may be displayed in a different way.
Basic About the Setup Menu [Clock Set], [Economy] and [Auto Review] are important items. Check their settings before using them. For details on how to select the [Setup] menu settings, refer to P44. [Precautions] To maintain waterproof performance, display the things you need to check before use. • Refer to P9 for details. U [Clock Set] — • Refer to P27 for details. [Auto Clock Set] The clock is updated automatically using the GPS function. [ON]/[OFF] • Refer to P89 for details.
Basic u [Volume] Adjust the volume of the speaker to any of 7 levels. • When you connect the camera to a TV, the volume of the TV speakers does not change. These menu settings make it easier to see the LCD monitor when you are in bright places. LCD [LCD Mode] „ [Auto Power LCD]¢: The brightness is adjusted automatically depending on how bright it is around the camera. … [Power LCD]: The LCD monitor becomes brighter and easier to see even when taking pictures outdoors.
Basic This allows you to set either to display or not display the histogram. [ON]/[OFF] [Histogram] A Histogram is a graph that displays brightness along the horizontal axis (black to white) and the number of pixels at each brightness level on the vertical axis. It allows you to easily check a picture’s exposure. A dark B optimal C bright • When you take pictures with the flash or in dark places, the histogram is displayed in orange because the recorded picture and the histogram do not match each other.
Basic You can conserve the battery life by setting these menus. Also, the battery life is conserved by dimming the LCD monitor. q [Economy] p [Auto Power Off]: The camera is automatically turned off if the camera has not been used for the time selected on the setting. [2MIN.]/[5MIN.]/[10MIN.]/[OFF] ECO [LCD Power Save]: Brightness of the LCD monitor is lowered. The battery life will be conserved by lowering the image quality of the LCD monitor further during the recording¢.
Basic v [No.Reset] Reset the file number of the next recording to 0001. • The folder number is updated and the file number starts from 0001. • A folder number between 100 and 999 can be assigned. When the folder number reaches 999, the number cannot be reset. We recommend formatting the card (P53) after saving the data on a PC or elsewhere. • To reset the folder number to 100, format the built-in memory or the card first and then use this function to reset the file number.
Basic Set to match the color television system in each country or the type of TV. (Playback Mode only) [TV Aspect]: | [Output] [W]: When connecting to a 16:9 screen TV. [X]: When connecting to a 4:3 screen TV. • This will work when the AV cable is connected.
Basic Setup so this unit can be controlled by the remote control of the VIERA by automatically coupling this unit with the VIERA Link compatible equipment using HDMI micro cable (optional). [VIERA Link] [ON]: Remote control operation of the VIERA Link compatible equipment is enabled. (Not all operations are possible) Button operation of the main unit will be limited. [OFF]: Operation is performed with the buttons on this unit. • This will work when the HDMI micro cable (optional) is connected.
Basic [Format] The built-in memory or card is formatted. Formatting irretrievably deletes all the data so check the data carefully before formatting. • Use a battery with sufficient battery power or the AC adaptor (optional) and DC coupler (optional) when formatting. Do not turn the camera off during formatting. • If a card has been inserted, only the card is formatted. To format the built-in memory, remove the card.
Recording Recording About the LCD Monitor Press [DISP.] to change. A LCD monitor • When the menu screen appears, the [DISP.] button is not activated. During Playback Zoom, while playing back Motion Pictures and during a Slide Show, you can only select “Normal display F” or “No display H”.
Recording [Rec] Mode: ñ· ¿ Taking Pictures with the Zoom Using the Optical Zoom/Using the Extended Optical Zoom (EZ)/Using the Intelligent Zoom/Using the Digital Zoom You can zoom-in to make people and objects appear closer or zoom-out to record landscapes in wide angle. To make subjects appear even closer (maximum of 9.1k), do not set the picture size to the highest setting for each aspect ratio (X/Y/W/ ). To make subjects appear further away use (Wide) ヸ Press [W] of the zoom button.
Recording ∫ Types of zooms Feature Maximum magnification Picture quality Conditions Optical Zoom Extended Optical Zoom (EZ) 4.6k 9.1k¢ No deterioration No deterioration [Picture Size] with selected. None (P97) is Screen display A [ Feature ] is displayed. Intelligent Zoom Digital Zoom Approximately 4 times the Optical Maximum Approximately 1.
Recording Note • The indicated zoom magnification is an approximation. • “EZ” is an abbreviation of “Extended Optical Zoom”. It is possible to take more magnified pictures with the optical zoom. • When using the Digital Zoom, we recommend using a tripod and the Self-timer (P62) for taking pictures. • The Intelligent Zoom cannot be used in the following cases. – In [Motion Deblur] in Intelligent Auto Mode – In Macro Zoom Mode – In [Handheld Night Shot], [High Sens.
Recording [Rec] Mode: ñ· ¿ Taking Pictures Using the Built-in Flash A Photo flash Do not cover the flash with your fingers or other objects. Switching to the appropriate flash setting Set the flash to match the recording. Press 1 [‰]. Press 3/4 to select a mode and then press [MENU/SET]. Item ‡: AUTO ˆ: AUTO/Red-Eye Reduction¢ ‰: Forced Flash ON Š: Forced ON/Red-Eye Reduction¢ ‹: Slow Sync.
Recording ∫ About the Digital Red-Eye Correction When [Red-Eye Removal] (P109) has been set to [ON] and Red-Eye Reduction ([ ], [ ], [ ]) is selected, Digital Red-Eye Correction is performed whenever the flash is used. The camera automatically detects red-eye and corrects the picture. (Only available when [AF Mode] is set to [š] and Face Detection is active) • Under certain circumstances, red-eye cannot be corrected. • [ ] is displayed on the icon when it is set to [ON].
Recording ∫ The available flash range Wide [AUTO] in [Sensitivity] Tele 30 cm (0.99 feet) to 5.6 m (18.4 feet) 30 cm (0.99 feet) to 3.1 m (10.2 feet) ∫ Shutter speed for each flash setting Flash setting Shutter speed (Sec.) Flash setting ‡ ˆ ‹ 1/60 to 1/1300th¢1 ‰ Š Shutter speed (Sec.) 1 to 1/1300th¢1 1 or 1/4th to 1/1300th¢2 Œ ¢1 It may vary depending on the [Min. Shtr Speed] setting. ¢2 When [Min. Shtr Speed] is set to [AUTO].
Recording [Rec] Mode: · Taking Close-up Pictures ([AF Macro]/[Macro Zoom]) Press 4 [#]. Press 3/4 to select a mode and then press [MENU/SET]. Item Description of settings This mode allows you to take close-up pictures of a subject, e.g. when taking pictures of flowers. You can take pictures of a [ ] subject as close as 5 cm (0.17 feet) from the lens by pressing the ([AF Macro]) zoom button upmost to Wide (1k). •[ ] is displayed during AF Macro Mode.
Recording [Rec] Mode: ñ· ¿ Taking Pictures with the Self-timer Press 2 [ë]. Press 3/4 to select a mode and then press [MENU/SET]. Item [ Description of settings ] Picture is taken after 10 seconds. • Self-timer cannot be set to 10 seconds in [Self Portrait] in Scene ] Picture is taken after 2 seconds. • When using a tripod etc., this setting is a convenient way to avoid Mode. [ the jitter caused by pressing the shutter button.
Recording [Rec] Mode: · ¿ Compensating the Exposure Use this function when you cannot achieve appropriate exposure due to the difference in brightness between the subject and the background. Look at the following examples. Underexposed Properly exposed Compensate the exposure towards positive. Overexposed Compensate the exposure towards negative. Press 3 [È] until [Exposure] appears, compensate the exposure with 2/1. • Select [0 EV] to return to the original exposure. Press [MENU/SET].
Recording [Rec] Mode: · ¿ Taking Pictures Using Auto Bracket In this mode, 3 pictures are automatically recorded in the selected Exposure Compensation range each time the shutter button is pressed. You can select the picture with the desired exposure from the 3 pictures with different exposures. With Auto Bracket d1 EV 1st picture 2nd picture 3rd picture d0 EV j1 EV i1 EV Press 3 [È] until [Auto Bracket] appears, set the compensation range of the exposure with 2/1.
Recording [Rec] Mode: Take the Outdoors Scene Expressively By setting the [Rec] Mode to [ ], [ ], [ ] or [ ] pictures can be taken more effectively matching the conditions such as sports, snow, beach & snorkeling. Note • The mode flash setting is reset to the initial setting when the mode is switched after changing ]. the flash setting between [ ], [ ], [ ] and [ • Tone of the color of the image may change when picture is taken with unmatched usage.
Recording [Beach & Snorkeling] This is optimal for taking pictures underwater and at the beach. Depth meter will automatically operate. It can be a rough indication of how deep you have gone underwater. Make sure to perform [Depth indicator] in [GPS/Sensor] menu to set the depth meter before you dive underwater. Press [MENU/SET]. Press 3/4/2/1 to select [GPS/Sensor] menu, and then press [MENU/SET]. Press 3/4 to select [Depth indicator], and then press [MENU/SET]. • Confirmation screen is displayed.
Recording ∫ About the screen display underwater A Depth meter A • Depth meter will display the depth up to 12 m (40 feet) in 3 levels. When the third level is flashing You are approaching a depth of 12 m (40 feet), which is the diving limit of this unit. Please be aware. Entire depth meter is flashing You have exceeded a depth of 12 m (40 feet). • Camera will automatically set to the optimal picture quality for underwater from the depth information.
Recording [Underwater] This is optimal for taking pictures underwater deeper than 12 m (40 feet) by the use of the marine case (DMW-MCFT3; optional) ¢ This camera has a waterproof/dustproof function equivalent to “IP68”. It is possible to take pictures in 12 m (40 feet) depth for 60 minutes. Fixing the focus underwater (AF Lock) You can fix the focus before taking a picture with AF lock. This is useful if you want to take pictures of a fast moving subject etc. 1 Aim the AF area at the subject.
Recording [Rec] Mode: ¿ Taking Pictures that Match the Scene Being Recorded (Scene Mode) When you select a Scene Mode to match the subject and recording situation, the camera sets the optimal exposure and hue to obtain the desired picture. Press [MODE]. Press 3/4/2/1 to select [Scene Mode], and then press [MENU/SET]. Press 3/4/2/1 to select the Scene Mode and then press [MENU/SET]. • You can switch menu screens from any menu item by pressing the zoom button.
Recording [Soft Skin] When taking pictures of people outdoors during the day, this mode enables the texture of their skin to appear even softer than with [Portrait]. (It is effective when taking pictures of people from the chest up.) ∫ Technique for Soft Skin Mode To make this mode more effective: 1 Press and hold down the zoom button as far as possible to Tele. 2 Move close to the subject to make this mode more effective. Note • If a part of the background etc.
Recording [Panorama Assist] You can take pictures with connections suitable for creating panorama images. ∫ Setting the recording direction 1 Press 3/4 to select the recording direction and then press [MENU/SET]. • The horizontal/vertical guideline will be displayed. 2 Take the picture. • You can retake the picture by selecting [Retake]. 3 4 Press 3 to select [Next] and then press [MENU/SET]. • Part of the recorded image is displayed as a transparent image.
Recording [Night Scenery] This allows you to take vivid pictures of the nightscape. Note • We recommend using a tripod and the self-timer for taking pictures. • Shutter speed may slow down up to 8 seconds. • The shutter may remain closed (max. about 8 sec.) after taking the picture because of signal processing. This is not a malfunction. • Noise may become visible when you take pictures in dark places.
Recording [Baby1]/[Baby2] This takes pictures of a baby with a healthy complexion. When you use the flash, the light from it is weaker than usual. It is possible to set different birthdays and names for [Baby1] and [Baby2]. You can select to have these appear at the time of playback, or have them stamped on the recorded image using [Text Stamp] (P127). ∫ Birthday/Name setting 1 Press 3/4 to select [Age] or [Name] and then press [MENU/SET]. 2 Press 3/4 to select [SET] and then press [MENU/SET].
Recording [High Sens.] This mode minimizes the jitter of the subjects, and enables you to take pictures of these subjects in dimly lit rooms. ∫ Picture size and aspect ratio Select the picture size of 3M (4:3), 2.5M (3:2), 2M (16:9) or 2.5M (1:1). [Hi-Speed Burst] This is a convenient mode for shooting rapid movement or a decisive moment. ∫ Picture size and aspect ratio Select the picture size of 3M (4:3), 2.5M (3:2), 2M (16:9) or 2.5M (1:1).
Recording [Flash Burst] Still pictures are taken continuously with flash. It is convenient to take continuous still pictures in dark places. ∫ Picture size and aspect ratio Select the picture size of 3M (4:3), 2.5M (3:2), 2M (16:9) or 2.5M (1:1). • Still pictures are taken continuously while the shutter button is pressed fully. Number of recordable pictures max. 5 pictures Note • The focus, zoom, exposure, shutter speed, ISO sensitivity, and flash level are fixed to the settings for the first picture.
Recording [Pin Hole] Picture is taken darker and with soft focus around the subjects. Note • Face Detection may not operate normally in the dark areas around the edges of the screen. [Film Grain] Picture is taken with a grainy texture as though blasted with sand. [High Dynamic] You can use this mode to easily record pictures in which bright and dark regions of the scene are expressed with suitable brightness when looking into the sun, at night, or in similar circumstances. ∫ Setting the effect [STD.
Recording [Rec] mode: Taking 3D pictures (3D Photo Mode) Pictures are recorded continuously while moving the camera horizontally, two pictures selected automatically are combined to make a single 3D picture. To view 3D pictures, a television that supports 3D is required (This unit will playback in 2D). Refer to P144 for details about the playback method. Press [MODE]. Press 3/4/2/1 to select [3D Photo Mode], and then press [MENU/ SET]. • Description of recording method is displayed.
Recording [Rec] Mode: ñ· ¿ Recording Taking a Picture with Face Recognition Function Face Recognition is a function which finds a face resembling a registered face and prioritizes focus and exposure automatically. Even if the person is located towards the back or on the end of a line in a group photo, the camera can still take a clear picture. [Face Recog.] is initially set to [OFF] on the camera. [Face Recog.] will turn [ON] automatically when the face image is registered.
Recording Face Settings You can register information such as names and birthdays for face images of up to 6 people. Registration can be facilitated by taking multiple face images of each person. (up to 3 pictures/registration) ∫ Point of recording when registering the face images • Face front with eyes open and mouth closed, making sure the outline (Good example for registering) of the face, the eyes, or the eyebrows are not covered with the hair when registering.
Recording Registering face image of new person Select [Face Recog.] on the [Rec] Mode menu and then press [MENU/ SET]. (P44) Press 3/4 to select [MEMORY] and then press [MENU/SET]. Press 3/4/2/1 to select the Face Recognition frame that is not registered, and then press [MENU/SET]. • [New] will not display if there are 6 people already registered. Delete a person already registered to register a new person. Take the picture adjusting the face with the guide.
Recording Select item to edit with 3/4, and then press [MENU/SET]. • You can register up to 3 face images. Item [Name] Description of settings It is possible to register names. 1 Press 4 to select [SET] and then press [MENU/SET]. 2 Enter the name. • For details on how to enter characters, refer to “Entering Text” section on P115. [Age] It is possible to register the birthday. 1 Press 4 to select [SET] and then press [MENU/SET].
Recording Change or delete the information for a registered person You can modify the pictures or information of an already registered person. You can also delete the information of the registered person. 1 2 3 4 Select [Face Recog.] from the [Rec] Mode menu, and then press [MENU/SET]. (P44) Press 4 to select [MEMORY] and press [MENU/SET]. Press 3/4/2/1 to select the face image to edit or delete and then press [MENU/SET]. Press 3/4 to select the item and then press [MENU/SET].
Recording [Rec] Mode: ñ· ¿ Recording using the GPS function ∫ About the GPS This is an abbreviation for “Global Positioning System”, which is a system that allows you to check your position utilising GPS satellites. Calculating the current position by receiving radio waves including orbit information and clock information from multiple GPS satellites is called positioning. Positioning is performed by this unit when radio waves from 3 or more GPS satellites are received.
Recording Acquiring of the GPS information Positioning is started once the GPS function is started, and acquired location name information and other information can be stored in the recorded pictures. Select [GPS Setting] from the [GPS/Sensor] menu. (P44) Press 3/4 to select [ON] or [ ] and then press [MENU/SET]. Item [ON] [ Settings • Starts the GPS to receive radio waves. • It will continuously perform the positioning even if the power is turned off when set to [ON].
Recording ∫ About the GPS information display screen • An icon displaying the positioning status is displayed in the recording screen when the GPS is started up.
Recording Update the GPS information When the displayed location name information is different from the current location or when the positioning is not successful, move to a location where the radio waves from GPS satellites can be received better and perform the positioning update. Select [Repositioning] from the [GPS/Sensor] menu, and then press [MENU/SET]. (P44) • Positioning is started and the current location information is updated once the positioning is successful.
Recording Change the recorded place name information When the information acquired by the positioning is different from the current location, it is possible to change it by selecting the desired location name or landmark from the selectable candidates registered in the database of this unit. Select [GPS Area Select] from the [GPS/Sensor] menu. (P44) • Other location name information can be selected when [ ] is displayed. Press 3/4 to select the item to change, and then press [MENU/SET].
Recording Switch between displaying and hiding the location name information Switches the displaying and hiding of the location name information displayed on the screen. Select [Area Info. Set] from the [GPS/Sensor] menu. (P44) Press 3/4 to select the item to change, and then press [MENU/SET]. Select [ON] for the items to display and [OFF] for the items not to display by pressing 3/4, and then press [MENU/SET]. Register additional landmarks Additionally register new landmarks in the database of this unit.
Recording Automatically correct the clock using GPS function Clock of the camera is automatically corrected to the time of the current location utilising the date and time information received from the GPS satellites. The clock is automatically set to local time when you travel to countries or regions with a time difference and the positioning is successful. Select [Auto Clock Set] (P46) from the [Setup] menu. (P44) Press 3/4 to select [ON], and then press [MENU/SET].
Recording [Rec] Mode: ñ· ¿ Measure bearing, altitude and atmospheric pressure It is possible to display or store in recorded pictures the environmental information of the recording location utilising the built-in compass, altimeter, and barometer. To display the compass, altimeter, and barometer, set [GPS Setting] to [ON] or [ ]. Select [GPS Setting] from the [GPS/ Sensor] menu.
Recording Note • It may not measure correctly when you measure with this unit upside down. • The bearing measurement value may be affected in locations with weak geomagnetism. • It may not measure accurately if close to the following objects: – Permanent magnets (metals in magnetic necklaces, etc.)/metallic objects (steel desks, lockers, etc.)/high-voltage lines or overhead wires/household appliances (TVs, PCs, speakers, etc.
Recording Altimeter You can check the altitude of the current location. • Displaying range is j600 m (–2000 feet) to 9000 m (30000 feet). • There are the following 2 ways to display altitude value: – Sea level altitude (absolute altitude from sea level) – Relative altitude (difference of altitude between two places) The altitude value displayed on this unit employs relative altitude.
Recording Barometer This can be used as a rough indication to understand the trend of weather change during mountain climbing or camping, etc. With the most current atmospheric pressure as a reference, it is displayed on the graph within the range of j10 hPa¢ to _10 hPa¢.
Recording [Rec] Mode: ñ· ¿ Useful Functions at Travel Destinations Recording which Day of the Vacation and the Location of the Vacation ([Travel Date]) For details on the [Setup] menu settings, refer to P44. If you set the departure date or the travel destination of the vacation in advance, the number of days that have passed since the departure date (which day of the vacation it is) is recorded when you take the picture.
Recording Enter the location. • For details on how to enter characters, refer to “Entering Text” on P115. • Exit the menu after it is set. ∫ Canceling the travel date The travel date is automatically canceled if the current date is after the return date. If you want to cancel the travel date before the end of the vacation, select [OFF] on the screen shown in step 3. If the [Travel Setup] is set to [OFF], [Location] will be also set to [OFF].
Recording Recording Dates/Times at Overseas Travel Destinations ([World Time]) For details on the [Setup] menu settings, refer to P44. You can display the local times at the travel destinations and record them on the pictures you take. • Select [Clock Set] to set the current date and time in advance. (P27) Select [World Time] from the [Setup] menu, and then press [MENU/ SET]. • When first using the camera after purchasing it, the message appears.
Recording Using the [Rec] Mode Menu [Aspect Ratio] For details on [Rec] Mode menu settings, refer to P44. This allows you to select the aspect ratio of the pictures to suit printing or the playback method. Applicable modes: · ¿ [X] [Aspect Ratio] of a 4:3 TV [Y] [Aspect Ratio] of a 35 mm film camera [W] [Aspect Ratio] of a high-definition TV, etc. [ ] Square aspect ratio Note • The ends of the recorded pictures may be cut at printing so check before printing.
Recording When the aspect ratio is [W]. (9M) 4000k2248 pixels )¢ (6M 2560k1440 pixels )¢ (2M 1920k1080 pixels )¢ (0.2M When the aspect ratio is [ (9M) (6M 3264k1840 pixels )¢ (3.5M 640k360 pixels ]. 2992k2992 pixels )¢ 2448k2448 pixels (3.5M )¢ 1920k1920 pixels (2.5M )¢ 1536k1536 pixels (0.2M )¢ 480k480 pixels Note • A digital picture is made of numerous dots called pixels.
Recording [Quality] For details on [Rec] Mode menu settings, refer to P44. Set the compression rate at which the pictures are to be stored. Applicable modes: · ¿ [A] Fine (when giving priority to the picture quality) [›] Standard (when using the standard picture quality and increasing the number of pictures to be recorded without changing the number of pixels) Note • The setting is fixed to [›] in [Transform], [Handheld Night Shot], [High Sens.], [Hi-Speed Burst] or [Flash Burst] in Scene Mode.
Recording [Sensitivity] For details on [Rec] Mode menu settings, refer to P44. This allows the sensitivity to light (ISO sensitivity) to be set. Setting to a higher number enables pictures to be taken even in dark places without the resulting pictures coming out dark.
Recording [White Balance] For details on [Rec] Mode menu settings, refer to P44. In sunlight, under incandescent lights or in other such conditions where the color of white takes on a reddish or bluish tinge, this item adjusts to the color of white which is closest to what is seen by the eye in accordance with the light source.
Recording Setting the White Balance manually Set the White Balance value. Use to match the condition when taking photographs. 1 Select [Ó] and then press [MENU/SET]. 2 Aim the camera at a sheet of white paper etc. so that the frame in the center is filled by the white object only and then press [MENU/SET]. • If the subject is overly bright or overly dark, you may not be able to set the White Balance. If this is the case, adjust to an appropriate brightness and then set the White Balance again.
Recording [AF Mode] For details on [Rec] Mode menu settings, refer to P44. This allows the focusing method that suits the positions and number of the subjects to be selected. Applicable modes: · ¿ [š]: Face Detection The camera automatically detects the person’s face. The focus and exposure can then be adjusted to fit the face no matter what portion of the picture it is in. (max. 15 areas) [ ]: AF Tracking Focus can be adjusted to a specified subject.
Recording ∫ About [š] (Face Detection) The following AF area frames are displayed when the camera detects the faces. Yellow: When the shutter button is pressed halfway, the frame turns green when the camera is focused. White: Displayed when more than one face is detected. Other faces that are the same distance away as faces within the yellow AF areas are also focused.
Recording [Quick AF] For details on [Rec] Mode menu settings, refer to P44. As long as the camera is held steady, the camera will automatically adjust the focus and focus adjustment will then be quicker when the shutter is pressed. This is useful when you do not want to miss a picture-taking opportunity. Applicable modes: · [ON]/[OFF] ¿ Note • The battery will be consumed faster than usual. • Press the shutter button halfway again when it is difficult to focus on the subject.
Recording [Min. Shtr Speed] For details on [Rec] Mode menu settings, refer to P44. You can take bright pictures in dark places by setting [Min. Shtr Speed] slower. Also, you can set it faster to reduce the blur of the subject. Applicable modes: · [AUTO], [1/125], [1/60], [1/30], [1/15], [1/8], [1/4], [1/2], [1] Minimum shutter speed setting 1/125 1 Brightness Darker Brighter Jitter Less More Note • This should usually be set to [AUTO] to take pictures.
Recording [Digital Zoom] For details on [Rec] Mode menu settings, refer to P44. This can enlarge subjects even more than the Optical Zoom, Extended Optical Zoom or [i.ZOOM]. Applicable modes: · ¿ [ON]/[OFF] Note • Refer to P55 for details. • The setting is fixed to [ON] in Macro Zoom Mode. [Burst] For details on [Rec] Mode menu settings, refer to P44. Pictures are taken continuously while the shutter button is pressed. Select the ones you really like from among the pictures you have taken.
Recording [Color Mode] For details on [Rec] Mode menu settings, refer to P44. Using these modes, the pictures can be made sharper or softer, the colors of the pictures can be turned into sepia colors or other color effects can be achieved. Applicable modes: ñ· [STANDARD] This is the standard setting. [Happy]¢1 Image with enhanced brightness and vividness. [NATURAL]¢2 The picture becomes softer. [VIVID]¢2 The picture becomes sharper. [B/W] The picture becomes black and white.
Recording [Red-Eye Removal] For details on [Rec] Mode menu settings, refer to P44. Applicable modes: ·¿ [ON]/[OFF] Note • Refer to P59 for details. [Stabilizer] For details on [Rec] Mode menu settings, refer to P44. Using this mode, jitter during picture taking is detected, and the camera automatically compensates for the jitter, enabling jitter-free images to be taken. Applicable modes: · [ON]/[OFF] ¿ Note • The stabilizer function may not be effective in the following cases.
Recording [Date Stamp] For details on [Rec] Mode menu settings, refer to P44. You can take a picture with date and time of recording. Applicable modes: · ¿ [W/O TIME] Stamp the year, month, and day. [WITH TIME] Stamp the year, month, day, hour, and minutes. [OFF] — Note • Date information for pictures recorded with the [Date Stamp] set cannot be deleted.
Recording Using the [Motion Picture] Mode menu [Rec Mode] For details on [Motion Picture] Mode menu settings, refer to P44. This sets up the data format of motion pictures. Applicable modes: ñ· ¿ [ [AVCHD]] • Select this format to record HD (high definition) video for playback on your HDTV using an HDMI connection. • It can be played back as is by inserting the card into a device compatible with AVCHD. Refer to the instructions of the device used for details on compatibility.
Recording [Rec Quality] For details on [Motion Picture] Mode menu settings, refer to P44. This sets up the picture quality of motion pictures. Applicable modes: ñ· ¿ When [AVCHD] is selected Item Quality (bit rate) fps 1920k1080 pixels/Approx. 17 Mbps 60i (CCD output is 30 fps) 1280k720 pixels/Approx.
Recording [Active Mode] For details on [Motion Picture] Mode menu settings, refer to P44. In addition to the optical image stabilizer, the electronic image stabilizer is used, further decreasing the jitter of the image when recording motion picture while walking, etc. Applicable modes: · ¿ [ON]/[OFF] Note • While recording motion pictures, the angle of view narrows. • Stronger effect of the correction can be achieved at the wide end.
Recording [Wind Cut] For details on [Motion Picture] Mode menu settings, refer to P44. This reduces the wind noise in the audio recording. Applicable modes: · ¿ [ON]/[OFF] Note • Sound quality will be different than usual when [Wind Cut] is set. [LED Light] For details on [Motion Picture] Mode menu settings, refer to P44. This will illuminate the subject with a lamp when taking picture in dark surrounding.
Recording Entering Text It is possible to enter babies’ and pets’ names and the names of travel destinations when recording. (Only alphabetical characters and symbols can be entered.) Display the entry screen. • You can display the entry screen via the following operations. – [Name] of [Baby1]/[Baby2] or [Pet] (P73) in Scene Mode. – [Name] in [Face Recog.] (P81) – [My Landmark] (P88) – [Location] in [Travel Date] (P94).
Playback/Editing [Playback] Mode: ¸ Playback/Editing Creating Still Pictures from a Motion Picture You can create a single still picture from a recorded motion picture. Press 3 to pause motion picture playback. Press [MENU/SET]. • Confirmation screen is displayed. It is executed when [Yes] is selected. Exit the menu after it is executed. Picture size [Motion JPEG] Picture size [HD] 2 M (16:9) [VGA]/[QVGA] 0.
Playback/Editing [Playback] Mode: ¸ Various methods to playback You can playback the recorded pictures in various methods. Press [(]. Press [MODE]. Press 3/4/2/1 to select item, and then press [MENU/SET]. Item Settings [Normal Play] (P34) All the images are played back. [Slide Show] (P118) Images are played back in sequence. [Filtering Play] (P120) Images are sorted into categories and played back. [Calendar] (P122) Images are played back by the date the picture was taken.
Playback/Editing [Slide Show] Recorded pictures can be played back in fixed intervals in order along with music. It is also possible to playback only the still pictures, only the motion pictures, only the 3D pictures, or pictures recorded with GPS function by the location names, etc., as a slide show. This method of playback is recommended when connecting to a TV and viewing the pictures. Select the group to playback by pressing 3/4, and then press [MENU/SET].
Playback/Editing ∫ Changing the slide show settings You can change the settings for Slide Show Playback by selecting [Effect] or [Setup] on the slide show menu screen. [Effect] This allows you to select the screen effects or music effects when switching from one picture to the next. [NATURAL], [SLOW], [SWING], [URBAN], [OFF], [AUTO] • When [URBAN] has been selected, the picture may appear in black and white as a screen effect. • [AUTO] can be used only when [Category Selection] has been selected.
Playback/Editing [Filtering Play] Pictures are classified into only still pictures, only motion pictures, or only 3D pictures etc., and played back. Item Description of settings [Picture Only] Only still pictures are played back. [Video Only] Only motion pictures are played back. [3D Play] Only 3D pictures are played back. • Refer to P144 for the method to playback [3D Play] pictures in 3D. It is possible to playback by selecting the location name or landmark of the place where it was recorded.
Playback/Editing ∫ About the categories to be sorted It will be sorted as following when [Category Selection] is set. Recording information e.g. Scene Modes [Face Recog.]¢ * [Portrait], [i-Portrait], [Soft Skin], [Transform], [Self Portrait], [Night Portrait], [i-Night Portrait], [Baby1]/[Baby2], [i-Baby] , [Scenery], [i-Scenery], [Sunset], [i-Sunset], [Aerial Photo] .
Playback/Editing [Calendar] You can display pictures by recording date. Press 3/4/2/1 to select the date to be played back. • If there were no pictures recorded during a month, that month is not displayed. Press [MENU/SET] to display the pictures that were recorded on the selected date. • Press [ ] to return to the calendar screen. Note • The recording date of the picture selected in the playback screen becomes the date selected when the calendar screen is first displayed.
Playback/Editing [Playback] Mode: ¸ Using the [Playback] Mode menu You can setup pictures to be uploaded to image sharing sites and perform editing like cropping recorded pictures, as well as set up the protection of recorded images, etc. • With [Text Stamp], [Resize] or [Cropping] a new edited picture is created. A new picture cannot be created if there is no free space on the built-in memory or the card so we recommend checking that there is free space and then editing the picture.
Playback/Editing ∫ Upload to the image sharing sites An upload tool built-in to the camera “LUMIX Image Uploader” is automatically copied to the card when you setup [Upload Set]. Perform the upload operation after connecting the camera to a PC (P149). For details, refer to P152. ∫ Canceling all the [Upload Set] settings Select [Upload Set] on the [Playback] Mode menu. Press 3/4 to select [CANCEL] and then press [MENU/SET]. • Confirmation screen is displayed. It is executed when [Yes] is selected.
Playback/Editing [Title Edit] You can add text (comments) to pictures. After text has been registered, it can be stamped in prints using [Text Stamp] (P127). Select [Title Edit] on the [Playback] Mode menu. (P44) Press 3/4 to select [SINGLE] or [MULTI] and then press [MENU/ SET]. [SINGLE] [MULTI] Select the picture, and then press [MENU/SET] to set. • [’] is displayed for pictures with titles already registered. [MULTI] setting Press [DISP.
Playback/Editing [Place-Name Edit] You can display other location names or landmark names as selectable candidates by searching the database in this unit using the location information of the picture when it was recorded. Location name information can be changed by overwriting with selected candidate information. Select [Place-Name Edit] from Playback menu. (P44) Press 2/1 to select a picture with [ [MENU/SET]. ] icon, and then press Press 3/4 to select item, and then press [MENU/SET].
Playback/Editing [Text Stamp] You can stamp the recording date/time, name, location, travel date, the location name or landmark name stored by the GPS function, etc., onto the recorded pictures. Select [Text Stamp] on the [Playback] Mode menu. (P44) Press 3/4 to select [SINGLE] or [MULTI] and then press [MENU/ SET]. [SINGLE] [MULTI] Select the picture, and then press [MENU/SET] to set. • [‘] is displayed on pictures already with date or text stamped. [MULTI] setting Press [DISP.
Playback/Editing Press 3/4 to select the settings, and then press [MENU/SET]. Item [Shooting Date] Setting item [W/O TIME]: Stamp the year, month and date. [WITH TIME]: Stamp the year, month, day, hour and minutes. [OFF] [ [Name] Name registered in Face Recognition will be stamped. ]: [ ]: Stamps names on pictures that already have registered name settings of [Baby1]/[Baby2] or [Pet] in Scene Mode. [OFF] [ON]: [Location] Stamps the travel destination name set under [Location].
Playback/Editing Press [ ]. Press 3 to select [OK], and then press [MENU/SET]. • Confirmation screen is displayed. It is executed when [Yes] is selected. Exit the menu after it is executed. Note • When you print pictures stamped with text, the date will be printed over the stamped text if you specify printing of the date at the photo shop or on the printer. • You can set up to 50 pictures at one time in [MULTI]. • The picture quality may deteriorate when text stamping is carried out.
Playback/Editing [Video Divide] Recorded motion picture can be divided in two. It is recommended for when you want to divide a part you need with a part you do not need. It cannot be restored once divided. Select [Video Divide] on the [Playback] Mode menu. (P44) Press 2/1 to select the motion picture to divide, and then press [MENU/SET]. Press 3 at the location to divide. • Motion picture is played back from the same location when 3 is pressed again. Press 4. • Confirmation screen is displayed.
Playback/Editing [Resize] To allow easy posting to web pages, attachment to e-mail etc., picture size (number of pixels) is reduced. Select [Resize] on the [Playback] Mode menu. (P44) Press 3/4 to select [SINGLE] or [MULTI] and then press [MENU/ SET]. Select the picture and size. [SINGLE] setting 1 Press 2/1 to select the picture, and then press [MENU/SET]. 2 Press 2/1 to select the size, and then press [MENU/SET]. • Confirmation screen is displayed. It is executed when [Yes] is selected.
Playback/Editing [Cropping] You can enlarge and then crop the important part of the recorded picture. Select [Cropping] on the [Playback] Mode menu. (P44) Press 2/1 to select the picture, and then press [MENU/SET]. Use the zoom button and press 3/4/2/1 to select the parts to be cropped. ヸ ヵ Zoom button [T]: Enlargement Zoom button [W]: Reduction 3/4/2/1: Move Press [MENU/SET]. • Confirmation screen is displayed. It is executed when [Yes] is selected. Exit the menu after it is executed.
Playback/Editing [Favorite] You can do the following if a mark has been added to pictures and they have been set as favorites. • Play back only the pictures set as favorites. ([Favorite] in [Filtering Play]) • Play back the pictures set as favorites only as a slide show. • Delete all the pictures not set as favorites. ([All Delete ExceptÜ]) Select [Favorite] on the [Playback] Mode menu. (P44) Press 3/4 to select [SINGLE] or [MULTI] and then press [MENU/ SET].
Playback/Editing [Print Set] DPOF “Digital Print Order Format” is a system that allows the user to select which pictures to print, how many copies of each picture to print and whether or not to print the recording date on the pictures when using a DPOF compatible photo printer or photo printing store. For details, ask at your photo printing store. When you want to use a photo printing store to print pictures recorded on the built-in memory, copy them to a card (P138) and then set the print setting.
Playback/Editing ∫ Canceling all the [Print Set] settings 1 Select [Print Set] on the [Playback] Mode menu. 2 Press 3/4 to select [CANCEL] and then press [MENU/SET]. • Confirmation screen is displayed. It is executed when [Yes] is selected. Exit the menu after it is executed. ∫ To print the date After setting the number of prints, set/cancel printing with the recording date by pressing [DISP.].
Playback/Editing [Protect] You can set protection for pictures you do not want to be deleted by mistake. Select [Protect] on the [Playback] Mode menu. (P44) Press 3/4 to select [SINGLE] or [MULTI] and then press [MENU/ SET]. [SINGLE] [MULTI] Select the picture, and then press [MENU/SET]. • The settings are canceled when [MENU/ SET] is pressed again. • Exit the menu after it is set. Press 2/1 to select the picture. Press 3/4/2/1 to select the pictures.
Playback/Editing [Face Rec Edit] You can delete or change the information relating to Face Recognition for the selected picture. Select [Face Rec Edit] on the [Playback] Mode menu. (P44) Press 3/4 to select [REPLACE] or [DELETE] and then press [MENU/ SET]. Press 2/1 to select the picture and then press [MENU/SET]. Press 2/1 to select the person and then press [MENU/SET]. (When [REPLACE] is selected) Press 3/4/2/1 to select the person to replace and then press [MENU/SET].
Playback/Editing [Copy] You can copy the data of the pictures you have taken from the built-in memory to a card or from a card to the built-in memory. Select [Copy] on the [Playback] Mode menu. (P44) Press 3/4 to select the copy destination and then press [MENU/ SET]. : All the picture data in the built-in memory are copied onto the card at one time. : One picture at a time is copied from the card to the built-in memory. (When [ ] is selected) Press 2/1 to select the picture and then press [MENU/SET].
Connecting to other equipment [Playback] Mode: ¸ Connecting to other equipment Playing Back Pictures on a TV Screen Playing back pictures using the AV cable (supplied) Preparations: Set the [TV Aspect]. (P51) Turn this unit and the TV off. モヷチヰヶヵチバチュリヨリヵモロ 1 Yellow: to the video input socket 2 White: to the audio input socket A Align the marks, and insert. B AV cable (supplied) • Check the directions of the connectors, and plug them straight in or unplug them straight out.
Connecting to other equipment Playing back pictures on a TV with an SD Memory Card slot The recorded still pictures can be played back on a TV with an SD Memory Card slot. Note • Depending on the TV model, pictures may not be displayed on the full screen. • Motion pictures recorded with [AVCHD] can be played back on Panasonic TVs (VIERA) with the AVCHD logo mark. In all other cases, connect the camera to the TV using the AV cable (supplied) and playback the motion picture.
Connecting to other equipment Turn the camera on and then press [(]. • Normal Playback is displayed automatically when the power is turned on by pressing and holding the [(] button. Note • Depending on the [Aspect Ratio], bands may be displayed on the top and bottom or the left and right of the pictures. • Do not use any other cables except a genuine Panasonic HDMI micro cable (RP-CHEU15; optional). Part numbers: RP-CHEU15 (1.5 m) (5 feet) • During HDMI output, no picture is displayed on the LCD monitor.
Connecting to other equipment Playback using VIERA Link (HDMI) (HDAVI Control™) What is the VIERA Link? • VIERA Link™ is a new name for EZ Sync™. • This function allows you to use your remote control for the Panasonic TV for easy operations when this unit has been connected to a VIERA Link compatible device using a HDMI micro cable (optional) for automatic linked operations. (Not all operations are possible.
Connecting to other equipment Note • To play back the audio of the motion pictures, set the [Sound] in the Slide Show setting screen to [AUTO] or [Audio]. • Operation icons are hidden, if no operation is performed for a while when the operation icons are displayed. Operation icons are displayed when one of the following buttons is pressed while the operation icons are not displayed.
Connecting to other equipment Playing back 3D pictures Playing back 3D pictures Connecting the camera to a 3D compatible television and playing back pictures taken in 3D allows you to enjoy 3D pictures for extra impact. It is also possible to playback the recorded 3D pictures by inserting an SD card into the 3D compatible television with an SD card slot. http://panasonic.jp/support/global/cs/dsc/ (This site is English only.) Preparations: Set [3D Playback] (P52) to [ ].
Connecting to other equipment Note • When a picture recorded in 3D is displayed on the LCD monitor of this unit, it is played back in 2D (conventional image). • A black screen is displayed for a few seconds when switching back and forth playback of 3D pictures and 2D pictures. • When you select a 3D picture thumbnail, it may take a few seconds for playback to start. After playback, the thumbnail display may take a few seconds to reappear.
Connecting to other equipment Saving the Recorded Still Pictures and Motion Pictures Methods to export still pictures and motion pictures to other devices will vary depending on the file format. (JPEG, MPO, AVCHD, or Motion JPEG). Here are a few suggestions.
Connecting to other equipment Copy the playback image using an AV cable File formats that can be used: [AVCHD], [Motion JPEG] Copy images played back with this unit to Blu-ray disc, DVD disc, hard disk, or video using a Blu-ray Disc Recorder, DVD recorder, or video. This can be played back with equipment that is not compatible with high definition (AVCHD), so it is convenient for distributing copies. Image will be standard quality instead of high definition at this time.
Connecting to other equipment Copying to a PC using “PHOTOfunSTUDIO” File formats that can be used: [JPEG], [MPO], [AVCHD], [Motion JPEG] It is possible to acquire still pictures and motion pictures recorded in [AVCHD] or [Motion JPEG] formats, or create conventional standard quality DVD video from the motion picture that was recorded as [AVCHD], using “PHOTOfunSTUDIO” in the CD-ROM (supplied).
Connecting to other equipment Connecting to a PC You can transfer the pictures in the camera to a PC by connecting the camera and the PC. • Some PCs can read directly from the card removed from the camera. For details, refer to the operating instructions of your PC. • If the computer being used does not support SDXC Memory Cards, a message prompting you to format may appear. (Doing so will cause recorded images to be erased so do not choose to format.
Connecting to other equipment Acquiring of still pictures and [Motion JPEG] motion pictures (other than [AVCHD] motion pictures) Preparations: Turn on the camera and the PC. Remove the card before using the pictures in the built-in memory. モヷチヰヶヵチバチュリヨリヵモロ A USB connection cable (supplied) • Check the directions of the connectors, and plug them straight in or unplug them straight out. (Otherwise the connectors may be bent out of shape which may cause malfunction.) B Align the marks, and insert.
Connecting to other equipment ∫ Viewing the contents of the built-in memory or card using the PC (folder composition) For Windows: A drive ([Removable Disk]) is displayed in [My Computer] For Macintosh: A drive ([LUMIX], [NO_NAME] or [Untitled]) is displayed on the desktop DCIM: Images 1 Folder number 2 File number 3 JPG: MOV: MPO: MISC: Still pictures [Motion JPEG] Motion pictures 3D pictures DPOF print Favorite AVCHD: [AVCHD] Motion pictures AD_LUMIX: For Upload set LUMIXUP.
Connecting to other equipment ∫ Disconnecting the USB connection cable safely • Proceed with the hardware removal using “Safely Remove Hardware” on the task tray of the PC. If the icon is not displayed, check that [Access] is not displayed on the LCD monitor of the digital camera before removing the hardware. ∫ Connection in the PTP Mode (WindowsR XP, Windows VistaR, WindowsR 7 and Mac OS X only) Set [USB Mode] to [PictBridge(PTP)]. • Data can now be read only from the card into the PC.
Connecting to other equipment Printing the Pictures If you connect the camera to a printer supporting PictBridge, you can select the pictures to be printed out and instruct that printing be started from the camera’s LCD monitor. • Some printers can print directly from the card removed from the camera. For details, refer to the operating instructions of your printer. Preparations: Turn on the camera and the printer. Remove the card before printing the pictures in the built-in memory.
Connecting to other equipment Selecting a single picture and printing it Press 2/1 to select the picture and then press [MENU/SET]. PictBridge Multi Print Select Print Press 3 to select [Print start] and then press [MENU/SET]. • Refer to P155 for the items which can be set before starting to print the pictures. • Disconnect the USB connection cable after printing. Selecting multiple pictures and printing them Press 3. Press 3/4 to select an item and then press [MENU/SET].
Connecting to other equipment Print Settings Select and set the items both on the screen in step 2 of the “Selecting a single picture and printing it” and in step 3 of the “Selecting multiple pictures and printing them” procedures. • When you want to print pictures in a paper size or a layout which is not supported by the camera, set [Paper Size] or [Page Layout] to [{] and then set the paper size or the layout on the printer. (For details, refer to the operating instructions of the printer.
Connecting to other equipment [Paper Size] Item { Description of settings Settings on the printer are prioritized. [L/3.5qk5q] 89 mmk127 mm [2L/5qk7q] 127 mmk178 mm [POSTCARD] 100 mmk148 mm [16:9] 101.6 mmk180.6 mm [A4] 210 mmk297 mm [A3] 297 mmk420 mm [10k15cm] 100 mmk150 mm [4qk6q] 101.6 mmk152.4 mm [8qk10q] 203.2 mmk254 mm [LETTER] 216 mmk279.4 mm [CARD SIZE] 54 mmk85.6 mm • Paper sizes not supported by the printer will not be displayed.
Others Others Screen Display ∫ In Recording Recording in Normal Picture Mode [!] (Initial setting) 1 Recording Mode 1 2 3 4 5 6 2 REC MODE (P111)/Recording quality (P112) 15 3 3 Picture size (P97) 14 4 Quality (P99) 5 Flash Mode (P58) 13 6 Optical Image Stabilizer (P109)/ : Jitter alert (P31) 7 Battery indication (P19) ISO 8 Focus (P32) 100 F3.
Others ∫ In Recording (after settings) 16 17 18 19 20 16 Spot AF area (P103) 21 B/W 17 Wind Cut (P114) 37 22 18 Motion Deblur (P40) 36 19 White Balance (P101) 23 35 20 Color Mode (P108) 24 34 21 AF Macro Mode (P61) 3s 33 : Macro Zoom Mode (P61) 25 32 22 Burst (P107)/ : Auto Bracket (P64) 1 23 GPS (P85) 31 24 Histogram (P48) 30 29 28 27 26 25 Intelligent Exposure (P105) 26 Number of days that have passed since the departure date (P94) Name¢2 (P73) 27 Minimum shutter speed (P106) 28 Self-timer Mode (P62) 29
Others ∫ In Playback 1 2 3 4 5 6 7 8 1 Playback Mode (P117) 2 Protected picture (P136) B/W 1/3 3 Favorites (P133) 19 1 18 100-0001 4 Date/Text stamped display (P110, 127) 3s 17 5 Color Mode (P108) 16 6 Picture size (P97) 7 Quality (P99) 15 8 Battery indication (P19) 9 Picture number/Total pictures 10:00 DEC. 1.
Others Cautions for Use (Important) About the waterproof/dustproof and anti-shock performance of the camera • This camera has a waterproof/dustproof function equivalent to "IP68". It is possible to take pictures in 12 m (40 feet) depth for 60 minutes.¢1 ¢1 This means that the camera can be used underwater for specified time in specified pressure in accordance with the handling method established by Panasonic. This does not guarantee no destruction, no malfunction, or waterproofing in all conditions.
Others Optimal use of the camera Keep this unit as far away as possible from electromagnetic equipment (such as microwave ovens, TVs, video games etc.). • If you use this unit on top of or near a TV, the pictures and/or sound on this unit may be disrupted by electromagnetic wave radiation. • Do not use this unit near cell phones because doing so may result in noise adversely affecting the pictures and/or sound.
Others Cleaning Before cleaning the camera, remove the battery or the DC coupler (optional), or disconnect the power plug from the outlet. Then wipe the camera with a dry soft cloth. • When the camera is soiled badly, it can be cleaned by wiping the dirt off with a wrung wet cloth, and then with a dry cloth. • Do not use solvents such as benzine, thinner, alcohol, cleanser, kitchen detergents, etc., to clean the camera, since it may deteriorate the external case or the coating may peel off.
Others Battery The battery is a rechargeable lithium ion battery. Its ability to generate power comes from the chemical reaction that takes place inside it. This reaction is susceptible to the surrounding temperature and humidity. If the temperature is too high or too low, the operating time of the battery will become shorter. Always remove the battery after use. • Place the removed battery in a plastic bag, and store or carry away from metallic objects (clips, etc.).
Others About 3D ∫ About 3D viewing Anyone who is hypersensitive to light, suffers from heart disease or is otherwise unwell should avoid viewing 3D pictures. • Doing so may have an adverse affect on such medical conditions. If you feel tired, uncomfortable or otherwise strange when viewing 3D pictures, stop viewing at once. • Continuing to view may cause illness. • Please rest appropriately after stopping the viewing. When viewing 3D pictures, we recommend taking a break every 30 to 60 minutes.
Others Card Do not leave the card where the temperature is high, where electromagnetic waves or static electricity are easily generated or exposed to direct sunlight. Do not bend or drop the card. • The card may be damaged or the recorded content may be damaged or deleted. • Put the card in the card case or the storage bag after use and when storing or carrying the card. • Do not allow dirt, dust or water to get into the terminals on the back of the card and do not touch the terminals with your fingers.
Others When not using the camera for a long period of time • Store the battery in a cool and dry place with a relatively stable temperature: (Recommended temperature: 15 oC to 25 oC (59 oF to 77 oF), Recommended humidity: 40%RH to 60%RH) • Always remove the battery and the card from the camera. • If the battery is left inserted in the camera, it will discharge even if the camera is turned off.
Others Important! Be sure to read the following before using the location names that are stored in this product. User License Agreement for Location Name data Personal Use Only. You agree to use this data together with this digital camera for the solely personal, non-commercial purposes for which you were licensed, and not for service bureau, time-sharing or other similar purposes.
Others Disclaimer of Warranty: PANASONIC CORPORATION AND ITS LICENSORS (INCLUDING THEIR LICENSORS AND SUPPLIERS) DISCLAIM ANY WARRANTIES, EXPRESS OR IMPLIED, OF QUALITY, PERFORMANCE, MERCHANTABILITY, FITNESS FOR A PARTICULAR PURPOSE OR NON-INFRINGEMENT. Some States, Territories and Countries do not allow certain warranty exclusions, so to that extent the above exclusion may not apply to you.
Others Notices related to licensed software copyright holders © 2010 NAVTEQ. All rights reserved. This service uses POI (Points Of Interest) of ZENRIN CO., LTD. “POWERED BY ZENRIN” is a trademark of ZENRIN CO., LTD. © 2011 ZENRIN CO., LTD. All rights reserved. © Her Majesty the Queen in Right of Canada, © Queen’s Printer for Ontario, © Canada Post Corporation, GeoBase®, © Department of Natural Resources Canada, © United States Postal Service® 2009, USPS®, ZIP+4® Australia Copyright.
Others ∫ Landmark types The following points of interest, such as tourist spots and public facilities, are displayed as landmarks. • About 1,000,000 landmarks are registered, but some landmarks are not registered. (Current as of December 2010. Will not be updated.
Others Message Display Confirmation messages or error messages will be displayed on the screen in some cases. The major messages are described below as examples. [GPS feature is not available in this region.] • The GPS may not operate in China or close to the Chinese border in neighbouring countries. (As of December 2010) [This picture is protected] > Delete the picture after canceling the protect setting.
Others [Memory card error. This card cannot be used in this camera. Format this card?] • It is a format that cannot be used with this unit. > Insert a different card. > Format the card again with the camera after saving necessary data on a PC etc. (P53) Data will be deleted. [Please turn camera off and then on again]/[System Error] • This message will be displayed when the lens did not operate properly. > Turn the camera off and on.
Others [Cannot record due to incompatible format(NTSC/PAL) data on this card.] > If you want to delete some pictures, format the card after saving necessary data on a PC etc. (P53) > Insert a different card. [A folder cannot be created] • A folder cannot be created because there are no remaining folder numbers that can be used. > Format the card after saving necessary data on a PC etc. (P53) If you execute [No.Reset] in the [Setup] menu after formatting, the folder number is reset to 100.
Others Troubleshooting First, try out the following procedures (P174–185). If the problem is not resolved, it may be improved by selecting [Reset] (P50) on the [Setup] menu when taking pictures. Battery and power source The camera cannot be operated even when it is turned on. The camera turns off immediately after it is turned on. • The battery is exhausted. Charge the battery. • If you leave the camera on, the battery will be exhausted. > Turn the camera off frequently by using the [Economy] Mode etc.
Others About the GPS Positioning is not possible. • [GPS Setting] is set to [OFF]. (P84) • Radio waves from GPS satellites may not be received depending on the recording environment, such as indoors or close to a building. (P83) > It is recommended to use by holding the camera still for a while at an outdoor location clear to the sky, with the antenna pointed upward. GPS status indicator is lit while the power is turned off. • [GPS Setting] is set to [ON].
Others Recording The picture cannot be recorded. • Is the mode set to Recording Mode? (P29) • Is there any memory remaining on the built-in memory or the card? > Delete the pictures which are not necessary to increase the available memory. (P42) • You may not be able to record for a short while after turning the power on when using a large capacity card. The recorded picture is whitish. • The picture can become whitish if there is dirt e.g. fingerprints on the lens.
Others The recorded picture is blurred. The Optical Image Stabilizer is not effective. > The shutter speed becomes slower when pictures are taken in dark places so hold the camera firmly with both hands to take the pictures. (P31) > When taking pictures at a slow shutter speed, use the Self-timer. (P62) Taking pictures using Auto Bracket is not possible. • Is there any memory remaining on the built-in memory or the card? The recorded picture looks rough. Noise appears on the picture.
Others Motion Picture Recording stops in the middle. • Use a card with SD Speed Class with “Class 4” or higher when recording motion pictures in [AVCHD]. Also, use a card with SD Speed Class with “Class 6” or higher when recording motion pictures in [Motion JPEG]. • Depending on the type of the card, recording may stop in the middle.
Others LCD monitor The LCD monitor becomes darker or brighter for a moment. • This phenomenon appears when you press the shutter button halfway to set the aperture value and does not affect the recorded pictures. • This phenomenon also appears when the brightness changes when the camera is zoomed or when the camera is moved. This is because of operation of the automatic aperture of the camera, and it is not a malfunction. The LCD monitor flickers indoors.
Others Flash The flash is not activated. • Is the flash setting set to [Œ]? > Change the flash setting. (P58) • Flash Mode is not available when Auto Bracket (P64) or [Burst] (P107) in the [Rec] Mode menu has been set. Flash is activated several times. • The flash is activated twice when Red-Eye Reduction (P58) has been set. • Has [Flash Burst] (P75) in Scene Mode been set? Playback The picture being played back is rotated and displayed in an unexpected direction. • [Rotate Disp.
Others White round spots like soap bubbles appear on the recorded picture. • If you take a picture with the flash in a dark place or indoors, white round spots may appear on the picture caused by the flash reflecting of particles of dust in the air. This is not a malfunction. A characteristic of this is that the number of round spots and their position differ in every picture. Red part of the recorded image has changed color to black.
Others TV, PC and printer The picture does not appear on the television. • Is the camera connected to the TV correctly? > Set the TV input to External Input Mode. The display areas on the TV screen and the camera’s LCD monitor are different. • Depending on the TV model, the pictures may be extended horizontally or vertically or they may be displayed with their edges cut off. The motion pictures cannot be played back on a TV.
Others The card is not recognized by the PC. (The built-in memory is recognized.) > Disconnect the USB connection cable. Connect it again while the card is inserted in the camera. The card is not recognized by the PC. (SDXC memory card is used) > Check if your PC is compatible with SDXC memory cards. http://panasonic.net/avc/sdcard/information/SDXC.html > A message prompting to format the card may be displayed when connecting, but do not format.
Others Others [Precautions] is displayed repeatedly whenever the power is turned on. • Press [MENU/SET] after viewing the last screen (12/12) of the [Precautions]. For details, refer to P9. An unreadable language was selected by mistake. > Press [MENU/SET], select the [Setup] menu icon [ ]. Then press [MENU/SET], and then select the [~] icon to set the desired language. (P53) White lamp may come on when the shutter button is pressed halfway.
Others The lens clicks. • When the brightness changes due to zoom or camera movement etc., the lens may click and the picture on the screen may drastically change. However, the picture is not affected. The sound is caused by the automatic adjustment of the aperture. This is not a malfunction. The clock is reset. • If you do not use the camera for a long time, the clock may be reset. > [Please set the clock] message will be displayed; please re-set the clock.
• SDXC Logo is a trademark of SD-3C, LLC. • The “AVCHD” and the “AVCHD” logo are trademarks of Panasonic Corporation and Sony Corporation. • Manufactured under license from Dolby Laboratories. Dolby and the double-D symbol are trademarks of Dolby Laboratories. • HDMI, the HDMI Logo, and High-Definition Multimedia Interface are trademarks or registered trademarks of HDMI Licensing LLC in the United States and other countries. • HDAVI Control™ is a trademark of Panasonic Corporation.