PTO-Driven 6" Wood Chipper OWNER’S MANUAL Read carefully and understand RULES FOR SAFE OPERATION and instructions before operating. Failure to follow the safety rules and other basic safety precautions may result in serious personal injury.
Thank you very much for choosing a NORTHERN TOOL + EQUIPMENT CO., INC., Product! For future reference, please complete the owner’s record below: Model: _______________ Purchase Date: _______________ Save the receipt, warranty and these instructions. It is important that you read the entire manual to become familiar with this product before you begin using it. This machine is designed for certain applications only.
WORK AREA Keep everyone — especially children — away from the area of operation. Anyone who has not read this manual and received instructions from a qualified person should not be in the area. Provided labels on the unit advise the user of proper hitch dimensions and maximum safe operating speed. Check that proper danger labels are supplied with the drive-line (replacements are available from your drive-line supplier).
Never leave the chipper running unattended. Do not attempt alterations, repairs, or adjustments while the chipper head is turning. Always disconnect the PTO and stop the motor. ALWAYS make sure the feed roll drive-shaft and pivots are properly lubricated. ALWAYS make sure the feed roll clutch is properly lubricated and the clutch releases when the handle is pushed toward the chute. ALWAYS make sure the PTO shaft does not come apart or bottom out during the normal lifting range.
On drive-lines with torque limiting or overrunning devices, specify that the device be positioned on the end of the drive-line by the implement. For implement connections which require bolts or set screws, select and/or supply hardware which minimizes protrusions. For tractor PTO shaft connections, specify a safety type yoke (twist or slide collar) to minimize protrusions. Provide a proper clearance zone for the operation of the drive-line to avoid damaging the shielding components.
1. The chipper is a flywheel-and-knife type of chipper, not a shredder. The blades actually chip the limbs as they are fed into the head. The blades must be sharp to operate properly. Dirt, rocks, nails, or other foreign material will shorten blade life. 2. Before operating the chipper, review the machine checklist. After turning the chipper by hand and making sure there are no obstructions in the head, start the tractor and raise the chipper until the PTO shaft is within 15 degrees of straight. 3.
the lock washers and flat washers. 11. Do not operate the unit without the deflector in place. 12. Before stopping the chipper, be sure the all of the material is out of the head and out of the feed roll. 13. All of the material in the chute must be gone or the unit could jam on a small piece of material. This can usually be cleared by turning the unit backwards by hand. 14. To replace the blades, take the PTO shaft out of gear, then turn off the tractor.
WARNING: Always stop the PTO, turn off the engine and remove the key before performing any inspection, maintenance, adjustments or cleaning. Lubricate: PTO shaft — 2 zerks on universals once a day with multipurpose grease. Slip Joint — Lubricate with multi-purpose grease. Feed roll pivot — 2 zerks on underside of chute end. Multipurpose grease every 4 to 8 hours of operation.
Symptom Head slows but tractor does not Feed roll clutch kicking in and out of gear excessively Problems Solution Main drive belts are slipping Tighten Blades dull Sharpen/reverse Blades dull Sharpen/reverse Material jammed in chute Release feed roll clutch and remove material by pulling cut of chute, trim forks, and feed into chute Blades dull Sharpen/reverse Sharpen reverse Not chipping clean or chip reflector plugging Cutter bar rounded Cutter bar not adjusted properly-adjust to toleranc
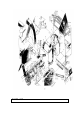
PARTS LIST
NO. DESCRIPTION NO. DESCRIPTION 1 Bolt 8×18 43 Chipper blade 2 Washer 8 44 Flywheel 3 Washer 8 45 Key C6*20 4 Gearbox mounting plate 46 Main shaft assembly 5 Bolt 6×90 47 Key C10*50 6 Bolt 8×25 48 Little around plate 7 Release hand seat 49 Outer protective cover assembly 8 Nut 6 50 Front supporting plate 9 Nut 8 5l Rear cover 10 Worm reduction gear WPR40 30 1II 52 Bolt 6×12 11 Key 4X 20 53 Bolt M14×1.
85 Bearing seat shim 90 Washer 12 86 Bearing seat adjust screw 91 Rear plate 87 Drive shaft 92 Driving pulley of W.R.G 88 Nut M10 93 Belt 89 Side plate 94 Driving pulley of W.R.G WARNING Some dust created by power sanding, sawing, grinding, drilling, and other construction activities contains chemicals known to the State of California to cause cancer, birth defects or other reproductive harm.