Portable Stereo CD System !"#CD ! ‰UI½ u¹d²Ý≈ W− b U½«uDÝ≈ ÂUE½ Operating Instructions !" qOGA² « Model No. «œUý—≈ RX-ES27 RX-ES22 Before connecting, operating or adjusting this product, please read these instructions completely. Please keep this manual for future reference. !"#$%&'()*+,-./012 !"#$%&'()*+,-.
DearDear Customer Customer Thank you for purchasing this product. For optimum performance and safety, please read these instructions carefully. Table of Contents Inside of product ! Z²M*« qš«œ N o te o n A C p o w e r s u p p ly c o r d ( F o r S a u d i A r a b ia a n d K u w a it o n ly ) !"#$%&'()*+,-./0123456789 WOÐdF « WJKLLK ® œœd²*« —UO² « eON& qÐU" ’uB Ð WCŠö©jI5 X¹uJ «Ë W¹œuFF « Before use ! «b ²Ýô« q³ Remove the connector cover.
!" Dear Customer !"#$%& !"#$%&'()*+,-./012 e¹eF « UM½uГ ÆZ²M*« «c¼ pz«dA ö¹eł Î Î «dJý «œU?ý—ù« Ác?¼ …¡«d vłd¹ ¨q¦$_« ¡«œ_« vKŽ ‰uB(«Ë ÊU$_« qł√ s$ ÆW¹UMFÐ U¹u²;« ‰Ëbł ! .......................................................................................... 5 ! .......................................................................................... 5 !" ...................................................................................... 5 .......................
A 7 A Supplied Accessories a Remote control transmitter (EUR648251) ............................ 1 pc. b AC power supply cord .......................................................... 1 pc. c AC plug adaptor .................................................................. 1 pc. d Batteries for remote control ............................................... 2 pcs. Please check and identify the supplied accessories. a Note b The included AC power supply cord is for use with this unit only.
A ! WI d*« UI×K*« A !"#$%&'()*+ (EUR648251) ............................................................ 1 WFD# ± .................................. (EUR648251) bFÐ sŽ rJײ « tłu! !" ............................................................................ 1 !"#$ .................................................................... 1 !" ............................................................................
7 7 Power Sources A 1 A VOLT ADJ 110 – 127V OFF 2 7 ○ ○ ○ VOLT ADJ 110 – 127V OFF 220– 240V OFF ○ ○ ○ ○ OFF 110-127 V ○ ○ ○ ○ ○ ○ a flat head screwdriver to turn [VOLT ADJ] to 1 Use ■ the voltage setting for your area. 2 Connect the AC power supply cord. ■ VOLT ADJ 110 – 127V 220– 240V ○ a).
A 1 ■ 2 ■ …—bI « —œUB !"#$%&'!" œœd²*« —UO² « …—b vKŽ “UN'« qOGAð !"#$%&' [VOLT ADJ] ( !"#$%&'()*+,-. !) W?¾?O?Nð v? ≈ [VOLT ADJ] …—«œù ”√d? « `?D?#? p?H? Âb?<²Ý≈ Æp²IDM w' WO² uH « !"#$%& !"#$%&'()*+",-. !"#$%&'()*( ) ( ). a Æœœd²*« —UO² « …—b pKÝ qO>u²Ð r B !"#$% &'()*+ ! "#$%&' ()*+,-./ !"#!$%&' ()*+,- C !" a) ÎU¹—Ëd{ ÊUE «–≈ ©o'd ® fÐUI « T¹UN ∫X¹uJ «Ë W¹œuF « WOÐdF « WJKL*« «bŽ U oÞUMLK .
Location of Controls A 7 A 1 2 3 4 Basic controls Number Designation 1 Standby/on switch ( Reference Page /I ) Press to switch the unit from on to standby mode or vice versa. In standby mode, the unit is still consuming a small amount of power. 2 Preset equalizer button (PRESET EQ) ..................... 32 3 Play timer/record timer button (˚ PLAY/REC) ............................................................ 34 4 Clock/timer button (CLOCK/TIMER) ..................
! A rJײ « `OðUH l u ! WOÝUÝ_« rJײ « 1 / E ! /I F !"#$%&' &()*+&,-"./012+&, !"#$%&'()* 2 !"# (PRESET EQ) ................................................... 33 3 ! "#$% (˚ PLAY/REC) ...................................... 35 4 ! "# (CLOCK/TIMER) ..................................... 13, 35 5 RX-ES27 !" ( ) ! AC !"#$%&'()*+,-.#/012 !"# RX-ES22 ! "#$ ( /I) !"#$%&'()*+, AC !"#$% AC !"#$%&'()*+ !"#$%&' 6 !" (+, – VOLUME) ........
The Remote Control A 7 A ¤ § SLEEP TIMER FADER DISPLAY 1 2 3 4 5 6 ≥10 7 8 9 0 FM MODE/BP C RESET RANDOM REPEAT PRESET EQ TUNER CD Number ‹ 1 PGM/-CLEAR 14 ≥ ª • TAPE › 12 2 22 17 , 23 º ⁄ S.VIRTUALIZER REW fi 11 FF fl AUTO SCAN PRESET TUNE CD SKIP – VOLUME ‡ + Buttons 6 Designation Reference Page § Sleep timer button (SLEEP) ....................................... 36 ≥ Numbered buttons ..........................................
A § ≥ • ª º ⁄ ¤ ‹ › fi fl ‡ bFÐ sŽ rJײ « tłu —«—“_« ! !"# (SLEEP) ........................................................... PT ......................................................................... 17, 21, 23 FM !"#$% (FM MODE/BP) ............................ 15, 31 !"#$% (C-RESET) ................................................ 25 !"# (S.VIRTUALIZER) ........................................... 33 !" (AUTO SCAN) ................................................
3 7 1 7 Setting the Clock 4 2 •7 7 This is a twenty-four hour clock. The example shows how to set the clock to 13:30. 1 Press [ /I ] to turn the unit on. ■ 2 Press [CLOCK/TIMER] to select “CLOCK”. ■ Each time you press the button: CLOCK ON ˚PLAY Original display ˚PLAY OFF ˚REC OFF 3 Turn [TIME/PRESET TUNE ■ ON ˚REC Within 10 seconds 1 7 2 7 ○ ○ ○ 3 7 ○ ○ ○ CD SKIP ] to set the time. 4 Press [CLOCK/TIMER] to start the clock. ■ The original display is restored shortly after.
! 24 WŽU « j³{ !" ÆWŽUÝ ≤¥ XO uð ÂUEMÐ WŽUÝ Ác¼ Ʊ≥∫≥∞ v ≈ WŽU « W¾ONð WOHO ‰U¦*« `{u¹ !"#$%&'()"13 30 1 [ /I ] !"#$ ■ [ C L O C K / T I M E R 2 ■ “CLOCK” ÆqOGA² « l{Ë v ≈ “UN'« …—«œù [ !" #$] ! Æ“CLOCK” —UO²šô [CLOCK/TIMER] jG{≈ ∫—e « UNO jGC¹Ô …d q w !"#$%&'()*+, ˚PLAY OFF CLOCK ON ˚PLAY ˚PLAY OFF ˚REC OFF ON ˚REC ON ˚PLAY ˚REC OFF 3 [TIME/PRESET TUNE ■ ON ˚REC w½«uŁ ±∞ ‰öš w CD SKIP ] —Ëœ Ò ! CD SKIP ] ! ÆW?ŽU « ¡b³ [CLOCK/TIME
3 7 A 2 7 1 7 The Radio Preparation: (when using batteries) Press [ A /I ]. Normal tuning 1 Press [TUNER BAND] to select “FM” or “AM”. ■ (Unit comes on when using AC power.) Each time you press the button: AM ↔ FM 7 Q ] or [ R /+/FF ] to select a [ REW/–/Q 2 Press ■ station.
!"#$%& [ A u¹œ«d « /I ] .[ /I ]—e « jG{« © U¹—UDÐ ‰ULF²Ý« bMŽ® ∫dOCײ « ! [TUNER BAND 1 ■ AM !"#$] !"FM 2 ■ 3 [+, – VOLUME ■ FM ↔ AM ∫—e « UNO jGCð …d q w Q ] [ R/+/FF ] !"#$%& [ REW/–/Q B FM !"#$%&'“ Æ“AM” Ë« “FM” —UO²šô [TUNER BAND] jG{≈ ©AC œœd² —UOð ‰ULF²Ý« bMŽ “UN'« qG²A¹® !"#$%&'()*+,-./ !"#$%&'()*+, AM ↔ FM Q ] jG{≈ ÆU WD× —UO²šô [ R/+/FF ] Ë√ [ REW/–/Q .
2 1 •7 2 7 7 A The Radio Preparation: (when using batteries) Press [ /I ]. Preset tuning Tuning is simpler if you preset stations. You can preset 12 FM and 12 AM stations. A SLEEP TIMER FADER DISPLAY 1 7 2 7 ○ ○ ○ 2 7 1 2 3 4 5 6 ≥10 7 8 9 0 Preparation: Tune to the station you want to preset. (\ page 14) 1 7 PGM/-CLEAR Presetting radio stations 1 Press [•MEMORY CLEAR]. ■ 2 Turn [TIME/PRESET TUNE ■ * While “ ” is flashing CD SKIP ] to select a channel and press [•MEMORY *CLEAR].
u¹œ«d « !"#$%& [ .[ /I ] ! j³C « WI³ *« WH «u*« !"#$%&'()*+ !"12 FM 12 AM A Æ UD×LK o³ *« j³C UÐ XL «–≈ j Ð√ nO u² « ÊuJ¹ ÆAM WD× ±≤ Ë FM W?D?×? ±≤ œbF o³ *« j³C UÐ ÂuIð Ê√ pMJ1 !"#$ u¹œ«d « !"#$%&' (\ 15 1 [•MEMORY CLEAR ■ 2 [TIME/PRESET TUNE ■ * “ /I ] —e « jG{« © U¹—UDÐ ‰ULF²Ý« bMŽ® ∫dOCײ « ” !"# [•MEMORY * !"#$] .
CDs 2 7 TAPE ⁄ CD 1 Press [0 CD] to open the tray. ■ (The unit comes on.) Load a CD and press [0 CD] to close the tray. 2 Press [6 CD] to start play. ■ 3 Press [ +, – VOLUME] to adjust the volume. ■ Plays to the end of the CD and stops. To stop play 3 7 Press [L TAPE/CD]. 1 7 One touch play (When using AC power) When a CD is loaded, press [6 CD]. The unit comes on and play starts. To pause play 1 7 Press [6 CD] during play. Press again to resume play.
CD W− b*« 1 [0 CD CD ■ !"#] !"#$%& CD [0 CD CD 2 [6 CD] ■ !CD ÆWOMOB « `²H [0 CD] jG{≈ ©“UN'« qG²A¹® !"#] !"# ÆWOMOB « ‚öžô [0 CD] jG{«Ë CD W− b W½«uDÝ« l{ !"#$ !" ÆŸUL²Ýù« ¡b³ [6 CD] jG{≈ #$% 3 [ +, – VOLUME ■ !"#$ !"#] Æn u²¹Ë W− b*« W½«uDÝ≈ W¹UN½ v ≈ ŸUL²Ýù« r²¹ !"#$ Æ uB « …—UNł Èu² j³C [ +, – VOLUME] jG{≈ !"# ŸUL²Ýù« ·UI¹ù [L TAPE/CD !"CD ] U½«uDÝù« .
CDs Other modes of play SLEEP TIMER FADER DISPLAY ! Numbered buttons WOL d « —«—“_« 1 7 1 2 3 4 5 6 ≥10 7 8 9 0 RANDOM REPEAT FM MODE/BP C RESET PRESET EQ TAPE TUNER Remote control only A REPEAT FF Direct access play Starts play from a selected track Select the track with the numbered buttons. ≥10], then the two digits. For two-digit tracks, press [≥ 2 7 CD S.VIRTUALIZER REW A 7 Preparation: Press [L] to switch to CD mode.
CD W− b*« !"# [ ] U½«uDÝù« ŸUL²Ýû Èdš_« ŸU{Ë_« !"CD ∫dOCײ « !"#$% U½«uDÝù« l{Ë v ≈ ‰uײK [L] jG{≈ ÆW?−? b?*« jI bFÐ sŽ rJײ « tłu A !"# !"#$%&'()* A dýU³*« ‰uu UÐ ŸUL²Ýù« Æ—U²<« —U *« s ŸUL²Ýô« √b³¹ !"#$%&'( !"#$%10 ≥10] !"#$% [≥ !"#$%&' ÆWL d*« —«—“_UÐ —U *« d²š≈ Æ5L d « rŁ ¨[≥10] jG{« ¨5L — s ÊuJ²ð w² « B ! !"#$%&'() B —dJ²*« ŸUL²Ýù« Æ…—dJ² …—uBÐ ŸUL²Ýû «—U LK ! "#$% [REPEAT ] «—U *« q Ë√ bŠ«Ë —U qGA¹
TAPE ⁄ CD CDs 3 1 7 2 7 7 Program play Select up to 36 tracks to play in the order you choose. On the main unit Preparation: Press [ 1 7 [TIME/PRESET TUNE 1 Turn ■ the track. 2 Press [•MEMORY CLEAR]. ■ Play time ! ŸUL²Ýù« X Ë Track number ! —U *« r — TAPE/CD] to switch to CD mode. CD SKIP ] to select * Repeat step ■ 1 and ■ 2 to program other tracks.
CD W− b*« !" U½«uDÝù« ∫Z d³*« ŸUL²Ýù« !"36 !"#$%&'()* ÆÁb¹dð Íc « VOðd² « w UNŽUL Ϋ—U ≥∂ v²Š d²š≈ !" [ 1 ■ 2 ■ w Ozd « “UN'« vKŽ TAPE/CD !"CD ] =xqfjbLmobpbq=qrkb= =xqfjbLmobpbq=qrkb= `a=phfm [•MEMORY *CLEAR ■ 1 ■ 2 !"CD z= z= !" !"#$] ∫dOCײ « ÆW− b*« U½«uDÝù« l{Ë v ≈ ‰uײK [L TAPE/CD] jG{≈ Æ—U *« —UO²šô [TIME/PRESET TUNE ÆÈdš« [ 6 CD] !"#$% [ ] ] —Ëœ Ò .
Cassettes TAPE ⁄ CD 1 7 2 7 3 7 REW 1 Press [0 DECK] to open the deck. ■ (The unit comes on.) Load a cassette and close the deck by hand. 2 Press [ : TAPE] to start play. ■ 3 Press [+, – VOLUME] to adjust the volume. ■ To stop play Press [L TAPE/CD]. 1 7 One touch play (When using AC power) When a cassette is loaded, press [: TAPE]. The unit comes on and play starts.
U²OÝUJ « 1 [0 DECK ■ !] !" Æ„b « `²H [0 DECK] jG{≈ !"#$%& !"#$%&'()* ©“UN'« qG²A¹® ÆbO « WDÝ«uÐ „b « oKž«Ë XOÝU j¹dý l{ 2 [ : TAPE !"] !"#$ ■ ! ] !"#$ 3 [+, – VOLUME ■ ÆŸUL²Ýù« ¡b³ [ : TAPE] jG{≈ Æ uB « …—UNł Èu² j³C [+, – VOLUME] jG{≈ ŸUL²Ýù« ·UI¹ù !"# Æ[7 TAPE/CD] jG{≈ [L TAPE/CD !"CD ] ©œœd²*« —UO² « …—b «b ²Ý≈ bMŽ® …bŠ«Ë W LKÐ ŸUL²Ýù« Æ[3 TAPE] jG{≈ ¨XOÝU qOL% bMŽ ÆŸUL²Ýù« √b³¹Ë qOGA² « l{Ë v ≈ “UN'« ‰uײ¹ !"#$ !"#$%&' !"#$%
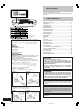
A 7 Tips on Recording To protect tapes against further recording !"#$%& j¹dA « vKŽ Èdš√ öO− ð lM* Side A A A V½Uł A Erasure prevention The illustration shows how to remove the tabs to prevent recording. To record on the tape again, cover as shown.
!" A qO− ² « vKŽ !"#$ ` *« lM !"#$%&'()*+,-./0,-1234,-56/ !"#$%&' B !" öO− ² « ` !] 2 [L TAPE/CD 3 [a/ J] ! !"# $%&"' !"CD ] !"#$%&'( ÊuJ¹ YO×Ð XOÝUJ « j¹dý qšœ« rŁ „b « `²H [0 DECK] jG{≈ ÆvKŽô« ÁU&UÐ t× œ«d*« V½U'« 1 .
Recording CDs 3 7 7 7 4 ALL-REC 2 7 1 Records the whole CD or selected tracks. When the tape finishes before CD, recording and CD pauses for you to resume recording on the opposite side. Preparation: Insert a CD (\ page 18). 1 Press [L TAPE/CD] to switch to CD mode. ■ 2 Press [CD REC MODE] to display “ALL-REC”. ■ Each time you press the button: ALL-REC 2 7 ○ ○ OFF The display shows the tape length needed. “C – – – –” indicates the tape needed exceeds 100 minutes.
CD W− b*« ALL-REC !"# !CD !"#$%&'()*+CD !"#$CD !"#$%&'()*+,-./'(0 CD \ 19 1 [L TAPE/CD !"CD ] !"CD ■ [ CD REC MODE CD !"] !" 2 ■ ALL-REC !"#$% !"#$%&'()*+, !"# $%&'()*+,“C – – – –” !"#$%&'()100 !"#$% !"#$%&'"#()*+,$-.
A Recording CDs 2 3 4 7 1 7 7 7 A 1-REC Records a selected track from the CD and stops. Preparation: Insert a CD (\ page 18) and a cassette (\ page 24). Wind the tape on to where you want to start recording. 1 7 2 7 ○ ○ ○ 3 7 ○ ○ ○ 1 Press [L TAPE/CD] to switch to CD mode. ■ 2 Press [CD REC MODE] to display “1-REC”.
CD A W− b*« !"# 1-REC CD Æ©≤µ W×H 1 [L TAPE/CD !"CD ] !"CD ■ [ CD REC MODE CD !"] !" 2 ■ “1-REC !"#” ∫dOCײ « ® XOÝU Ë ©±π W×H ® W− b W½«uDÝ≈ qšœ√ ÆqO− ² « √b³ð Ê√ b¹dð YOŠ v ≈ j¹dA « n ÆW− b*« W½«uDÝù« l{Ë v ≈ ‰uײK [ ∫—e « UNO jGC¹Ô …d q w OFF —U *« —UO²šô [TIME/PRESET TUNE 3 ■ 4 [a/ J] ■ CD SKIP ] !"CD CD SKIP ] —Ëœ Ò ÆtKO− ð b¹dð Íc « ÆX u « fH½ w qO− ² «Ë W− b*« W½«uDÝû ŸUL²Ýù« √b³¹ qO− ² « ·UI¹ù !"#$CD !"#$%&'() [
A 7 A Sound Quality PRESET EQ a XBS: Adds punch to rock b Clear: Clarifies higher sounds c Soft: For background music d Vocal: Adds gloss to vocals You can choose one of four types of sound quality. Press [PRESET EQ] to select a setting. Each time you press the button: a XBS b Clear c Soft d Vocal EQ-OFF (cancelled) Note Changes to sound quality do not affect recordings.
A A uB « WOŽu½ !"#$%&'() a XBS: !"#$%&'( b !"#$ c !"#$%&'() d !"#$%& a b c d Æ uB « WOŽuM Ÿ«u½√ WFЗ√ 5Ð s bŠ«Ë Ÿu½ —U² ð Ê√ pMJ1 „Ëd « vIOÝu* …u nOC¹ ∫XBS WO UF « «u_« `{u¹ ∫ÒvKł WOHK)« vIOÝu qł√ s W¾ON² « Ác¼ Âb ²Ý≈ ∫ÊuMŠ uB qIB « s Ϋb¹e nOC¹ ∫¡UMž 5ÐdD*« [PRESET EQ !"#$] !"#$%& !"#$%&'()*+, ÆU W¾ONð —UO²šô [PRESET EQ] jG{≈ ¡UMž d ÊuMŠ c —e « UNO jGCÔ¹ …d q w wKł Ò b XBS a ©¡UG ≈® EQ-OFF !"#$%&'( ÅWEŠö Å Æ öO− ² « vKŽ B !"
5 7 3 1 •7 2 •7 7 2 •7 3 7 4 7 2 1 The Play and Record Timer 2 You can set the timer to come on at a certain time to wake you up (play timer) or to record a radio station (record timer). 1 Preparations: Turn the unit on and set the clock. (\ page 12) • For play timer, prepare the music source (tape/CD/radio) for listening, and set the volume. • For record timer, check the cassette’s erasure prevention tab (\ page 26: ■ A ) and load the cassette with the side for recording facing up.
! "#$ qO− ² «Ë ŸUL²Ýô« X R !""#$%&'()"*#+, -./"#0123456 !"#$%&'( !"#$%&'\ 13 • !" !"#$%&'&()*&+LCDL !" !"# A !" • !" !"#$%&'()\ 27 ■ !"#$ %&'()*+,-.
The Play and Record Timer A 7 To check the settings (when unit is off) SLEEP TIMER FADER DISPLAY SLEEP ○ ○ ○ ○ ○ ○ ○ Press [CLOCK/TIMER]. The settings are shown in the following order: Start time, Finish time Music source Volume ○ ○ ○ ○ 1 2 3 4 5 6 ○ ○ ○ ○ ○ ○ PGM/-CLEAR To change the settings (when unit is on) ≥10 ○ ○ ○ Original display ○ ○ ○ ○ ○ ○ ○ ○ ○ ○ Time setting ! X u « j³{ SLEEP To change the times Do steps ■ 1,■ 2 ,■ 3 , and ■ 5.
! "#$ qO− ² «Ë ŸUL²Ýô« X R !"#$%&'()* [CLOCK/TIMER !" #$] !"#$%&'( !"#$ ! !" wK_« ÷dF « ← !"#$%&'()* !"#$! !■ 1 ■ 2 ■ 3 ■ 5 !"#$!% ˚ PLAY/REC] 1. [˚ 2. !"# $% 3. ! ■ 4 ■ 5. UÞu³C « dOOG² U Ë_« dOOG² «uD)« cOHM²Ð r Æ Ë ¨ ¨ uB « …—UNł Èu² Ë« —bB*« dOOG² ˚ PLAY/REC] jG{« Ʊ ÆX R*« 5³ ` * [˚ Æ uB « …—UNł Èu² Ë« —bB*« dOOG²Ð r Æ≤ «uD)« cOHM²Ð r Æ≥ Æ v « ! !"#$%&' ! "#$%&'()*&+,-./01 !"#$%&"'(#)*+,-.
Troubleshooting Before requesting service, make the below checks. If you can’t fix the unit as described below, or if something not listed here occurs, refer to the enclosed directory to locate an Authorized Service Center convenient to you or contact your dealer. Reference pages are shown as black circled numbers (e.g. ) 6 Common problems 6 6 Indicates incorrect operation. Read the instructions. Replace the batteries or use household AC power. Power batteries haven’t been inserted.
!"# !"#$%&'()*+,-./012345*6789:;<=&>?@A7<=BCDEF+@&')G HI7JK&LMEN !"#$%&'()*+,-./0 !"#$%&'() 7 ! b !"#$%&'()*" U01 !"#$%$&' U02 !"#"$%&'( UO2 !"CD 2345"$6789:;< â ! CD !"#$% !"#$%&'()*+,-./0 !"#$%&'( CD â CD )*+,+-."#/01 7 CD CD 7 () !" !"#$%&'CD ! ë !"# !"#$%&'()*+,-."/0123 ! !" !"#$%& !"#$%&'()"*+,-.
UNŠö «Ë ‰UDŽ_« Íd% qO œ w —u c dOž qDŽ qBŠ «–« Ë« ¨qHÝô« w WŠËdA*« «¡«dłôUÐ “UN'« `OKBð s sJL²ð r «–« ÆqHÝô« w …—u c*« U u×H « ¡«dłSÐ r7 ¨`OKB² « U bš VKÞ q³7 ÆqO u UÐ qBð« Ë« p VÝUM hšd `OKBð U bš e d œU−¹ô “UN'« l o d*« `OKB² « U bš e «d qO œ v « lł—« ¨‰Ëb'« «c¼ 7 ¡«œuÝ …dz«œ qš«œ ÂU7—U WMO³ lłd*« U×H W UŽ q UA 7 Æ «œUý—ù« √d7≈ Æ`O× dOž qOGAð v ≈ dOA¹ “E” ÷dŽ r²¹ U¹—UD³ « ‰b³²Ý≈ “U01” ÷dŽ r²¹ 7 Æœœd²*« —UO² « …—b7 Âb\²Ý≈ Ë√ “U02” ÷dŽ r²¹ Æw eM*« AC œœd²*« —UO² « W7UÞ qLF²Ý« Ë«