0366 cover.fm Page 1 Thursday, March 22, 2001 5:04 PM ® DIRECTV Digital Satellite Receiver Operating Instructions TZ-DBS01 For product assistance, please call: 1-888-726-2377 or send e-mail to: consumerproducts@panasonic.
TABLE OF CONTENTS Table of Contents Important Safety Instructions........................... 2 Important Information ....................................... 4 Information on the DIRECTV Digital Satellite Receiver............................................ 6 Reception Capability of DIRECTV Digital Satellite Receiver .............................................................................. 6 Panasonic DIRECTV Digital Satellite Receiver Model TZ-DBS01...................................................
IMPORTANT SAFETY INSTRUCTIONS IMPORTANT SAFETY INSTRUCTIONS WARNING RISK OF ELECTRIC SHOCK DO NOT OPEN WARNING: To reduce the risk of electric shock do not remove cover or back. No user-serviceable parts inside. Refer servicing to qualified service personnel. The lightning flash with arrow head within a triangle is intended to tell the user that parts inside the product are a risk of electric shock to persons.
IMPORTANT SAFETY INSTRUCTIONS 12. 13. Do not overload wall outlets and extension cords as this can result in fire or electric shock. Never push objects of any kind in to this Digital Satellite Receiver through cabinet slots as they may touch dangerous voltage points or short out parts that could result in a fire or electric shock. Never spill liquid of any kind on the Digital Satellite Receiver. 14.
IMPORTANT INFORMATION Important Information FCC INFORMATION Your Digital Satellite Receiver is registered with the Federal Communications Commission and is in compliance with CFR47, Parts 15 and 68, FCC Rules and Regulations. Radio Interference This equipment has been tested and found to comply with the limit for a Class B Digital Device in accordance with the specifications in Part 15 of FCC Rules.
IMPORTANT INFORMATION Notification to the Local Telephone Company On the back of this equipment is a label indicating among other information, the FCC Registration number and Ringer Equivalence Number (REN) for the equipment. You must, upon request, provide this information to your telephone company. The REN is useful to determine the number of devices you may connect to your telephone line and still have all these devices ring when your telephone number is called.
INFORMATION ON THE DIRECTV DIGITAL SATELLITE RECEIVER Information on the DIRECTV Digital Satellite Receiver Reception capability of DIRECTV Digital Satellite Receiver The Panasonic Digital Satellite Receiver is capable of receiving DIRECTV ® * digital satellite signals and converting them to standard definition signal. You may connect a terrestrial or cable antenna to the VHF/UHF ANT input of the Digital Satellite Receiver.
CONGRATULATIONS Congratulations Your Panasonic Digital Satellite Receiver features state-of-the-art technology for high-quality picture and sound with complete audio/video output jacks for your home theater system. This Digital Satellite Receiver is capable of receiving DIRECTV® standard definition satellite signals. DTV signals are displayed in interlaced format, providing a clear, crisp picture. Your new Digital Satellite Receiver is designed to give you many years of enjoyment.
IMPORTANT NOTES Important Notes Digital Satellite Receiver Location This unit can be used as part of an entertainment center. Consult your dealer for available options. r r r Avoid excessive sunlight or bright lights. Keep away from excessive heat or moisture. Inadequate ventilation may cause internal component failure. Fluorescent lighting may reduce Remote Control transmitting range. Connecting Cables Shielded audio/video cables (provided) should be used for all connections between components.
IMPORTANT NOTES Antenna/Cable Connection A terrestrial antenna or cable antenna may be connected to the VHF/UHF IN jack of the Digital Satellite Receiver. This input works as a passthrough. The VHF/UHF channels can be passed through either by toggling TV/SAT button on remote control or by turning the Digital Satellite Receiver off. The RF output (VHF (SAT) UHF OUT) of the Digital Satellite Receiver must be connected to the television.
FRONT AND REAR VIEW OF THE DIGITAL SATELLITE RECEIVER Front and Rear View of the Digital Satellite Receiver Front Panel Menu button Power indicator LED Navigation buttons POWER MENU INFO GUIDE ACTION Smart Card (behind door) Info buttton Panasonic DIGITAL SATELLITE RECEIVER Navigation buttons Remote Control sensor Power button Guide button Action button POWER Turns the Digital Satellite Receiver On. MENU Press to enter and exit Roller Guide Menu system.
FRONT AND REAR VIEW OF THE DIGITAL SATELLITE RECEIVER Rear Panel SATELLITE IN jack SATELLITE IN NTSC OUTPUT R-AUDIO-L UHF/VHF IN Jack VHF/UHF IN VIDEO VHF (SAT) /UHF OUT NTSC OUTPUT VHF (SAT) /UHF OUT Jack TEL LINE Tel Line AC IN AC POWER INPUT SATELLITE IN Use to connect DIRECTV satellite dish antenna to the Digital Satellite Receiver. VHF/UHF IN Use to connect an off-air antenna or cable TV signal to the Digital Satellite Receiver.
FEATURES OF THE DIGITAL SATELLITE RECEIVER Features of the Digital Satellite Receiver DIRECTV Channel Banner The Channel Banner is available with DIRECTV® programming to show you which channel and program you are currently viewing or have selected. The following figure shows the DIRECTV channel banner. The DIRECTV channel banner description area can be expanded, if the user presses the INFO key. 105 DTV ALL CH Any Given Sunday 3:00 PM - 5:37 PM Mon 10/30/00 3:23 PM Movie. Drama.
FEATURES OF THE DIGITAL SATELLITE RECEIVER Channel Banner: Components The Channel Banner is used to show you which channel and program you are currently viewing or selecting. The figure below indicates the various components of the Channel Banner.
FEATURES OF THE DIGITAL SATELLITE RECEIVER Icons: Channel Banner The Channel Banner contains several icons that are displayed only when the feature is available and is supported by the Digital Satellite Receiver. The following figure and table depicts the location and appearance of these icons. Icon Name Icons Description Messages Indicates that there is an unread message. Lock Indicates that the channel is locked due to either limits on spending or by content advisory.
FEATURES OF THE DIGITAL SATELLITE RECEIVER Power On Requirements When the Digital Satellite Receiver is powered on, the receiver will tune to the last tuned channel. If this channel no longer exists, the receiver will tune to channel 100. Prior to initial setup of the receiver, the receiver may automatically go to Setup menu or tune to channel 100. Tuning Mode The Tuning Mode happens when the user attempts to change the channel.
FEATURES OF THE DIGITAL SATELLITE RECEIVER Tuning Mode (Cont.) Example of Non-compound (Single) Channel Number Input For example, to tune channel 345, you enter the channel number by using the number keys (0-9) on the remote control. Then press the ACTION button which causes the tuning event to occur. Example of Compound Channel Number Input A compound numbers (major-minor) can range from (0-0 to 999-99). For example, to enter channel number 345-78, you do the following.
GETTING STARTED Getting Started Step 1. Connect AC Power Cord Plug the AC power cord into a grounded outlet. Do not turn on any devices until you have finished making all necessary connections. Step 1a. DIRECTV Satellite dish Connection Connect the DIRECTV Satellite dish downlead to the Satellite In jack on the rear panel of the Digital Satellite Receiver.
GETTING STARTED Step 1c. Digital Satellite Receiver connection to TV or Monitor Follow this diagram when connecting the Digital Satellite Receiver to a Television or Monitor. AUDIO R L TV VIDEO INPUT NOTE: A/V CABLES AND MODEM CABLE INCLUDED.
GETTING STARTED Step 1d. Digital Satellite Receiver, Satellite dish, Cable box and terrestrial antenna Follow this diagram if you have Satellite service, cable box and terrestrial antenna. Cable or terrestrial antenna signal is passed through when you press TV/SAT button to toggle or when the Digital Satellite Receiver is turned off. CABLE BOX ANT IN ANT OUT NOTE: A/V CABLES AND MODEM CABLE INCLUDED.
GETTING STARTED Step 1e. Digital Satellite Receiver Connection to VCR Follow this diagram when connecting the Digital Satellite Receiver to a standard VCR. R-AUDIO-L VIDEO TV ANT IN NOTE: A/V CABLES AND MODEM CABLE INCLUDED.
GETTING STARTED Step 2. Turning Digital Satellite Receiver On Procedure • • Press the Remote Control SAT mode button Press the POWER button. Note: T SA . Monitor/TV should also be turned on. Step 3. Roller Guide Menu™ Press the MENU button to display the Roller Guide Menu*. Press the or arrow on the ACTION button to rotate the Roller Guide. Press the arrow on the ACTION button to exit the Roller Guide Menu. Panasonic ROLLER GUIDE MENU SELECTIONS pq for more features Press ACTION to enter.
REMOTE CONTROL Remote Control POWER EXIT Press to turn ON and OFF. Press to exit SAT Guide or DVD menu. ACTION GUIDE Press to access sub menus or display Main Menus. Press to activate wink enabled transactions (available in the future). Press to select STB Guide or DVD menu. TV/SAT TV/VCR Press to access Roller Guide Menu. Press to select VIDEO inputs in TV mode. Press to switch between TV and SAT in SAT mode or to switch between TV and VCR in VCR mode.
REMOTE CONTROL FUNCTIONAL KEY CHART Remote Control Functional Key Chart Key Component POWER Function ALL COMPONENTS Turn components On and Off ALL COMPONENTS Component mode selection for Remote Control DVD VCR TV T SA TV SAT VCR DVD CH Channel up/down Up navigation Down navigation CH CH AUDIO TRACK / VOL CH ACTION MENU INFO TV SAT DVD SAT DVD TV TV VCR DVD SAT AUDIO TRACK / VOL Left and right navigation Exit Roller Guide Menu Select and adjust features Select audio tracks Roller Gu
REMOTE CONTROL FUNCTIONAL KEY CHART Remote Control Functional Key Chart Key Component REW Function DVD Skip / Search Rewind VCR Rewind PLAY u VCR DVD FF Play DVD VCR Skip/Search Fast Forward Fast Forward VCR DVD Stop TV / SAT TV / VCR TV SAT VCR Selects Video inputs Switch between TV and SAT Switch between TV and VCR PAUSE DVD Still / Pause VCR Pause SAT VCR DVD Page up/down Channel up / down Slow +/- STOP CH / PAGE p q 1 2 3 TV SAT VCR DVD Selects channel number Selects
SPECIAL REMOTE BUTTONS Special Remote Buttons MENU MENU button The MENU button is used to enter and exit the Roller Guide Menu system. Each time the MENU button is pressed, the Roller Guide will appear on and disappear from the viewing screen. INFO INFO button The INFO button lets you view Satellite program display and other on-screen displays when you are in TV, VCR or DVD operating modes. GUIDE GUIDE button The GUIDE button lets you bring up the Satellite guide.
PROGRAMMING THE REMOTE CONTROL Programming the Remote Control The Universal Remote Control can be programmed to operate many manufacturers’ components using the component function buttons for TV, VCR, DVD. Follow the procedures for programming your Remote Control with and without codes for the component. Determine the manufacturer of the component and look in the table for the code. Programming With Code • • • • • • Confirm that the external component is plugged in and is turned on.
COMPONENT CODES Component Codes The Universal Remote Control is capable of operating many component brands after entering a code. Some components may not operate because memory is limited. The Universal Remote Control does not control all features in all models.
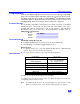
COMPONENT CODES Codes for VCR Brand Code Brand Code 135 Orion 120, 126 Aiwa 132 Panasonic 121, 122, 123, 124 Akai 129, 114, 115, 116 Penney 100, 105, 110, 111, 124, 139, 145 Audio Dynamic 111, 139 Pentax 100, 111, 145 Bell & Howell 105, 113 Philco 120, 123, 124, 126, 127, 131 Broksonic 120, 126 Philips 123, 124, 131, 173 Canon 123, 125 Pioneer 123 CCE 143 Proscan Citizen 106 100, 101, 102, 123,124, 131, 133, 145, 146 Craig 105, 106, 129 Quasar 121, 122, 123, 124 Cur
SPECIAL FEATURES OF DIGITAL SATELLITE RECEIVER Special Features of Digital Satellite Receiver Impulse Pay Per View (IPPV) You must connect your phone line to the Digital Satellite Receiver to receive pay per view (PPV) service offered by DIRECTV. Connecting the phone line permits you to use the IPPV feature, which allows event purchases without calling a CSR (Customer Service Representative).
SPECIAL FEATURES OF DIGITAL SATELLITE RECEIVER If you press the ACTION key, the PPV window will be displayed. Once a PPV event starts, video and audio could be displayed for 5 minutes into the PPV event. After 5 minutes have elapsed, video and audio are removed from the screen. You can purchase the current PPV event up to 30 minutes after an event has started.
SPECIAL FEATURES OF DIGITAL SATELLITE RECEIVER You will be given a choice of whether you wish to Purchase (OK) or Cancel this PPV event, as shown below. 345 Buy Times Swift, Smart and Deadly Sun 3/21/01 9:15 PM “Test the limits of shark smarts with two New Zealand researchers as they hand feed sharks...” Thriller, Drama, Sports (1999) John Smith, Jane Doe, Joe Miller - The Sharks... Exit CC PG-13 MSNBC Buy: $3.
SPECIAL FEATURES OF DIGITAL SATELLITE RECEIVER Software Upgrade Messages The Digital Satellite Receiver has the ability to receive download replacement software. This will allow the Digital Satellite Receiver software to be upgraded. The Digital Satellite Receiver will prompt you when an update is required. You have the ability to reject or cancel the update at this time. However, this notification will repeatedly occur until you have upgraded the software.
ROLLER GUIDE MENU™ Roller Guide Menu™ Press the MENU button on the Remote Control to display the Roller Guide Menu™*. Press the p or q arrow to rotate the Roller Guide. Press the ACTION button to enter a category submenu screen, where the options for that category can be changed. Press the t arrow to exit the Roller Guide Menu. The Roller Guide screen is the entry point for all menu operations on the system.
ROLLER GUIDE FEATURE CHART Roller Guide Feature Chart Roller Guide Feature Chart MENU DESCRIPTION SET UP r r Dish Type - Lets you choose Oval or Round dish. Sat. Ports - Selects up to 4 nominal satellite configuration or lets you perform auto-detection. The user can select: • • • • Satellite Setup r r Dish Type : Oval or Round Satellite A and B Satellite A, B, and C Auto Configuration Dish Position - Digital Satellite Receiver displays the proper co-ordinates for the particular zip code.
ROLLER GUIDE FEATURE CHART Roller Guide Feature Chart (Cont.) MENU DESCRIPTION TIMER r TIMER 1 TIMER 2 TIMER 3 TIMER 4 r TIMER 5 TIMER 6 TIMER 6 r TIMER 7 TIMER 8 MODE - Select one of the following: • OFF (default setting) to disable timer. • ON to turn on Digital Satellite Receiver only. (Must turn TV on to view the event). • Repeat (weekly or once) DAY - Select the day of the week to activate timer. • START - Select time for timer to start. • STOP - Select time for timer to stop.
ROLLER GUIDE FEATURE CHART Roller Guide Feature Chart (Cont.) MENU DESCRIPTION ACCOUNT r Future purchases - Displays PPV events purchased, but not aired. Also lets you to cancel a PPV event. r Past purchases - Lets you review PPV purchased events. Displays CAM slot numbers when Past purchase data is highlighted. r Messages - Displays message sent to the Digital Satellite Receiver from DIRECTV over the Satellite Link.
ROLLER GUIDE MENU OPERATIONS Roller Guide Menu Operations Setup To help you with the initial set up of the Digital Satellite Receiver, the Setup menu is displayed automatically when the Digital Satellite Receiver is turned on for the first time. A setup wizard will help guide you through the procedure of setting up the proper satellite configurations, dish type, monitor and TV output setup.
ROLLER GUIDE MENU OPERATIONS Setup : Satellite Setup – Sat. Ports After you have selected the Dish type, you can choose the satellite port configuration. If Round dish is selected, then only the Satellite A configuration is available. If you selected Oval shaped dish, you can choose from the three configurations: Auto configuration, Sat. A and B, and Sat. A, B and C.
ROLLER GUIDE MENU OPERATIONS Setup : Satellite Setup – Dish position This screen allows you to position your Satellite antenna by having the Digital Satellite Receiver provide approximate values for elevation, azimuth and tilt (marked in degrees), after the you have entered your 5-digit zip code. q Sat Setup Sat Ports Dish Pos Sig Meter Press Zip code for position 92154 Elevation 51 degrees Azimuth 166 degrees Tilt 101 degrees Enter zip code, press ACTION u to change the zip code.
ROLLER GUIDE MENU OPERATIONS Setup : Monitor The monitor menu allows you to match your monitor/receiver type. You can choose between two monitor types: 16:9 or 4:3 aspect ratio. u u Sat Setup 4:3 Aspect Monitor System Test Panasonic Access Card Standard TV TV Output Press u to set monitor aspect ratio. Setup : Monitor Screen The following table shows the icon and messages displayed for each of the monitor types.
ROLLER GUIDE MENU OPERATIONS Setup : System Test The System Test menu allows you to invoke a system test which perform a check of the following subsystems. Component Requirement Display Information Tuning Test This attempts to tune to an known frequency. Status: PASSED or FAILED Signal Test This tests the signal strength. Status: PASSED or FAILED Phone Test This checks the operational status. modem Status: PASSED or FAILED Access Test This checks the Access Card function.
ROLLER GUIDE MENU OPERATIONS Setup : Access Card The Setup screen allows you to setup a new access card. You can transfer existing access card information to the new access card. This procedure is called “chaining”. When you press the ACTION button while the Access Card is highlighted, a series of Conditional Access driven menus will be displayed. This will direct you on what procedures to perform.
ROLLER GUIDE MENU OPERATIONS TV Output This menu lets you set the RF output of the Digital Satellite Receiver to either CH 3 or CH 4. You can connect the Digital Satellite Receiver to your television, even if your TV does not have video inputs. u Sat Setup Monitor System Test Access Card TV Output Press u Channel 4 Warning: Television must be set to the selected channel! u to change TV output settings. TV Output Screen Procedure r r r r In SETUP menu, press p or q buttons to highlight TV Output.
ROLLER GUIDE MENU OPERATIONS Guide The Advanced Program Guide™ (APG) is a key feature of the Digital Satellite Receiver. The Guide enables you to browse through a large number of programs and provides useful information upon user request, as shown below. Guide: Full Screen If the user tries to access the Guide while it is acquiring data from the satellite signal, a message will be displayed showing the graphical countdown clock of when the Guide will be ready for display. 80% 100% 6 Acquiring data...
ROLLER GUIDE MENU OPERATIONS Guide : Channel List The guide will display channel(s) that are either in the “ALL CH” or “FAV CH” mode. The Digital Satellite Receiver default mode is “ALL CH”. The user can switch the mode through a button in the channel banner area of the guide. Guide : “ALL CH” mode “All CH” mode - APG will contain all guide ‘permitted channels’. Guide : “FAV CH” mode “FAV CH” - APG will contain all guide defined ‘permitted channels’ except the channels the user chose to remove.
ROLLER GUIDE MENU OPERATIONS Searching the Guide by Categories The APG is capable of displaying information according to the categories that you have selected. For example, if you select Movies category, then only those channels broadcasting movies are displayed in the guide. You can also select sub-categories of the category you selected. t Movies Action/Adventure Animation Biography Comedy Current Affairs Press ACTION to search - Press INFO for Grid.
ROLLER GUIDE MENU OPERATIONS Guide : Direct Channel Entry The APG has the ability to search for a channel based on the channel number. When the user presses a numeric key to enter in channel numbers, a channel entry area appears in the top left corner of the guide channel banner, as shown below.
ROLLER GUIDE MENU OPERATIONS Guide (Cont.) The following figure shows the Banner components. Channel Number System Clock Banner Icons Mode selection Content Advisory Rating Guide Banner Components Guide : Banner Components Guide : Grid The guide grid shows information on 5 channels within 1.5 hour time span. The channel name can be highlighted by navigating to the left of the grid. Following is an example of the Channel Grid Components. Channel Number and Name (5 channel span) Time columns (1.
ROLLER GUIDE MENU OPERATIONS Lock This Digital Satellite Receiver incorporates V-Chip technology to block the viewing of movies and television programs according to the rating category. There are 2 Content Advisory categories: MPAA (Motion Picture Association of America) and TV Parental Guidelines Ratings and are used as guidelines for blocking the programs. Lock : Password Before you can access the LOCK menu settings, you need to enter a 4 digit secret code.
ROLLER GUIDE MENU OPERATIONS Lock: Unlock This menu lets you unlock the Digital Satellite Receiver so that you can view the locked channels after entering the password. Unlock Movie Limits TV Limits The IRD is currently locked Press ACTION to permanently unlock the IRD and remove password challenges. Unlock Movie Limits TV Limits Ch Locks Ch Locks Spending Spending Password Password Press ACTION to unlock the IRD.
ROLLER GUIDE MENU OPERATIONS Lock : Movie Limits The MPAA uses the standard movie ratings. The TV Parental Guidelines provides rating schemes of its own: age-based ratings, content-based ratings or combination of the two. The following table and figure shows the MPAA ratings system. MPAA Rating Description NR Not Rated by MPAA G General Audience PG Parental Guidance Suggested. Some material may not be suitable for children. PG-13 Parent Strongly Cautioned.
ROLLER GUIDE MENU OPERATIONS Lock : TV Limits The TV Parental Guidelines has 7 levels of age-based ratings that the user can select. These 7 levels are split into 2 age-based groups: Youth Age-based Ratings and Guidance Age-based Ratings. Some of these age-based ratings can also have content-based ratings, denoted as D (Dialog), L (Language), S (Sex) and V (Violence). Any non-rated program that does not provide Content Advisory information will be viewable.
ROLLER GUIDE MENU OPERATIONS Lock : Ch Locks The user can lock satellite channels from being displayed. To access these channels when channel surfing, the user is required to enter the 4 digit secret password. Once the user has highlighted Sat Ch Lock or Non-Sat Lock Grid, the user will be able to easily “Unlock All” or “Lock All” available channels. The channel numbers that are underlined indicate that there are more than one minor channel number.
ROLLER GUIDE MENU OPERATIONS Lock : Spending The feature allows the user to control the amount per event. If the amount is below the event cost, you won’t be able to view the event. Unlock Movie Limits TV Limits Ch locks Spending Amount per Event $ 10.00 Password Press u to change Spending Limit. Lock : Spending Screen Procedure r r r r 54 In LOCK menu, press p or q button to highlight Spending. Press u button to highlight Amount per event. Press u button to highlight amount field.
ROLLER GUIDE MENU OPERATIONS ACCOUNT The Account category conveys information to the user. This information was either the result of the action by the user or sent from DIRECTV to the Digital Satellite Receiver. This category contains 2 areas: Purchase Purchases of programs (Future / Past) Messages Electronic messages sent to the user through the satellite link. Account : Future and Past Purchase The Purchase screen allows you to review upcoming and past PPV event purchases.
ROLLER GUIDE MENU OPERATIONS Account : Past This screen allows you to review PPV purchased events. The PPV events that the subscriber purchased but cancels or does not watch will not be displayed. Following is an example of Past purchase screen. Future Past Msgs Swift, Smart and Deadly Ch: 320.24 Date: 11/30 Time: 9:00 PM Cost: $3.50 CANCEL EVENT Johnny Carson Show #20 Ch: 130 Date: 10/05 Time: 9:00 PM Cost: $3.50 Johnny Carson Show #22 Ch: 130 Date: 11/05 Time: 9:00 PM Cost: $3.
ROLLER GUIDE MENU OPERATIONS Options The Options menu gives you the ability to configure the Digital Satellite Receiver. These options can affect the overall behavior of the Digital Satellite Receiver. Options menu has the following sub-options: • • • • • • Audio Clock Favorites About Upgrades Features Options : Audio The Audio option allows you to select the Language preferences.
ROLLER GUIDE MENU OPERATIONS Options : Clock The clock option allows you to configure the system clock. When connected to DIRECTV® service, you can set the DST (daylight savings time), Time Zone and reset the time to what is current in the smart card. Audio Clock Wednesday 10/18 1:43 PM Favorites About DST Time Zone Observed Pacific Upgrades Features Press Reset Time to default to Access Card settings. Reset Time Press u to change system clock settings.
ROLLER GUIDE MENU OPERATIONS Options : Favorites The Favorites Option allows you to create a favorite channel list when you toggle the FAV mode in the Advanced Program Guide™ or to remove all channels from the favorite list (Delete All), as shown below. Add Channels to Channel List Audio Clock Chan 000’s Del All Favorites Audio Add All Clock Favorites About About Upgrades Upgrades Features Features Press u to change favorite channel settings.
ROLLER GUIDE MENU OPERATIONS Options : About The About screen displays assorted information about the manufacturer, including the following: • • • • Product Description Version Serial # number of the Digital Satellite Receiver Model # Audio Panasonic Clock Favorites About Upgrades DIRECTV APG Digital Satellite Receiver Version: Serial # Model # Version 3.8 MR1 TZ-DBS01 Features About Panasonic DTV Digital Receiver.
ROLLER GUIDE MENU OPERATIONS Options : Upgrades This screen shows the past and present version of the software and any future upgrades. Audio TZ-DBS01 Upgrade List Clock Favorites About Upgrades Software Revisions: Original 3.8 Current 3.8 Future Upgrades: Features None pending. Software upgrades information. Options: Upgrades Screen Procedure r In the Options menu, press p or q button to highlight Upgrades. The software information is displayed.
ROLLER GUIDE MENU OPERATIONS TIMER This Digital Satellite Receiver contains eight timers that are capable of tuning the Digital Satellite Receiver on and off at selected times, on selected channels and on selected days. The timer options provide you an automatic way of controlling the Digital Satellite Receiver when it is active. The options are the following: • • OFF (default state) ON Off state The Off state disables the timer and clears the timer data fields.
ROLLER GUIDE MENU OPERATIONS TIMER (Cont.) Note: All Data fields must be entered prior to setting the view mode. Timers cannot overlap between the timers. The first entered timer will override the other timers. TIMER Activation The TIMER is active when the Digital Satellite Receiver is OFF or ON. The Digital Satellite Receiver will switch to the selected channel at the selected time set in the TIMER.
GLOSSARY AND ACRONYMS Glossary and Acronyms APG Advanced Program Guide™ the DIRECTV electronic program guide. ATSC Advanced Television Systems Committee. Standardization body that developed the Digital Television Terrestrial formats. CAM Conditional access module, usually referred to as the access card. A removable, electronic subassembly providing conditional access control of the subscriber terminal. CSR Customer Service Representative DIRECTV DIRECTV is a registered trademark of DIRECTV, Inc.
GLOSSARY AND ACRONYMS OSD On-screen display Password A stored word a user must provide in order to perform a function. SD Standard Definition Smart Card Credit card sized microcomputer capable of securely storing service authorization and system preferences such as pay per view lock. Also known as the CAM. Subscriber Customer of the DIRECTV Service This product incorporates copyright protection technology that is protected by U.S. patents and other intellectual property rights.
TROUBLESHOOTING Troubleshooting Before requesting service for this unit, check the table below for a possible cause of the problem you are experiencing. Some simple checks or a minor adjustment on your part may eliminate the problem and restore proper operation. If you are in doubt about some of the check points, or if the remedies indicated in the table do not solve the problem, consult your dealer or call 1-888-726-2377 for assistance.
SERVICE INFORMATION Service Information Product Service If you ship the product Do not attempt to remove the cover or repair the unit yourself. Refer servicing to qualified personnel only. Carefully pack and send it prepaid, adequately insured and preferably in the original carton. Attach a postage-affixed letter, detailing the complaint, to the outside of the carton. DO NOT send the product to the Executive or Regional Sales offices. They are NOT equipped to make repairs.
NOTES Panasonic Home and Commercial Products Company, Division of Matsushita Electric Corporation of America One Panasonic Way Secaucus, New Jersey 07094 68