
Operation Manual
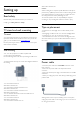
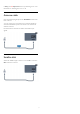
Table Of Contents
- Contents
- 1 - My new TV
- 2 - Setting up
- 3 - Network
- 4 - Connections
- 4.1 - Tips on connections
- 4.2 - EasyLink HDMI CEC
- 4.3 - Common interface - CAM
- 4.4 - Set-top box - STB
- 4.5 - Satellite receiver
- 4.6 - Home Theatre System - HTS
- 4.7 - Blu-ray Disc player
- 4.8 - DVD player
- 4.9 - Game console
- 4.10 - USB Hard Drive
- 4.11 - USB keyboard or mouse
- 4.12 - USB flash drive
- 4.13 - Photo camera
- 4.14 - Camcorder
- 4.15 - Computer
- 4.16 - Headphones
- 4.17 - Wireless speakers
- 5 - Switch on
- 6 - Remote control
- 7 - TV channels
- 8 - Satellite channels
- 9 - Home menu
- 10 - TV guide
- 11 - Sources
- 12 - Timers and clock
- 13 - 3D
- 14 - Games
- 15 - Your photos, videos and music
- 16 - Pause TV
- 17 - Recording
- 18 - Skype
- 19 - Smart TV
- 20 - Multi room
- 21 - Share this…
- 22 - Settings
- 23 - Specifications
- 24 - Software
- 25 - Troubleshooting and support
- 26 - Safety and care
- 27 - Terms of use, copyrights and licenses
- Index

In
Help
, press
Keywords
and look up Switching on for more
information on switching the TV on or off.
2.5
Antenna cable
Insert the antenna plug firmly into the
ANTENNA
socket at the
back of the TV.
You can connect your own antenna or an antenna signal from
an antenna distribution system. Use an IEC Coax 75 Ohm RF
antenna connector.
Use this antenna connection for DVB-T and DVB-C input
signals.
2.6
Satellite dish
Attach the satellite F-type connector to the satellite connection
SAT
at the back of the TV.
8