Register your product and get support at 6550/6560/6580 series www.philips.
Contents 1 TV Tour 1.1 Philips Android TV 4 1.2 Using Apps 4 1.3 Playing Games 4 1.4 Movies and missed programmes 1.5 Pause TV and Recordings 4 1.6 Smartphones and Tablets 4 1.7 Social Networks 5 1.8 3D 5 1.9 Ambilight 5 1.10 Ambilight + Hue 5 1.11 Bluetooth Connection 5 2 Setting Up 8 TV Guide 4 9 Recording and Pause TV 10 Top Picks 7 11 Home Menu 9 12 TV Menu 13 Netflix 46 47 47 48 14 Sources 49 14.1 Switch to a TV Input 49 14.2 Options for a TV Input 49 14.3 Device Name and Type 49 14.
19.2 19.3 19.4 19.5 Google Cast 61 Miracast 61 AirPlay 62 MHL 62 20 Ambilight 31.1 Terms of Use - TV 140 31.2 Terms of Use - Smart TV 140 31.3 Terms of Use - Philips App Gallery 32 Copyrights 64 20.1 Ambilight Style 64 20.2 Ambilight Off 64 20.3 Ambilight Settings 64 21 3D 65 21.1 What You Need 65 21.2 3D Glasses 65 21.3 Watch 3D 66 21.4 Optimal 3D Viewing 66 21.5 Care of the 3D Glasses 66 21.6 Health Warning 66 22 Multi View Index 68 22.1 Text and TV 68 22.2 App Gallery and TV 22.
For more information, in Help, press the colour key Keywords and look up Apps. 1 TV Tour 1.3 1.1 Playing Games Philips Android TV This TV is your big screen for gaming. Big enough for two. This a Philips Android TV™. Android TV offers thousands of movies, shows and games from Google Play, YouTube and your favourite apps.* Voice search and personalised recommendations mean more time being entertained and less time hunting for something good.
1.6 1.9 Smartphones and Tablets Ambilight The new Philips TV Remote App is your new TV buddy. Ambilight is the most elegant and exclusive feature of your new Philips TV. With the TV Remote App on your smartphone or tablet, you master your media around you. Send photos, music or videos to your big TV screen or watch any of your TV channels live on your tablet or phone. Open the TV Guide and schedule a recording for tomorrow. Your TV at home will do the job.
up Bluetooth or Wireless Speakers.
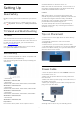
Setting Up threaded bushes on the back of the TV. Make sure that the metal screws, to mount the TV to the VESA-compliant bracket, go about 10mm deep inside the threaded bushes of the TV. 2.1 Caution 2 Read Safety Wall mounting the TV requires special skills and should only be performed by qualified personnel. The TV wall mounting should meet safety standards according to the TVs weight. Also read the safety precautions before positioning the TV. TP Vision Europe B.V.
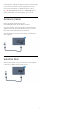
consumption, unplug the power cable to save energy if you do not use the TV for a long period of time. For more information, in Help, press the colour key Keywords and look up Switching On for more information on switching the TV on or off. 2.5 Antenna Cable Insert the antenna plug firmly into the Antenna socket at the back of the TV. You can connect your own antenna or an antenna signal from an antenna distribution system. Use an IEC Coax 75 Ohm RF antenna connector.
6 - Depending on the type of router, enter your encryption key - WEP, WPA or WPA2. If you entered the encryption key for this network before, you can select OK to make the connection immediately. 7 - A message will be shown when the connection is successful. 3 Connect your Android TV 3.1 Network and Internet WPS If your router has WPS, you can directly connect to the router without scanning for networks.
Internet does not work • If the connection to the router is OK, check the router connection to the Internet. Network Settings View Network Settings The PC and Internet connection are slow • Look in your wireless router's user manual for information on indoor range, transfer rate and other factors of signal quality. • Use a high-speed (broadband) Internet connection for your router. You can view all current network settings here. The IP and MAC address, signal strength, speed, encryption method, etc.
press (right) to enter the menu. 3 - Select Wired or Wi-Fi > Wi-Fi Miracast Connections and press OK. 4 - Select Clear All and press OK. 5 - Press (left) repeatedly if necessary, to close the menu. Switch on Wi-Fi connection You can switch on or off Wi-Fi connection on your TV. To switch on Wi-Fi… 1 - Press , select All Settings and press OK. 2 - Select Wireless and Networks and press (right) to enter the menu. 3 - Select Wired or Wi-Fi > Wi-Fi On/Off and press OK. 4 - Select On and press OK.
File Sharing Android Settings The TV can connect to other devices in your wireless network, like your computer or smartphone. You can use a computer with Microsoft Windows or Apple OS X. You can set or view several Android specific settings or information. You can find the list of apps installed on your TV and the storage space they need. You can set the language you like to use with Voice Search. You can configure the onscreen keyboard or allow apps to use your location.
Privacy Settings You can set some privacy settings for the Philips App Gallery apps. • You can allow technical statistics to be send to Philips. • You can allow personal recommendations. • You can allow cookies. • You can switch on the Child Lock for 18+ rated apps. To set the Philips App Gallery privacy settings… 1 - Press HOME and select Philips Collection > App Gallery and press OK to open the App Gallery. 2 - You can select Privacy Policy, then press OK to read. 3 - Select Accept and press OK.
HDMI cables support HDCP (High-bandwidth Digital Content Protection). HDCP is a copy protection signal that prevents copying content from a DVD disc or Bluray Disc. Also referred to as DRM (Digital Rights Management). 4 Connect Devices 4.1 About Connections HDMI ARC Connectivity Guide All of the HDMI connections on the TV have HDMI ARC (Audio Return Channel). Always connect a device to the TV with the highest quality connection available.
control. EasyLink On or Off You can switch EasyLink on or off. The TV comes with the EasyLink settings switched on. To switch off EasyLink completely… 1 - Press , select All Settings and press OK. 2 - Select General Settings and press (right) to enter the menu. 3 - Select EasyLink, press (right) and select EasyLink one step further. 4 - Select Off. 5 - Press (left) repeatedly if necessary, to close the menu.
Copy protection Audio Out - Optical DVI and HDMI cables support HDCP (High-bandwidth Digital Content Protection). HDCP is a copy protection signal that prevents copying content from a DVD disc or Blu-ray Disc. Also referred to as DRM (Digital Rights Management). Audio Out - Optical is a high quality sound connection. This optical connection can carry 5.1 audio channels.
4.3 Smart Card Receiver - Set-Top Box Digital TV operators provide a CI+ module (Conditional Access Module - CAM) and an accompanying smart card, when you subscribe to their premium programmes. Cable Box Use 2 antenna cables to connect the antenna to the Set-top box (a digital receiver) and the TV. Insert the smart card into the CAM module. See the instruction you received from the operator. To insert the CAM in the TV… 1 - Look on the CAM for the correct method of insertion.
Connect with HDMI Use an HDMI cable to connect a Home Theatre System (HTS) to the TV. You can connect a Philips Soundbar or an HTS with a built-in disc player. If the Home Theatre System has no HDMI ARC connection, add an optical audio cable (Toslink) to send the sound of the TV picture to the Home Theatre System. Switch Off Timer Switch off this automatic timer, if you only use the remote control of the Set-top box.
2 - Select Sound and press (right) to enter the menu. 3 - Select Advanced > Audio Out Levelling and press OK. 4 - Select More, Medium, or Less, then press OK. 4 - Select Off. 5 - Press (left) repeatedly if necessary, to close the menu. Audio Out Offset 5 - If the volume difference is large, select More. If the volume difference is small, select Less. 6 - Press (left) repeatedly if necessary, to close the menu.
4.6 What You Need Blu-ray Disc Player You can connect a wireless device with Bluetooth® to this TV – a wireless speaker, a subwoofer, a sound bar or headphones. You can also connect a wireless gamepad with Bluetooth LE. Use a High speed HDMI cable to connect the Bluray Disc player to the TV. To play the TV sound on a wireless speaker, you must pair the wireless speaker with the TV. You can pair some wireless speakers and a maximum of 4 Bluetooth LE (low energy) devices.
speaker, in Help, press the colour key Keywords and look up Speakers, Select. To adjust the volume… 1 - Press , select Headphone Volume and press OK. 2 - Press the arrows (up) or (down) to adjust the value. 3 - Press (left) repeatedly if necessary, to close the menu. For more information on the Bluetooth On or Off setting, in Help, press the colour key Keywords and look up Bluetooth, On or Off. Select a Device 4.
Suitable Gamepads A selected range of wireless Gamepads are suited and tested for use on this TV. Other Gamepads might not be fully compatible. The suited Gamepads are… • Logitech F710 • Logitech F510 • Xbox 360 Wireless Controller for Windows • Speedlink Strike FX Wireless Gamepad • Sony Play Station wired • Mad Catz C.T.R.L.
1 - Connect the USB Hard Drive to one of the USB connections on the TV. Do not connect another USB device to the other USB ports when formatting. 2 - Switch on the USB Hard Drive and the TV. 3 - When the TV is tuned to a digital TV channel, press (Pause). Trying to pause will start the formatting. Follow the instructions on screen. 4 - The TV will ask if you want to use the USB Hard Drive to store apps, agree to the question if you do.
start the keyboard setup. 4.15 Photo Camera Special Keys To view photos stored on your digital photo camera, you can connect the camera directly to the TV. Keys for entering text • Enter key = OK • Backspace = delete character before cursor • Arrow keys = navigate within a text field • To switch between keyboard layouts, if a secondary layout is set, press the Ctrl + Spacebar keys simultaneously. Use one of the USB connections on the TV to connect. Switch on the camera after you made the connection.
2 - Select Picture and press (right) to enter the menu. 3 - Select Advanced > Game or Computer, and press OK. 4 - Select Game (for gaming) or select Computer (for watching a movie). 5 - Press (left) repeatedly if necessary, to close the menu. 4.17 Computer Connect You can connect your computer to the TV and use the TV as a PC monitor. Remember to set Game or Computer setting to Off when you stop playing the game. With HDMI Use an HDMI cable to connect the computer to the TV.
press OK. 5 - Press (left) repeatedly if necessary, to close the menu. 5 Switching On and Off 5.1 On, Standby or Off Before you switch on the TV, make sure you plugged in the mains power in the POWER connector on the back of the TV. 5.3 Keys on TV To put the TV in Standby when the indicator light is off, press the small joystick key on the back of the TV. The indicator will light up. If you lost the remote control or its batteries are empty, you can still do some basic TV operations.
5.5 Switch Off Timer If the TV receives a TV signal but you don't press a key on the remote control during a 4 hour period, the TV switches off automatically to save energy. Also, if the TV does not receive a TV signal nor a remote control command for 10 minutes, the TV switches off automatically. If you use the TV as a monitor or use a digital receiver to watch TV (a Set-Top Box - STB) and you do not use the remote control of the TV, you should deactivate this automatic switch off.
6 Remote Control 6.1 Key overview Top 1 To open the TV Menu with typical TV functions. 2 - SOURCES To open or close the Sources menu. 3 - Colour keys Direct selection of options. Blue key , opens Help. 4 - INFO To open or close programme info. 1 - Standby / On To switch the TV on or back to Standby. 5 - BACK To switch back to the previous channel you selected. To close a menu without changing a setting. To go back to the previous App/Internet page.
Voice Search Pairing with your TV There is no microphone on your remote control, if you want to use voice search, you must install Android TV Remote Control app on your Android smartphone or tablet first. 1 - On your Android smartphone or tablet, search "Android TV Remote Control" in Google Play store. 2 - Download and install Android TV Remote Control app* on your Android smartphone or tablet . 3 - Connect your Android smartphone or tablet to the same network as your Android TV device.
1 - Press , select All Settings and press OK. 2 - Select Android Settings and press OK. 3 - Select Preferences > Speech and press OK. 4 - Select the language you want to use and press OK. 5 - Press BACK to go back one step or press EXIT to close the menu. To write text… 1 - Select a text field if it is not yet selected. 2 - Turn the remote control keyboard facing upwards to activate the keyboard keys. Hold the remote control with two hands and type with both thumbs.
To start pairing... Accented Letters and Symbols 1 - On the back of the TV, standing in front of the TV at the right, press the joystick power key in for 3 seconds. A message will show that the TV is ready to pair. 2 - Press the colour keys (red) and (blue) simultaneously for 1 second. A message appears when the pairing is successful. Accented characters and symbols are not directly available on the Remote Control Keyboard. To type such a character, you can open the onscreen keyboard.
7 Open a Channel List Channels Next to the list with all channels for each tuner, Antenna/Cable or Satellite tuner, you can select a filtered list or you can select one of the favourite lists you created. 7.1 Install Channels To open the current channel list… For more information, in Help, press the colour key Keywords and look up Channel, Satellite Installation. 1 - Press , to switch to TV. 2 - Press OK to open the current channel list. 3 - Press BACK to close the channel list.
Search for a Channel Lock a Channel You can search for a channel to find it in a long list of channels. Lock and Unlock a Channel The TV can search for a channel within one of the 3 main channel lists - the Antenna, Cable or Satellite channel list. To prevent children from watching a channel, you can lock a channel. To watch a locked channel, you must enter the 4 digit Child Lock PIN code first. You cannot lock programmes from connected devices.
4 - Back in Parental Rating, select the age and press OK. 5 - Press (left) repeatedly if necessary, to close the menu. To know if a channel is analogue or digital, switch to the channel and open Channel Info in OPTIONS. To switch off the parental age rating, select None. However, in some countries you must set an age rating. Subtitle Language Preferred Subtitle Languages For some broadcasters/operators, the TV only locks programmes with a higher rating.
1 - Tune to the channel. 2 - Press OPTIONS, select Channel Info and press OK. 3 - To close this screen, press OK. Select an Audio Language If none of the preferred audio languages are available, you can select another audio language if available. If no audio languages are available, you cannot select this option. Mono / Stereo To select an audio language when none of your preferred languages are available… You can switch the sound of an analogue channel to Mono or Stereo. 1 - Press OPTIONS.
Create a Favourites List Rename a Favourites List To create a favourite channels list… You can only rename a Favourites List. 1 - Press , to switch to TV. 2 - Press OK to open the current channel list. 3 - Press OPTIONS. 4 - Select Create Favourites List and press OK. 5 - In the list at the left, select a channel you want as a favourite and press OK. Channels come in the list at the right in the order you add them. To undo, select the channel in the list at the left and press OK again.
Digital Text (UK only) Text Pages To open Text/Teletext press TEXT, while you are watching TV channels. To close Text, press TEXT again. Some digital broadcasters offer dedicated Digital Text or interactive TV on their digital TV channels. This includes normal Text using the number, colour and arrow keys to select and navigate. Select a Text page To close Digital Text, press BACK. To select a page . . . 1 - Enter the page number with the number keys. 2 - Use the arrow keys to navigate.
3 - Select Text 2.5 > Off. 4 - Press (left) repeatedly if necessary, to close the menu. Use iTV 7.6 Most channels that offer HbbTV or iTV invite you to press the colour key (red) or OK key to open their interactive programme. Open iTV pages Interactive TV Navigate iTV pages About iTV You can use the arrow and colour keys, the number keys and the BACK key to navigate the iTV pages. You can use the (Play), (Pause) and (Stop) keys to watch videos within iTV pages.
Internet or vice versa. The TV might have switched to From the Internet automatically. To make the recordings available in the list of recordings, switch to the setting that was selected when the recordings were made. 8 TV Guide 8.1 What You Need 8.3 With the TV Guide you can view a list of the current and scheduled TV programmes of your channels. Depending on where the TV guide information (data) is coming from, analogue and digital channels or only digital channels are shown.
To clear a reminder… 3 - Press BACK to close the menu. 1 - Press TV GUIDE and select a programme with the reminder. 2 - Press OPTIONS. 3 - Select Clear Reminder and press OK. 4 - Press BACK to close the menu. To cancel a recording… 1 - Press TV GUIDE and select the programme set for recording. 2 - Press the colour key Clear Recording . 3 - Press BACK to close the menu. * See chapter Recording and Pause TV for more information.
or (left) to scroll through the programmes of a channel. Use the colour key Day to select the day you need. 3 - With the programme highlighted, press the colour key Record . The programme is scheduled for recording. A warning will show automatically when overlapping recordings are scheduled. If you plan to record a programme in your absence, remember to leave the TV switched to Standby and the USB Hard Drive switched on. 4 - The TV adds some time margin at the end of the programme.
5 - Select the scheduled recording that conflicts with another scheduled recording and press the colour key Adjust Time . 6 - Select the start or end time and change the time with the (up) or (down) keys. Select Apply and press OK. 7 - Press BACK to close the menu. If you use 1 CAM to decode scrambled channels, you can only watch the channels that don't need decoding and the channel you are recording.
Pause a Programme To pause and resume a broadcast… To pause a broadcast, press (Pause). A progress bar at the bottom of the screen appears briefly. To call up the progress bar, press (Pause) again. To resume watching, press (Play). With the progress bar on screen, press (Rewind) or press (Forward) to select from where you want to start viewing the paused broadcast. Press these keys repeatedly to change speed. You can pause a broadcast for a maximum time span of 90 minutes.
10 when Now on TV is available. Top Picks The TV does not store former recommendations. 10.1 Using Now on TV About Top Picks To open Now on TV… With TOP PICKS your TV recommends current TV programmes, the latest rental videos and Online TV services for you to watch. Make sure you agree to the Terms of Use. To enjoy Top Picks connect your TV to the Internet. 1 - Press TOP PICKS to open the Top Picks menu. 2 - Select Now on TV at the top of the screen and press OK. 3 - Press BACK to close.
one is available. 5 - Select a programme icon and press OK to start watching. 6 - Press BACK to close. 4 - Make the payment on TV. 5 - Start watching. You can use the (Play) and (Pause) keys. When you open TV on Demand, the TV may need a few seconds to refresh the page information. Once a programme started, you can use the (Play) and (Pause) keys. 10.4 Video on Demand About Video on Demand With Video on Demand , you can rent movies from an online rental video store.
11 11.3 Home Menu Search and Voice Search You can search for videos, music or anything else on the Internet with the icon in the Home menu. You can use the speak out or type what you are looking for. 11.1 About the Home Menu To enjoy the benefits of your Android TV, connect the TV to the Internet. For more information, in Help, press the colour key Keywords and look up Voice Search for more information. Like on your Android smartphone or tablet, the Home menu is the centre of your TV.
12 TV Menu 12.1 About TV Menu If the TV cannot be connected with the Internet, you can use the TV Menu as your Home menu. In the TV Menu, you will find every TV function. 12.2 Open TV Menu To open TV Menu and open an item… 1 - Press to open TV Menu. 2 - Select an item and press OK to open or start it. 3 - Press BACK to close TV Menu without starting anything.
13 Netflix If you have a Netflix menbership subscription, you can enjoy Netflix on this TV. Your TV must be connected to the Internet. To open Netflix, press to open the Netflix App. You can open Netflix immediately from a TV in standby. www.netflix.
14 14.3 Sources Device Name and Type When you connect a new device to the TV and the TV detects the device, you can assign an icon that fits the device type. If you connect a device with an HDMI cable and HDMI CEC, the TV detects the device type automatically and the device gets an appropriate icon. 14.1 Switch to a TV Input From the list of Sources, you can switch to any of the TV inputs.
ideal settings for a connected computer. You can only use the setting Game or Computer when you switch to a connected device in the Sources menu. The Game or Computer setting is stored for the selected device. To switch to the ideal settings for gaming or computer manually… 1 - Press SETTINGS, select All Settings and press OK. 2 - Select Picture > Advanced and press OK. 3 - Select Game, Computer or Off. 4 - Press (left) to go back one step or press BACK to close the menu.
Movies & TV and press OK. 3 - Select My library and select My Movies or My TV Shows and press OK. 4 - Select what you want to watch and press OK. You can use the (stop), (pause), (rewind) or (fast forward) keys on the remote control. 5 - To stop the Movies & TV app, press BACK repeatedly or press EXIT. 15 Apps 15.1 About Apps You can find all installed apps in the Apps section of the Home menu. Some Google Play products and features aren't available in all countries.
new game apps on your TV. Some games are free of charge. A message appears if a particular game needs a gamepad to play the game. Payments To make a payment on Google Play on TV, you must add a form of payment - a credit card (outside the United States) - to your Google Account. When you purchase a movie or TV show, you will be charged on this credit card. To start or stop a Google Play Game… 1 - Press HOME. 2 - Scroll down and select Apps > Google Play Games and press OK.
15.5 cannot… Lock Apps • Find or open apps which are marked as Not allowed • Access the Google Play Store • Purchase through Google Play Movies & TV, nor Google Play Games • Use third-party apps that don't use the Google signin About App Locks You can lock apps unsuited for children. You can lock 18+ rated apps from the App Gallery or set up a restricted profile in the Home menu.
If you connect a USB Hard Drive, you can use the drive to extent the TV memory to store more apps. Allow the USB Hard Drive to be used as an additional TV memory during the formatting process. The TV will try to store new apps on the USB Hard Drive first. Some apps do not allow to be stored on a USB Hard Drive. Exit To exit the restricted profile… 1 - Press HOME, scroll down to Settings and scroll far right. 2 - Select Restricted Profile and press OK. 3 - Select Exit restricted profile and press OK.
16 From a Game Console Games To start a game from a Game Console… 1 - Switch on the Game Console. 2 - Press SOURCES and select a game console or the name of the connection. 3 - Start the game. 4 - Press BACK repeatedly or press EXIT or stop the app with its dedicated exit/stop button. 16.
Press BACK repeatedly or press EXIT or stop the game with its dedicated exit/stop button. 16.5 Ideal Game Settings If you start playing a game app from the Home menu, the TV will switch to the ideal game settings automatically. If you start a game from a connected game console with the device type set to 'Game Console', also then the TV switches to the ideal game settings automatically. You can always switch the TV to the ideal game settings manually.
17 Internet 17.1 Start Internet You can browse the Internet on your TV. You can view any Internet website but most of them are not prepared for a TV screen. • Some plug-ins (e.g. to view pages or videos) are not available on your TV. • You cannot send or download files. • Internet pages are shown one page at a time and full screen. To start the Internet browser… 1 - Press HOME. 2 - Scroll down and select Apps > Internet and press OK. 3 - Enter an Internet address and select , press OK.
3 - You can browse and play your files. 4 - To stop playing videos, photos and music, press EXIT. 18 Videos, Photos and Music 18.3 From a Cloud Storage Service 18.1 From a USB Connection You can view photos or play music and videos you uploaded on a storage service in the online cloud*. You can view your photos or play your music and videos from a connected USB flash drive or USB Hard Drive. With the Cloud Explorer app you can connect to Cloud Hosting Services.
Video Options Slideshow with Music During the video playback, press OPTIONS to… You can watch a slideshow of your photos and listen to your music at the same time. You must start the usic before you start the photo slideshow. • Mark as Favourite – Set the selected video as favourite. • Play All – Play all video files in this folder. • Play One – Play this video only. To play music with the slide show… 1 - Select a song or a folder with songs and press OK.
• To jump to the next song in a folder, press OK to pause and select on screen and press OK. • To go back to the folder, press BACK, the music will keep on playing. • To stop the music playback, press (Stop). Progress Bar To show the progress bar when a song is playing (playhead position, duration, title, date, etc.), press INFO . Press again to hide the info. Music Options Options for playing music... • Mark as Favourite – Set the selected song as favourite.
19 Cast to Your TV Smartphones and Tablets To cast an app to the TV screen… Philips TV Remote App 1 - On your smartphone or tablet, open an app that supports Google Cast. 2 - Tab the Google Cast icon. 3 - Select the TV you would like to cast to. 4 - Press play on your smartphone or tablet. What you selected should start playing on TV. The new Philips TV Remote App on your smartphone or tablet is your new TV buddy. 19.3 19.1 With the TV Remote App, you master your media around you.
All previously connected and also blocked devices are stored in the Wi-Fi Miracast list of connections. If you clear this list, all blocked devices will be unblocked. Share a Screen on TV To share the screen of your smartphone, tablet or computer on the TV… To unblock all blocked devices… 1 - Switch on the TV. 2 - On the device, in the settings menu, set the device to cast or mirror its display. Miracast uses Wi-Fi Direct™.
to connect your mobile device to the TV. You might need an extra adapter to connect to your mobile device. To connect the MHL cable to the TV use the HDMI 4 MHL connection. MHL, Mobile High-Definition Link and the MHL Logo are trademarks or registered trademarks of the MHL, LLC.
20 20.2 Ambilight Ambilight Off To switch off Ambilight… 20.1 1 - Press AMBILIGHT. 2 - Select Off and press OK. 3 - Press (left) to go back one step or press BACK to close the menu. Ambilight Style Follow Video You can set Ambilight to follow the video dynamics or to show a preset colour style. Alternatively, you can switch Ambilight off. 20.3 Ambilight Settings If you select Follow Video, you can select one of the styles that follow the dynamics of the picture on your TV screen.
3D • If the LED light blinks orange, you can use the glasses for at least 2 hours but less than 4 hours. • If the LED light blinks red, the battery is almost empty and less than 2 hours of 3D watching remain. 21.1 Switch Off What You Need To switch off the 3D glasses, press . The LED light blinks red 4 times. When the 3D glasses do not receive 3D signals for 2 minutes, the glasses switch off automatically. 21 This is an active 3D TV.
placed inside any part of the body, seek immediate medical attention. on your 3D glasses. 3 - Press (left) repeatedly if necessary, to close the menu. To switch off 2D to 3D conversion... 21.3 1 - Press . 2 - Select 3D Format > Watch 3D Start Watching 3D 2D, then press OK. 21.4 When the TV switches to 3D or when a notification is shown that 3D is available, put on your 3D glasses.
consulting a medical professional first. • To avoid discomfort such as dizziness, headache or disorientation, we recommend not watching 3D for extended periods of time. • Do not use the 3D glasses for any purpose other than watching 3D TV. • If you normally wear corrective glasses or use contact lenses, wear the 3D glasses together with these glasses or lenses. • Keep the glasses away from small children to avoid the swallowing of small parts or batteries.
VIEW again and select Multi View: Off on screen. * You can only watch TV channel image in Multi view mode, the audio of TV channel will be mute. 22 Multi View 22.1 Text and TV You can watch a TV channel in the small screen of Multi View when you're watching Text. To watch a TV channel while watching Text… 1 - Press MULTI VIEW . 2 - Select Multi View: On on screen. The channel you were watching appears in the small screen. 3 - Press or to switch channels in the small screen.
4 - Press (left) repeatedly if necessary, to close the menu. 23 Settings 23.1 Home or Shop Picture If the Picture Style is switched back to Vivid every time you switch on the TV, the TV location is set to Shop. A setting meant for in-store promotion. Picture Style To set the TV for Home use… Select a Style 1 - Press , select All Settings and press OK. 2 - Select General Settings and press (right) to enter the menu. 3 - Select Location > Home and press OK.
2 - Select Picture and press (right) to enter the menu. 3 - Select Sharpness and press (right). 4 - Press the arrows (up) or (down) to adjust the value. 5 - Press (left) repeatedly if necessary, to close the menu. the ideal settings for gaming manually. Don't forget to switch the Game or Computer setting off, when you return to watch TV. To switch the setting manually… 1 - Press , select All Settings and press OK. 2 - Select Picture and press (right) to enter the menu.
1 - Press , select All Settings and press OK. 2 - Select Picture and press (right) to enter the menu. 3 - Select Advanced > Colour > Colour Temperature and press OK. 4 - Select Normal, Warm or Cool. Or select Custom if you want to customise a colour temperature yourself. 5 - Press (left) repeatedly if necessary, to close the menu. conditions or select ISF Night when it's dark. Hue To adjust Hue value… 1 - Press , select All Settings and press OK.
3 - Select Advanced > Colour > RGB Only Mode and press OK. 4 - Select Red, Green, Blue, or Off to turn off RGB mode. 5 - Press (left) repeatedly if necessary, to close the menu. the menu. Brightness With Brightness, you can set the level of brightness of the picture signal. Brightness is a setting intended for expert users. We recommend non-expert users to adjust the brightness of the picture with the Contrast setting.
2 - Select Picture and press (right) to enter the menu. 3 - Select Advanced > Sharpness > Noise Reduction, and press (right) to enter the menu. 4 - Select Maximum, Medium, Minimum or Off. 5 - Press (left) repeatedly if necessary, to close the menu. Light Sensor The Light Sensor adjusts the picture settings automatically to the lighting conditions of the room. You can switch Light Sensor on or off. To switch on or off… 1 - Press , select All Settings and press OK.
5 - Press (left) repeatedly if necessary, to close the menu. Quick Picture Setting Picture Format During the first installation, you did some picture settings in a few easy steps. You can redo these steps with Quick Picture Setting. To do these steps, make sure the TV can tune to a TV channel or can show a programme from a connected device.
5 - Press (left) repeatedly if necessary, to close the menu. in Sources menu. To restore the style to its original setting… 1 - While watching a TV channel, press . 2 - Select Sound and press (right) to enter the menu. 3 - Select Sound Style , and select the Sound Style you want to restore. 4 - Press the colour key Restore Style . The style is restored 5 - Press (left) repeatedly if necessary, to close the menu.
the menu. 3 - Select Advanced > Audio Out Offset and press OK. 4 - Use the slider bar to set the sound offset and press OK. 5 - Press (left) repeatedly if necessary, to close the menu. Clear Sound With Clear Sound, you improve the sound for speech. Ideal for news programmes. You can switch the speech improvement on or off. For more information, in Help, press the colour key Keywords and look up Audio Out Offset. To switch on or off… 1 - Press , select All Settings and press OK.
Off, EasyLink, or EasyLink Autostart . 6 - Press (left) repeatedly if necessary, to close the menu. Subwoofer Volume To adjust the volume of wireless speaker… To switch to speakers directly… 1 - Press , select All Settings and press OK. 2 - Select Sound and press (right) to enter the menu. 3 - Select Wireless Speakers > Subwoofer Volume and press OK. 4 - Press (left) repeatedly if necessary, to close the menu. 1 - While watching TV, press . 2 - Select Speakers and select TV or Audio System.
matches the colour of the wall behind the TV. 5 - Press (left) repeatedly if necessary, to close the menu. Ambilight Brightness, at bottom side To adjust the Ambilight brightness level at bottom side… 1 - Press , select All Settings and press OK. 2 - Select Ambilight and press (right) to enter the menu. 3 - Select Brightness Bottom Side and press OK. 4 - Press the arrows (up) or (down) to adjust the value. 5 - Press (left) repeatedly if necessary, to close the menu.
1 - Press , select All Settings and press OK. 2 - Select Ambilight and press (right) to enter the menu. 3 - Select Advanced > Lounge Light+hue and press OK. 4 - Select Off. 5 - Press (left) repeatedly if necessary, to close the menu. Immersion With Immersion, you can adjust how accurate the Hue bulbs follow the Ambilight. To adjust Ambilight+hue immersion... 1 - Press , select All Settings and press OK. 2 - Select Ambilight and press (right) to enter the menu.
1 - Press , select All Settings and press OK. 2 - Select Eco Settings and press (right) to enter the menu. 3 - Select Energy Saving, the Picture Style is set to Standard automatically. 4 - Press (left) repeatedly if necessary, to close the menu. 2 - Select Eco Settings and press (right) to enter the menu. 3 - Select Switch Off Timer. Select inside the slider bar to adjust the value. The value 0 (Off) deactivates the automatic switch off. 4 - Press (left) repeatedly if necessary, to close the menu.
USB Hard Drive HbbTV To set up and format a USB Hard Drive... If a TV channel offers HbbTV pages, you must first switch on HbbTV in the TV settings to view the pages. 1 - Press , select All Settings and press OK. 2 - Select General Settings and press (right) to enter the menu. 3 - Select USB Hard Drive, and press OK. 4 - Select Start, then follow the instructions on screen. 5 - Press (left) repeatedly if necessary, to close the menu. 1 - Press , select All Settings and press OK.
TV Placement Child Lock As part of the first installation, this setting is set to either On a TV stand or On the Wall. If you have changed the placement of the TV since then, adjust this setting accordingly for best sound reproduction. Parental Rating To set a minumum age to watch rated programmes... 1 - Press , select All Settings and press OK. 2 - Select Child Lock and press (right) to enter the menu. 3 - Select Parental Rating, and select one of the age in the list.
Reinstall TV Subtitles You can redo a full TV installation. The TV is completely reinstalled. Switch On To switch on Subtitles, press SUBTITLE. To redo a full TV installation… You can switch subtitles On, Off or On During Mute. Or to show subtitles automatically when the broadcasted programme is not in language – the language set for the TV – select Automatic. This setting will also show Subtitles automatically when you mute the sound. 1 - Press , select All Settings and press OK.
Digital Text (UK only) Text / Teletex Languages Some digital broadcasters offer dedicated Digital Text or interactive TV on their digital TV channels. This includes normal Text using the number, colour and arrow keys to select and navigate. Text Pages To open Text/Teletext press TEXT, while you are watching TV channels. To close Text, press TEXT again. To close Digital Text, press BACK. Select a Text page To select a page . . . Text Options 1 - Enter the page number with the number keys.
4 - Press (left) repeatedly if necessary, to close the menu. Remote Control Keyboard To set the keyboard layout to Azerty… 1 - Press , select All Settings and press OK. 2 - Select Region and Language and press (right) to enter the menu. 3 - Select Remote Control Keyboard and press OK. 4 - Select Azerty or Qwerty and press OK. 5 - Press (left) repeatedly if necessary, to close the menu. Clock Date and Time Automatic To know what time it is, press . The Home Menu always shows what time it is.
the menu. Speakers/Headphones To switch on Hearing impaired while watching TV... With Speakers/Headphones, you can select where you want to hear the audio commentary. On the TV speakers only, on the headphones only or on both. 1 - While watching a TV channel, press OPTIONS , select Universal Access and press OK. 2 - Select Hearing impaired, and select On.
Speech The audio commentary can also hold subtitles for the words which are spoken. To switch on these subtitles (if available) . . . 1 - Press , select All Settings and press OK. 2 - Select Universal Access and press (right) to enter the menu. 3 - Select Audio Description > Speech and press OK. 4 - Select Descriptive or Subtitles and press OK. 5 - Press (left) repeatedly if necessary, to close the menu.
24 Select a Device Wireless and Networks For more information, in Help, press the colour key Keywords and look up Bluetooth, Select device for more information on how to select a wireless speaker. 24.1 Network Remove a Device For more information, in Help, press the colour key Keywords and look up Network, for more information on connecting the TV to a network.
25 Android Settings You can set or view several Android specific settings or information. You can find the list of apps installed on your TV and the storage space they need. You can set the language you like to use with Voice Search. You can configure the onscreen keyboard or allow apps to use your location. Explore the different Android settings. You can go to www.support.google.com/androidtv for more information on these settings. To open these settings… 1234- Press , select All Settings and press OK.
6 - Select Update Digital Channels, select Next and press OK. 7 - Select Start and press OK to update the digital channels. This can take a few minutes. 8 - Press BACK to close the menu. 26 Channel Installation 26.1 Antenna/Cable Installation Reinstall Channels Update Channels Reinstall All Channels Automatic Channel Update You can reinstall all channels and leave all other TV settings untouched. If you receive digital channels, you can set the TV to automatically update these channels.
Free / Scrambled DVB-T or DVB-C If you have a subscription and a CAM - Conditional Access Module for pay TV services, select Free + Scrambled. If you did not subscribe to pay TV channels or services, you can select Free Channels Only . DVB Settings Network Frequency Mode If you intend to use the fast Quick Scan method in Frequency Scan to search for channels, select Automatic. The TV will use 1 of the predefined network frequencies (or HC - homing channel) as used by most cable operator in your country.
• Search Channel To find a channel, select Search Channel and press OK. You can enter a frequency yourself to find a channel or let the TV search for a channel. Press (right) to select Search and press OK to search for a channel automatically. The found channel is shown on screen and if the reception is poor, press Search again. If you want to store the channel, select Done and press OK. 5 - Select Install and press OK. The TV shows the current satellite installation setup.
Satellite CAMs User Band Number If you use a CAM – a Conditional Access Module with a smart card – to watch satellite channels, we recommend to do the satellite installation with the CAM inserted in the TV. In a Unicable system, each connected satellite tuner must be numbered (e.g. 0, 1, 2 or 3 etc.). You can find the available user bands and their number on the Unicable switchbox. User band is sometimes shortened as UB. There are Unicable switchboxes that offer 4 or 8 user bands.
In certain countries, the automatic channel update is done while watching TV or on any moment when the TV is in Standby. Remove a Satellite Manual Channel Update You can remove one or more satellites from your current satellite installation. You remove the satellite and its channels. Some satellite operators do not allow removing a satellite. You can always start an channel update yourself. To remove satellites… 1 - Press , select All Settings and press OK.
the channel package. Homing Transponder and LNB I cannot remove a satellite In some countries, you can adjust the expert settings for homing transponder and each LNB. Only use or change these settings when a normal installation fails. If you have non-standard satellite equipment, you can use these settings to overrule the standard settings. Some providers might give you some transponder or LNB valeus which you can enter here. • Subscription packages do not allow removing a satellite.
5 - Select Copy to USB and press OK. You might be asked to enter the Child Lock PIN code to copy the channel list. 6 - When copying is done, unplug the USB flash drive. 7 - Press (left) repeatedly if necessary, to close the menu. reinstallation. See chapter Reinstall All Channels and start the installation. Select the correct country and skip the channels search. Finish the installation. When done, continue with step 2. 2 - Plug in the USB flash drive that holds the channel list of the other TV.
27 Download the software 1 - Insert the USB flash drive into your computer. 2 - On the USB flash drive, locate the file update.htm and double click it. 3 - Click Send ID. 4 - If new software is available, download the .zip file. 5 - After the download, unzip the file and copy the file autorun.upg onto the USB flash drive. Do not place this file in a folder. Software 27.1 Update Software Update from Internet If the TV is connected to the Internet, you may receive a message to update the TV software.
The Netherlands services by normal system calls - this is merely considered normal use of the kernel, and does *not* fall under the heading of "derived work". Also note that the GPL below is copyrighted by the Free Software Foundation, but the instance of code that it refers to (the linux kernel) is copyrighted by me and others who actually wrote it. Also note that the only valid version of the GPL as far as the kernel is concerned is _this_ particular version of the license (ie v2, not v2.2 or v3.
License SSL and TLS protocols. The core library, written in the C programming language, implements the basic cryptographic functions and provides various utility functions. The original download site for this software is : http://openssl.org/OpenSSL license libjpeg (8a) This package contains C software to implement JPEG image encoding, decoding, and transcoding. This software is based in part on the work of the Independent JPEG Group. Zlib compression library (1.2.
services and generic (non-SOAP) C/C++ XML data bindings. Part of the software embedded in this product is gSOAP software. Portions created by gSOAP are Copyright 2001-2009 Robert A. van Engelen, Genivia inc. All Rights Reserved. THE SOFTWARE IN THIS PRODUCT WAS IN PART PROVIDED BY GENIVIA INC AND ANY EXPRESS OR IMPLIED WARRANTIES, INCLUDING, BUT NOT LIMITED TO, THE IMPLIED WARRANTIES OF MERCHANTABILITY AND FITNESS FOR A PARTICULAR PURPOSE ARE DISCLAIMED.
Software or Document provided on this Web page, you should read the following terms (Terms of Use). By downloading the Software and Document, you are deemed to agree to these terms.1. The Government of the Hong Kong Special Administrative Region (HKSARG) has the right to amend or vary the terms under this Terms of Use from time to time at its sole discretion.2.
Unicode (4.0) allows a system administrator to configure the tables provided by the Linux kernel firewall (implemented as different Netfilter modules) and the chains and rules it stores. Different kernel modules and programs are currently used for different protocols; iptables applies to IPv4The original download site for this software is : https://android.googlesource.comThis piece of software is made available under the terms and conditions of the GPL v2.
download site for this software is : http://www.sentex.net/~mwandel/jhead/Portions of this source code are in the public domain IMPLIED, INCLUDING BUT NOT LIMITED TO THE WARRANTIES OFMERCHANTABILITY, FITNESS FOR A PARTICULAR PURPOSE AND NONINFRINGEMENT.IN NO EVENT SHALL THE AUTHORS OR COPYRIGHT HOLDERS BE LIABLE FOR ANYCLAIM, DAMAGES OR OTHER LIABILITY, WHETHER IN AN ACTION OF CONTRACT,TORT OR OTHERWISE, ARISING FROM, OUT OF OR IN CONNECTION WITH THESOFTWARE OR THE USE OR OTHER DEALINGS IN THE SOFTWARE.
authorization of the copyright holder. All trademarks and registered trademarks mentioned herein are the property of their respective owners. other materials provided with the distribution. * Neither the name of Google Inc. nor the names of its contributors may be used to endorse or promote products derived from this software without specific prior written permission.
conditions of this Agreement. Licensee shall maintain the following copyright and permission notices on STLport sources and its documentation unchanged :Copyright 1999,2000 Boris Fomitchev tinyalsa (NA) This TV uses tinyalsa: a small library to interface with ALSA in the Linux kernel The original download site for this software is : http://github.
names of its contributors may be used to endorse or promote products derived from this software without specific prior written permission. THIS SOFTWARE IS PROVIDED BY THE COPYRIGHT HOLDERS AND CONTRIBUTORS``AS IS'' AND ANY EXPRESS OR IMPLIED WARRANTIES, INCLUDING, BUT NOTLIMITED TO, THE IMPLIED WARRANTIES OF MERCHANTABILITY AND FITNESS FORA PARTICULAR PURPOSE ARE DISCLAIMED.
The licenses for most software are designed to take away your freedom to share and change it. By contrast, the GNU General Public License is intended to guarantee your freedom to share and change free software--to make sure the software is free for all its users. This General Public License applies to most of the Free Software Foundation's software and to any other program whose authors commit to using it.
three years, to give any third party, for a charge no more than your cost of physically performing source distribution, a complete machine-readable copy of the corresponding source code, to be distributed under the terms of Sections 1 and 2 above on a medium customarily used for software interchange; or, conditions either of that version or of any later version published by the Free Software Foundation.
distribute copies of the library or if you modify it. a certain library, so that it becomes a de-facto standard. To achieve this, non-free programs must be allowed to use the library. A more frequent case is that a free library does the same job as widely used non-free libraries. In this case, there is little to gain by limiting the free library to free software only, so we use the Lesser General Public License.
You may charge a fee for the physical act of transferring a copy, and you may at your option offer warranty protection in exchange for a fee. library. If distribution of object code is made by offering access to copy from a designated place, then offering equivalent access to copy the source code from the same place satisfies the requirement to distribute the source code, even though third parties are not compelled to copy the source along with the object code.
?b) Use a suitable shared library mechanism for linking with the Library. A suitable mechanism is one that (1) uses at run time a copy of the library already present on the user's computer system, rather than copying library functions into the executable, and (2) will operate properly with a modified version of the library, if the user installs one, as long as the modified version is interface-compatible with the version that the work was made with.
"Software"), to deal in the Software without restriction, including "Licensor" shall mean the copyright owner or entity authorized by without limitation the rights to use, copy, modify, merge, publish, the copyright owner that is granting the License.
"Derivative Works" shall mean any work, whether in Source or Object and conditions of this License, each Contributor hereby grants to You a perpetual, form, that is based on (or derived from) the Work and for which the worldwide, non-exclusive, no-charge, royaltyfree, irrevocable editorial revisions, annotations, elaborations, or other modifications copyright license to reproduce, prepare Derivative Works of, represent, as a whole, an original work of authorship.
meet the following conditions: from the Work, provided that such additional attribution notices cannot be construed (a) You must give any other recipients of the Work or as modifying the License.
implied, including, without limitation, any warranties or conditions defend, and hold each Contributor harmless for any liability of TITLE, NON-INFRINGEMENT, MERCHANTABILITY, or FITNESS FOR A incurred by, or claims asserted against, such Contributor by reason PARTICULAR PURPOSE. You are solely responsible for determining the of your accepting any such warranty or additional liability.
limitations under the License. and with the following additions to the disclaimer: There is no warranty against interference with your enjoyment of the library or against infringement. There is no warranty that our _____________________________ efforts or the library will fulfill any of your particular purposes This copy of the libpng notices is provided for your convenience. In case of or needs.
For the purposes of this copyright and license, "Contributing Authors" A "png_get_copyright" function is available, for convenient use in "about" is defined as the following set of individuals: boxes and the like: Andreas Dilger printf("%s",png_get_copyright(NULL)); Dave Martindale Guy Eric Schalnat Also, the PNG logo (in PNG format, of course) is supplied in the Paul Schmidt files "pngbar.png.jpg" and "pngbar.jpg (88x31) and "pngnow.png.jpg" (98x31).
The FreeType Project is distributed in several archive packages; FreeType Project and assume no liability related to The FreeType Project. some of them may contain, in addition to the FreeType font engine, various tools and contributions which rely on, or relate to, the Finally, many people asked us for a preferred form for a FreeType Project. credit/disclaimer to use in compliance with this license.
herein, subject to the following conditions: This license applies to all files distributed in the original o Redistribution of source code must retain this license file FreeType Project, including all source code, binaries and (`FTL.TXT') unaltered; any additions, deletions or changes to documentation, unless otherwise stated in the file in its the original files must be clearly indicated in accompanying original, unmodified form as distributed in the original archive. documentation.
As you have not signed this license, you are not required to LICENSE ISSUES ============== accept it. However, as the FreeType Project is copyrighted The OpenSSL toolkit stays under a dual license, i.e. both the conditions of material, only this license, or another one contracted with the the OpenSSL License and the original SSLeay license apply to the toolkit. authors, grants you the right to use, distribute, and modify it. See below for the actual license texts.
the OpenSSL Project * OF THE POSSIBILITY OF SUCH DAMAGE. * for use in the OpenSSL Toolkit. (http://www.openssl.org/)" * =========================== * * * 4. The names "OpenSSL Toolkit" and "OpenSSL Project" must not be used to * This product includes cryptographic software written by Eric Young * endorse or promote products derived from this software without * (eay@cryptsoft.com). This product includes software written by Tim * prior written permission.
* in documentation (online or textual) provided with the package. * HOWEVER CAUSED AND ON ANY THEORY OF LIABILITY, WHETHER IN CONTRACT, STRICT * * LIABILITY, OR TORT (INCLUDING NEGLIGENCE OR OTHERWISE) ARISING IN ANY WAY * Redistribution and use in source and binary forms, with or without * OUT OF THE USE OF THIS SOFTWARE, EVEN IF ADVISED OF THE POSSIBILITY OF * modification, are permitted provided that the following conditions * SUCH DAMAGE. * are met: * * 1.
including portions thereof. previous Modifications. 1.4. "Electronic Distribution Mechanism" means a mechanism generally 1.10. "Original Code" means Source Code of computer software code accepted in the software development community for the electronic which is described in the Source Code notice required by Exhibit A as transfer of data. Original Code, and which, at the time of its release under this License is not already Covered Code governed by this License. 1.5.
to cause the direction or management of such entity, whether by Code or ii) the combination of the Original Code with other software or devices. contract or otherwise, or (b) ownership of more than fifty percent (50%) of the outstanding shares or beneficial ownership of such 2.2. Contributor Grant. Subject to third party intellectual property claims, each Contributor entity. hereby grants You a world-wide, royalty-free, non-exclusive license 2.1. The Initial Developer Grant.
granted: 1) for any code that Contributor has deleted from the whom you made an Executable version available; and if made available via Electronic Contributor Version; 2) separate from the Contributor Version; Distribution Mechanism, must remain available for at least twelve (12) 3) for infringements caused by: i) third party modifications of months after the date it initially became available, or at least six Contributor Version or ii) the combination of Modifications made (6) months after a subsequ
obtains such knowledge after Exhibit A. You must also duplicate this License in any documentation the Modification is made available as described in Section 3.2, for the Source Code where You describe recipients' rights or ownership Contributor shall promptly modify the LEGAL file in all copies rights relating to Covered Code.
that the license for the understand it. Executable version does not attempt to limit or alter the recipient's rights in the Source Code version from the rights set forth in this This License applies to code to which the Initial Developer has License. If You distribute the Executable version under a different attached the notice in Exhibit A and to related Covered Code.
the Initial or a Contributor (the Initial Developer or Contributor against whom Developer, Original Code or Contributor in the notice described in You file such action is referred to as "Participant") alleging that: Exhibit A shall not of themselves be deemed to be modifications of this License.
Version directly or THIS EXCLUSION AND LIMITATION MAY NOT APPLY TO YOU. indirectly infringes any patent where such claim is resolved (such as by license or settlement) prior to the initiation of patent The Covered Code is a "commercial item," as that term is defined in infringement litigation, then the reasonable value of the licenses 48 C.F.R. 2.101 (Oct. 1995), consisting of "commercial computer granted by such Participant under Sections 2.1 or 2.
expressly excluded. License for the specific language governing rights and limitations Any law or regulation which provides that the language of a contract under the License. shall be construed against the drafter shall not apply to this The Original Code is _________. License. The Initial Developer of the Original Code is ______. As between Initial Developer and the Contributors, each party is Portions created by _______ are Copyright (C) ______. All Rights Reserved.
27.5 Announcements You can receive an announcement on new TV software available for download or other software related issues. To read these announcements… 1 - Press , select All Settings and press OK. 2 - Select Update Software > Announcements, and press OK. 3 - If there is an announcement, you can read it or select one of the announcements available. 4 - Press (left) repeatedly if necessary, to close the menu.
hours per day for 365 days. The actual energy consumption depends on how the television is used. 28 Specifications ** When the TV is turned off with the remote control and no function is active. 28.1 Environmental End of Use European Energy Label Disposal of your old product and batteries The European Energy Label informs you on the energy efficiency class of this product. The greener the energy efficiency class of this product is, the lower the energy it consumes.
• Ambient temperature : 5°C to 35°C • Power saving features : Eco mode, Picture mute (for radio), Auto switch-off timer, Eco settings menu. 28.6 Display Input Resolution For power consumption information, see chapter Product Fiche. Video formats Resolution — Refresh rate The power rating stated on the product typeplate is the power consumption for this product during normal household use (IEC 62087 Ed.2). The maximum power rating, stated between brackets, is used for electrical safety (IEC 60065 Ed. 7.
• without TV stand: Width 1239.2 mm - Height 726 mm - Depth 79.2 mm - Weight ± 15.1 kg • with TV stand: Width 1239.2 mm - Height 773.6 mm - Depth 279 mm - Weight ± 18.5 kg Supported USB file systems • FAT 16, FAT 32, NTFS Playback formats • Containers : 3GP, AVCHD, AVI, MPEG-PS, MPEG-TS, MPEG-4, Matroska (MKV), Quicktime (MOV, M4V, M4A), Windows Media (ASF/WMV/WMA) • Video Codecs : MPEG-1, MPEG-2, MPEG-4 Part 2, MPEG-4 Part 10 AVC (H264), H.
29 Switch On and Remote Control Help and Support The TV does not switch on • Disconnect the power cable from the power outlet. Wait for one minute then reconnect it. • Make sure that the power cable is securely connected. 29.
list Sound Make sure that the correct channel list is selected. No sound or poor sound quality If no audio signal is detected, the TV automatically switches the audio output off — this does not indicate malfunction. Picture No picture / distorted picture • Make sure that the antenna is properly connected to the TV. • Make sure that the correct device is selected as the display source. • Make sure that the external device or source is properly connected.
supported by the TV. 29.4 Choppy playback of USB files • The transfer performance of the USB storage device may limit the data transfer rate to the TV which causes poor playback. Online Help Wi-Fi, Internet and Bluetooth Go to www.philips.com/support . To solve any Philips TV related problem, you can consult our online support. You can select your language and enter your product model number.
30 Risk of Injury or Damage to the TV Safety and Care • Two people are required to lift and carry a TV that weighs more than 25 kg or 55 lbs. • If you mount the TV on a stand, only use the supplied stand. Secure the stand to the TV tightly. Place the TV on a flat, level surface that can support the weight of the TV and the stand. • When wall mounted, ensure that the wall mount can safely bear the weight of the TV set.
Lightning Storms Disconnect the TV from the power outlet and antenna before lightning storms. During lightning storms, never touch any part of the TV, power cord or antenna cable. Risk of Hearing Damage Avoid using earphones or headphones at high volumes or for prolonged periods of time. Low Temperatures If the TV is transported in temperatures below 5°C or 41°F, unpack the TV and wait until the TV temperature reaches room temperature before connecting the TV to the power outlet.
more, black dots or bright points of light (red, green or blue) may appear constantly on the screen. This is a structural property of the display (within common industry standards) and is not a malfunction. 31 Terms of Use 31.1 CE compliance This product is in compliance with the essential requirements and other relevant provisions of Directives 2006/95/EC (Low Voltage), 2004/108/EC (EMC) and 2011/65/EU (ROHS). Terms of Use - TV 2015 © TP Vision Europe B.V. All rights reserved.
32 32.4 Copyrights DTS Premium Sound ™ 32.1 MHL MHL, Mobile High-Definition Link and the MHL Logo are trademarks or registered trademarks of the MHL, LLC. DTS Premium Sound ™ For DTS patents, see http://patents.dts.com. Manufactured under license from DTS Licensing Limited. DTS, the Symbol, & DTS and the Symbol together are registered trademarks, and DTS 2.0 Channel is a trademark of DTS, Inc. © DTS, Inc. All Rights Reserved. 32.2 32.
Content owners may require you to upgrade PlayReady to access their content. If you decline an upgrade, you will not be able to access content that requires the upgrade. 32.7 Wi-Fi Alliance Wi-Fi®, the Wi-Fi CERTIFIED logo, the Wi-Fi logo are registered trademarks of the Wi-Fi Alliance. 32.8 Kensington (If applicable) Kensington and Micro Saver are registered US trademarks of ACCO World Corporation with issued registrations and pending applications in other countries throughout the world. 32.
Index 3 3D 65 3D Backlight Contrast 70 3D, 2D to 3D Conversion 66 3D, Health Warning 66 3D, Optimal Viewing 66 3D, What you need, active 3D 65 A Age Rating 33 Ambilight Style 64 Ambilight, Lounge Light 78 Ambilight, Lounge Light+hue 78 Ambilight, Settings 77 Ambilight, TV Switch Off 78 Ambilight, Wall Colour 78 Android Settings 12 Announcements 131 Antenna connection 8 Antenna, Manual Installation 91 APP lock 53 Apps 51 Audio commentary 86 Audio Description 86 Audio Language 34 Audio Language, Primary 34 A
Frequency Scan 91 Frequency Step Size 91 G Game Console, connect 21 Game or Computer 49 Game or Computer, setting 70 Gamepad, connect 22 Games,split screen gaming 55 Gamma 73 Google Play Store 52 H Hard of hearing 85 HbbTV 38 HDMI MHL 14 HDMI, ARC 14 HDMI, DVI connection 15 Headphones Volume 76 Headphones, connect 21 Hearing impaired 85 Home Menu 46 Home Theatre System, Multichannel 19 Home Theatre System, problems 19 Home Theatre System, sound 76 Home Theatre System, volume levelling 19 I Incredible Sur
Satellite, Channel packages 93 Satellite, Manual Channel Update 94 Satellite, Manual Installation 94 Satellite, Remove Satellite 94 Satellite, Unicable 93 SCART connection, tips 16 Screen care 139 Sharpness 69 Sharpness, MPEG Artefact Reduction 73 Sharpness, Noise reduction 73 Sharpness, Super Resolution 73 Sleep Timer 26 Smart Card, CAM 16 Software, Update 97 Sound Style 74 Sound, Auto Surround 3D 75 Sound, Auto Volume Levelling 75 Sound, Bass 75 Sound, Clear Sound 76 Sound, Headphones Volume 76 Sound, Inc
Powered by TCPDF (www.tcpdf.