Philips Business Solutions EN User Manual TYPE Nr.
User Manual BDS4241V/BDH4241/BDH5021V T ABLE OF C ONT ENT S IMPO RT A N T N O T ES A N D SA FET Y IN ST RU C T IO N S . . . . . . . . . . . . . . . . . . . . . . . . . 3 1.1 1.2 1.3 Safety Instructions . . . . . . . . . . . . . . . . . . . . . . . . . . . . . . . . . . . . . . . . . . . . . . . . . . . . . . . . . . . . . . . . . . . 3 FCC Instruction . . . . . . . . . . . . . . . . . . . . . . . . . . . . . . . . . . . . . . . . . . . . . . . . . . . . . . . . . . . . . . . . . . . . .
User Manual BDS4241V/BDH4241/BDH5021V 6.10 6.11 6.12 6.13 Changing the screen size . . . . . . . . . . Setting up the PC Input . . . . . . . . . . . . Viewing the picture in picture (PIP). . . Remote management . . . . . . . . . . . . ... ... ... ... ... ... ... ... ... ... ... ... .... .... .... .... ... ... ... ... ... ... ... ... ... ... ... ... .... .... .... .... ... ... ... ... ... ... ... ... ... ... ... ... ... ... ... ... .... .... .... .... ... ... ... ... ... ... ... ... ... ...
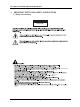
User Manual BDS4241V/BDH4241/BDH5021V 1. IMPORTANT NOTES AND SAFETY INSTRUCTIONS 1.1 Safty Instructions CAUTION RISK OF ELECTRIC SHOCK DO NOT OPEN • • • • • • re if it is connected to .) • • • • • re.
User Manual BDS4241V/BDH4241/BDH5021V CAUTION • • • • • • • • • • • • • • • Should not be adhered to a power supply plug and receptacle. (This can result in a risk of re) Do not use new batteries with old ones together. (This can result in a risk of electric shock) Do not place this product in the place to reach children’s hands. Do not take out a power supply plug with the wet hand.
User Manual BDS4241V/BDH4241/BDH5021V 1.2 FCC Information User Instructions This device complies with part 15 of the FCC Rules. Operation is subject to the following two conditions: 1. This device may not cause harmful interference, and 2. This device must accept any interference received, including interference that may cause undesired operation. NOTE: This equipment has been tested and found to comply with the limits for a Class A digital device, pursuant to Part 15 of the FCC Rules.
User Manual BDS4241V/BDH4241/BDH5021V 1.3 END-OF-LIFE DISPOSAL This Philips product and its packaging contain materials that cna be recycled and re-used. Specialized companies can recycle your product to increase the amount of reusable materials and minimize the amounts which need to be properly disposed. This product might also use batteries, which should not be thrown away when depleted, but should be handed in and disposed of as small chemical waste.
User Manual BDS4241V/BDH4241/BDH5021V 7
User Manual BDS4241V/BDH4241/BDH5021V 2. UNPACKING AND INSTALLATION 2.1 UNPACKING The monitor is packed in a carton, to gether with the standard accessories. Any other optional accessories will be packed separately. The weight of the monitor differs-depending on the type-from29 to 43kg. Due to the size and weight it is rccommended to move it by 2 people. The protective glass and the glass substrate are installed on the front of the product.
User Manual BDS4241V/BDH4241/BDH5021V 2.3 INSTALLATION NOTES Due to the high power consumption, always use the plug exclusively designed for this product. If an extended line is required, please consult your service agent. The product should be installed on a flat surface to avoid tipping. The distance between the back of the product and the wall should be maintained for proper ventilation.
User Manual BDS4241V/BDH4241/BDH5021V 3. PARTS AND FUNCTIONS 1 12 13 14 15 16 17 3.1 FRONT VIEW 1. Input Button Use this button to switch between available inputs. 2. Menu Button Use this button to engage the On Screen Display menu. 3. Volume Adjustment Buttons Use these buttons to adjust volume up and down. These keys also serve as navigation and adjustment keys when On Screen Display menu is engaged. 4. Select Buttons Use these buttons to navigate through the On Screen Display menu.
User Manual BDS4241V/BDH4241/BDH5021V 3.2 REAR VIEW 17 VIDEO 2 1 12 13 14 15 16 1 8 VIDEO 1 1 1 19 1. External speaker output Connect to external speakers. 2. RS-232 Connector Connec to a PC to update software. 3. Digital DVI Input Connect to digital video signals from a Set-Top box or Computer Audio output. 4. RGB(VGA) Input Connect to RGB(VGA) output of Computer or Set-Top box. 5.
U ser M anual B D S 4241V /B D H 4241V /B D H 5021V 3.3 REMOTE CONTROL 3.3.1 GENERAL FUNCTIONS 1. Sound Mute On/Off 1 12 2. Standby Power On/Off Push this button to switch on the monitor from Standby mode. Push it again to turn it off to Standby mode. 3. Menu Activates the OSD (On Screen Display) menu 13 15 14 16 4. Volume +/Turns volume up or down. 5. Channel Up/Down Changes the TV channels sequentially. 17 12 1 6. TEXT Activates the TELETEXT mode. 7.
U ser M anual B D S 4241V /B D H 4241V /B D H 5021V 3.3.2 INSERTING THE BATTERIES IN THE REMOTE CONTROL 1. Remove the cover on the rear of the remote control. 2. Insert two AAA size 1.5V batteries ensuring that the "+" and "-" ends of the batteries are correctl aligned. 3. Replace the cover. Note : Do not mix battery types, e.g. alkaline and managnese.
User Manual BDS4241V/BDH4241/BDH5021V 4. CONNECTIONS TO EXTERNAL EQUIPMENT 4.1 CONNECTING EXTERNAL EQUIPMENT 4.1.1 USING S-VIDEO INPUT 1. Connect the S-Video (4-pin DIN)connector of the external decvice to the "S-VIDEO" input of the monitor. 2. Connect the red (R) and white (L) audio jacks of the device to the R and L audio-in jacks located next to the S-VIDEO connector. 4.1.2 USING COMPONENT VIDEO INPUT 1.
U ser M anual B D S 4241V /B D H 4241V /B D H 5021V VIDEO 2 4.1.3 USING VIDEO INPUT 1. Connect the jack of the external device to the VIDO INPUT of the monitor. 2. Connect the red(R) and white (L) audio jacks to the R and L audioin jacks located next to the VIDO connector. VIDEO 1 4.1.4 USING MONITOR OUTPUT 1. Connect the jack of the DVD or VCR (for recording) or audio system to the MONITOR OUTPUT of the monitor. 2.
U ser M anual B D S 4241V /B D H 4241V /B D H 5021V 4.2 EXTERNAL AUDIO CONNECTION 4.2.1 CONNECTING EXTERNAL AMPLIFIED SPEAKERS This monitor can be connected to an external set of amplified speakers using the ADDIO OUT jacks located on the back of the monitor. 1. Connect the red (R) and white (L) AUDIO OUT jacks to the external amplified speakers.
User Manual BDS4241V/BDH4241/BDH5021V 4.3 CONNECTING A PC 4.3.1 USING RGB (VGA) OR DVI VIDEO INPUT 1 1. Connect the 15-pin D-Sub RGB(VGA) connector of the PC to the RGB-IN connector of the monitor. If you have a PC that is equipped with a DVI (Digital Visual Interface), you may connect the PC DVI connector from the PC to the DVI-IN connector of the monitor. 2. For both RBB(VGA) and DVI, connect the red (R) and white (L) audio jacks of the PC to the R and L (DVI/RGB) AUDIO IN jacks of the monitor.
User Manual BDS4241V/BDH4241/BDH5021V 5. BASIC FUNCTIONS 5.1 POWERING ON / OFF Make sure the monitor is plugged into the wall outlet with the supplied power cord. If the power is plugged in, the STATUS LED on the control panel will illuminate in red color. Using Front Panel or Remote Control 1. Press the POWER key on the front panel or the remote control. => The monitor will now turn on after a brief pause. The STATUS LED will now turn green to indicate power on status. 2.
User Manual BDS4241V/BDH4241/BDH5021V 5.3 Image S c reen S etup VOLUME ADJUSTMENT Using Front Panel or Remote Control A udio Vo lu m e 60 T r e ble 055 B as s 072 B a la nc e 043 M u te ON OF F Audio rPes et [-VOL +] o trPes etAudio Move [- C H +] Adjus t [- VOL +] E xit [ME NU] 1. Press the MENU button on either the front panel or on the remote control. 2. Press the VOL+ or VOL- button to select Audio. 3. Press the CH- button to enter the selected menu group. 4.
User Manual BDS4241V/BDH4241/BDH5021V 5.5 DISPLAY INFORMATION Via Remote Control Press the RECALL button to display the channel information and setting status. Press again to exit. Note The displayed information can differ, depending on the selected source.
User Manual BDS4241V/BDH4241/BDH5021V 21
User Manual BDS4241V/BDH4241/BDH5021V 6. ADVANCED FUNCTIONS 6.1 PICTURE CONTROLS 6.1.1 ADJUSTING PICTURE SETTINGS Various picture adjustments can be set using the Picture Adjustment OSD menu. Image Screen Setup Audio B r i g h tn e s s C o n tr a s t S h a r pn e s s C o lo r T int Image Preset 083 052 019 063 05 0 [-VOL+]to Preset Image Move [- CH +] Select [- VOL +] Exit [MENU] 1. Press the MENU button on the monitor panel or remote control. The Image menu is displayed. 2.
User Manual BDS4241V/BDH4241/BDH5021V Image S c reen S etup 6.2 SOUND CONTROLS 6.2.1 ADJUSTING SOUND SETTINGS Various sound adjustments can be set using the Sound Adjustment OSD menu. A udio Vo l u m e 60 T r e ble 055 B as s 072 B a la nc e 043 M u te ON OF F Audio Pr es et [-VOL +] to P res et Audio Move [- C H +] Adjus t [- VOL +] E xit [ME NU] 1. Press the MENU button on the monitor panel or remote control. 2. Press the VOL+ or VOL- key to select Audio. 3.
User Manual BDS4241V/BDH4241/BDH5021V 6.3 OSD MENU LANGUAGE This monitor has multiple OSD Menu languages built-in including English, French, Spanish, Italian, German and Dutch. Image S creen S etup Audio Move [- C H +] Setting OSD Menu Language E nglis h L anguage S leep Timer OS D S ettings C olor Temp 030 1. Press the MENU button on the monitor panel or remote control. 2. Press the VOL+ or VOL- key to select Setup. 3. Press the CH- key to enter the selected menu group.
User Manual BDS4241V/BDH4241/BDH5021V 6.6 Image S creen S etup If the fixed pattern is displayed for a long time, a difference in brightness is caused around the lighting area and non-lighting area due to deterioration in the fluorescent substance used in the plasma module. It comes to be recognized as image sticking. This feature allows you to make the occurrence of image sticking as slow as possible.
User Manual BDS4241V/BDH4241/BDH5021V 6.10 Image Screen S etup S iz e F reez e Sticking Minimum You can select the screen size which best corresponds to your viewing requirements. Audio A UTO OF F ON OFF ON 1 2. 3. 4. Move [- CH +] Select [- VOL +] Exit [ MENU ] Image Screen S etup S iz e Select [- VOL CHANGING THE SCREEN SIZE Press the MENU button. Press the VOL+ or VOL- key to select Screen. Press the CH- key to enter the selected menu group. > The Size is selected.
User Manual BDS4241V/BDH4241/BDH5021V 6.12 VIEWING THE PICTURE IN PICTURE (PIP) You can display a sub-picture with the main picture. In this way you can watch monitor the video input from any connected devices while watching other video input. S plit S creen NOR MAL Selecting a PIP mode Press the SPLIT button repeatedly to select required mode. The available modes are displayed in the following order. NORMAL - PIP - PBP Selecting a location of the sub-picture Press the LOCATE button.
User Manual BDS4241V/BDH4241/BDH5021V Swapping the main picture and the sub-picture Press the SWAP button. The main picture and the sub picture are interchanged. It is available in PIP and PBP mode only. Sub Input VIDEO 1 VIDEO 2 Main Input Video S-Video VIDEO 1 X O O O VIDEO 2 O X O Video O O X O O S-Video O O O COMPONENT X X X X X X X X X RGB DVI X X X X Swapping the audio of the main or sub-picture Press the A.SWAP (Audio SWAP) button repeatedly.
User Manual BDS4241V/BDH4241/BDH5021V 29
User Manual BDS4241V/BDH4241/BDH5021V 7. INPUT MODE VGA Resolution Active Resolution Standard resolution H Pixels V Lines VGA 640 480 848 WVGA Refresh Rate 60 72 75 480 SVGA 800 600 XGA 1024 768 SXGA 1280 1024 60 60 72 75 60 70 75 60 Aspect ratio Stand for Mode 16:9 Video Graphic Array 16:9 Wide Video Graphic Array 16:9 Super VGA 65 MHz 75 MH z 16:9 78.
User Manual BDS4241V/BDH4241/BDH5021V When horizontal synchronous signals seem irregular in RGB mode, check PC power saving mode or cable connections. The display settings table complies to the IBM/VESA standards, and based on the analog input. The DVI support mode is regarded as same to the PC support mode. The best timing for the vertical frequency to each mode is 60Hz.
User Manual BDS4241V/BDH4241/BDH5021V 8. TECHNICALS SPECIFICATIONS Display Item Screen Size (Active Area) 42" SD 42" HD 42" (920.1(H ) x 518.4(V) ± 0.5mm) Aspect ratio Number of pixels Pixel pitch Contrast Ratio 50" (1106.5(H ) x 622.1(V) ±0.5mm) 16:9 852 (H ) x 480 (V) 1024 (H ) x 7 68 (V ) 1366 (H) x 76 8 (V) 1.080(H) x 1. 080(V) [mm] 0.900(H ) x 0.676(V) [ mm] 0.810(H) x 0 .810(V) [mm] Displayable Colors Brightness 50" HD 1 billion (O ption) 1500 cd/m2 1000 cd/m2 1000 cd/m2 10.
User Manual BDS4241V/BDH4241/BDH5021V In / Out Terminals Item 42" SD ; 42" HD ; 50" HD Internal speaker (option)) 10W (L) + 10W (R) [ RMS] / 8 2 Way 2 Speaker n) External speaker (option) 10W( L) + 1 0W (R) [R MS] / 8 2 Way 6 Speaker D-Sub Jack x 1 (9 pin) T XD + R XD (1:1) DVI Jack x 1 (24 pin) Digital RGB : TM DS MAX : 720p, 1080i, 1280 x 1024 / 60 Hz (SXGA) RCA Jack x 1 Audio : 0.5V [rms](N ormal) / 2 Channel (L + R ) D-Sub Jack x 1 (15 pin) Analog RG B : 0.7V[p-p](75 ), H/C S/V : TT L (2 .
User Manual BDS4241V/BDH4241/BDH5021V General 42" SD 42" HD 50" HD 250 W AC 100 V ~ 240 V, 50/60 Hz 300 W 440 W 1028 x 625 x 8 9.8 (A) 1028 x 625 x 107.4 (B) 1205 x 721 x 114.
User Manual BDS4241V/BDH4241/BDH5021V 35
User Manual BDS4241V/BDH4241/BDH5021V 9. CLEANING AND TROUBLESHOOTING 9. 1 CLEANING Cautions When Using the Plasma Display Do not bring your hands, face or objects close to the ventilation holes of the plasma dislay. Top of plasma dislay is usually very hot due to the high temperature of exhaust air being released through the ventilation holes. Burns or personal injuries may occur if any body parts are brought too close.
User Manual BDS4241V/BDH4241/BDH5021V 9.2 TROUBLESHOOTING Symptom Possible Cause Remedy No picture is displayed 1. The power cord is disconnected. 2. The main power switch on the back of the monitor is not switched on. 3. The selected input has no connection. 4. The monitor is in standby mode in RGB mode. 1. Plug in the power cord. 2. Make sure the power switch is switched on. 3. Connect a signal connection to the monitor. 4. Press any key on your keyboard.
User Manual BDS4241V/BDH4241/BDH5021V 10. LIMITED WARRANTY (USA) Two Year Free Laber Two Year Free Parts WHO IS COVERED? You must have proof of the date purchased to receive warranty service. A sales receipt or other document showing the date that you purchased the product is considered proof of purchase. WHAT IS COVERED? Warranty cover age begins the day you buy your product. For two years thereafter, all defective parts will be repaired or replaced and labor is free.
User Manual BDS4241V/BDH4241/BDH5021V MAKE SURE YOU KEEP... Please keep your sales receipt or other document showing proof of purchase. Attach it to this owner's manual and keep both nearby. Also keep the original box and packing material in case you need to return your product. BEFORE REQUESTING SERVICE... Please check your owner's manual before requesting service. Adjustments of the controls discussed there may save you a service call. TO GET WARRANTY SERVICE U.S.A.
User Manual BDS4241V/BDH4241/BDH5021V 40