PHILIPS ^NORELCO ALL IN 'I GROOMING SYSTEM G370 Rechargeable Cordless Register your product and get support at www.philips.
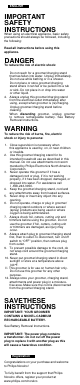
ENGLISH IMPORTANT SAFETY INSTRUCTIONS When using an electrical appliance, basic safety precautions should always be followed, including the following: Read all instructions before using this appliance. DANGER To reduce the risk of electric shock: Do not reach for a groomer/charging stand that has fallen into water. Unplug immediately. Do not use while bathing or in a shower. Do not place or store groomer/charging stand where it can fall or be pulled into a tub or sink.
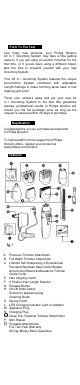
Put It To The Test Like many new products, your Philips Norelco All In 1 Grooming System may take a little getting used to. If you are using an electric Groomer for the first time, or If you've been using a different brand, take the time to acquaint yourself with your new Grooming System.
To Charge/Recharge ► Fully charge Groomer before using for the first time or after non-use for a long period of time. I Battery performance is best if you recharge only when the battery is (almost) completely empty. I Charging or recharging at temperatures below 40°F or higher than 95°F adversely affects lifespan of the battery. I Continuously recharging Groomer will reduce lifespan of battery. D Be certain Groomer is OFF. u Insert the appliance plug directly into the Groomer (fig.
Trimming > Make sure hair is clean and dry. > Always comb the hair with the styling comb in the direction of growth before you start trimming. Do not move the Groomer too fast. Make smooth and gentle movements. Trimming your Beard & Moustache with AccuControl Guide Comb Attachment I Use this Groomer for its intended household use as described in this manual. > Make sure that the Groomer is fully charged before you start trimming. This Groomer will not operate while cord is connected to electrical outlet.
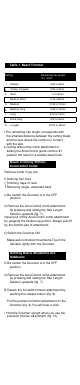
Table 1. Beard Trimmer Setting Remaining hair length (In.) /(mm) 1 Stubble 5/64 in/2mm 2 Closely Cropped 5/32 in/4mm 3 Short Medium Short 1/4 in/6mm 5/16 in/8mm 5 Medium 6 Medium Long 5/32 in/12mm 7 Long 9/16 in/14mm Extra Long 5/8 in/16mm 8 9 Longest 13/32 in/10mm 23/32 in/18mm I The remaining hair length corresponds with the smallest distance between the cutting blade and the spot where the comb is in contact with the skin.
Using Nose, Ear & Eyebrow Trimmer Attachment D Be certain the Groomer is in the OFF position. Q To attach or remove nose, ear, eyebrow trimmer (or change attachments): k Remove the AccuControl comb attachment (fig-7). I Remove the full width trimmer attachment by pushing the release button (fig. 8). I Put the nose, ear, eyebrow attachment on the Groomer (fig. I l).You will hear a click. Trimming Nose Hair I Make sure nasal passages are clean. D Place nose, ear and eyebrow attachment on Groomer.
Trimming Eyebrow > Nose, ear and eyebrow attachment should be on Groomer. 11 Switch the Groomer on and use the tip to cut individual eyebrow hairs. The Groomer can be used for clipping single long hairs. B Put the Groomer at the root of the hair and move it along the edge of the eyebrow from the base of the nose towards the outer tip of the eyebrow in the direction of hair growth (fig. 15). IMPORTANT: Do not use the Groomer to define or trim the entire eyebrow. Do not try to trim your eyelashes.
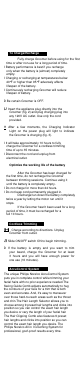
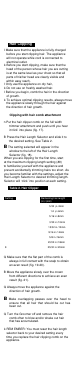
Hair Clipping I Make sure that the appliance is fully charged before you start clipping hair. The appliance will not operate while cord is connected to electrical outlet. k Before you start clipping, make sure that the head of the person whose hair you are cutting is at the same level as your chest so that all parts of his/her head are clearly visible and within easy reach. I Only use the appliance on dry hair, k Do not use on freshly washed hair.
Contouring without the hair clipping comb attachment D Remove the hair comb by pressing and sliding the Hair Length Selector upwards (fig. 22). Be careful when you are clipping without comb attachment as when the appliance is turned on it will trim every hair it touches. D Tilt the appliance in such a way that only one edge of the trimming attachment touches the hair ends when you shape the contours around the ears (fig. 23).
Replacing The Mini Shaver Cutter If the mini shaver cutter is worn or damaged, do not continue using the appliance. Replace the mini foil cutter and the shaving foil immediately. A worn or damaged mini shaver cutter should only be replaced with an original Philips cutter Visit www.philips.com/support or call I -800-243-3050 for assistance. n Remove the detachable shaving head by pulling it from the appliance (fig. 26). B Remove the old mini shaver cutter by pulling it from the appliance (fig. 32).
4222 002 8161 I PHILIPS £norelco 45-DAY MONEY-BACK GUARANTEE If you are not fully satisfied with your Philips Norelco Groomer, send the product back along with dated sales receipt and we’ll refund you the full purchase price. The Groomer must be shipped prepaid by insured mail, insurance prepaid, and have the original sales receipt, indicating purchase price and the date of purchase, enclosed. We cannot be responsible for lost mail.