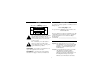
Digital Audio Player SA101 NO BOOKMA RK YE S DELETE DIS PLA Y D L O H MO DE /EQ VOL UME 4.
SAFETY INFORMATION Know these safety symbols For details on warranty registration or the Player, visit the Philips web site: www.rush.philips.com CAUTION t ATTENTION s For questions about RealJukebox and its features, visit: www.real.com Record your Player’s model and serial numbers here. The serial number is located inside the battery compartment, and the model number is on the back of the Player.
IMPORTANT SAFETY INSTRUCTIONS - Please read before operating equipment. 7. Install in accordance with the manufacturer’s instructions. Do not block any of the ventilation openings. For example, the appliance should not be situated on a bed, sofa, rug, or similar surface or placed in a built-in installation, such as a bookcase or cabinet that may impede the flow of air through the ventilation openings. This product was designed and manufactured to meet strict quality and safety standards.
TABLE OF CONTENTS RealJukebox Features . . . . . . . . . . . . . .18-20 Playing Music . . . . . . . . . . . . . . . . . . . . . . .21 Adjusting Volume and Sound . . . . . . . . . . .22 Putting Buttons on Hold . . . . . . . . . . . . . . .23 Display . . . . . . . . . . . . . . . . . . . . . . . . . . . .24 Selecting Tracks/Searching . . . . . . . . . . . . .25 Repeating and Shuffling Tracks . . . . . . . . .26 Bookmarks . . . . . . . . . . . . . . . . . . . . . . . . .27 Clearing Tracks . . . . . . . . . . .
GENERAL INFORMATION COMPUTER REQUIREMENTS • Windows 95 or 98; Internet Explorer 3.01 or above; Netscape 4.0 or above; and Internet access • Intel® Pentium® 200 MHz • 64 MB internal memory (recommended) • Free on the personal computer (PC): 15 MB for the RealJukebox software, plus 1 MB for every minute of music you store on the PC • CD-ROM drive • Parallel port with ECP/EPP mode • 16 bit sound card • 256 color video card RUSH is a solid-state, portable, digital audio player.
MAINTENANCE BATTERIES BATTERIES 1. Remove the battery compartment lid and insert two AAA batteries (preferably alkaline) as indicated by the + and – symbols inside the battery compartment. 2. Replace the battery compartment lid. Powered will appear very briefly on the display. • Do not expose the Player, batteries, or SmartMedia cards to strong magnetic fields, humidity, rain, sand, or excessive heat caused by heating equipment or direct sunlight.
POWER ADAPTER BEGIN 1 Make sure your local voltage matches the 4.5V voltage of the adapter. NO 4 BOOKMA RK YE S 2 DELETE DIS Remove the batteries from the Player. PLA Y D L O H MO DE /EQ VOLU ME 3 3 V D C DA TA I/O 4.5 Connect the adapter to the Player's 4.5V DC jack and to an AC power outlet. Powered will appear briefly on the display (if there are no batteries in the Player).
CONTROLS NO ■ – Press to turn off the Player or to stop playback. Display – Shows the current activity of the Player and gives details about the current track or file. Details are on page 24. BOOKMARK – Use to set bookmarks. Details are on page 27. YES © – Press to turn on the Player or to start or pause playback. DELETE – Press to delete the current track, erase the SmartMedia card, or clear bookmarks. Details are on page 28.
CONTROLS, CONTINUED General Info Inf o Your Player consists of materials which can be recycled if disassembled by a specialized company. Please observe the local regulations to dispose of packing materials, dead batteries and old equipment. EJEC Two AAA CARD We have reduced the packaging to its minimum and made it easy to separate into two materials: cardboard (box) and polyethylene (bags). Battery Compartment – Install two AAA, R03, or UM4 batteries here.
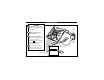
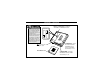
CONNECTING RUSH TO YOUR COMPUTER BEGIN 1 Press NO ■ to turn off the Player. Make sure the computer is off. 1 4 NO BOOKMARK YE S DELETE DISP D LAY L O H MO /EQ VOLU ME 5V D C DA TA I/O 4. If a printer cable is connected to the parallel port on your computer, disconnect the printer cable. 5 DE 2 3 TO P 3 DATA I/O Jack Connect the supplied parallel cable to the computer's parallel port.
INSTALLING REALJUKEBOX Install the RealJukebox software to manage your playlist on your PC. RealJukebox lets you: • Record CD tracks onto your PC or send the CD songs to RUSH for portable playback. • Index your songs according to artist, album, or genre. • Download music from the Internet. BEGIN 1 RealJukebox works in ECP (Extended Capability Port or Printer Port) mode. To make sure your computer is in ECP mode, select My Computer → Control panel → System → Device Manager → Ports. Select ECP at Ports.
RECORDING FORMATS (ENCODING OPTIONS) RUSH plays files recorded in MP3, Wave Audio, or RealAudio format. Before recording, select a format and a Secure Files setting. BEGIN 1 While installing RealJukebox (details are on page 12), select Encoding Options. 2 The following formats will be available. Select your format. • MP3 (MPEG layer 3 Audio) compression levels are 96, 64, and 56 Kbps stereo, using the supplied RealJukebox software.
USING REALJUKEBOX Play the broadest range of digital music. Listen to music while you record. Download and install new plug-ins and updates. Go to the on-line tutorial, Access the Philips SmartConnect web site. Put your CD collection on your PC. Record CDs at high speed. Create and save Playlists. Sort and manage songs and CDs by genre, artist, album, song title, etc. Portable Players/Storage Find and download music, including MP3 songs, from the Internet.
SMARTMEDIA CARD You can store up to an hour of music on the card, erasing and overwriting as much as you want. NO ■ Button 1 Bottom of RUSH BEGIN 1 Press NO ■ to turn off the Player before inserting or removing the card. 2 Insert a SmartMedia Card into CARD INSERT with the clipped corner of the card aligned as shown on the Player. 3 To remove the card, slide the CARD EJECT switch toward the card and remove the card.
PREVENTING CARD ERASURE AND OVERWRITING BEGIN 1 To prevent accidental erasure or overwriting of your card, place a chrome sticker (supplied) over the circle on the front of the card. 1 2 2 If you later decide to erase or overwrite your card, remove the chrome sticker first. Details are on page 28. Write Protect may appear on the display if you forget to remove the chrome sticker and try to delete tracks or erase your card.
REALJUKEBOX ON-LINE TUTORIAL The RealJukebox on-line tutorial is a helpful resource when you want more information on RealJukebox features. To get to this information, follow the steps below. Read the tutorial before using and recording files. BEGIN 1 Use your Internet browser to go to: www.real.com 2 At the www.real.com site, select RealJukebox. 3 Select RealJukebox Central, usually located at the bottom of the page. 4 5 Choose Using RealJukebox.
REALJUKEBOX FEATURES SENDING FILES TO RUSH FROM YOUR PC MAKING MP3 FILES FROM A CD 1 2 BEGIN Double-click to select the RealJukebox symbol on your PC. Insert an audio CD in the CD-ROM drive. CD track details will appear on the screen. (Make sure you have selected record/play CD at the left of the RealJukebox screen.) 3 Select the track you want to record in MP3. 4 From Controls in the RealJukebox toolbar, choose Record. The recording status will appear on the screen.
REALJUKEBOX FEATURES, CONTINUED ORGANIZING THE LIBRARY CREATING A PLAYLIST You can organize the Master Library into three groupings: Artist, Album or Genre. Enter the Master Library from the Options menu: (Options) →Preferences →Music Library →Master Library. Your Master Library can be organized in several ways, allowing you to select the way you want to group your music. Create a playlist for playback on your computer or to download to RUSH. BEGIN 1 Click New Playlist at the bottom of the screen.
REALJUKEBOX FEATURES, CONTINUED DOWNLOADING MUSIC FROM THE INTERNET BEGIN 1 With access to the Internet on your PC, click get music in RealJukebox. RealJukebox will connect you to the Internet. 2 Select your music and download it to your library and playlist. Follow the steps on the site; different sites may vary. Note For MP3 news and files, try these web sites: Emusic . . . . . . . . . . . . .http://www.emusic.com Audible Inc. . . . . . . . . .http://www.audible.com AudioExplosion, Inc.http://www.
PLAYING MUSIC BEGIN 1 Press YES © to turn on the Player. Philips RUSH will appear on the display, then playback will begin. (If the Player is already on, press YES © to start playback.) If no card is inserted, Insert Card will appear. 3 1 2 NO BOOKMARK YE S DELETE DIS PLA Y D L O H Press YES © briefly to pause playback. To resume playback, press YES © again. (Press NO ■ once to stop playback.) MO DE /EQ VOL UME D C DA TA I/O 3 4.
ADJUSTING VOLUME AND SOUND BEGIN 1 Press and hold VOLUME ▼ or ▲ to decrease or increase the volume. The volume bar will appear on the display. 2 Press and hold MODE/EQ for two seconds until you see one of the sound modes: Normal, Jazz, Rock, or Classic. NO BOOKMARK YE S DELETE DIS PLA Y MO D L O H DE 3 D C DA TA I/O 4.5 V Press MODE/EQ briefly and repeatedly until your preferred sound mode appears on the display. The setting will be saved, even if the Player is turned off.
PUTTING BUTTONS ON HOLD HOLD prevents the Player’s buttons from operating accidentally. BEGIN 1 Press the HOLD © switch to the right as indicated to lock the buttons. When HOLD is activated, will appear on the display and the buttons will not function. If you try to turn the Player on or off when HOLD is active, Hold Switch will appear on the display. NO YE S DELETE DIS PLA Y D L O H MO DE 2 /EQ DA TA I/O D C VOL UME 4.
DISPLAY BEGIN 1 Press the DISPLAY button repeatedly to see information about the items stored on the SmartMedia card. 2 3 NO BOOKMARK 2 Press YES © to have your chosen detail remain on the screen. Otherwise, the display will return to the first choice listed within four seconds.
SELECTING TRACKS/SEARCHING BEGIN 1 Press §§ or ©© once or repeatedly until the desired track number appears on the display. 2 To search within a track, press and hold §§ or ©©. Watch the track time on the display; when the desired point is reached, release the §§ or ©© button. NO BOOKMARK YE S DELETE DIS PLA Y D L O H MO DE /EQ VOL UME 2 1 4.
REPEATING AND SHUFFLING TRACKS BEGIN 1 Press the MODE /EQ button briefly and repeatedly to select: REPEAT 1 – repeats current track; REPEAT ALL – repeats all tracks; or SHUFFLE – plays tracks in random order. Your selection will appear on the display in the bottom left corner. NO BOOKMARK YE S DELETE DIS PLA Y D L O H 2 To return to normal playback, press the MODE/EQ button repeatedly until the display is clear. MO DE /EQ VOL UME 4.
BOOKMARKS BOOKMARK allows you to start playback instantly at a selected point within a file/track. You can set up to 10 bookmarks. 3 2 1 BEGIN 1 When the desired point is reached during playback, press and hold BOOKMARK for more than two seconds. Mark Set appears on the display. NO BOOKMARK YE S DELETE DIS PLA Y D L O H MO DE 2 Repeat step 1 to set other bookmarks. /EQ VOL UME V D C DA TA I/O 3 4.
CLEARING TRACKS When clearing tracks, bookmarks, or the SmartMedia card, use DELETE only when you are absolutely sure you no longer want the existing contents! 3 BEGIN 2 NO BOOKMARK YE 2 S Within 15 seconds, press DELETE repeatedly to see: Delete Track? Erase Card? or Clear Marks? DELETE DIS PLA Y D L O H MO DE 3 /EQ VOL UME If you no longer wish to delete the information, press NO ■. To delete the bookmark, track, or card, press YES ©.
CARRYING POUCH Disconnect the headphones before using the pouch. BEGIN 1 1 Store your extra SmartMedia card(s) in the pocket. 2 2 Insert the Player into the pouch with the display screen facing the plastic square. 3 Insert the strap through the plastic square and pull the strap to adjust it securely. 4 3 Adjust the elastic cords to make sure all the buttons are accessible. Detachable key ring Push back the hinge of the key ring, then hook it onto a belt, etc.
SMART HELP If you have questions about RealJukebox, visit www.Real.com . For help with the RUSH Player, visit www.rush.philips.com, or call Philips at 1-800-531-0039. The display is blank or there is no sound. • Make sure the batteries are inserted correctly. Install new ones if necessary. Details are on pages seven and 10. • Make sure the power adapter is connected securely. Check the power supply at the wall outlet. Details are on page eight. • Press YES © until information appears on the display.
SMART HELP, CONTINUED External drive of PC has no power. • Secure all connections. Turn on the power at the wall outlet. Turn on the PC. SmartMedia card can not be inserted or will not play. • Insert card correctly. Details are on page 15. • Use MP3 format. Details are on page 13. • The card may be damaged. Replace the card. • Use only Philips blue SmartMedia cards. Do not use cards from a digital camera or another MP3 player. RUSH skips or repeats files during playback.
LIMITED WARRANTY PORTABLE AUDIO 90 days Free Exchange / One year Free Parts This product must be carried in for an exchange. WHO IS COVERED? You must have proof of purchase to exchange the product. A sales receipt or other document showing that you purchased the product is considered proof of purchase. Attach it to this owner’s manual and keep both nearby. WHAT IS COVERED? Warranty coverage begins the day you buy your product.
LIMITED WARRANTY EXCHANGING A PRODUCT IN U.S.A., PUERTO RICO OR U.S.VIRGIN ISLANDS... Contact your dealer to arrange an exchange. Or, ship the product, insured and freight prepaid, and with proof of purchase enclosed, to the address listed below. Small Product Service Center Philips Service Solutions Group 907 Snapps Ferry Road, Plant 2, Building 6 Greeneville, TN 37743 (In U.S.A., Puerto Rico and U.S.
INDEX batteries ...........................7, 10 BOOKMARK button.......9, 27 bookmarks, setting of...........27 CARD EJECT................10, 15 CARD INSERT .............10, 15 carrying pouch .....................29 chrome sticker......................16 clearing tracks ......................28 compression levels...............13 connections...........................11 controls .............................9-10 DATA I/O jack .................9, 11 DC jack...............................8-9 DELETE button ...
www.rush.philips.