SA5225BT SA5245BT SA5247BT SA5285BT SA5287BT Congratulations on your purchase and welcome to Philips! To fully benefit from the support that Philips offers, register your product at www.philips.
Need help? Please visit www.philips.com/welcome where you can access a full set of supporting materials such as user manual, the latest software updates and answers to frequently asked questions.
Contents 1 Important safety information 3 2 Your new player 8 3 Getting started 9 2.1 2.2 3.1 3.2 3.3 3.4 3.4.1 3.4.2 3.5 3.6 3.6.1 3.6.2 3.7 3.7.1 3.7.2 3.7.3 4 4.1 4.1.1 4.2 4.3 4.4 4.5 5 5.1 5.1.1 5.1.2 5.1.3 5.1.4 5.1.5 5.1.6 5.2 5.2.1 5.2.2 5.2.
Contents 5.3 Video 27 5.4 Radio 28 5.5 Recordings 30 5.6 Use your player to store and carry data files 31 5.3.1 5.3.2 5.3.3 5.4.1 5.4.2 5.4.3 5.4.4 5.4.5 5.5.1 5.5.2 5.5.
1 Important safety information General maintenance To avoid damage or malfunction: • Do not expose the player to excessive heat caused by heating equipment or direct sunlight. • Do not drop your player or allow objects to fall on your player. • Do not allow your player to be submerged in water. Do not expose headphone socket or battery compartment to water, as water entering the set may cause major damage.
Be sure to observe the following guidelines when using your headphones. • Listen at reasonable volumes for reasonable periods of time. • Be careful not to adjust the volume as your hearing adapts. • Do not turn up the volume so high that you can’t hear what’s around you. • You should use caution or temporarily discontinue use in potentially hazardous situations. • Do not use headphones while operating a motorized vehicle, cycling, skateboarding, etc.
In the event of revocation, Philips will attempt to make available software updates to restore some or all of your device’s ability to transfer, store, access, copy, display and/or play Secure Content. However, the ability to make such updates available does not rest solely with Philips. Philips does not guarantee that, after revocation, such software updates will be available.
Data logging Philips is committed to improving the quality of your product and enhancing the Philips user experience. To understand the usage profile of this device, this device logs some info / data to the non-volatile memory region of the device. These data are used to identify and detect any failures or problems you as a user may experience while using the device.
Notice for USA Note: Philips This equipment has been tested and found to comply with the limits SA5225 SA5225BT for a Class B digital device, pursuant to part 15 of the FCC Rules. SA5245 SA5245BT SA5247 SA5247BT These limits are designed to provide reasonable protection against SA5285 SA5285BT SA5287 SA5287BT harmful interference in a residential installation.
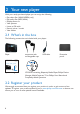
2 Your new player With your newly purchased player, you can enjoy the following: • • • • • • • Play video files (WMV, MPEG4 (.avi)) Play audio files (MP3, WMA) Display album art View pictures Listen to FM radio Record voices / sounds View folders 2.
3 Getting started 3.
3.2 Main menu Menu Music Video Pictures Radio Recording Folders Settings Now playing Last played To Play digital music tracks Watch videos View pictures Listen to FM radio Create or listen to recordings View folders Customize the settings of your player Go to the play screen Resume play 3.3 Install Important Make sure to install the software provided in the supplied CD for music and video transfer.
3.4 Connect and charge When you connect the player to the PC, it automatically charges. 3.4.1 Use the supplied USB cable 1 Before you use the player for the first time, charge it for at least 5 hours. > The battery2 has a 100% charge after 4 hours and an 80% charge after 2 hours. 2 Connect the supplied USB cable to the mini USB port at the bottom of the player, the other end to your PC. > The player will start to charge as soon as it is connected to your PC.
3.5 Transfer music and pictures You can transfer music and picture files to your player using Rhapsody Media Player. See 4 Organize and transfer pictures and music with Rhapsody Media Player section of the user manual for more details. 3.6 Download, convert & transfer videos with MediaConverter™ Important DRM protected videos that you have downloaded (purchased) from the Internet must have a bit rate of e 800kbps so you can transfer them to the player.
3.6.1 Download or add videos to MediaConverter™ 3.6.1.1 Download videos with Stream Ripper* 1 Use the Internet Explorer to open the website from where you want to download the video. The Stream Ripper software supports downloads from the following websites: • video.google.com • myspace.com • youtube.com 2 While playing the video on the website, move your mouse cursor over the video until you see the Stream Ripper icon in the top left hand side corner, then click Download.
3.6.1.2 Add video files from your PC or DVD 1 In the MediaConverter™ window, click Add File / Add DVD to select the source of your video. 2 In the pop-up window, mark your video file, then click Open. 3 In the MediaConverter™ window, click Start to start the conversion and transfer of the video. 1 3 3.6.2 Convert and transfer videos with MediaConverter™ 1 Follow section 3.6.1.1 or 3.6.1.2 to download or add a video.
> The progress of conversion and transfer is shown. All the converted files will be transferred to the player. Tip You can also select the files in Windows Explorer and then drag and drop them into the MediaConverter™ for Philips screen. Note If needed, the files will first be converted to a format that can be played on the player. 3.7 Enjoy 3.7.1 Turn on and off To turn on, press z/2; until the display shows the Philips logo. To turn off, press and hold z/2; until the display shows ‘Bye’.
4 Organize and transfer music and pictures with Rhapsody Media Player 4.1 Install Rhapsody Media Player Install the Rhapsody Media Player from the supplied software CD. (See section 3.3 Install for more details). 4.1.
4.2 Add your music to the player You can add the music that is stored on your PC. For more information visit www.Rhapsody.com. 1 Ensure the computer is connected to the Internet. 2 Connect the player to the computer. 3 Launch the Rhapsody Media Player. 4 In the sources window on the left hand side of the screen, select My Library. 5 On the toolbar at the top, select the pull-down menu File and select Add Media to My Library....
6 In the pop-up window, check the box next to Scan for music in this folder:. 6 6 7 > By default, the pop-up window shows the music in the My Music folder on your computer. Click Browse... to find the folder with your music, if it is different from the pre-selected folder. 7 Click Import. > All music in the selected folder is imported into My Library. 8 To transfer the music files to your player, drag and drop the files from the main window to the player icon in the Sources window.
4.3 Add Rhapsody Music* to the player Depending on the type of Rhapsody account you hold, you can add Rhapsody Music to the player using. For more information visit www.Rhapsody.com. 1 Ensure the computer is connected to the Internet. 2 Connect the player to the computer. 3 Launch the Rhapsody Media Player. 4 7 6 4 In the main window, select the tab Music Guide. 5 In the main window, select an album and song title. 6 In the main window, click the + icon to add the title to My Library.
4.4 Add Rhapsody Music Channels* to the player Depending on the type of Rhapsody account you hold, you can add Rhapsody Music Channels to the player using. For more information visit www.Rhapsody.com 1 Ensure the computer is connected to the Internet. 2 Connect the player to the computer. 3 Launch the Rhapsody Media Player. > The player is shown in the Sources window on the left hand side of the screen. 4 6 5 4 In the main window, select the tab Channel Guide.
4.5 Transfer picture files to the player with Rhapsody Media Player You can transfer picture files to your player using Rhapsody Media Player. 1 Connect the player to the computer. 2 Launch the Rhapsody Media Player. > The player is shown in the Sources window on the left hand side of the screen. 5 4 6 3 6 7 3 In the Sources window, select My Library. 4 In the main window, click on a tab to select Photos. 5 To add pictures from a different folder on your computer, click on the Add Photos icon.
5 Detailed operation 5.1 Music mode (also play mode for recordings) Your player supports MP3 and WMA formats. 5.1.
5.1.2 Find your music 1 1 From the main menu, select to enter music mode.
5.1.3 Find your Rhapsody Channels* When you transfer Rhapsody Channels to the player, the Rhapsody Channels icon in the home menu. 1 From the main menu, select appears to enter Rhapsody Channels. 2 Press 3 or 4 to scroll through the list of items that are available to you. 3 Press 2 to select or press to return to previous level. 4 Press 2; to play. 5.1.4 Adding music from your Rhapsody Channels* to the player library You can add music from your Rhapsody Channels to the library of your player.
5.1.5 Limit the volume Listening to loud sounds for longer than a moment can be harmful to the listener. You can set the volume level of the player to suit your preferences: 1 From the main menu, select Settings > Sound settings > Volume limit. 2 Press -VolUME+ to adjust the level. 3 Press 2; to set. > When you set a volume limit, you can no longer exceed the set volume, even if you press the VolUME+ button. To enable maximum volume again, set the volume limit back to maximum. 5.1.
5.2 Picture library 5.2.1 View pictures The player supports pictures in JPEG format and provides a slide show function. 1 1 From the main menu, select to enter Picture mode. 2 Press 3 or 4 to browse through picture thumbnails. 3 Press 2; to see the picture in full view. 4 During full screen browsing, press 3 or 4 to move to next or previous picture. 5.2.2 Adding pictures to folder ‘Favorites’ The Favorites feature enables you to share your favorite pictures more quickly.
5.3 Video 5.3.1 Transfer videos from a computer to the player Please see section 3.6 Download, convert & transfer videos with MediaConverter™ in this user manual. 5.3.2 Video play You can play video clips that are stored on the player. 1 1 From the main menu, select to enter Video mode. > A list of video files stored on the player is displayed. 2 Press 3 or 4 to select the file and press 2; to play. 3 Short press main menu. to go back to the previous menu, and long press to return to the 5.3.
5.4 Radio From the main menu, select to enter radio mode. 1 Connect the headphones The supplied headphones serve as a radio antenna. Ensure you connect the headphones properly for an optimal reception. 5.4.1 Automatic tuning of radio stations Note The Autotune function saves the frequencies of found radio stations under presets and overwrites existing presets. When there are no frequencies saved under presets, the radio feature prompts you to start Autotune.
5.4.5 Manually save a radio station to a preset 1 While playing a radio station, press OPTIONS to see the options menu. 2 Press 3 or 4 to select the Save to preset, then 2; to save.
5.5 Recordings You can record audio with the player. The section 3.1 Overview of controls and connections shows you the location of the microphone. 1 1 From the main menu, select . 2 Press 3 or 4 to select the Start voice recording, then 2; to start. 3 Press 2; to pause. 4 Press to stop and save the recording. > Your recordings are saved in the Recordings library on the player. 5 You can find the voice recordings file under recordings.
5.5.3 Delete recordings You can delete one or all of the recordings. 1 From the main menu, select > Recordings Library > Voice recordings. 2 Press 3 or 4 to select the recording you want to delete. 3 Press OPTIONS to see the options menu. 4 Press 3 or 4 to select Delete or Delete all. 5 Press 2; to confirm. 5.6 Use your player to store and carry data files You can use your player to store and carry data files by copying data files into your player with Windows Explorer.
6 Settings You can set preferences in your player to suit your needs. 1 1 Press and select . 2 Press 3 or 4 to select an option. 3 Press 2; to go to next level or to return to previous level. 4 Press 2; to confirm your selection.
Settings Skins Factory settings Information Options Further Options Dark / Light / Red Restore factory settings? Confirmation feedback Yes / No Memory Capacity / Available free space Firmware version Support website 6.1 Equalizer custom settings You can customize the equalizer settings: 1 From the main menu, select . 2 Press 3 or 4, then 2; to select Sound settings. 3 Press 3 or 4, then 2; to select Equalizer. 4 Press 3 or 4, then 2; to select Custom.
7 Update your player Your player is controlled by an internal program called the firmware. Newer versions of the firmware may have been released after you have purchased your player. A software program called Philips Device Manager checks for firmware updates that are available on the Internet. Install Philips Device Manager from the supplied CD or download the latest version from www.philips.com/support. 7.1 Perform a software update Attention This procedure will erase the content of the player.
8 Technical data Power • Power supply 880mAh Li-polymer internal rechargeable battery1 Display • White backlight LCD, 320 x 240 pixels, 262K colors Sound • Channel separation: 45dB • Equalizer setting: Off / FullSound / Rock / Pop / Jazz / Classical / Dance / Electronica / Lounge / RnB / Hip Hop / Spoken Word / Custom • Frequency response: 20-18000Hz • Signal to noise ratio: > 84dB • Output Power (RMS): 2x2.4mW Audio playback • Compression format: MP3 (8-320kps and VBR, Sample rates: 8, 11.025, 16, 22.
1 Rechargeable batteries have a limited number of charge cycles. Battery life and number of charge cycles vary by use and settings. 2 1MB = 1 million bytes; available storage capacity will be less. 1GB = 1 billion bytes; available storage capacity will be less. Full memory capacity may not be available as some memory will be reserved for the player. Storage capacity based on 4 minutes per song and 64kbps WMA encoding.
9 Frequently asked questions If you encounter problems with your player, go through the following points listed in the next section. Please also check out FAQs at www.philips.com/support for further help and other troubleshooting tips. Consult your dealer or service center if you are unable to find a solution by following these hints. Warning Under no circumstances should you try to repair the set yourself, as this will invalidate the warranty. My player cannot power on.
My player hangs. 1 In the unlikely event that your player hangs, do not panic. Insert a small pin or other sharp object into the reset hole located at the bottom of the player. Hold until the player shuts down. Note The existing contents on your player will not be erased. 2 If nothing happens, recharge the battery for at least 4 hours and try to power on or reset again. If this does not work, you might have to repair your player with Philips Device Manager. There is no sound.
PHILIPS reserves the right to make design and specification changes for product improvement without prior notice.
Specifications are subject to change without notice. Trademarks are the property of Koninklijke Philips Electronics N.V. or their respective owners © 2008 Koninklijke Philips Electronics N.V. All rights reserved. www.philips.