
User's Manual

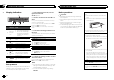
Table Of Contents

The RCA outputs can be used for rear speaker or
subwoofer connection.
If you switch to SW, you can connect a rear speak-
er lead directly to a subwoofer without using an
auxiliary amp.
Initially, PREOUT is set for rear full-range speaker
connection (SW).
1 Press M.C. to select the desired setting.
SW—REA
! Even if you change this setting, there will
be no output if you select OFF in SUB.W
(Refer to SUB.W (subwoofer on/off setting)
on the previous page).
! If you change this setting, subwoofer out-
put in the audio menu will return to the fac-
tory settings.
DEMO (demo display setting)
1 Press M.C. to turn the demo display on or off.
SCROLL (scroll mode setting)
When ever scroll is set to ON, recorded text infor-
mation scrolls continuously in the display. Set to
OFF if you prefer the information to scroll just
once.
1 Press M.C. to turn the ever scroll on or off.
Selecting the illumination color
This unit is equipped with multiple-color illumi-
nation. You can select desired colors for the keys
and display of this unit. You also can customize
the colors you want to use.
Selecting the key color from the
illumination color list
You can select desired colors for the keys of this
unit.
1 Press
.
2 Turn M.C. to display KEY COLOR and
press to select.
3 Turn M.C. to select the illumination color.
You can select one option from the following list.
! 30 preset colors (WHITE to ROSE)
! SCAN (cycle through all colors)
! 3 sets of colors (WARM, AMBIENT, CALM)
! CUSTOM (customized illumination color)
4 Press M.C. to confirm the selection.
Notes
! When SCAN is selected, the system auto-
matically cycles through the 30 preset colors.
! When WARM is selected, the system auto-
matically cycles through the warm colors.
! When AMBIENT is selected, the system au-
tomatically cycles through the ambient col-
ors.
! When CALM is selected, the system auto-
matically cycles through the calm colors.
! When CUSTOM is selected, the customized
color saved is selected.
! To cancel selecting the illumination color,
press
.
Selecting the display color from
the illumination color list
You can select the desired colors for the display
of this unit.
1 Press
.
2 Turn M.C. to display DISP COLOR and
press to select.
3 Turn M.C. to select the illumination color.
You can select one option from the following list.
! 30 preset colors (WHITE to ROSE)
! SCAN (cycle through all colors)
! 3 sets of colors (WARM, AMBIENT, CALM)
! CUSTOM (customized illumination color)
4 Press M.C. to confirm the selection.
Note
For details about colors on the list, refer to Se-
lecting the key color from the illumination color
list on this page.
Selecting key and display color
from the illumination color list
You can select the desired colors for the keys
and display of this unit.
1 Press
.
2 Turn M.C. to display BOTH COLOR and
press to select.
3 Turn M.C. to select the illumination color.
You can select one option from the following list.
! 30 preset colors (WHITE to ROSE)
! SCAN (cycle through all colors)
4 Press M.C. to confirm the selection.
Notes
! You cannot select 3 sets of preset colors and
CUSTOM in this function.
! Once you select a color in this function, col-
ors on the keys and display of this unit auto-
matically switch to the color you selected.
! For details about colors on the list, refer to
Selecting the key color from the illumination
color list on this page.
Customizing the illumination color
1 Press .
2 Turn M.C. to display KEY COLOR or
DISP COLOR. Press to select.
3 Press M.C. and hold until the customizing
illumination color setting appears in the dis-
play.
4 Press M.C. to select the primary color.
R (red)—G (green)—B (blue)
5 Turn M.C. to adjust the brightness level.
Adjustment range: 0 to 60
# You cannot select a level below 10 for all three of
R (red), G (green), and B (blue) at the same time.
# You can also perform the same operation on
other colors.
Notes
! You cannot create a custom illumination
color when SCAN or a set of colors (WARM,
AMBIENT,orCALM) is selected.
! You can create custom illumination colors
for both KEY COLOR and DISP COLOR.
Switching the dimmer setting
You can adjust the brightness of illumination.
% Press and hold
.
Using an AUX source
1 Insert the stereo mini plug into the AUX
input jack.
2 Press SRC/OFF to select AUX as the
source.
Note
AUX cannot be selected unless the auxiliary set-
ting is turned on. For more details, refer to AUX
(auxiliary input) on the previous page.
Turning the clock display on
or off
% Press to turn the clock display on or
off.
# The clock display disappears temporarily when
you perform other operations, but the clock display
appears again after 25 seconds.
Operating this unit
10
Section
Operating this unit
En
02