DEH-P9600MP Español Multi-CD/DAB control DSP High power CD/MP3/ WMA player with RDS tuner Reproductor de CD/MP3/WMA de alta potencia con sintonizador RDS, DSP y control de CD múltiple/DAB English Operation Manual Manual de instrucciones
Contents Thank you for buying this Pioneer product. Please read through these operating instructions so you will know how to operate your model properly. After you have finished reading the instructions, keep this manual in a safe place for future reference.
Contents English Scrolling titles in the display 29 Selecting tracks from the track title list 29 MP3/WMA/WAV Player Playing MP3/WMA/WAV 30 Selecting a track directly in the current folder 31 Introduction of advanced built-in CD player (MP3/WMA/WAV) operation 32 Repeating play 32 Playing tracks in a random order 32 Scanning folders and tracks 33 Pausing MP3/WMA/WAV playback 33 Using compression and BMX 33 Selecting the search method 33 Searching every 10 tracks in the current folder 34 Switching the tag
Contents Setting the high pass filter for rear speakers 52 Using the auto-equalizer 52 Recalling equalizer curves 52 Adjusting equalizer curves 53 Adjusting 13-band graphic equalizer 53 Using BBE sound 54 Adjusting loudness 54 Using automatic sound levelizer 54 Adjusting source levels 55 Auto TA and EQ (auto-time alignment and auto-equalizing) 55 Before operating the auto TA and EQ function 56 Carrying out auto TA and EQ 57 Initial Settings Adjusting initial settings 59 Selecting the display language
Section 01 Before You Start This unit allows you to select the OEL display language. Refer to Selecting the display language on page 59 for how it set it. This manual uses English displays in the explanations. About this unit The tuner frequencies on this unit are allocated for use in Western Europe, Asia, the Middle East, Africa and Oceania. Use in other areas may result in poor reception. The RDS (radio data system) function operates only in areas with FM stations broadcasting RDS signals.
Section 01 Before You Start ! Supply of this product only conveys a license for private, non-commercial use and does not convey a license nor imply any right to use this product in any commercial (i.e. revenue-generating) real time broadcasting (terrestrial, satellite, cable and/or any other media), broadcasting/streaming via internet, intranets and/or other networks or in other electronic content distribution systems, such as pay-audio or audio-on-demand applications.
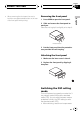
Section 01 Before You Start Removing the front panel 1 Press OPEN to open the front panel. 2 Slide and remove the front panel toward you. Take care not to grip it too tightly or to drop it. English ! When removing the front panel, be sure to hold the corrugated release button on the rear of the front panel while pulling. Release button 3 Put the front panel into the protective case provided for safe keeping. Attaching the front panel 1 Make sure the inner cover is closed.
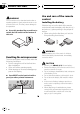
Section 01 Before You Start WARNING Do not use the unit in standard mode when a speaker system for 3-way network mode is connected to this unit. This may cause damage to the speakers. % Use a thin standard tip screwdriver to switch the DSP switch on the bottom of this unit. Use and care of the remote control Installing the battery Slide the tray out on the back of the remote control and insert the battery with the plus (+) and minus ( ) poles pointing in the proper direction.
Section 01 Before You Start Using the remote control Track number that currently playing English Point the remote control in the direction of the front panel to operate. ! The remote control may not function properly in direct sunlight. ! OEL display contains detailed information about the each source and other settings which is visible only when the front panel is opened. Important ! Do not store the remote control in high temperatures or direct sunlight.
Section 01 Before You Start Feature demo Pressing button 6 when power to this unit is turned off while the ignition switch is set to ACC or ON starts the feature demo. Pressing button 6 during feature demo operation cancels the feature demo mode. Remember that if the feature demo continues operating when the car engine is turned off, it may drain battery power. About basic displays This unit has two forms of basic OEL display. Choose the one you prefer.
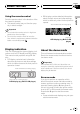
Section 02 What s What 1 2 3 4 English 5 6 Head unit (front panel close) 1 EJECT button Press to eject a CD from your built-in CD player. 2 TA button Press to turn traffic announcements function on or off. Press and hold to turn NEWS function on or off. 3 TEXT button Press to turn radio text function on or off. 4 OPEN button Press to open or close the front panel. When you want to operate buttons inside the front panel, press OPEN to open the front panel.
Section 02 What s What b d Head unit (front panel open) These buttons listed below can be operated only when the front panel opened. b ENTERTAINMENT button Press to change to the entertainment display. Press and hold to change the display form. c AUDIO button Press to select various sound quality controls. d DISPLAY button Press to select different displays. e FUNCTION button Press to select functions.
Section 02 What s What f g h i j 8 d l 7 k m n l Joystick Move to do manual seek tuning, fast forward, reverse and track search controls. Also used for controlling functions. Functions are the same as a/b/c/d buttons. English k NUMBER buttons Press to enter the number for selecting a desired track in direct track select mode. c e m DIRECT button Press to directly select the desired track. n CLEAR button Press to cancel the input number when NUMBER are used.
Section 03 Power ON/OFF Turning the unit on % Press SOURCE to turn the unit on. When you select a source the unit is turned on. Selecting a source You can select a source you want to listen to. To switch to the built-in CD player, load a disc in the unit (refer to page 24). % Press SOURCE to select a source.
Section 04 Tuner Listening to the radio 2 3 4 To perform manual tuning, briefly press c or d. The frequencies move up or down step by step. 4 5 These are the basic steps necessary to operate the radio. More advanced tuner operation is explained starting on the next page. This unit s AF (alternative frequencies search) function can be turned on and off. AF should be off for normal tuning operation (refer to page 19). 1 Frequency indicator Shows to which frequency the tuner is tuned.
Section 04 Tuner Introduction of advanced tuner operation 1 1 Function display Shows the function status. 1 Press OPEN to open the front panel. 2 Press FUNCTION to display the function names.
Section 04 Tuner 4 When you want to return to normal seek tuning, press b to turn local seek tuning off. Local OFF appears in the display. Storing the strongest broadcast frequencies BSM (best stations memory) lets you automatically store the six strongest broadcast frequencies under preset tuning buttons 1 6 and once stored there you can tune in to those frequencies with the touch of a button. 1 Press FUNCTION to select BSM. Press FUNCTION until BSM appears in the display.
Section 05 RDS Introduction of RDS operation 1 2 # To return to the frequency display, press BAND. # If MW/LW band is selected, you can only select BSM, preset channel list and Local. Notes 3 4 RDS (radio data system) is a system for providing information along with FM broadcasts. This inaudible information provides such features as program service name, program type, traffic announcement standby and automatic tuning, intended to aid radio listeners in finding and is tuning in to a desired station.
Section 05 RDS If you are listening to a broadcast and the reception becomes weak or there are other problems, the unit will automatically search for a different station in the same network which is broadcasting a stronger signal. ! AF is on as a default. 1 Press FUNCTION to select Alternative FREQ. Press FUNCTION until Alternative FREQ appears in the display. 2 Press a to turn AF on. The light comes on. # To turn AF off, press b.
Section 05 RDS Receiving traffic announcements TA (traffic announcement standby) lets you receive traffic announcements automatically, no matter what source you are listening to. TA can be activated for both a TP station (a station that broadcasts traffic information) or an enhanced other network s TP station (a station carrying information which cross-references TP stations). ! You can also turn the TA function on or off in the menu that appears with the pressing of FUNCTION.
Section 05 RDS Notes Using news program interruption When a news program is broadcast from a PTY code news station the unit can switch from any station to the news broadcast station. When the news program ends, reception of the previous program resumes. % Press TA and hold to turn on news program interruption. Press TA until NEWS ON temporarily appears in the LCD display. # To turn off news program interruption, press TA and hold until NEWS OFF temporarily appears in the LCD display.
Section 05 RDS Storing and recalling radio text You can store data from up to six radio text transmissions at buttons 1 6. 1 Display the radio text you want to store in memory. Refer to Displaying radio text on the previous page. 2 Press any buttons 1 6 and hold to store the selected radio text. The memory number will display and the selected radio text will be stored in memory. The next time you press the same button in the radio text display the stored text is recalled from memory.
Section 05 RDS PTY list Specific Type of program News&Inf News News Affairs Current affairs Info General information and advice Sport Sports Weather Weather reports/meteorological information Finance Stock market reports, commerce, trading, etc.
Section 06 Built-in CD Player Playing a CD 3 Use VOLUME to adjust the sound level. Rotate it to increase or decrease the volume. 1 2 These are the basic steps necessary to play a CD with your built-in CD player. More advanced CD operation is explained starting on the next page. 1 Track number indicator Shows the track currently playing. 2 Play time indicator Shows the elapsed playing time of the current track. 1 Press EJECT. CD loading slot appears.
Section 06 Built-in CD Player Selecting a track directly English When using the remote control, you can select a track directly by entering the desired track number. Introduction of advanced built-in CD player operation 1 Press DIRECT. Track number input display appears. 2 Press NUMBER buttons to enter the desired track number. 1 # You can cancel the input number by pressing CLEAR. 1 Function display Shows the function status. 3 Press DIRECT. The track of entered number will play.
Section 06 Built-in CD Player 1 Press FUNCTION to select Repeat mode. Press FUNCTION until Repeat mode appears in the display. 2 Press a to turn repeat play on. The light comes on. The track currently playing will play to the end and then repeat. 3 When you find the desired track press b to turn scan play off. The light goes off. The track will continue to play. # If the display has automatically returned to the playback display, select Scan mode again by pressing FUNCTION.
Section 06 Built-in CD Player 2 Press a or b to select your favorite setting. Press a or b repeatedly to switch between the following settings: COMP/BMX OFF COMP 1 COMP 2 COMP/BMX OFF BMX 1 BMX 2 Selecting the search method You can switch the search method between fast forward/reverse and searching every 10 tracks. 1 Press FUNCTION to select Search mode. Press FUNCTION until Search mode appears in the display. 2 Press c or d to select the search method.
Section 06 Built-in CD Player Alphabet (upper case), numbers and symbols Alphabet (lower case) European letters, such as those with accents (e.g., á, à, ä, ç) # You can select to input numbers and symbols by pressing button 2. 5 Press a or b to select a letter of the alphabet. Each press of a will display a letter of the alphabet in A B C ... X Y Z, numbers and symbols in 1 2 3 ... @ # < order. Each press of b will display a letter in the reverse order, such as Z Y X ... C B A.
Section 06 Built-in CD Player Scrolling titles in the display 1 # If track title has not been recorded on a disc, No T.Title will be displayed. English This unit can display the first 22 letters of disc title, disc artist name, track title and track artist name. When the text information is longer than 22 letters, you can scroll the display as follows. 2 Press a or b to scroll through the list of track titles. 3 Press d to select the desired track title. That selection will begin to play.
Section 07 MP3/WMA/WAV Player Playing MP3/WMA/WAV 1 2 CD loading slot 3 EJECT button 4 5 These are the basic steps necessary to play an MP3/WMA/WAV with your built-in CD player. More advanced MP3/WMA/WAV operation is explained starting on page 32. 1 MP3/WMA/WAV indicator Shows when the MP3/WMA/WAV file is playing. 2 Folder number indicator Shows the number of folder currently playing. 3 Track number indicator Shows the track (file) currently playing.
Section 07 MP3/WMA/WAV Player ! ! ! ! ! ! ! ! ! ! ! ! Selecting a track directly in the current folder When using the remote control, you can select a track directly by entering the desired track number. English ! and MIXED-MODE CDs, both types can be played only by switching mode between MP3/ WMA/WAV and CD-DA with BAND. If you have switched between playback of MP3/WMA/WAV files and audio data (CD-DA), playback starts at the first track on the disc.
Section 07 MP3/WMA/WAV Player Introduction of advanced built-in CD player (MP3/ WMA/WAV) operation 1 1 Function display Shows the function status. 1 Press OPEN to open the front panel. 2 Press FUNCTION to display the function names.
Section 07 MP3/WMA/WAV Player Scanning folders and tracks 1 Select the repeat range. Refer to Repeating play on the previous page. 2 Press FUNCTION to select Scan mode. Press FUNCTION until Scan mode appears in the display. 3 Press a to turn scan play on. The light comes on. The first 10 seconds of each track of the current folder (or the first track of each folder) is played. 4 When you find the desired track (or folder) press b to turn scan play off. The light goes off.
Section 07 MP3/WMA/WAV Player ! FF / REV Fast forward and reverse ! Rough search Searching every 10 tracks Searching every 10 tracks in the current folder If the current folder contains over 10 tracks, you can search every 10 tracks. When one folder contains a lot of tracks, you can roughly search for the track you want to play. 1 Select the search method Rough search. Refer to Selecting the search method on the previous page. 2 Press and hold c or d to search every 10 tracks in the current folder.
Section 07 MP3/WMA/WAV Player When playing back a WAV disc 1 Press OPEN to open the front panel. 2 Press DISPLAY. Press DISPLAY repeatedly to switch between the following settings: Play time : folder name : file name # You can only play back WAV files in the frequencies 16, 22.05, 24, 32, 44.1 and 48 kHz (LPCM), or 22.05 and 44.1 kHz (MS ADPCM). The sampling frequency shown in the display may be rounded.
Section 08 Multi-CD Player Playing a CD # You can also sequentially select a disc by pressing a/b. 1 2 3 You can use this unit to control a multi-CD player, which is sold separately. These are the basic steps necessary to play a CD with your multi-CD player. More advanced CD operation is explained starting on the next page. 5 To skip back or forward to another track, press c or d. Pressing d skips to the start of the next track. Pressing c once skips to the start of the current track.
Section 08 Multi-CD Player Note 50-disc multi-CD player Only those functions described in this manual are supported for 50-disc multi-CD players. This unit is not designed to operate disc title list functions with a 50-disc multi-CD player. About the disc title list funtions, please refer to Selecting discs or tracks from the title list on page 42. English After entering the number input mode, if you do not perform an operation within about eight seconds, the mode is automatically canceled.
Section 08 Multi-CD Player 2 Press c or d to select the repeat range. Press c or d until the desired repeat range appears in the display. ! Magazine repeat Repeat all discs in the multi-CD player ! Track repeat Repeat just the current track ! Disc repeat Repeat the current disc Notes ! If you select other discs during repeat play, the repeat play range changes to Magazine repeat. ! If you perform track search or fast forward/reverse during Track repeat, the repeat play range changes to Disc repeat.
Section 08 Multi-CD Player # To turn pause off, press b. Using compression and bass emphasis You can use these functions only with a multiCD player that supports them. Using COMP (compression) and DBE (dynamic bass emphasis) functions lets you adjust the sound playback quality of the multiCD player. Each of the functions has a twostep adjustment. The COMP function balances the output of louder and softer sounds at higher volumes. DBE boosts bass levels to give playback a fuller sound.
Section 08 Multi-CD Player Playback from your ITS playlist ITS play lets you listen to the tracks that you have entered into your ITS playlist. When you turn on ITS play, tracks from your ITS playlist in the multi-CD player will begin to play. 1 Select the repeat range. Refer to Repeating play on page 37. 2 Press FUNCTION to select ITS play mode. Press FUNCTION until ITS play mode appears in the display. 3 Press a to turn ITS play on. The light comes on.
Section 08 Multi-CD Player Entering disc titles 1 Play the CD that you want to enter a title for. Press a or b to select the CD. 2 Press OPEN to open the front panel. 3 Press FUNCTION and hold until Title input appears in the display. After Title input is displayed, press FUNCTION repeatedly, the following functions appear in the display: Title input (disc title input) ITS memory (ITS programming) # When playing a CD TEXT disc on a CD TEXT compatible multi-CD player, you cannot switch to Title input.
Section 08 Multi-CD Player Some discs have certain information encoded on the disc during manufacture. These discs may contain such information as the CD title, track title, artist s name and playback time and are called CD TEXT discs. Only these specially encoded CD TEXT discs support the functions listed below. Displaying titles on CD TEXT discs 1 Press OPEN to open the front panel. 2 Press DISPLAY.
Section 09 Audio Adjustments Operation modes Important ! When no power is supplied to this unit because of a change of the car battery or for some similar reason, the microcomputer of this unit is returned to its initial condition. If this happens, all memorized adjusted audio settings are erased. When you have completed audio setting adjustment, be sure to record the settings shown on page 75. English This unit features two operation modes: the 3way network mode (NW) and the standard mode (STD).
Section 09 Audio Adjustments ! Auto TA and EQ (auto-time alignment and auto-equalizing) on page 55 ! Recalling equalizer curves on page 52 ! Adjusting equalizer curves on page 53 ! Adjusting 13-band graphic equalizer on page 53 Introduction of audio adjustments 1 Extra functions These functions are helpful in adjusting the sound to suit your system or your personal preferences.
Section 09 Audio Adjustments NW.1 (network adjustment 1) NW.2 (network adjustment 2) NW.3 (network adjustment 3) NW.4 (network adjustment 4) HP F1 (front high pass filter slope) HP F2 (front high pass filter cut-off frequency) HP R1 (rear high pass filter slope) HP R2 (rear high pass filter cut-off frequency) AUTO EQ (auto-equalizer on/off) ASL (automatic sound levelizer) SLA (source level adjustment) # To return to the display of each source, press BAND. # You can select SW.2 and SW.
Section 09 Audio Adjustments Using balance adjustment You can select a fader/balance setting that provides an ideal listening environment in all occupied seats. 1 Press AUDIO to select FAD/BAL. Press AUDIO until FAD/BAL appears in the display. 2 Press a or b to adjust front/rear speaker balance. Each press of a or b moves the front/rear speaker balance towards the front or the rear. FAD: F25 FAD: R25 is displayed as the front/ rear speaker balance moves from front to rear.
Section 09 Audio Adjustments 4 2 5 6 3 High-range speaker left High-range speaker right Middle-range speaker right Middle-range speaker left Low-range speaker left Low-range speaker right # You can adjust the distance for the other speakers in the same way.
Section 09 Audio Adjustments Adjustable parameters The network function enables adjustment of the following parameters. Make adjustments in line with the reproduced frequency band and characteristics of each connected speaker unit. Level (dB) dB/oct.). The steeper the slope, the more the signal is attenuated. Phase You can switch phase (normal, reverse) for each speaker unit s input signal. When the continuity of sound between speakers is imprecise, try switching phase.
Section 09 Audio Adjustments Phase adjustment When the cross-over point value for filters on both sides is set to 12 dB/oct., the phase is reversed 180 degrees at the filter cut-off frequency. In this case, reversing the phase assures improved sound continuity. Normal phase Reverse phase Crossover point Muting the speaker unit (filter) You can mute each speaker unit (filter). When a speaker unit (filter) is muted, no sound is outputted from that speaker.
Section 09 Audio Adjustments 5 Press a or b to adjust the level of the selected speaker unit (filter). Each press of a or b increases or decreases the level of the selected speaker unit (filter). ±0 24 is displayed as the level is increased or decreased. +6 24 is displayed as the level is increased or decreased, only if you have selected Low LPF. 6 Press AUDIO to select NW.3. Press AUDIO until NW.3 appears in the display. 7 Press c or d to select the slope of the selected speaker unit (filter).
Section 09 Audio Adjustments Adjusting low pass filter attenuation slope When the subwoofer output is on, you can adjust the continuity of sound between speaker units. 1 Press AUDIO to select the slope setting. Press AUDIO until SW.3 appears in the display. # When the subwoofer output is on, you can select SW.3. 2 Press c or d to select slope. Each press of c or d selects slopes in the following order: 18 12 6 (dB/oct.
Section 09 Audio Adjustments 3 Press AUDIO to select HP F2. Press AUDIO until HP F2 appears in the display. Only frequencies higher than those in the selected range are output from the rear speakers. 4 Press c or d to select cut-off frequency. Each press of c or d selects cut-off frequencies in the following order: 50 63 80 100 125 160 200 (Hz) Only frequencies higher than those in the selected range are output from the front speakers. 5 Press a or b to adjust the output level of the rear speakers.
Section 09 Audio Adjustments Equalizer curve SUPER BASS Super bass POWERFUL Powerful NATURAL Natural VOCAL Vocal FLAT Flat CUSTOM1 Custom 1 CUSTOM2 Custom 2 ! CUSTOM1 and CUSTOM2 are adjusted equalizer curves that you create. Adjustments can be made with a 13-band graphic equalizer. ! When FLAT is selected no supplement or correction is made to the sound. This is useful to check the effect of the equalizer curves by switching alternatively between FLAT and a set equalizer curve.
Section 09 Audio Adjustments 50 80 125 200 315 500 800 1.25k 2k 3.15k 5k 8k 12.5k (Hz) 4 Press a or b to adjust the level of the equalizer band. Each press of a or b increases or decreases the level of the equalization band. +6 6 is displayed as the level is increased or decreased. # You can then select another band and adjust the level. 5 Press BAND to cancel the 13-band graphic equalizer mode.
Section 09 Audio Adjustments 2 Press a to turn ASL on. ASL: ON appears in the display. # To turn ASL off, press b. 3 Press c or d to select the desired ASL level. Each press of c or d selects ASL level in the following order: Low (low) Mid-Low (mid-low) Mid (mid) Mid-High (mid-high) High (high) 3 Press a or b to adjust the source volume. Each press of a or b increases or decreases the source volume. +4 4 is displayed as the source volume is increased or decreased.
Section 09 Audio Adjustments CAUTION ! Carrying out auto TA and EQ under the following conditions may damage the speakers. Be sure to check the conditions thoroughly before carrying out auto TA and EQ. When speakers are incorrectly connected. (e.g., When a rear speaker is connected to a subwoofer output.) When a speaker is connected to a power amp delivering output higher than the speaker s maximum input power capability.
Section 09 Audio Adjustments Carrying out auto TA and EQ Press OPEN to open the front panel. 7 Press and hold AUDIO to enter the auto TA and EQ measurement mode. English 1 Stop the car in a place that is as quiet as possible, close all doors, windows and the sun roof, and then turn the engine off. If the engine is left running, engine noise may prevent correct auto TA and EQ. 6 8 Plug the microphone into the microphone input jack on this unit.
Section 09 Audio Adjustments 13 Store the microphone carefully in the glove compartment. Store the microphone carefully in the glove compartment or any other safe place. If the microphone is subjected to direct sunlight for an extended period, high temperatures may cause distortion, color change or malfunction. Note Make sure you have disconnected the microphone before pressing OPEN to open or close the panel (an alert sounds if the mic is still connected).
Section 10 Initial Settings Adjusting initial settings English # You can also cancel initial settings by holding down FUNCTION until the unit turns off. # When the hands-free telephoning is Hands free OFF, you can select Mute. # When the hands-free telephoning is Hands free ON, you can select SRC off standby. 1 Initial settings lets you perform initial setup of different settings for this unit. 1 Function display Shows the function status. 1 Press SOURCE and hold until the unit turns off.
Section 10 Initial Settings Adjusting the brightness 3 Press a or b to set the clock. Pressing a will increase the selected hour or minute. Pressing b will decrease the selected hour or minute. Switching the auxiliary setting It is possible to use auxiliary equipment with this unit. Activate the auxiliary setting when using auxiliary equipment connected to this unit. 1 Press FUNCTION to select AUX. Press FUNCTION repeatedly until AUX appears in the display. 2 Press a or b to turn AUX on or off.
Section 10 Initial Settings 1 Press FUNCTION to select Mute. Press FUNCTION repeatedly until Mute appears in the display. 2 Press c or d to select the desired setting. Each press of c or d selects settings in the following order: TEL mute (muting) 10dB ATT (attenuation) 20dB ATT (attenuation) 20dB ATT has a stronger effect than 10dB ATT. Note The tuning step remains at 50 kHz during manual tuning. English ceived using a cellular telephone connected to this unit.
Section 10 Initial Settings Switching the flap auto open For theft protection, the front panel opens automatically and easily detaches. Flap auto open is on as a default. 1 Press FUNCTION to select Face auto open. Press FUNCTION repeatedly until Face auto open appears in the display. 2 Press a or b to turn Face auto open on or off. Pressing a or b will turn Face auto open on or off and that status will be displayed (e.g., Face auto open ON).
Section 10 Initial Settings English 2 Press a or b to turn Demonstration on or off. Pressing a or b will turn Demonstration on or off and that status will be displayed (e.g., Demonstration ON). Using reverse mode If you do not perform an operation within about 30 seconds, screen indications start to reverse, and then continue reversing every 10 seconds. You can turn the reverse mode on or off. 1 Press FUNCTION to select Reverse mode. Press FUNCTION repeatedly until Reverse mode appears in the display.
Section 11 Other Functions Using the AUX source An IP-BUS-RCA Interconnector such as the CD-RB20/CD-RB10 (sold separately) lets you connect this unit to auxiliary equipment featuring RCA output. For more details, refer to the IP-BUS-RCA Interconnector owner s manual. Selecting AUX as the source % Press SOURCE to select AUX as the source. Press SOURCE until AUX appears in the display. 5 Press d to move the cursor to the next character position.
Section 11 Other Functions Hands-free telephoning function Using different entertainment displays You can enjoy entertainment displays while listening to each sound source. 1 Press OPEN to open the front panel. 2 Press ENTERTAINMENT.
Section 11 Other Functions Important Introduction of DAB operation Once the rewriting process has started, do not close the front panel or turn the ignition off, until it is completed. 1 2 1 Press SOURCE and hold until the unit turns off. 2 3 Press OPEN to open the front panel. 3 Press and hold ENTERTAINMENT and DISPLAY until the unit goes into download mode. DOWNLOAD appears in the LCD display, and then CD loading slot appears.
Section 11 Other Functions Note 5 WTHR indicator Shows when area weather flash is received. With a service component that has no service component label or dynamic label, switching to service component label and dynamic label is not possible. 6 ANNC indicator Shows when announcement is received. Service list function Operation You can use the following functions with this unit. (Reference pages are in this manual.) ! Available PTY function (Refer to this page.
Section 11 Other Functions Searching the PTY 1 Press OPEN to open the front panel. 2 Press FUNCTION to select program type selection (PTY). 3 Press a or b to select a program type. 4 Press d to begin the search. Note The PTY method displayed is narrow. The wide method cannot be selected when using DAB as source. Using dynamic label Dynamic label provides character information concerning the service component you re currently listening to. You can scroll the displayed information.
Section 11 Other Functions Operation You can use the following function with this unit. (Reference page is in this manual.) ! Using ITS playlist and disc title functions (Refer to this page.) Also, operation of the following function with this unit differs. (Reference page is in this manual.) ! Function menu switching (Refer to this page.) ! Selecting discs from the disc list (Refer to this page.) Notes ! When using this unit with multi-DVD player, you can switch to disc list and ITS play mode.
Appendix Additional Information Understanding built-in CD player error messages When problems occur during CD play an error message may appear on the display. If an error message appears, refer to the table below to see what the problem is and the suggested method of correcting the problem. If the error cannot be corrected, contact your dealer or your nearest Pioneer Service Center. Message Cause Action ERROR-11, 12, Dirty disc 17, 30 Clean disc. ERROR-11, 12, Scratched disc 17, 30 Replace disc.
Appendix Additional Information Cause Action CD ERROR A0 Electrical error Turn the ignition ON and OFF. Disc ERROR The disc does not Press EJECT and contain the nereplace the disc. cessary data Download Writing error ERROR, Transmit ERROR ! To clean a CD, wipe the disc with a soft cloth outward from the center. English Message Press EJECT and retry the rewriting. CD player and care ! Use only CDs that have either of the two Compact Disc Digital Audio marks as shown below.
Appendix Additional Information ! This unit conforms to the track skip function of the CD-R/CD-RW disc. The tracks containing the track skip information are skipped automatically (in case of audio data (CD-DA)). ! If you insert a CD-RW disc into this unit, time to playback will be longer than when you insert a conventional CD or CD-R disc. ! Read the precautions with CD-R/CD-RW discs before using them.
Appendix Additional Information WMA additional information ! This unit plays back WMA files encoded by Windows Media Player version 7, 7.1, 8 and 9. ! You can only play back WMA files in the frequencies 32, 44.1 and 48 kHz. ! The sound quality of WMA files generally becomes better with an increased bit rate.
Appendix Additional Information 1 First level 2 Second level 3 Third level Notes ! This unit assigns folder numbers. The user can not assign folder numbers. ! It is not possible to check folders that do not include MP3/WMA/WAV files. (These folders will be skipped without displaying the folder number.) ! MP3/WMA/WAV files in up to 8 tiers of folders can be played back. However, there is a delay in the start of playback on discs with numerous tiers.
Appendix Additional Information DSP adjustment value record sheet English 3-way network mode Network setting Filter Low LPF Mid HPF Mid LPF High HPF Cut-off frequency Level Slope Phase Time alignment setting Speaker unit High-range speaker Middle-range speaker Low-range speaker Left Left Left Right Right Right Distance Standard mode Network setting Filter Subwoofer HPF (front) HPF (rear) Cut-off frequency Level Slope Phase Time alignment setting Speaker unit Front speaker Lef
Appendix Additional Information Terms Bit rate This expresses data volume per second, or bps units (bits per second). The higher the rate, the more information is available to reproduce the sound. Using the same encoding method (such as MP3), the higher the rate, the better the sound. ID3 tag This is a method of embedding track-related information in an MP3 file.
Appendix Additional Information English just as is done with files on floppy or hard discs. VBR VBR is short for variable bit rate. Generally speaking CBR (constant bit rate) is more widely used. But by flexibly adjusting the bit rate according to the needs of audio compression, it is possible to achieve compressionpriority sound quality. WAV WAV is short for waveform. It is a standard audio file format for Windows®.
Appendix Additional Information Specifications General Power source ............................. 14.4 V DC (10.8 15.1 V allowable) Grounding system ................... Negative type Max. current consumption ..................................................... 10.0 A Dimensions (W × H × D): DIN Chassis ..................... 178 × 50 × 157 mm Nose ........................... 188 × 58 × 28 mm D Chassis ..................... 178 × 50 × 162 mm Nose ........................... 170 × 44 × 23 mm Weight .....
Appendix Additional Information MW tuner English Frequency range ...................... 531 1,602 kHz (9 kHz) Usable sensitivity ..................... 18 µV (S/N: 20 dB) Signal-to-noise ratio ............... 65 dB (IEC-A network) LW tuner Frequency range ...................... 153 281 kHz Usable sensitivity ..................... 30 µV (S/N: 20 dB) Signal-to-noise ratio ...............
Contenido Gracias por haber comprado este producto Pioneer. Lea con detenimiento estas instrucciones sobre el funcionamiento del aparato, para que pueda darle el mejor uso posible. Una vez que las haya leído, guarde este manual en un lugar seguro para consultarlo en el futuro.
Contenido Reproductor de MP3/WMA/WAV Reproducción de ficheros MP3/WMA/ WAV 109 Selección directa de una pista en la carpeta actual 110 Introducción a las funciones avanzadas del reproductor de CD incorporado (MP3/ WMA/WAV) 111 Repetición de reproducción 112 Reproducción de las pistas en un orden aleatorio 112 Exploración de carpetas y pistas 112 Pausa de la reproducción de un MP3/WMA/ WAV 113 Uso de la compresión y BMX 113 Selección del método de búsqueda 113 Búsqueda cada 10 pistas en la carpeta actual 11
Contenido Funciones adicionales 126 Introducción a los ajustes de audio 127 Uso del selector de posición 128 Uso del ajuste del balance 128 128 Uso del ajuste del balance Uso de la alineación temporal 129 Ajuste de la alineación temporal 129 Acerca de la función de red 130 Parámetros ajustables 130 Puntos a tener en cuenta con respecto a los ajustes de red 131 Silenciamiento del altavoz (filtro) 132 Ajuste de red 132 Uso de la salida de subgraves 133 Configuración de los ajustes de subgraves 13
Contenido Español Operación 150 Cambio de etiqueta 151 Función de lista de servicios 151 Operación de los anuncios con el menú de funciones 151 Función de PTY disponibles 151 Uso de etiquetas dinámicas 151 Introducción a la operación con DVD 152 Operación 152 Cambio del menú de funciones 153 Selección de discos de la lista de discos 153 Uso de la lista de reproducción ITS y las funciones de títulos de discos 153 Información adicional Comprensión de los mensajes de error del reproducto
Sección 01 Antes de comenzar Acerca de la visualización en idiomas múltiples Esta unidad le permite seleccionar el idioma de visualización para el display OEL. Consulte Selección del idioma de visualización en la página 142 para obtener información sobre cómo definirlo. En las explicaciones de este manual se utilizan ejemplos de visualizaciones en idioma inglés.
Sección 01 Antes de comenzar Reproducción de ficheros WMA Se pueden reproducir ficheros WMA grabados en CD-ROM/CD-R/CD-RW (grabaciones según la norma ISO9660 Nivel 1/Nivel 2). Reproducción de ficheros WAV Se pueden reproducir ficheros WAV grabados en CD-ROM/CD-R/CD-RW (grabaciones en formatos LPCM (PCM lineal) o MS ADPCM). Acerca de WMA El logo de Windows Media" impreso en la caja indica que esta unidad puede reproducir datos WMA.
Sección 01 Antes de comenzar Importante ! Nunca presione ni sujete el display y los botones con fuerza excesiva al extraer o colocar la carátula. ! Evite someter la carátula a impactos excesivos. ! Mantenga la carátula fuera del alcance de la luz solar directa y no la exponga a altas temperaturas. ! Unos segundos después de conectar o desconectar la llave de encendido del automóvil, la carátula se mueve automáticamente. Cuando esto sucede, corre el riesgo de apretarse los dedos.
Sección 01 Antes de comenzar % Utilice un destornillador de punta fina estándar para cambiar el ajuste del conmutador DSP ubicado en la parte inferior de la unidad. Uso y cuidado del mando a distancia Instalación de la batería Español Deslice y extraiga la bandeja de la parte posterior del mando a distancia y coloque la batería con los polos positivo (+) y negativo ( ) en la dirección correcta. ! Al utilizar el mando a distancia por primera vez, extraiga la película que sobresale de la bandeja.
Sección 01 Antes de comenzar Uso del mando a distancia Apunte el mando a distancia hacia la carátula para utilizarlo. ! Es posible que el mando a distancia no funcione correctamente si lo expone a la luz solar directa. ! El display OEL muestra información detallada sobre cada fuente y otros ajustes cada vez que se abre o se cierra la carátula. Número de pista que se está reproduciendo Importante ! No guarde el mando a distancia en lugares expuestos a altas temperaturas o a la luz solar directa.
Sección 01 Antes de comenzar Demostración de características Español Al presionar el botón número 6 cuando se apaga la unidad mientras la llave de encendido está en ACC u ON, se iniciará la demostración de características. Al presionar el botón número 6 durante la demostración de características, se cancelará este modo de demostración. Recuerde que si este modo de demostración sigue funcionando cuando el motor del vehículo está apagado, se puede descargar la batería.
Sección 02 Qué es cada cosa 1 5 2 6 3 7 Unidad principal (carátula cerrada) 1 Botón EJECT Presione este botón para expulsar un CD del reproductor de CD incorporado. 2 Botón TA Presione este botón para activar o desactivar la función de anuncios de tráfico. Presione este botón y manténgalo presionado para activar o desactivar la función NEWS. 3 Botón TEXT Presione este botón para activar o desactivar la función de radio texto. 4 Botón OPEN Presione este botón para abrir o cerrar la carátula.
Sección 02 Qué es cada cosa b Español d c e Unidad principal (carátula abierta) Los botones que se indican a continuación sólo se pueden utilizar cuando la carátula está abierta. b Botón ENTERTAINMENT Presione este botón para cambiar a la visualización de entretenimiento. Presiónelo y manténgalo presionado para cambiar el formato de visualización. c Botón AUDIO Presione este botón para seleccionar los diversos controles de calidad del sonido.
Sección 02 Qué es cada cosa f j Botón TUNER Presione este botón para seleccionar el sintonizador como la fuente. c e g h i j 8 d l 7 k m n Mando a distancia Los botones del mando a distancia se utilizan de la misma manera que los botones de la unidad principal. f Botones VOLUME Presione estos botones para aumentar o disminuir el volumen. g Botón PGM Presione este botón para utilizar las funciones preprogramadas de cada fuente. (Consulte Uso del botón PGM en la página 148.
Sección 03 Encendido y apagado Encendido de la unidad % Presione SOURCE para encender la unidad. Cuando se selecciona una fuente, la unidad se enciende. Puede seleccionar la fuente que desea escuchar. Para cambiar al reproductor de CD incorporado, coloque un disco en la unidad (consulte la página 103). % Presione SOURCE para seleccionar una fuente.
Sección 04 Sintonizador Para escuchar la radio 1 4 2 3 5 A continuación se indican los pasos básicos necesarios para hacer funcionar la radio. En la página siguiente se explican las funciones más avanzadas del sintonizador y cómo utilizarlas. Se puede activar y desactivar la función AF (búsqueda de frecuencias alternativas) de esta unidad. Se debe desactivar la función AF para la sintonización normal (consulte la página 98).
Sección 04 Sintonizador Introducción a las funciones avanzadas del sintonizador Almacenamiento y llamada de frecuencias Si se presiona cualquiera de los botones de ajuste de presintonías 1 6, se pueden almacenar con facilidad hasta seis frecuencias de emisoras para llamarlas con posterioridad presionando un solo botón. 1 Visualización de función Muestra el estado de la función. 1 Presione OPEN para abrir la carátula. 2 Presione FUNCTION para visualizar los nombres de las funciones.
Sección 04 Sintonizador 1 Presione FUNCTION para seleccionar Local. Presione FUNCTION hasta que Local aparezca en el display. 2 Presione a para activar la sintonización por búsqueda local. La sensibilidad de búsqueda local (p. ej., Level 2) aparece en el display. 3 Presione c o d para ajustar la sensibilidad.
Sección 05 RDS Introducción a la operación RDS 1 2 4 RDS (sistema de datos de radio) es un sistema que ofrece información junto con las transmisiones FM. Esta información no audible brinda funciones tales como nombre del servicio de programa, tipo de programa, espera por anuncio de tráfico y sintonización automática, a fin de ayudar a los oyentes de radio a encontrar y sintonizar la emisora deseada. 1 Nombre del servicio de programa Muestra el nombre del programa que se está transmitiendo.
Sección 05 RDS # Si se recibe un código PTY cero de una emisora, el display aparecerá en blanco. Esto indica que la emisora no ha definido el contenido del programa. # Si la señal es demasiado débil como para que esta unidad capte el código PTY, el display aparecerá en blanco.
Sección 05 RDS 1 Presione FUNCTION para seleccionar Regional. Presione FUNCTION hasta que Regional aparezca en el display. 2 Presione a para activar la función regional. Se enciende la luz. Notas ! La programación regional y las redes regionales se organizan de distinta manera según el país (es decir, pueden cambiar de acuerdo con la hora, el estado o la provincia de que se trate, o el área de transmisión).
Sección 05 RDS Uso de las funciones PTY Se puede sintonizar una emisora usando la información PTY (tipo de programa). Búsqueda de una emisora RDS por información PTY Se pueden buscar tipos generales de programas, tales como los que se indican en la página 102. 1 Presione FUNCTION para seleccionar PTY (tipo de programa). Presione FUNCTION hasta que el tipo de programa aparezca en el display. 2 Presione a o b para seleccionar un tipo de programa.
Sección 05 RDS ! También se puede cancelar un anuncio de emergencia presionando SOURCE, BAND, a, b, c o d. Uso del radio texto Visualización de radio texto Se pueden almacenar los datos de hasta seis transmisiones de radio texto en los botones 1 6. 1 Visualice el radio texto que desea almacenar en la memoria. Consulte Visualización de radio texto en esta página. 2 Presione cualquiera de los botones 1 6 y mantenga presionado para almacenar el radio texto seleccionado.
Sección 05 RDS Lista PTY Generales Específico Tipo de programa News&Inf News Noticias Affairs Temas de actualidad Info Información general y consejos Sport Programas deportivos Weather Informes del tiempo/Información meteorológica Finance Informes del mercado de valores, comercio, transacciones, etc.
Sección 06 Reproductor de CD incorporado Reproducción de un CD 1 A continuación se indican los pasos básicos necesarios para reproducir un CD con el reproductor de CD incorporado. En la página siguiente se explican las funciones más avanzadas del reproductor y cómo utilizarlas. 1 Indicador de número de pista Muestra la pista que se está reproduciendo actualmente. 2 Indicador de tiempo de reproducción Muestra el tiempo transcurrido de reproducción de la pista actual. 1 Presione EJECT.
Sección 06 Reproductor de CD incorporado ! Si el reproductor de CD incorporado no funciona correctamente, puede aparecer un mensaje de error tal como ERROR-11. Consulte Comprensión de los mensajes de error del reproductor de CD incorporado en la página 154. ! Se puede expulsar el CD presionando el botón EJECT y manteniéndolo presionado con la carátula en la posición adecuada, cuando la carga o expulsión de CD no funciona correctamente.
Sección 06 Reproductor de CD incorporado Repetición de reproducción La repetición de reproducción le permite escuchar la misma pista de nuevo. 1 Presione FUNCTION para seleccionar Repeat mode. Presione FUNCTION hasta que Repeat mode aparezca en el display. # Para desactivar la repetición de reproducción, presione b. Nota Si se realiza una búsqueda de pista o el avance rápido/retroceso, la repetición de reproducción se cancelará automáticamente.
Sección 06 Reproductor de CD incorporado 2 Presione a para activar la pausa. Se enciende la luz. Se detiene la reproducción de la pista actual. # Para desactivar la pausa, presione b. Uso de la compresión y BMX El uso de las funciones COMP (compresión) y BMX le permite ajustar la calidad sonora que ofrece el reproductor de CD. Cada una de las funciones tiene un ajuste de dos pasos. La función COMP equilibra la salida de los sonidos más fuertes y más suaves a volúmenes altos.
Sección 06 Reproductor de CD incorporado Uso de las funciones de títulos de discos Se pueden ingresar títulos de CD y visualizarlos. La próxima vez que se coloque un CD cuyo título se haya ingresado, se visualizará el título de ese CD. Utilice la función de ingreso de títulos de discos para almacenar hasta 48 títulos de CD en la unidad. Cada título puede tener una longitud de hasta 10 caracteres. 1 Reproduzca el CD cuyo título desea ingresar. 2 Presione OPEN para abrir la carátula.
Sección 06 Reproductor de CD incorporado Uso de las funciones CD TEXT Algunos discos contienen información que viene codificada de fábrica. Estos discos pueden contener información tal como el título del CD, el título de la pista, el nombre del artista y el tiempo de reproducción, y se denominan discos CD TEXT. Sólo estos discos especialmente codificados son compatibles con las funciones que se indican a continuación. Visualización de títulos de discos CD TEXT 1 Presione OPEN para abrir la carátula.
Sección 07 Reproductor de MP3/ WMA/WAV Reproducción de ficheros MP3/WMA/WAV 1 2 3 # Después de colocar un CD-ROM, presione SOURCE para seleccionar el reproductor de CD incorporado. 2 Introduzca un CD-ROM por la ranura de carga de CD. La reproducción comenzará automáticamente. 4 Español Ranura de carga de CD 5 A continuación se indican los pasos básicos necesarios para reproducir un MP3/WMA/ WAV con el reproductor de CD incorporado.
Sección 07 Reproductor de MP3/ WMA/WAV # Si selecciona el método de búsqueda Rough search, al presionar c o d y mantener presionado podrá buscar una pista cada 10 pistas en la carpeta actual. (Consulte Selección del método de búsqueda en la página 113.) 6 Para saltar y retroceder o avanzar hasta otra pista, presione c o d. Al presionar d se salta al comienzo de la siguiente pista. Al presionar una vez el botón c, se salta al comienzo de la pista actual.
Sección 07 Reproductor de MP3/ WMA/WAV 2 Presione los botones NUMBER para ingresar el número de la pista deseada. # Se puede cancelar el número ingresado presionando CLEAR. 3 Presione DIRECT. Se reproducirá la pista seleccionada. Introducción a las funciones avanzadas del reproductor de CD incorporado (MP3/ WMA/WAV) Después de acceder al modo de ingreso de números, si no realiza una operación en unos ocho segundos, el modo se cancelará automáticamente.
Sección 07 Reproductor de MP3/ WMA/WAV Repetición de reproducción Para la reproducción de un MP3/WMA/WAV, hay tres gamas de repetición: Folder repeat (repetición de carpeta), Track repeat (repetición de una sola pista) y Disc repeat (repetición de todas las pistas). 1 Presione FUNCTION para seleccionar Play mode. Presione FUNCTION hasta que Play mode aparezca en el display. 2 Presione c o d para seleccionar la gama de repetición.
Sección 07 Reproductor de MP3/ WMA/WAV 4 Cuando encuentre la pista (o la carpeta) deseada, presione b para desactivar la reproducción con exploración. Se apaga la luz. La pista (o carpeta) se continuará reproduciendo. # Si el display vuelve automáticamente a la visualización de reproducción, seleccione Scan mode de nuevo presionando FUNCTION. Pausa de la reproducción de un MP3/WMA/WAV La pausa le permite detener temporalmente la reproducción del MP3/WMA/WAV. 1 Presione FUNCTION para seleccionar Pause.
Sección 07 Reproductor de MP3/ WMA/WAV Búsqueda cada 10 pistas en la carpeta actual Si la carpeta actual tiene más de 10 pistas, se puede hacer la búsqueda cada 10 pistas. Cuando la carpeta tiene muchas pistas, se puede realizar una búsqueda aproximada de la pista que se desea reproducir. 1 Seleccione el método de búsqueda Rough search. Consulte Selección del método de búsqueda en la página anterior. 2 Presione c o d y mantenga presionado para buscar una pista cada 10 pistas en la carpeta actual.
Sección 07 Reproductor de MP3/ WMA/WAV Al reproducir un disco WAV 1 Presione OPEN para abrir la carátula. 2 Presione DISPLAY. Presione DISPLAY repetidamente para cambiar entre los siguientes ajustes: Tiempo de reproducción : nombre de la carpeta : nombre del fichero # Sólo se pueden reproducir ficheros WAV en las frecuencias de 16; 22,05; 24; 32; 44,1 y 48 kHz (LPCM) o de 22,05 y 44,1 kHz (MS ADPCM). Puede redondearse la frecuencia de muestreo que se visualiza en el display.
Sección 07 Reproductor de MP3/ WMA/WAV 2 Presione a o b para desplazarse por la lista de nombres de los ficheros (o de las carpetas). 3 Presione d para seleccionar el nombre del fichero deseado (o de la carpeta deseada). Al seleccionar el fichero, comenzará su reproducción. Al seleccionar la carpeta, aparece en el display la lista de ficheros (o carpetas) de la carpeta seleccionada. # Una vez seleccionada la carpeta, presione d y mantenga presionado para reproducir los ficheros de esa carpeta.
Sección 08 Reproductor de CD múltiple Reproducción de un CD 1 2 Se puede usar esta unidad para controlar un reproductor de CD múltiple, que se vende por separado. A continuación se indican los pasos básicos necesarios para reproducir un CD con el reproductor de CD múltiple. En la página siguiente se explican las funciones más avanzadas del reproductor y cómo utilizarlas. 1 Indicador de número de disco Muestra el disco que se está reproduciendo actualmente.
Sección 08 Reproductor de CD múltiple 1 Presione DIRECT. Se visualiza en el display el área para ingresar el número de pista. 2 Presione los botones NUMBER para ingresar el número de la pista deseada. Introducción a las funciones avanzadas del reproductor de CD múltiple # Se puede cancelar el número ingresado presionando CLEAR. 3 Presione DIRECT. Se reproducirá la pista seleccionada.
Sección 08 Reproductor de CD múltiple 1 Presione FUNCTION para seleccionar Play mode. Presione FUNCTION hasta que Play mode aparezca en el display. ! Magazine repeat Repite todos los discos que se encuentran en el reproductor de CD múltiple ! Track repeat Sólo repite la pista actual ! Disc repeat Repite el disco actual Notas ! Si se seleccionan otros discos durante la repetición de reproducción, la gama de repetición cambia a Magazine repeat.
Sección 08 Reproductor de CD múltiple Nota Una vez finalizada la exploración de pistas o discos, volverá a comenzar la reproducción normal de las pistas. Pausa de la reproducción de un CD La pausa le permite detener temporalmente la reproducción del CD. 1 Presione FUNCTION para seleccionar Pause. Presione FUNCTION hasta que Pause aparezca en el display. 2 Presione a para activar la pausa. Se enciende la luz. Se detiene la reproducción de la pista actual. # Para desactivar la pausa, presione b.
Sección 08 Reproductor de CD múltiple 1 Reproduzca el CD que desea programar. Presione a o b para seleccionar el CD. 2 Presione OPEN para abrir la carátula. 4 Seleccione la pista deseada presionando c o d. 5 Presione a para almacenar la pista que se está reproduciendo actualmente en la lista de reproducción. Se visualiza Memory complete por un momento y se agrega la pista actual a la lista de reproducción. 6 Presione BAND para volver a la visualización de reproducción.
Sección 08 Reproductor de CD múltiple 3 Presione FUNCTION y mantenga presionado hasta que Title input aparezca en el display. Presione FUNCTION para seleccionar ITS memory. Después de que visualice Title input, presione FUNCTION hasta que ITS memory aparezca en el display. 4 Seleccione la pista deseada presionando c o d. 5 Presione b para borrar la pista de la lista de reproducción ITS.
Sección 08 Reproductor de CD múltiple de disco, no podrá cambiar a Title input. El título del disco ya estará grabado en el disco CD TEXT. # Se puede seleccionar el ingreso de números y símbolos presionando el botón número 2. 5 Presione a o b para seleccionar una letra del alfabeto. Cada vez que se presiona a, se visualizará una letra del alfabeto en orden ascendente A B C ... X Y Z, y los números y símbolos en el orden de 1 2 3 ... @ # <.
Sección 08 Reproductor de CD múltiple Visualización de títulos de discos CD TEXT 1 Presione OPEN para abrir la carátula. 2 Presione DISPLAY. Presione DISPLAY repetidamente para cambiar entre los siguientes ajustes: Tiempo de reproducción : título del disco : nombre del artista del disco : título de la pista : nombre del artista de la pista # Si determinada información no se grabó en un disco CD TEXT, se visualizará No xxxx (p. ej., No artist name).
Sección 09 Ajustes de audio Modos de funcionamiento Importante ! Si no se suministra energía a esta unidad debido a que se reemplaza la batería del automóvil o por otro motivo similar, se restablecerán los valores iniciales del microordenador. En caso de que esto ocurra, se borrarán todos los ajustes de audio de la memoria. Una vez que haya finalizado la configuración del audio, grabe los ajustes que se indican en la página 159.
Sección 09 Ajustes de audio Modo Estándar Funciones adicionales Ajuste sencillo del sistema de audio Estas funciones son útiles para ajustar el sonido de acuerdo con el sistema de que dispone o sus preferencias personales.
Sección 09 Ajustes de audio Introducción a los ajustes de audio 3 Presione AUDIO y mantenga presionado hasta que NW.1 ( ) o HP F1 ( ) aparezca en el display. Presione AUDIO para visualizar los nombres de las funciones del segundo menú de audio. Después de visualizar NW.1 o HP F1, presione AUDIO repetidamente para cambiar entre las siguientes funciones de audio: 1 Visualización de audio Muestra el estado de los ajustes de audio. 1 NW.1 (ajuste de red 1) NW.2 (ajuste de red 2) NW.3 (ajuste de red 3) NW.
Sección 09 Ajustes de audio Uso del selector de posición Una manera de garantizar un sonido más natural consiste en posicionar con claridad la imagen estéreo, colocándola en el centro propiamente dicho del campo sonoro. El selector de posición le permite ajustar automáticamente los niveles de salida de los altavoces e introduce un retardo a fin de armonizar la cantidad y la posición de los asientos ocupados. 1 Presione AUDIO para seleccionar POSITION.
Sección 09 Ajustes de audio Uso de la alineación temporal La alineación temporal le permite ajustar la distancia que existe entre cada altavoz y la posición del oyente. 1 Presione AUDIO para seleccionar TA.1. Presione AUDIO hasta que TA.1 aparezca en el display. ! Initial es la alineación temporal que viene ajustada de fábrica. ! Custom es una alineación temporal ajustada, creada por el usuario. ! Auto TA es la alineación temporal creada con las funciones TA y EQ automáticas.
Sección 09 Ajustes de audio 1 4 1 2 3 4 5 2 5 3 Altavoz delantero izquierdo Altavoz delantero derecho Altavoz trasero derecho Altavoz trasero izquierdo Altavoz de subgraves Altavoz delantero izquierdo Altavoz delantero derecho Altavoz trasero derecho Altavoz trasero izquierdo Altavoz de subgraves # No podrá seleccionar el altavoz de subgraves si la salida de subgraves está desactivada.
Sección 09 Ajustes de audio ! El filtro de paso bajo (LPF) corta las frecuencias (altas ) por encima de la frecuencia definida, lo que permite que pasen las frecuencias bajas. Pendiente El ajuste de la pendiente del HPF/LPF (pendiente de atenuación de filtro) le permite controlar la continuidad del sonido entre los altavoces. ! La pendiente indica el número de decibelios por el que se atenúa la señal cuando la frecuencia es una octava mayor (menor) (Unidad: dB/oct.).
Sección 09 Ajustes de audio Silenciamiento del altavoz (filtro) Se puede silenciar cada altavoz (filtro). Al silenciar un altavoz (filtro), no se emitirá sonido por ese altavoz. ! Si se silencia el altavoz (filtro) seleccionado, la indicación MUTE destellará y no se podrán hacer ajustes. ! Aunque un altavoz (filtro) esté silenciado, se podrán ajustar los parámetros de los demás altavoces (filtros). 1 Presione AUDIO y mantenga presionado hasta que el segundo menú de audio aparezca en el display.
Sección 09 Ajustes de audio 8 Presione AUDIO para seleccionar NW.4. Presione AUDIO hasta que NW.4 aparezca en el display. 9 Presione c o d para elegir la fase del altavoz (filtro) seleccionado. Presione c para seleccionar la fase inversa y Reverse aparece en el display. Presione d para seleccionar la fase normal y Normal aparece en el display. # Puede ajustar los parámetros de los demás altavoces (filtros) siguiendo el mismo procedimiento. 10 Presione BAND para cancelar el modo de ajuste de red.
Sección 09 Ajustes de audio Ajuste de la pendiente de atenuación del filtro de paso bajo Silenciamiento de altavoces (filtros) Cuando la salida de subgraves está activada, se puede ajustar la continuidad del sonido entre los altavoces. Se pueden silenciar los altavoces (filtros) delanteros y traseros por separado. Al silenciar los altavoces (filtros), no se emitirá sonido por esos altavoces. ! Si se silencia el altavoz (filtro) seleccionado, la indicación MUTE destellará y no se podrán hacer ajustes.
Sección 09 Ajustes de audio 3 Presione AUDIO para seleccionar HP R2. Presione AUDIO hasta que HP R2 aparezca en el display. 3 Presione AUDIO para seleccionar HP F2. Presione AUDIO hasta que HP F2 aparezca en el display. 4 Presione c o d para seleccionar la frecuencia de corte.
Sección 09 Ajustes de audio # Aparece Please set Auto EQ. Esto indica que no se puede activar el autoecualizador si no se han realizado los ajustes TA y EQ automáticos. Llamada de las curvas de ecualización El ecualizador le permite ajustar la ecualización de acuerdo con las características acústicas del interior del automóvil. Hay siete curvas de ecualización almacenadas que se pueden llamar con facilidad en cualquier momento.
Sección 09 Ajustes de audio ajustes cuando la curva CUSTOM2 está seleccionada, la curva CUSTOM2 se actualizará. 1 Llame la curva de ecualización que desea ajustar. Consulte Llamada de las curvas de ecualización en la página anterior. 3 Presione c o d para seleccionar la banda a ajustar. Cada vez que se presiona c o d, se cambia entre las bandas en el siguiente orden: 50 80 125 200 315 500 800 1.25k 2k 3.15k 5k 8k 12.5k (Hz) 4 Presione a o b para ajustar el nivel de la banda de ecualización.
Sección 09 Ajustes de audio Uso del nivelador automático de sonido Ajuste de los niveles de la fuente Al conducir su automóvil, los ruidos en el vehículo cambian de acuerdo con la velocidad de conducción y las condiciones de la carretera. El nivelador automático de sonido (ASL) controla los niveles variables de estos ruidos y aumenta el volumen automáticamente, si los ruidos alcanzan niveles más altos.
Sección 09 Ajustes de audio ! La unidad externa 1 y la unidad externa 2 se definen automáticamente con el mismo ajuste del nivel de fuente. La alineación temporal automática se ajusta automáticamente según la distancia que existe entre cada altavoz y la posición del oyente. El autoecualizador mide automáticamente las características acústicas del interior del automóvil y crea la curva de ecualización automática de acuerdo con la información recopilada.
Sección 09 Ajustes de audio ! Cuando esta unidad está conectada a un amplificador de potencia con un filtro de paso bajo (LPF), desactive el LPF del amplificador antes de realizar los ajustes TA y EQ automáticos. Además, se debe ajustar en el nivel máximo la frecuencia de corte correspondiente al LPF incorporado del altavoz de subgraves activo. ! El valor de la alineación de tiempo calculado por los ajustes TA y EQ automáticos puede ser diferente de la distancia real en las siguientes circunstancias.
Sección 09 Ajustes de audio 4 Seleccione la posición del asiento en que está colocado el micrófono. Consulte Uso del selector de posición en la página 128. # Si no se selecciona ninguna posición antes de comenzar con TA y EQ automáticos, se seleccionará Front Left automáticamente. 6 Presione OPEN para abrir la carátula. 7 Presione AUDIO y mantenga presionado para ingresar al modo de TA y EQ automáticos. 8 Enchufe el micrófono en el conector de entrada de esta unidad.
Sección 10 Ajustes iniciales Configuración de los ajustes iniciales 1 Se puede realizar la configuración inicial de los diferentes ajustes de esta unidad. Siga las instrucciones que se indican a continuación para operar cada ajuste en particular. # Para cancelar los ajustes iniciales, presione BAND. # También se pueden cancelar los ajustes iniciales presionando FUNCTION hasta que se apague la unidad.
Sección 10 Ajustes iniciales 2 Presione c o d para seleccionar el segmento de la visualización del reloj que desea ajustar. Al presionar c o d se seleccionará un solo segmento de la visualización del reloj: Horas Minutos Al seleccionar las horas o los minutos de la visualización del reloj, los dígitos seleccionados aparecerán resaltados. Cambio del ajuste del atenuador de luz 3 Presione a o b para ajustar el reloj. Al presionar a se aumentarán los dígitos de las horas o los minutos seleccionados.
Sección 10 Ajustes iniciales Corrección de distorsiones del sonido Al escuchar un CD u otra fuente en que el nivel de grabación es alto, el ajuste de la curva de ecualización a un nivel alto puede causar distorsiones. Se puede cambiar el atenuador digital al nivel bajo para reducir las distorsiones. ! La calidad del sonido es superior con el ajuste alto y, por lo tanto, se suele utilizar este ajuste. 1 Presione FUNCTION para seleccionar Digital ATT.
Sección 10 Ajustes iniciales Cambio de la apertura de la cubierta La unidad puede buscar automáticamente una emisora diferente con el mismo programa, aun durante la llamada de emisoras presintonizadas. Para brindar protección contra robo, la carátula se abre automáticamente y se extrae con facilidad. Normalmente, se deja la función de apertura automática activada. 1 Presione FUNCTION para seleccionar Auto PI seek. Presione FUNCTION repetidamente hasta que Auto PI seek aparezca en el display.
Sección 10 Ajustes iniciales Cambio de la espera telefónica Si desea utilizar el teléfono manos libres sin hacer funcionar otras fuentes de esta unidad, active el modo de espera telefónica. ! Cuando la función de teléfono manos libres está definida en Hands free ON, se puede utilizar esta función. 1 Presione FUNCTION para seleccionar SRC off standby. Presione FUNCTION repetidamente hasta que SRC off standby aparezca en el display. 2 Presione a o b para activar o desactivar SRC off standby.
Sección 11 Otras funciones Uso de la fuente AUX Un interconector IP-BUS-RCA tal como el CDRB20/CD-RB10 (que se vende por separado) le permite conectar esta unidad a un equipo auxiliar con salida RCA. Para más información, consulte el manual de instrucciones del interconector de IP-BUS-RCA. 4 Presione a o b para seleccionar una letra del alfabeto. Cada vez que se presiona a, se visualizará una letra del alfabeto en orden ascendente A B C ... X Y Z, y los números y símbolos en el orden de 1 2 3 ... @ # <.
Sección 11 Otras funciones Uso de las funciones de silenciamiento/atenuación de teléfono y de teléfono manos libres Función de silenciamiento/ atenuación de teléfono El sonido del sistema se silencia o atenúa automáticamente cuando se hace o se recibe una llamada con un teléfono móvil conectado a esta unidad. Cuando se selecciona el ajuste Hands free OFF de la función de teléfono manos libres en la configuración inicial, se activa el ajuste de silenciamiento/atenuación de teléfono.
Sección 11 Otras funciones % Presione PGM para activar la pausa al seleccionar el reproductor de CD incorporado, el reproductor de CD múltiple, el reproductor de DVD o el de DVD múltiple como la fuente. # Para desactivar la pausa, vuelva a presionar PGM. # Para cancelar el proceso de almacenamiento, vuelva a presionar PGM. % Presione PGM y mantenga presionado para activar la función BSSM al seleccionar el televisor como la fuente. Presione PGM y mantenga presionado hasta que se active la función BSSM.
Sección 11 Otras funciones Introducción a la operación DAB 1 2 3 4 Formato 1 3 Indicador News Aparece cuando se recibe un anuncio de noticias. 4 Indicador Traffic Aparece cuando se recibe un anuncio de tráfico. 5 Indicador WTHR Aparece cuando se recibe información meteorológica local. 6 Indicador ANNC Aparece cuando se recibe un anuncio. 1 2 Operación 5 6 3 4 Formato 2 Se puede usar esta unidad para controlar un sintonizador DAB (GEX-P700DAB), que se vende por separado.
Sección 11 Otras funciones Cambio de etiqueta 1 Presione OPEN para abrir la carátula. Nota Cuando un componente de servicio no tiene una etiqueta de componente de servicio ni una dinámica, no se puede cambiar a dichas etiquetas. Función de lista de servicios 1 Presione OPEN para abrir la carátula. 2 Presione FUNCTION para seleccionar la lista de servicios. 3 Presione a o b para desplazarse por la lista de servicios. 4 Presione d para llamar el servicio.
Sección 11 Otras funciones ! Se pueden almacenar los datos de hasta seis transmisiones de etiquetas dinámicas en los botones 1 6. Visualización de etiquetas dinámicas 1 Presione OPEN para abrir la carátula. 2 Presione TEXT para visualizar la etiqueta dinámica. Se visualiza la etiqueta dinámica de la emisora que está transmitiendo. # Se puede cancelar la visualización de la etiqueta dinámica presionando TEXT o BAND. # Cuando no se recibe una etiqueta dinámica, se visualiza No text.
Sección 11 Otras funciones gina a la que se hace referencia corresponde a este manual.) ! Cambio del menú de funciones (Consulte esta página.) ! Selección de discos de la lista de discos (Consulte esta página.) % Durante la reproducción de un DVD, presione FUNCTION para visualizar los nombres de las funciones.
Apéndice Información adicional Comprensión de los mensajes de error del reproductor de CD incorporado Comprensión de los mensajes de error de los ajustes TA y EQ automáticos Cuando se presentan problemas durante la reproducción de un CD, puede aparecer un mensaje de error en el display. Si esto ocurre, consulte la tabla que se ofrece a continuación para ver la causa del problema y la acción correctiva sugerida.
Apéndice Información adicional Comprensión de los mensajes de error durante la regrabación de visualizaciones de entretenimiento Mensaje Causa Acción CD ERROR Error del reproductor de CD Presione EJECT y revise el disco. CD ERROR A0 Problema eléctri- Cambie la llave de co encendido del automóvil entre las posiciones de activación y desactivación. Disc ERROR El disco no contiene los datos necesarios Presione EJECT y reemplace el disco.
Apéndice Información adicional ! Si se usa un calefactor en el invierno, se puede condensar humedad en las piezas internas del reproductor de CD. La humedad condensada puede causar una falla del reproductor. En caso de que esto ocurra, apague el reproductor de CD durante alrededor de una hora para permitir que el reproductor se seque y limpie los discos húmedos con un paño suave para eliminar la humedad. ! Las vibraciones en las carreteras pueden interrumpir la reproducción de un CD.
Apéndice Información adicional Importante ! Al escribir el nombre de un fichero MP3, WMA o WAV, añada la extensión correspondiente (.mp3, .wma o .wav). ! Esta unidad reproduce los ficheros con la extensión (.mp3, .wma o .wav) como fichero MP3, WMA o WAV. Para evitar que se genere ruido y se produzcan fallas de funcionamiento, no utilice esta extensión para otros ficheros que no sean ficheros MP3, WMA o WAV.
Apéndice Información adicional Windows Media Audio 9 Lossless Windows Media Audio 9 Voice Información adicional sobre WAV ! Esta unidad reproduce ficheros WAV codificados en los formatos LPCM (PCM lineal) o MS ADPCM. ! Sólo se pueden reproducir ficheros WAV en las frecuencias de 16; 22,05; 24; 32; 44,1 y 48 kHz (LPCM) o de 22,05 y 44,1 kHz (MS ADPCM). Puede redondearse la frecuencia de muestreo que se visualiza en el display.
Apéndice Información adicional Planilla de valores de ajuste del DSP Modo de red de 3 vías Ajuste de red Filtro Low LPF Mid HPF Mid LPF High HPF Frecuencia de corte Nivel Español Pendiente Fase Ajuste de la alineación temporal Altavoz Altavoz de gama alta Altavoz de gama media Altavoz de gama baja Izquierda Izquierda Izquierda Derecha Derecha Derecha Distancia Modo Estándar Ajuste de red Filtro Altavoz de subgraves HPF (delantero) HPF (trasero) Frecuencia de corte Nivel Pendie
Apéndice Información adicional Glosario Etiqueta ID3 Es un método para incorporar información relacionada con las pistas en un fichero MP3. Esta información incorporada puede consistir en el título de la pista, el nombre del artista, el título del álbum, el género musical, el año de producción, comentarios y otros datos. El contenido se puede editar libremente utilizando programas con funciones de edición de etiquetas ID3.
Apéndice Información adicional PCM lineal (LPCM)/Modulación de códigos de impulso Esta sigla significa Linear Pulse Code Modulation (modulación lineal de códigos de impulso) y representa el sistema de grabación de señal que se utiliza para discos DVD y CD de música. Español VBR VBR es la abreviatura de velocidad de grabación variable. En general, se utiliza mucho más la velocidad de grabación constante (CBR).
Apéndice Información adicional Especificaciones Generales Fuente de alimentación ........ 14,4 V CC (10,8 15,1 V permisible) Sistema de conexión a tierra ..................................................... Tipo negativo Consumo máximo de corriente ..................................................... 10,0 A Dimensiones (An × Al × Pr): DIN Bastidor .................... 178 × 50 × 157 mm Cara anterior .......... 188 × 58 × 28 mm D Bastidor .................... 178 × 50 × 162 mm Cara anterior ..........
Apéndice Información adicional Umbral de silenciamiento a 50 dB ..................................................... 10 dBf (0,9 µV/75 W, mono) Relación de señal a ruido .... 75 dB (red IEC-A) Distorsión .................................... 0,3 % (a 65 dBf, 1 kHz, estéreo) 0,1 % (a 65 dBf, 1 kHz, mono) Respuesta de frecuencia ..... 30 15.000 Hz (±3 dB) Separación estéreo ................. 45 dB (a 65 dBf, 1 kHz) Selectividad ................................
PIONEER CORPORATION 4-1, MEGURO 1-CHOME, MEGURO-KU, TOKYO 153-8654, JAPAN PIONEER ELECTRONICS (USA) INC. P.O. Box 1540, Long Beach, California 90801-1540, U.S.A. TEL: (800) 421-1404 PIONEER EUROPE NV Haven 1087, Keetberglaan 1, B-9120 Melsele, Belgium TEL: (0) 3/570.05.11 PIONEER ELECTRONICS ASIACENTRE PTE. LTD. 253 Alexandra Road, #04-01, Singapore 159936 TEL: 65-6472-1111 PIONEER ELECTRONICS AUSTRALIA PTY. LTD.