English Operation Manual Mode d emploi Multi-channel AV processor Processeur AV multi-canaux Français DEQ-P8000
Contents Thank you for buying this Pioneer product. Please read through these operating instructions so you will know how to operate your model properly. After you have finished reading the instructions, keep this manual in a safe place for future reference.
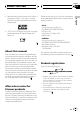
English Selecting fine audio equipment such as the unit you’ve just purchased is only the start of your musical enjoyment. Now it’s time to consider how you can maximize the fun and excitement your equipment offers. This manufacturer and the Electronic Industries Association’s Consumer Electronics Group want you to get the most out of your equipment by playing it at a safe level.
Section 01 Before You Start Information to User Alteration or modifications carried out without appropriate authorization may invalidate the user s right to operate the equipment. About this unit Important ! Following functions cannot be operated when DVH-P7000, DVH-P5000MP or AVH-P6500DVD is connected to this unit.
Section 01 Before You Start ! DTS and DTS Digital Surround are registered trademarks of Digital Theater Systems, Inc. Please do not ship your unit to the companies at the addresses listed below for repair without advance contact. U.S.A. Pioneer Electronics (USA) Inc. CUSTOMER SUPPORT DIVISION P.O. Box 1760 Long Beach, CA 90801-1760 800-421-1404 English ! Manufactured under license from Dolby Laboratories. Dolby , Pro Logic , and the double-D symbol are trademarks of Dolby Laboratories.
Section 01 Before You Start Precautions WARNING: % Press RESET with a pen tip or other pointed instrument. Handling the cord on this product or cords associated with accessories sold with the product will expose you to lead, a chemical known to the State of California and other governmental entities to cause cancer and birth defects or other reproductive harm. Wash hands after handling.
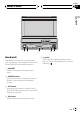
Section 02 What s What English 1 2 Head unit Operate this unit with the connected head unit. Instructions in this operation manual use AVH-P6600DVD as an example head unit. 3 4 5 5 Joystick Use to adjust the selected audio function and turn it on or off (substitute for the touch panel key). 1 VOLUME Rotate it to increase or decrease the volume. 2 SOURCE button This unit is turned on by selecting a source. Press to cycle through all the available sources.
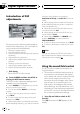
Section 03 Digital Signal Processor Introduction of DSP adjustments 1 By carrying out the following settings/adjustments in the order shown, you can create a finely-tuned sound field effortlessly.
Section 03 Digital Signal Processor 2 Press EQ to select the desired SFC mode. Press EQ repeatedly to switch between the following mode: MUSICAL (musical) DRAMA (drama) ACTION (action) JAZZ (jazz) HALL (hall) CLUB (club) OFF (off) Note If the source is a 2-channel LPCM audio or a 2channel Dolby Digital audio and you select SFC effects that are most applicable for 5.1-channel audio (i.e., MUSICAL, DRAMA or ACTION), we recommend turning Dolby Pro Logic B on.
Section 03 Digital Signal Processor LEFT:25 RIGHT:25 is displayed as the left/ right speaker balance moves from left to right. Adjusting source levels SLA (source level adjustment) lets you adjust the volume level of each source to prevent radical changes in volume when switching between sources. ! Settings are based on the FM tuner volume level, which remains unchanged. 1 Compare the FM tuner volume level with the level of the source you wish to adjust. 2 Touch A.MENU and DSP and then touch SLA.
Section 03 Digital Signal Processor Using the direct control 1 Touch A.MENU and DSP and then touch DIGITAL DIRECT. 2 Touch a to turn the direct control on. # To turn direct control off, touch b. Using the Dolby Pro Logic B This function cannot be operated when DVHP7000, DVH-P5000MP or AVH-P6500DVD is connected to this unit. Dolby Pro Logic B creates five full-bandwidth output channels from two-channel sources to achieve high-purity matrix surround.
Section 03 Digital Signal Processor 5 Touch on. to turn the panorama control # To turn the panorama control off, touch . 6 Touch and then touch or to adjust front/surround speaker balance. Each time you touch or it moves the sound towards the front or the surrounds. +3 3 is displayed as the front/surround speaker balance moves from front to surrounds. 7 Touch and then touch or to adjust the center image.
Section 03 Digital Signal Processor 4 Touch to turn subwoofer output on. # To turn subwoofer output off, touch . 5 Touch and then touch or to select the phase of subwoofer output. Touch to select normal phase and NORMAL appears in the display. Touch to select reverse phase and REVERSE appears in the display.
Section 03 Digital Signal Processor 2 Touch SP Lev. or to select the speaker to 3 Touch be adjusted. Each time you touch or selects the speaker in the following order: FRONT-L (front speaker left) CENTER (center speaker) FRONT-R (front speaker right) REAR-R (rear speaker right) REAR-L (rear speaker left) SUB WOOFER (subwoofer) # You cannot select speakers whose size is set at OFF. 4 Touch or to adjust the speaker output level. Each time you touch or increases or decreases the speaker output level.
Section 03 Digital Signal Processor This function cannot be operated when DVHP7000, DVH-P5000MP or AVH-P6500DVD is connected to this unit. You can select the time alignment adjustment mode. 1 Touch A.MENU and DSP and then touch NEXT. 2 Touch TIME ALIGNMENT. 3 Touch any of the following touch panel keys to select the time alignment. ! INITIAL Initial time alignment (factory setting) ! AUTO TA Time alignment created by auto TA and EQ.
Section 03 Digital Signal Processor ! CUSTOM1 and CUSTOM2 are adjusted equalizer curves. ! When FLAT is selected no supplement or correction is made to the sound. This is useful to check the effect of the equalizer curves by switching alternatively between FLAT and a set equalizer curve. 1 Press EQ and hold to switch to equalizer function. Press EQ and hold until an equalizer curve name appears in the display. # To switch to SFC function, press EQ and hold again. 2 Press EQ to select the equalizer.
Section 03 Digital Signal Processor # You can adjust parameters for each band of the other speakers in the same way. Note You can select a center frequency for each band. You can change the center frequency in 1/3-octave steps, but you cannot select frequencies that have intervals shorter than 1 octave among the center frequencies of the three bands.
Section 03 Digital Signal Processor Before operating the auto TA and EQ function ! Carry out auto TA and EQ in as quiet a place as possible, with the car engine and air conditioning switched off. Also cut power to car phones or portable telephones in the car, or remove them from the car before carrying out auto TA and EQ. Sounds other than the measurement tone (surrounding sounds, engine sound, telephones ringing etc.) may prevent correct measurement of the car interior acoustic characteristics.
Section 03 Digital Signal Processor # To cancel auto TA and EQ part way through, touch BACK or ESC. 4 Select the position for the seat on which the microphone is placed. Refer to Using the position selector on page 9. # If no position is selected before you start auto TA and EQ, FRONT-L is selected automatically. 10 When auto TA and EQ is completed, Complete is displayed. When correct measurement of car interior acoustic characteristics is not possible, an error message is displayed.
Section 04 Initial Settings Correcting distorted sound You can minimize distortion that may be caused by the equalizer curve settings. Setting an equalizer level high can cause distortion. If high sound is crippled or distorted, try switching to LOW. Normally, leave the setting at HIGH to ensure quality sound. 1 Touch A.MENU and INITIAL and then touch NEXT. 2 Touch DIGITAL ATT. 3 Touch or to switch the digital attenuator setting. Touch to select low setting and LOW appears in the display.
Appendix Additional Information Troubleshooting Symptom Cause Action Power doesn t turn on. No functions come on. Cables or connectors are not correctly connected. Check whether the cables are plugged in correctly and firmly. The fuse is blown. Rectify the reason for the fuse blowing, then replace the fuse. Be very sure to install the correct fuse with the same rating. Cables are not connected correctly. Connect the cables correctly. No sounds are heard. The volume level will not rise.
Appendix Additional Information Symptom Cause Action No sounds are heard. Optical cables are incorrectly connected. Connect the cables correctly. (Page 4) Symptom Cause Action No sounds come from the DVD player only. Optical cables are incorrectly connected. Connect the cables correctly. The DVD player is not properly set for output. Make the correct output setting. (See the manual for the DVD player.
Appendix Additional Information Terms Optical digital output/input By transmitting and receiving audio signals in a digital signal format, the chance of sonic quality deteriorating in the course of transmission is minimized. An optical digital output/ input is designed to transmit and receive digital signals optically. English Dolby Digital Dolby Digital provides multi-channel audio from up to 5.1 independent channels. This is the same as the Dolby Digital surround sound system used in theaters.
Appendix Additional Information Specifications General Power source ............................. 14.4 V DC (10.8 15.1 V allowable) Grounding system ................... Negative type Max. current consumption: Backup current .............. 10.0 A Dimensions (W × H × D) ... 237 × 29 × 171 mm (9-3/8 × 1-1/8 × 6-3/4 in.) Weight .......................................... 1.1 kg (2.
Table des matières Nous vous remercions d avoir acquis cet appareil Pioneer. Nous vous prions de lire ces instructions d utilisation afin que vous sachiez utiliser votre appareil correctement. Quand vous aurez fini la lecture de ces instructions, rangez ce mode d emploi dans un endroit sûr pour référence ultérieure.
La sélection d’un équipement audio de qualité comme l’unité que vous venez d’acheter n’est que le début de votre plaisir musical. Maintenant, il est temps de penser à la manière de profiter au maximum des plaisirs que vous offre votre équipement. Ce fabricant et le Groupe “Consumer Electronics Group” de l’Association des Industries Electroniques veut que vous profitiez au maximum de votre équipement en l’utilisation à un niveau sûr.
Section 01 Avant de commencer Quelques mots sur cet appareil Important Quelques mots sur l entrée optique de cet appareil Cet appareil dispose de deux entrées optiques, mais les équipements qui peuvent être connectés à chacune des entrées sont limités. Reportez-vous au tableau suivant, et utilisez les entrées optiques correctement. Sinon, cet appareil pourrait ne pas fonctionner correctement.
Section 01 Avant de commencer ! Fabriqué sous licence de Dolby Laboratories. Les termes « Dolby » et « Pro Logic », ainsi que le sigle double D sont des marques commerciales de Dolby Laboratories. ! DTS et DTS Digital Surround sont des marques commerciales déposées de Digital Theater Systems, Inc. Quelques mots sur ce mode d emploi Cet appareil possède des fonctions sophistiquées qui lui assurent une réception et un fonctionnement de haute qualité.
Section 01 Avant de commencer 3 Téléchargez les modes d emploi, commandez les catalogues des produits, recherchez de nouveaux produits, et bien plus. % Appuyez sur RESET avec la pointe d un stylo ou un autre instrument pointu. Précautions Français ! Conservez ce mode d emploi à portée de main afin de vous y référer pour les modes opératoires et les précautions. ! Maintenez toujours le niveau d écoute à une valeur telle que vous puissiez entendre les sons provenant de l extérieur du véhicule.
Section 02 Description de l appareil 1 2 Appareil central Utilisez cet appareil avec l appareil principal connecté. Les instructions de ce mode d emploi utilisent AVH-P6600DVD comme exemple d appareil central. 1 VOLUME Tournez ce bouton pour augmenter ou diminuer le niveau sonore. 2 Touche SOURCE Cet appareil est mis en service en sélectionnant une source. Appuyez sur cette touche pour parcourir les différentes sources disponibles.
Section 03 Processeur de Signal Numérique (DSP) Introduction aux réglages du DSP En effectuant les réglages/ajustements suivants dans l ordre indiqué, vous pouvez sans effort créer un champ sonore paramétré de manière fine.
Section 03 Processeur de Signal Numérique (DSP) ! L acoustique des différents environnements de spectacle n est pas la même et dépend des dimensions et du contour de l espace dans lequel se déplacent les ondes sonores et de la façon dont les sons se réfléchissent sur la scène, les murs, les planchers et les plafonds. Dans un spectacle live vous entendez la musique en trois phases : le son direct, les réflexions rapides, et les réflexions lentes, ou réverbérations.
Section 03 Processeur de Signal Numérique (DSP) Réglage de l équilibre sonore Vous pouvez régler l équilibre avant-arrière et droite-gauche de manière que l écoute soit optimale quel que soit le siège occupé. 1 Effleurez A.MENU puis DSP puis effleurez FADER/BALANCE. # FR:00 est le réglage convenable dans le cas où seulement deux haut-parleurs sont utilisés. 3 Effleurez c ou d pour régler l équilibre sonore entre les haut-parleurs gauche et droit.
Section 03 Processeur de Signal Numérique (DSP) ! Lors de la lecture d un disque autre qu un DVD, vous ne pouvez pas basculer sur D.R.C. 1 Effleurez A.MENU puis DSP puis effleurez D.R.C. 2 Effleurez a pour mettre en service le contrôle de la dynamique. # Pour mettre hors service le contrôle de la dynamique, effleurez b.
Section 03 Processeur de Signal Numérique (DSP) 3 Effleurez n importe quelle des touches suivantes du clavier tactile pour sélectionner le mode désiré. Réglage du mode Musique Vous pouvez régler le mode Musique avec les trois contrôles suivants. ! Panorama (PANORAMA) étend l image stéréo avant de façon à inclure les hautparleurs surround pour obtenir un effet d enveloppement excitant. ! Dimension (DIMENSION) vous permet d ajuster graduellement le champ sonore vers l avant ou vers l arrière.
Section 03 Processeur de Signal Numérique (DSP) Paramétrage de la configuration de haut-parleurs Vous devez faire des sélections avec/sans (ou oui/non) et des paramétrages de taille (capacité de reproduction des graves) en fonction des haut-parleurs installés. La taille doit être définie à LARGE (grande) si le haut-parleur peut reproduire des sons d environ 100 Hz ou en dessous. Sinon choisissez SMALL (petite).
Section 03 Processeur de Signal Numérique (DSP) ves) PHASE (réglage du haut-parleur d extrêmes graves) haut parleur LARGE ou le haut-parleur d extrêmes graves. 4 Effleurez pour mettre en service la sortie vers le haut-parleur d extrêmes graves. 1 Effleurez A.MENU puis DSP puis effleurez NEXT. # Pour mettre la sortie haut-parleur d extrêmes graves hors service, effleurez .
Section 03 Processeur de Signal Numérique (DSP) Réglage des niveaux de sortie des haut-parleurs Vous pouvez réajuster les niveaux de sortie des haut-parleurs en utilisant une tonalité de test tout en écoutant la musique. 1 Effleurez A.MENU puis DSP puis effleurez NEXT. 2 Effleurez SP Lev. 3 Effleurez ou pour choisir le hautparleur à régler.
Section 03 Processeur de Signal Numérique (DSP) # La tonalité de test passe au haut-parleur suivant après environ deux secondes à partir de la dernière opération. 5 Effleurez STOP pour arrêter l émission de la tonalité de test. # Vous pouvez aussi arrêter l émission de la tonalité de test en déplaçant le joystick vers le bas. Utilisation de l alignement temporel L alignement temporel vous permet de régler la distance entre chaque haut-parleur et la position d écoute.
Section 03 Processeur de Signal Numérique (DSP) 4 Effleurez a ou b pour régler la distance entre le haut-parleur sélectionné et la position d écoute. Chaque effleurement de a ou b augmente ou diminue la distance. 0.0in. 200.0in. sont les valeurs affichées tandis que la distance augmente ou diminue. 5 Effleurez ESC pour revenir à l affichage des conditions de lecture.
Section 03 Processeur de Signal Numérique (DSP) 2 Effleurez PRESET EQ. 4 Effleurez ou pour choisir le hautparleur à régler. Effleurez ou jusqu à ce que le haut-parleur désiré apparaisse sur l afficheur. REAR (haut-parleurs arrière) CENTER (hautparleur central) FRONT (haut-parleurs avant) # Vous ne pouvez pas sélectionner des haut-parleurs dont la taille est positionnée sur OFF. 5 Effleurez puis effleurez ou pour sélectionner la bande d égalisation à régler.
Section 03 Processeur de Signal Numérique (DSP) 3 Effleurez a pour mettre l égalisation automatique en service. # Effleurez b pour mettre l égalisation automatique hors service. TA et EQ Auto (alignement temporel automatique et égalisation automatique) Cette fonction ne peut pas être utilisée quand un lecteur DVH-P7000, DVH-P5000MP ou AVHP6500DVD est connecté à cet appareil. L alignement temporel automatique est ajusté automatiquement pour la distance entre chaque haut-parleur et la position d écoute.
Section 03 Processeur de Signal Numérique (DSP) ! ! ! Exécution du réglage TA et EQ auto 1 Arrêtez la voiture dans un endroit aussi calme que possible, fermez toutes les portières, les vitres et le toit ouvrant, puis coupez le moteur. Si vous laissez tourner le moteur, son bruit peut empêcher un réglage TA et EQ auto correct. 2 Attachez le microphone fourni au centre du repose-tête du conducteur, en l orientant vers l avant, en utilisant la ceinture (vendue séparément).
Section 03 Processeur de Signal Numérique (DSP) # Si aucune position n est sélectionnée avant que vous démarriez le réglage TA et EQ auto, FRONT-L est sélectionné automatiquement. 5 Maintenez la pression sur SOURCE jusqu à ce que l appareil soit mis hors tension. 6 Appuyez de façon prolongée sur EQ pour passer en mode mesure de TA et EQ auto. 7 Branchez le microphone dans le jack entrée microphone sur cet appareil. 8 Effleurez START pour démarrer le réglage TA et EQ auto.
Section 04 Réglages initiaux Correction de la distorsion sonore # Pour annuler la réinitialisation des fonctions audio, effleurez CANCEL. Français Vous pouvez minimiser la distorsion susceptible d être provoquée par les réglages de la courbe d égalisation. Fixer un niveau élevé de l égalisateur peut provoquer de la distorsion. Si le son est déformé ou distordu, essayez de basculer sur LOW. Normalement, laissez le réglage sur HIGH pour assurer un son de qualité.
Annexe Informations complémentaires Dépannage Commun Symptôme Causes possibles Action corrective L appareil ne se met pas sous tension. Aucune fonction ne devient active. Les câbles ou les connecteurs ne sont pas connectés correctement. Vérifiez que les câbles sont raccordés correctement et fermement. Le fusible a sauté. Corrigez la raison pour laquelle le fusible a sauté, puis remplacez le fusible. Assurezvous bien d installer le fusible correct avec la même intensité. On n entend aucun son.
Annexe Informations complémentaires Causes possibles Le Dolby Pro Logic B est en service. Mettez le Dolby Pro Logic B hors service. (Si la source audio est mono et si le Dolby Pro Logic B est en fonction, le son est entendu sur le haut-parleur central seulement.) (Page 34) Action corrective La mise en service du contrôle de la dynamique est sans effet. Le son en cours de reproduction n est pas codé Dolby Digital. La fonction n a d effet que sur les sons Dolby Digital.
Annexe Informations complémentaires Termes utilisés Contrôle de dynamique Dolby Digital possède une fonction de compression de la différence entre les sons les plus forts et les plus faibles: Le contrôle de dynamique. Ce contrôle assure que les sons avec une plage de dynamique accrue sont entendus clairement même aux faibles niveaux de volume. Dolby Digital Dolby Digital fournit un son multi-canaux à partir de 5.1 canaux indépendants.
Annexe Informations complémentaires Caractéristiques techniques Généralités Alimentation .............................. 14,4 V DC (10,8 15,1 V acceptable) Mise à la masse ....................... Pôle négatif Consommation max. en courant : Courant de secours ...... 10,0 A Dimensions (L x H x P) ......... 237 × 29 × 171 mm Poids ..............................................
PIONEER CORPORATION 4-1, MEGURO 1-CHOME, MEGURO-KU, TOKYO 153-8654, JAPAN PIONEER ELECTRONICS (USA) INC. P.O. Box 1540, Long Beach, California 90801-1540, U.S.A. TEL: (800) 421-1404 PIONEER EUROPE NV Haven 1087, Keetberglaan 1, B-9120 Melsele, Belgium TEL: (0) 3/570.05.11 PIONEER ELECTRONICS ASIACENTRE PTE. LTD. 253 Alexandra Road, #04-01, Singapore 159936 TEL: 65-6472-7555 PIONEER ELECTRONICS AUSTRALIA PTY. LTD.