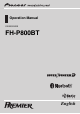
Operation Manual CD RECEIVER FH-P800BT English
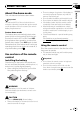
Contents Thank you for buying this Pioneer product. Please read through these operating instructions so you will know how to operate your model properly. After you have finished reading the instructions, keep this manual in a safe place for future reference.
Contents – Connecting to a Bluetooth audio player automatically 29 – Displaying BD (Bluetooth Device) address 29 Bluetooth Telephone 30 – Setting up for hands-free phoning 30 – Introduction to connection and pairing 30 – Connecting and disconnecting a cellular phone 31 – Making a phone call 34 – Taking a phone call 34 – Using the phone number list 35 – Using the call history 35 – Using the phone book 36 – Using preset numbers 37 – Introduction to advanced operations 39 – Downloading phone books from your c
Contents Available accessories Playing songs on iPod 56 – Basic operation 56 – Displaying text information on iPod 56 – Browsing for a song 56 – Introduction to advanced operations 56 – Playing songs in a random order (shuffle) 57 XM tuner 57 – Listening to XM Satellite Radio 57 – Selecting an XM channel directly 58 – Switching the XM display 58 – Storing and recalling broadcast stations 58 – Switching the XM channel select mode 58 – Displaying the Radio ID 59 SIRIUS Satellite Radio tuner 59 – Listening to
Section Before You Start FCC ID: AJDK017 MODEL NO.: FH-P800BT IC: 775E-K017 This device complies with Part 15 of FCC Rules and RSS-Gen of IC Rules. Operation is subject to the following two conditions: (1) this device may not cause interference, and (2) this device must accept any interference, including interference that may cause undesired operation of this device. MADE IN MALAYSIA ! This transmitter must not be co-located or operated in conjunction with any other antenna or transmitter.
Section 01 Before You Start CAUTION: USE OF CONTROL OR ADJUSTMENT OR PERFORMANCE OF PROCEDURES OTHER THAN THOSE SPECIFIED HEREIN MAY RESULT IN HAZARDOUS RADIATION EXPOSURE. CAUTION: THE USE OF OPTICAL INSTRUMENTS WITH THIS PRODUCT WILL INCREASE EYE HAZARD. CAUTION ! Do not allow this unit to come into contact with liquids. Electrical shock could result. Also, damage to this unit, smoke, and overheating could result from contact with liquids.
Section Before You Start ! ! ! About Bluetooth The SAT RADIO READY mark indicates that the Satellite Radio Tuner for Pioneer (i.e., XM tuner and Sirius satellite tuner which are sold separately) can be controlled by this unit. Please inquire to your dealer or nearest authorized Pioneer service station regarding the satellite radio tuner that can be connected to this unit. For satellite radio tuner operation, please refer to the satellite radio tuner owner’s manual.
Section 01 Before You Start After-sales service for Pioneer products Please contact the dealer or distributor from where you purchased this unit for after-sales service (including warranty conditions) or any other information. In case the necessary information is not available, please contact the companies listed below: Please do not ship your unit to the companies at the addresses listed below for repair without advance contact. U.S.A. Pioneer Electronics (USA) Inc. CUSTOMER SUPPORT DIVISION P.O.
Section Before You Start This unit features the feature demo mode. Important The red lead (ACC) of this unit should be connected to a terminal coupled with ignition switch on/off operations. If this is not done, the vehicle battery may be drained. Feature demo mode The feature demo automatically starts when power to this unit is turned off while the ignition switch is set to ACC or ON. Press DISP during feature demo operation to cancel the feature demo mode. Press DISP again to start.
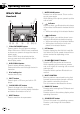
Section 02 Operating this unit What’s What Head unit 1 S.Rtrv/SAT MODE button Press to switch Sound Retriever settings. When XM tuner or SIRIUS tuner is selected as the source, press to change the channel select mode. When SIRIUS tuner is selected as the source, press and hold to perform the Instant Replay mode. 2 DISP/SCROLL button Press to select different displays. Press and hold to scroll through the text information. 3 Disc loading slot Insert a disc to play.
Section Operating this unit 02 Remote control Operation is the same as when using the buttons on the head unit. j DIRECT button Press to directly select the desired track. k CLEAR button Press to cancel the input number when 0 to 9 are used. l 0 to 9 buttons Press to directly select the desired track, preset tuning or disc. Buttons 1 to 6 can operate the preset tuning for the tuner or disc number search for the multi-CD player.
Section Operating this unit 02 Display indication 6 (song) indicator Appears when the track (song) name is displayed on the main display section. Appears when song search refinement on the iPod browsing function is in use. 7 (iPod connection) indicator Appears when the iPod connection is recognized while USB source is being selected. 1 Main display section Displays band, frequency, elapsed playback time and other settings.
Section Operating this unit h Basic Operations Power ON/OFF Turning the unit on % Press SOURCE to turn the unit on. Turning the unit off % Press OFF and hold until the unit turns off. Operating this unit (phone book) indicator Appears when phone book list is displayed while telephone source is being selected. 02 Selecting a source You can select a source you want to listen to. To switch to the built-in CD player, load a disc in the unit (refer to page 16).
Section 02 Operating this unit ! Charging the portable audio player using car’s DC power source while connecting it to AUX input may generate noise. In this case, stop charging. ! External unit refers to a Pioneer product (such as ones available in the future) that, although incompatible as a source, enables control of basic functions with this unit. Two external units can be controlled with this unit.
Section Operating this unit # You can also change the station by pushing MULTI-CONTROL up or down. # To return to the ordinary display, press BAND or LIST. # If you do not operate the list within about 30 seconds, the display automatically returns to the ordinary display. Using the remote control % When you find a frequency that you want to store in memory, press one of preset tuning buttons 1 to 6 and hold until the preset number stops flashing.
Section 02 Operating this unit The LEVEL 4 setting allows reception of only the strongest stations, while lower settings let you receive progressively weaker stations. Built-in CD Player Basic Operations 1 Folder number indicator Shows the folder number currently playing when the compressed audio is playing.
Section Operating this unit 02 2 Press 0 to 9 to enter the desired track number. # If folder 01 (ROOT) contains no files, playback commences with folder 02. # You can cancel the input number by pressing CLEAR. % Switch between compressed audio and CD-DA Press BAND. 3 Press DIRECT. The track for the entered number will play. # This operation is available only when playing CD-EXTRA or MIXED-MODE CDs.
Section 02 Operating this unit ! When playing back VBR (variable bit rate)-recorded WMA files, the average bit rate value is displayed. ! When playing back VBR (variable bit rate)-recorded MP3 files, VBR is displayed instead of bit rate value. ! The sampling frequency shown in the display may be abbreviated. ! When Ever Scroll is set to ON at the initial setting, text information scrolls continuously in the display. Refer to Switching the ever scroll on page 50.
Section Operating this unit Notes 02 Note You can also turn this function on or off in the menu that appears by using MULTI-CONTROL. Selecting a repeat play range 2 Use MULTI-CONTROL to select SCAN MODE in the function menu. 1 Display the function menu. Refer to Introduction to advanced operations on the previous page. 2 Use MULTI-CONTROL to select PLAY MODE in the function menu. 3 Press MULTI-CONTROL to select the repeat range.
Section 02 Operating this unit % Press S.Rtrv repeatedly to select the desired setting. OFF (off)—1—2 # 2 is more effective than 1. Note You can also perform this operation in the menu that appears by using MULTI-CONTROL. Using disc title functions You can input CD titles and display the title. The next time you insert a CD for which you have entered a title, the title of that CD is displayed. Entering disc titles Use the disc title input feature to store up to 48 CD titles in the unit.
Section Operating this unit 02 Playing songs on USB portable audio player/USB memory Basic Operations 1 2 3 4 Folder number indicator Track number indicator Play time indicator Bit rate/sampling frequency indicator ! When playing back VBR (variable bit rate)-recorded WMA files, the average bit rate value is displayed. ! When playing back VBR (variable bit rate)-recorded MP3 files, VBR is displayed instead of bit rate value. % Select a folder Push MULTI-CONTROL up or down.
Section 02 Operating this unit Introduction to advanced operations 1 Press MULTI-CONTROL to display the main menu. 2 Use MULTI-CONTROL to select FUNCTION. Turn to change the menu option. Press to select. The function menu is displayed. 3 Turn MULTI-CONTROL to select the function.
Section Operating this unit 02 Browsing for a song For details about the supported iPod, refer to iPod® compatibility on page 6. Searching songs by category Basic Operations 1 Song number indicator 2 Play time indicator % Fast forward or reverse Push and hold MULTI-CONTROL left or right. % Select a track (chapter) Push MULTI-CONTROL left or right. Notes ! When using an iPod, iPod Dock Connector to USB Cable is required. ! Read the precautions for iPod on page 78.
Section 02 Operating this unit 2 Use MULTI-CONTROL to select a category. Turn to change the category. Press to select. 3 Press LIST to switch to alphabet search mode. 4 Turn MULTI-CONTROL to select a desired alphabet. 5 Press MULTI-CONTROL to display the alphabetical list. # If alphabet search is aborted, NOT FOUND is displayed. Displaying text information on iPod % Press DISP to select the desired text information.
Section Operating this unit Playing songs in a random order (shuffle) 2 Use MULTI-CONTROL to select SHUFFLE MODE in the function menu. 3 Press MULTI-CONTROL to select your favorite setting. ! SHUFFLE SONGS – Play back songs in the selected list in random order. ! SHUFFLE ALBUMS – Play back songs from a randomly selected album in order. ! SHUFFLE OFF – Cancel random play. Playing all songs in a random order (shuffle all) % Press to turn shuffle all on. All songs on the iPod play randomly.
Section 02 Operating this unit Changing audiobook speed While listening to an audiobook on iPod, playback speed can be changed. 1 Display the function menu. Refer to Introduction to advanced operations on page 24. 2 Use MULTI-CONTROL to select AUDIOBOOKS in the function menu. 3 Press MULTI-CONTROL to select your favorite setting. Press MULTI-CONTROL repeatedly until the desired setting appears in the display.
Section Operating this unit 1 Device name Shows the device name of the connected Bluetooth audio player (or Bluetooth adapter). Connecting a Bluetooth audio player ! Before you can use audio players you may need to enter the PIN code into this unit. If your player requires a PIN code to establish a connection, look for the code on the player or in its accompanying documentation. Refer to Entering PIN code for Bluetooth wireless connection on page 51.
Section 02 Operating this unit 4 Press MULTI-CONTROL to establish connection. # While connecting, CONNECTING flashes. If the connection is established, CONNECTED is displayed. # If the connection fails, ERROR is displayed. In this case, try again from the beginning. Disconnecting a Bluetooth audio player This function can be operated only when the Bluetooth wireless connection is being established. 1 Press MULTI-CONTROL to display the main menu. 2 Use MULTI-CONTROL to select CONNECTION.
Section Operating this unit 02 Displaying BD (Bluetooth Device) address 1 Display the function menu. Refer to Introduction to advanced operations on the previous page. This unit displays the BD address of this unit. 2 Use MULTI-CONTROL to select PLAY in the function menu. 3 Press MULTI-CONTROL to start playback. Stopping playback 1 Display the function menu. Refer to Introduction to advanced operations on the previous page. 1 Display the function menu.
Section 02 Operating this unit Bluetooth Telephone Important ! Since this unit is on standby to connect with your cellular phone via Bluetooth wireless technology, using this unit without running the engine can result in battery drainage. ! Advanced operations that require your attention such as dialing numbers on the monitor, using phone book, etc., are prohibited while you are driving. When you need to use these advanced operations, stop your vehicle in a safe place.
Section Operating this unit 3 Turn MULTI-CONTROL to select the function. PAIRED PHONE (paired phone)— BT HANDS FREE (new phone)—SET PHONE (phone registration)—DISCONNECT PHONE (disconnect phone)—DELETE PHONE (delete phone) If the phone is not connected and not paired The following function can be operated. ! BT HANDS FREE (new phone) If the phone is not connected but paired The following functions can be operated.
Section 02 Operating this unit When you select YES, this unit changes to PH BOOK DOWNLOAD and the download operation automatically begins. After completing, DATA DOWNLOADED is displayed. According to the circumstances, this unit changes to PH BOOK TRANSFER. In this case, refer to step 4 on Transferring entries to the phone book on page 40. # When you select NO, the display reverts to normal. Using this unit to initiate a connection 1 Display the connection menu.
Section Operating this unit 2 Turn MULTI-CONTROL to select PAIRED PHONE. 3 Press MULTI-CONTROL to start connection. PIN code is set to 0000 as the default. You can change this code in the initial setting. Refer to Entering PIN code for Bluetooth wireless connection on page 51. While connecting, CONNECTING is displayed. If the connection is established, CONNECTED is displayed. After connected, this unit automatically changes to PH.BOOK DL (phone book download confirmation) display.
Section 02 Operating this unit 3 Push MULTI-CONTROL up or down to select a pairing assignment. P1 (user phone 1)—P2 (user phone 2)—P3 (user phone 3) # Push MULTI-CONTROL left or right to switch the BD address and device name. # If the assignment is empty, NO DATA is displayed and operation is not possible. 4 When the device name is being displayed, push MULTI-CONTROL right to select DELETE YES. DELETE YES is displayed. Deleting phone is now on standby.
Section Operating this unit Notes Operating a call waiting % Answering a call waiting When a call comes in, press MULTI-CONTROL. # You can also answer a call waiting by pressing OFF HOOK on the remote control. % End all calls Press . # You can also end all calls by pressing ON HOOK on the remote control. % Switch between callers on hold Press MULTI-CONTROL. # You can also switch between callers on hold by pressing OFF HOOK on the remote control. % Rejecting call waiting Press .
Section Operating this unit 02 # If you do not operate anything within about 30 seconds, the list display is canceled automatically. 4 Press MULTI-CONTROL to make a call. # While in the phone number list, press and hold MULTI-CONTROL to add or delete + to the phone number. 5 To end the call, press . Using the phone book Before using the phone book, you need to set up the phone book.
Section Operating this unit Assign genres to phone numbers If there are a lot of entries in the Phone Book it can be useful to assign them to specific genres (categories) for easier searching. There are four preset genres that you can assign entries to: HOME, MOBILE, OFFICE and OTHERS. 1 Display the phone number list of your desired phone book entry. See step 1 to 5 on Calling a number in the phone book on the previous page for how to do this.
Section 02 Operating this unit 3 Press MULTI-CONTROL to select a preset number that you want to assign a phone number to. 4 Press and hold MULTI-CONTROL to display MEMORY. Push MULTI-CONTROL up or down to switch MEMORY (memory) and DELETE (delete). # If a phone number is already stored in the selected preset number, the new phone number will overwrite the old one. # For details on deleting, refer to Deleting preset numbers on this page.
Section Operating this unit 02 Introduction to advanced operations 1 Push MULTI-CONTROL up or down to switch preset numbers. 1 Press MULTI-CONTROL to display the main menu. 2 Perform from step 4 to 10 of Assigning preset numbers on page 37. Assigning preset numbers by using remote control 1 Press thumb pad to display RECENT CALLS (call history list). 2 Push thumb pad up or down to select a phone number. 3 Press a number from 0 to 9 and hold to preset in memory. Preset number 10 is assigned to 0.
Section 02 Operating this unit ! DEVICE INFO is the same as that of the Bluetooth audio. (Refer to Displaying BD (Bluetooth Device) address on page 29.) ! PH. B. NAME VIEW (phone book name view) cannot be selected for cellular phone registered guest phone. ! If cellular phone is connected to this unit via Bluetooth wireless technology with HFP (Hands-Free Profile), PBAP (Phone Book Access Profile) and SPP (Serial Port Profile), PH BOOK DOWNLOAD can be operated.
Section Operating this unit # Depending on the cellular phone, phone book can only be transferred one by one. # The display indicates how many entries have been transferred and the total number to be transferred. 5 DATA TRANSFERRED is displayed and phone book transfer is completed. Setting automatic answering 1 Display the function menu. Refer to Introduction to advanced operations on page 39. 2 Use MULTI-CONTROL to select AUTO ANSWER. 3 Press MULTI-CONTROL to turn automatic answering on.
Section Operating this unit 02 Making a call by entering phone number Important Be sure to park your vehicle and apply the parking brake when performing this operation. 1 Display the function menu. Refer to Introduction to advanced operations on page 39. 2 Use MULTI-CONTROL to select NUMBER DIAL. # You can also enter in this menu from the standby display by pressing DIRECT on the remote control. 3 Push MULTI-CONTROL up or down to select a number.
Section Operating this unit 02 Operating this unit 3 Press MULTI-CONTROL to select the language.
Section 03 Audio Adjustments Introduction of audio adjustments Using balance adjustment You can change the fader/balance setting so that it can provide the ideal listening environment in all occupied seats. 1 Display the audio menu. Refer to Introduction of audio adjustments on this page. 1 Audio display Shows the audio adjustment status. 2 Use MULTI-CONTROL to select FADER/BALANCE. 1 Press MULTI-CONTROL to display the main menu. 3 Push MULTI-CONTROL up or down to adjust front/rear speaker balance.
Section Audio Adjustments Equalizer curve POWERFUL Powerful NATURAL Natural VOCAL Vocal CUSTOM1 Custom 1 CUSTOM2 Custom 2 FLAT Flat S.BASS Super bass ! CUSTOM1 and CUSTOM2 are adjusted equalizer curves that you create. Adjustments can be made with a 7-band graphic equalizer. ! When FLAT is selected, no supplement or correction is made to the sound. This is useful to check the effect of the equalizer curves by switching alternatively between FLAT and a set equalizer curve.
Section 03 Audio Adjustments 3 Push MULTI-CONTROL left or right to select the equalizer band to adjust. Each time MULTI-CONTROL is pushed left or right, equalizer bands are selected in the following order: 50HZ—125HZ—315HZ—800HZ—2KHZ— 5KHZ—12.5KHZ Using subwoofer output 4 Push MULTI-CONTROL up or down to adjust the level of the equalizer band. Each time MULTI-CONTROL is pushed up or down, the level of the equalization band increases or decreases.
Section Audio Adjustments Boosting the bass Bass boost function boosts the bass level of sound. 1 Display the audio menu. Refer to Introduction of audio adjustments on page 44. 2 Use MULTI-CONTROL to select BASS BOOST. 3 Push MULTI-CONTROL up or down to select a desired level. 0 to +6 is displayed as the level is increased or decreased.
Section 04 Initial Settings Adjusting initial settings Setting the date The calender display adjusted in this mode appears when the telephone source is selected or sources and the feature demo are off. 1 Display the initial setting menu. Refer to Adjusting initial settings on this page. Using the initial settings, you can customize various system settings to achieve optimal performance from this unit. 1 Function display ! Shows the function status. 1 Press SOURCE and hold until the unit turns off.
Section Initial Settings Note Switching the auxiliary setting Auxiliary devices connected to this unit can be activated individually. Set each AUX source to ON when using. For more information about connecting or using auxiliary devices, refer to Using the AUX source on page 53. 1 Display the initial setting menu. Refer to Adjusting initial settings on the previous page. 2 Use MULTI-CONTROL to select AUX1/ AUX2. 3 Press MULTI-CONTROL to turn AUX1/ AUX2 on. # To turn AUX off, press MULTI-CONTROL again.
Section Initial Settings 04 Switching the sound muting/attenuation Sound from this system is muted or attenuated automatically when the signal from the equipment with mute function is received. ! The sound is muted or attenuated, TEL MUTE or TEL ATT are displayed and no audio adjustment is possible. ! Sound from this system returns to normal when the muting or attenuation is canceled. 1 Display the initial setting menu. Refer to Adjusting initial settings on page 48. 2 Use MULTI-CONTROL to select MUTE.
Section Initial Settings Activating the BT AUDIO source You need to activate the BT AUDIO source in order to use a Bluetooth audio player. 1 Display the initial setting menu. Refer to Adjusting initial settings on page 48. 3 Press MULTI-CONTROL to turn the BT AUDIO source on. # To turn the BT AUDIO source off, press MULTI-CONTROL again. # Pushing MULTI-CONTROL right in the confirmation display returns you to the PIN code input display, and you can change the PIN code.
Section 04 Initial Settings Displaying system version for repair Should this unit fails to operate properly and you consult your dealer for repair, you may be asked to indicate the system versions of this unit and of Bluetooth module. You can display the versions and confirm them. 3 Push MULTI-CONTROL right to show a confirmation display. CLEAR MEMORY YES is displayed. Clearing memory is now on standby. # If you do not want to reset phone memory, push MULTI-CONTROL left. The display reverts.
Section Other Functions 05 Selecting AUX as the source Up to two auxiliary devices such as VCR or portable devices (sold separately) can be connected to this unit. When connected, auxiliary devices are automatically read as AUX sources and assigned to AUX1 or AUX2. The relationship between AUX1 and AUX2 sources is explained below. % Press SOURCE to select AUX as the source. # If the auxiliary setting is not turned on, AUX cannot be selected.
Section 05 Other Functions Basic operation Functions allocated to the following operations are different depending on the connected external unit. For details concerning functions, refer to the connected external unit’s owner’s manual. % Press BAND. % Press and hold BAND. % Push MULTI-CONTROL left or right. % Push and hold MULTI-CONTROL left or right. Turning the clock display on or off You can turn the clock display on or off.
Section Other Functions 05 ! USB – USB portable audio player/USB memory ! IPOD – iPod ! BT AUDIO – Bluetooth audio player ! DVD – DVD player/multi-DVD player # To turn pause off, press PGM again. Other Functions % Press PGM and hold to turn BSM on when selecting tuner or HD Radio as the source. Press PGM and hold until the BSM turns on. # To cancel the storage process, press PGM again. % Press PGM and hold to turn BSSM on when selecting television as the source.
Section 06 Available accessories Playing songs on iPod Browsing for a song Basic operation The operation is the same as that of the iPod connected to USB interface of this unit. (Refer to Searching songs by category on page 23.) However, the selectable categories are slightly different. Selectable categories are PLAYLISTS (playlists)—ARTISTS (artists)— ALBUMS (albums)—SONGS (songs)— GENRES (genres) You can use this unit to control an interface adapter for iPod, which is sold separately.
Section Available accessories Notes ! You can also select the function by pressing FUNCTION on the remote control. ! To return to the ordinary display, press BAND. ! If you do not operate functions within about 30 seconds, the display automatically returns to the ordinary display. % Press repeatedly to select the desired setting. XM tuner Listening to XM Satellite Radio You can use this unit to control an XM satellite digital tuner (GEX-P920XM), which is sold separately.
Section 06 Available accessories Selecting an XM channel directly When using the remote control, you can select the XM channel directly by entering the desired channel number. 1 Press DIRECT. Channel number input display appears. 2 Press 0 to 9 to enter the desired channel number. # You can cancel the input number by pressing CLEAR. 3 Press DIRECT. The XM channel of entered number is selected.
Section Available accessories Selecting a channel in the channel category 1 Select the channel select settings to CATEGORY. Refer to Switching the XM channel select mode on the previous page. 2 Push MULTI-CONTROL up or down to select the desired channel category. SIRIUS Satellite Radio tuner Listening to SIRIUS Satellite Radio You can use this unit to control a SIRIUS Satellite Radio tuner, which is sold separately.
Section 06 Available accessories Selecting a SIRIUS channel directly When using the remote control, you can select the SIRIUS channel directly by entering the desired channel number. 1 Press DIRECT. Channel number input display appears. 2 Press 0 to 9 to enter the desired channel number. # You can cancel the input number by pressing CLEAR. 3 Press DIRECT. The SIRIUS channel of entered number is selected.
Section Available accessories 06 Selecting the SIRIUS channel select mode 2 Use MULTI-CONTROL to select TEAM SETTING in the function menu. You have two methods for selecting a channel: by number and by category. When selecting by number, channels in any category can be selected. Select by category to narrow your search down to only channels in a particular category. 3 Push MULTI-CONTROL left or right to select a desired league. League names are switched in the display.
Section 06 Available accessories When the game of the selected team starts When a game of the selected team is about to start (or is currently playing) on a different station, GAME ALERT INFO is displayed. Press and hold MULTI-CONTROL to switch to that station, and you can listen to that game. ! If you do not operate the function within about 10 seconds, the display is automatically returned.
Section Available accessories HD Radio tuner 06 3 Use MULTI-CONTROL to select the desired station. Turn to change the station. Press to select. Basic Operations You can use this unit to control an HD Radio tuner (GEX-P10HD), which is sold separately. For details concerning operation, refer to the HD Radio’s operation manual. # You can also change the station by pushing MULTI-CONTROL up or down. # To return to the ordinary display, press BAND or LIST.
Section 06 Available accessories Introduction to advanced operations 1 Press MULTI-CONTROL to display the main menu. 2 Use MULTI-CONTROL to select FUNCTION. Turn to change the menu option. Press to select. The function menu is displayed. 3 Turn MULTI-CONTROL to select the function. BSM (best stations memory)—LOCAL (local seek tuning)—SEEK MODE (seek mode)— BLENDING (reception mode) 3 Press MULTI-CONTROL to select your favorite setting.
Section Available accessories 06 Multi-CD Player Using CD TEXT functions Basic Operations You can use these functions only with a CD TEXT compatible multi-CD player. The operation is the same as that of the builtin CD player. Refer to Displaying text information on disc on page 17. Introduction to advanced operations You can only use COMPRESSION (compression and DBE) with a multi-CD player that supports them. 1 Press MULTI-CONTROL to display the main menu.
Section 06 Available accessories Function and operation PLAY MODE, RANDOM MODE, SCAN MODE, PAUSE and TITLE INPUT operations are basically the same as that of the built-in CD player. Function name Operation PLAY MODE Refer to Selecting a repeat play range on page 19. However, the repeat play ranges you can select are different from that of the built-in CD player.
Section Available accessories 5 Push MULTI-CONTROL up to store the currently playing track in the playlist. MEMORY COMPLETE is displayed and the currently playing selection is added to your playlist. 6 Press BAND to return to the playback display. Note Playback from your ITS playlist ITS play lets you listen to the tracks that you have entered into your ITS playlist. When you turn on ITS play, tracks from your ITS playlist in the multi-CD player begin to play. 1 Select the repeat range.
Section 06 Available accessories 4 Push MULTI-CONTROL down to erase all tracks on the currently playing CD from your ITS playlist. All tracks on the currently playing CD are deleted from your playlist and MEMORY DELETED is displayed. 5 Press BAND to return to the playback display. Using disc title functions You can input CD titles and display the titles. Then, you can easily search for and play a desired disc.
Section Available accessories 06 DVD Player Selecting a disc Basic Operations ! You can operate this function only when a multi-DVD player is connected to this unit. Press any of 1 to 6 on the remote control to select the desired disc. Push MULTI-CONTROL up or down. Selecting a folder ! You can operate this function only when a DVD player compatible with compressed audio playback is connected to this unit. % Push MULTI-CONTROL up or down to select a folder.
Section 06 Available accessories # If you do not operate functions except for ITS MEMO and TITLE INPUT within about 30 seconds, the display is automatically returned to the ordinary display. Function and operation PLAY MODE, RANDOM MODE, SCAN MODE, PAUSE and TITLE INPUT operations are basically the same as that of the built-in CD player. Also, ITS PLAY MODE and ITS MEMO operations are basically the same as that the multiCD player.
Section Available accessories ! 12 stations for each band can be stored in memory. TV tuner Basic Operations You can use this unit to control a TV tuner, which is sold separately. For details concerning operation, refer to the TV tuner’s operation manual. This section provides information on TV operations with this unit, which differs from that described in the TV tuner’s operation manual. 1 Press LIST. Preset screen is displayed. 2 Use MULTI-CONTROL to store the selected station in memory.
Section 06 Available accessories 2 Use MULTI-CONTROL and select FUNCTION to display BSSM. # You can also select the function by pressing FUNCTION on the remote control. 3 Press MULTI-CONTROL to turn BSSM on. SEARCHING begins to flash. While SEARCHING is flashing, the 12 strongest broadcast stations are stored in order from the lowest channel up. When finished, the preset channel list appears. # To cancel the storage process, press MULTI-CONTROL again. 4 Use MULTI-CONTROL to select the desired station.
Appendix Additional Information Troubleshooting ERROR-22, 23 Bluetooth audio/telephone The CD format Replace disc. cannot be played back Cause Action NO AUDIO The audio of the Bluetooth audio source is not played back. A Bluetooth-connected cellular phone is currently in a phone call. The audio will be played back when the call is completed. The inserted disc Replace disc. does not contain any files that can be played back TRK SKIPPED The inserted disc Replace disc.
Appendix Additional Information CHECK USB The USB connec- Confirm that the tor or USB cable USB connector or is short-circuited. USB cable is not caught in something or damaged. The connected USB portable audio player/ USB memory consumes more than 500 mA (maximum allowable current). ERROR-19 ERROR-23 Communication failure USB device is not formatted with FAT16 or FAT32 Disconnect the USB portable audio player/USB memory and do not use it.
Appendix Additional Information Handling guideline of discs and player ! Road shocks may interrupt disc playback. ! Read the precautions for discs before using them. ! Use only discs featuring either of following two logos. Dual Discs ! Use only conventional, fully circular discs. Do not use shaped discs. Additional Information ! Use 12-cm or 8-cm CD. Do not use an adapter when playing 8-cm CDs. ! Do not insert anything other than a CD into the CD loading slot.
Appendix Additional Information ! MP3i (MP3 interactive), mp3 PRO: No AAC ! Compatible format: AAC encoded by iTunes® ! Sampling frequency: 11.025 kHz to 48 kHz ! Transmission rate: 16 kbps to 320 kbps ! Apple Lossless: No WAV ! Compatible format: Linear PCM (LPCM), MS ADPCM ! Quantization bits: 8 and 16 (LPCM), 4 (MS ADPCM) ! Sampling frequency: 16 kHz to 48 kHz (LPCM), 22.05 kHz to 44.1 kHz (MS ADPCM) ! File extensions such as .wma, .mp3, .m4a or .wav must be used properly.
Appendix Additional Information ! Supply current: 500 mA Notes Handling guideline and supplemental information ! Do not leave the USB portable audio player/USB memory in direct sunlight for extended amounts of time. Extended exposure to direct sunlight can result in USB portable audio player/USB memory malfunction due to the resulting high temperature. ! Do not leave the USB portable audio player/USB memory in high temperature. ! Firmly secure the USB portable audio player/USB memory when driving.
Appendix Additional Information ! Do not leave the iPod in a high temperature. ! Connect directly the dock connector cable to the iPod so that this unit works properly. ! Firmly secure the iPod when driving. Do not let the iPod fall onto the floor, where it may become jammed under the brake or accelerator pedal. ! For details, refer to the iPod’s manuals.
Appendix Additional Information Specifications General Audio Maximum power output ....... 50 W × 4 50 W × 2/4 W + 70 W × 1/2 W (for subwoofer) Continuous power output ... 22 W × 4 (50 Hz to 15 000 Hz, 5% THD, 4 W load, both channels driven) Load impedance ...................... 4 W to 8 W × 4 4 W to 8 W × 2 + 2 W × 1 Preout max output level ....... 4 V Equalizer (7-Band Graphic Equalizer): Frequency .......................... 50/125/315/800/2k/5k/12.5k Hz Gain ......................................
PIONEER CORPORATION 4-1, MEGURO 1-CHOME, MEGURO-KU TOKYO 153-8654, JAPAN PIONEER ELECTRONICS (USA) INC. P.O. Box 1540, Long Beach, California 90801-1540, U.S.A. TEL: (800) 421-1404 PIONEER EUROPE NV Haven 1087, Keetberglaan 1, B-9120 Melsele, Belgium TEL: (0) 3/570.05.11 PIONEER ELECTRONICS ASIACENTRE PTE. LTD. 253 Alexandra Road, #04-01, Singapore 159936 TEL: 65-6472-7555 PIONEER ELECTRONICS AUSTRALIA PTY. LTD.