ENGLISH 16:9 Touch Panel Display ESPAÑOL DEUTSCH NEDERLANDS This product conforms to new cord colors. Los colores de los cables de este producto se conforman con un nuevo código de colores. Dieses Produkt entspricht den neuen kabelfarben.
Contents Contents ...................................................... 1 IMPORTANT SAFEGUARDS .................... 2 Please Read All of These Instructions Regarding Your Display and Retain them for Future Reference ........................ 2 Fitting and Removing the Display .......... 3 To fit the display .............................................. 3 To remove the display ...................................... 4 IMPORTANT INFORMATION .................... 5 About This Product .........................
IMPORTANT SAFEGUARDS ENGLISH Please Read All of These Instructions Regarding Your Display and Retain them for Future Reference 1. Read this manual fully and carefully before operating your display. 2. Keep this manual handy for future reference. ESPAÑOL 3. Pay close attention to all warnings in this manual and follow the instructions carefully. 4. Never allow others to use the system until they have read and understood the operating instructions. 5.
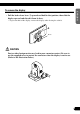
Fitting and Removing the Display Precaution: • To prevent failure, be sure to turn the ignition switch or system power OFF before fitting or removing the display. Also take care not to grip the screen or buttons too firmly or to drop the display. • Do not let any water get on the terminals on the display or on the base and do not allow the terminals to be shorted by a metal object or the like. This can cause system breakdown. • Be careful not to touch terminals on the display or on the base.
To remove the display ENGLISH • Pull the lock release lever 3 upward and hold in that position, then slide the display upward and detach it from its base. • To prevent theft of the display, remove the display when leaving the vehicle. ESPAÑOL Base DEUTSCH CAUTION Dust or other foreign matter may lead to poor connector contact. Be sure to use the supplied cover to protect the connector when the display is not in use. (Refer to the illustration below.
IMPORTANT INFORMATION About This Product • This product complies with the EMC Directives (89/336/EEC, 92/31/EEC) and CE Marking Directive (93/68/EEC). • Do not place the display in a position where it will impede the driver’s visibility or affect the operation of your vehicle’s airbags or headrests. • This product is designed for use with the Touch Panel function of the Pioneer Navigation unit. (See the Operation Manual of the Pioneer Navigation unit on how to operate the Touch Panel.
Before Using This Product To Avoid Battery Exhaustion ENGLISH Always run the vehicle engine while using this unit. Using this unit without running the engine can result in battery drainage. To Protect the LCD Screen of the Display ESPAÑOL • Do not allow direct sunlight to fall on the Display when this unit is not being used. Extended exposure to direct sunlight can result in LCD screen malfunction due to the resulting high temperatures.
Before Using This Product To Ensure Safe Driving This unit senses whether the parking brake is on or off. When installed, it is arranged so that video cannot be viewed while the vehicle is moving. The various settings and adjustments are also not possible while driving. (The following message will be displayed on the screen while the vehicle is moving.) Stop the vehicle in a safe place, apply the parking brake and wait for the message to clear before starting operation.
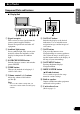
Key Finder Component Parts and Features ENGLISH 7 Display Unit ESPAÑOL 1 Signal receptor 2 Ambient light sensor Senses ambient light. This system automatically adjusts the brightness of the display to compensate for ambient light. Switches between sources and switches power ON/OFF. 4 WIDE button Changes the method of enlarging 4:3 video to 16:9 video. Adjust the volume of the built-in speaker 0. Note: • Never set the volume so high that you cannot hear outside traffic and emergency vehicles.
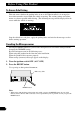
Basic Operation Turn On Power Remember to start the car engine before turning on the power to preserve battery life. 1. Start the car engine. T LOCK AR C ON ST AC 2. Turn on the system. Press the SOURCE/POWER button. To turn off the system, press the SOURCE/POWER button and hold for 2 seconds. Volume Adjustment Adjust the volume of audio output from the built-in speaker. • Raise or lower the speaker volume.
Selecting a Source ENGLISH When the Pioneer Navigation unit is combined, you can select the images of each source. • Select the desired source. AV I N 1 ESPAÑOL Each press of the SOURCE/POWER button selects the desired source in the following order: [AV IN1] = [AV IN2] = [NAVI SOURCE] = Exit to [AV IN1] DEUTSCH Note: FRANÇAIS • [NAVI SOURCE] indicates the Pioneer Navigation unit with DVD-Video playback connected to the hide-away unit’s 26-pin input.
Basic Operation Changing the Wide Screen Mode You can change the way in which normal video (aspect ratio 4:3) enlarges to wide video (16:9). Select wide modes to suit the kind of video you are viewing. 1. Display a source to view. (Refer to the previous page.) 2. Select a wide mode. JUST Each press of the WIDE button selects the wide mode in the following order: [FULL] = [JUST] = [CINEMA] = [ZOOM] = [NORMAL] = Exit to [FULL] Note: • Settings are stored for each source (NAVI SOURCE, AV IN1, AV IN2).
Wide Modes Available ENGLISH FULL Video with an aspect ratio of 4:3 enlarges only horizontally. Enjoy viewing video widened without missing parts. ESPAÑOL JUST DEUTSCH Video appears more extended horizontally as it gets closer to both edges of the screen. Because video appears in about the same size as regular video around the middle of the screen, enjoy viewing it without feeling out of place. CINEMA FRANÇAIS Video enlarges vertically with a aspect ratio falling between FULL and ZOOM.
Operating the Setup Menu Entering the Setup Menu This system offers a number of functionality setup and adjustment features to make it easier to use. Customize the settings to suit your taste and environment. 1. Display the setup menu. Press the MENU-ENTER button. MENU P I CTURE ADJUST V I DEO SET T I NG AUD I O SET T I NG RE TURN 2. Select a setting. MENU P I CTURE ADJUST V I DEO SET T I NG AUD I O SET T I NG RE TURN Press 5 or ∞ to select a desired item, and press the MENU-ENTER button.
Picture Adjust ENGLISH BRIGHTNESS/CONTRAST/COLOR/HUE Settings are stored for each source (NAVI SOURCE, AV IN1, AV IN2). Options Adjustment items Makes black appear darker or lighter. Contrast [CONTRAST]: Narrows or widens the gap between black and white (darken). Color [COLOR]: Makes colors appear lighter or darker. Hue [HUE]: Adjusts red or green of picture. ESPAÑOL Brightness [BRIGHTNESS]: Any of the above can be adjusted within the range of -24 to +24. 1. Display a source to adjust.
Operating the Setup Menu DIMMER Viewing can become difficult after extended video viewing if the screen is too bright at night or when ambient light darkens. You can select the brightness level from three settings; daytime, evening and nighttime viewing, after which this product will automatically adjusts the brightness to an optimum level within the setting range you selected and in relationship with the ambient light. 1. Display the setup menu and select [PICTURE ADJUST]. (Refer to page 13.) 2.
Video Setting ENGLISH Input Setting [AV IN2] To view videos by a VCR, DVD player or a back-up camera connected to the hide-away unit. 1. Display the setup menu and select [VIDEO SETTING]. (Refer to page 13.) ESPAÑOL 2. Choose [AV IN2]. V I DEO SE T T I NG AV I N 2 O F F REAR SOURCE NAV I POLAR I T Y BA T TERY P I CTURE A D J UST S E T UP P I CTURE MODE ST D I MG RETURN DEUTSCH 3. Select a connection mode. Select the connection mode of the source external unit to the right of [AV IN2].
Operating the Setup Menu Functions for Back-up Camera 7 Automatic Switching for Back-up Camera Using a commercially available back-up camera with the proper setting, this product automatically switches to the back-up camera image when the gear shift is moved to the REVERSE (R) position. For more information, consult your dealer or the nearest authorized Pioneer service facility. CAUTION This function is designed for use with a back-up camera only.
[PICTURE ADJUST] ENGLISH Press 5 or ∞ to select [SET UP], and press the MENU-ENTER button. [PICTURE ADJUST] menu is displayed. (Refer to page 14.) [PICTURE MODE] You can select either [STD IMG] or [MIR IMG] for the back-up camera image. [STD IMG]: You can see the back-up camera image as a non-reverse image. [MIR IMG]: You can see the back-up camera image like a rear-view mirror image. ESPAÑOL Note: • The initial setting for [PICTURE MODE] is [STD IMG].
Operating the Setup Menu Audio Setting 7 [GUIDE] This setting controls whether the volume of each source is automatically muted during voice guidance. Setting the Mixing of the Guidance Voice [GUIDE] When connecting the Pioneer Navigation unit to the 26-pin input of this hide-away unit, you can select three types of setting for the guidance voice from the Pioneer Navigation unit. 1. Display the setup menu and select [AUDIO SETTING]. (Refer to page 13.) 2. Select a desired setting.
Using the Display Correctly ENGLISH CAUTION • If moisture or foreign matter should get inside the unit, turn OFF the power immediately and consult your dealer or the nearest authorized PIONEER service facility. Using the unit in this condition may result in a fire, electric shock or other failure. ESPAÑOL • If you notice smoke, a strange noise or smell, or any other abnormal signs from the display, turn OFF the power immediately and consult your dealer or the nearest authorized PIONEER service facility.
Using the Display Correctly About the Liquid Crystal Display (LCD) Screen • If the display is near the vent of an air conditioner when it is deployed, make sure that air from the air conditioner is not blowing on it. Heat from the heater may break the LCD screen, and cool air from the cooler may cause moisture to form inside the display resulting in possible damage.
Connecting the System ENGLISH CAUTION • PIONEER does not recommend that you install or service your display yourself. Installing or servicing the product may expose you to risk of electric shock or other hazards. Refer all installation and servicing of your display to authorized Pioneer service personnel. ESPAÑOL • Secure all wiring with cable clamps or electrical tape. Do not allow any bare wiring to remain exposed.
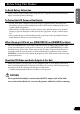
Connecting the System Note: • • 23 ACC position OF F O STAR • O N • ACC STAR • F N • If this unit is installed in a vehicle that does not have an ACC (accessory) position on the ignition switch, the red lead of the unit should be connected to a terminal coupled with ignition switch ON/OFF operations. If this is not done, the vehicle battery may be drained when you are away from the vehicle for several hours.
Names and Functions of Connection Terminals ENGLISH ■ Hide-away Unit ESPAÑOL Connects to the display unit. 2 AV IN1 RCA audio input (white, red) Receives stereo audio, as from a VCR, DVD player or other AV equipment. Receives video, as from a VCR, DVD player or other AV equipment. 4 REMOTE OUT Outputs remote control signals. (This part is for future use.) Receives stereo audio, as from a VCR, DVD player or other AV equipment. 6 AV IN2 RCA video input (yellow) Resets the display microprocessor.
Connecting the System Connecting the Power Cable Hide-away Unit Power cable Fuse resistor Violet/White (Refer to page 29.) Black (ground) To vehicle (metal) body. Fuse resistor Red To the electric terminal controlled by the ignition switch (12 V DC) ON/OFF. Do not connect this lead to power source terminals to which power is continuously supplied. If the lead is connected to such terminals, the battery may be drained.
Connection Diagram (VIDEO input) ENGLISH Display Unit ESPAÑOL 3m AV IN1 RCA audio input (white, red) AV IN1 RCA video input (yellow) DEUTSCH Hide-away Unit AV IN1 INPUT AV IN2 INPUT FRANÇAIS Commercial RCA cable (sold separately) To video output ITALIANO Commercially available portable video component or back-up camera with RCA output Brown To audio output Note: NEDERLANDS • When other AV equipment is connected to the AV IN2 input, setting may be required. (Refer to page 16.
Connecting the System Connection Diagram (26-pin input) You can connect a separately sold Pioneer Navigation unit.
Connecting the RCA Audio and Video Output ENGLISH Hide-away Unit ESPAÑOL Power cable (Refer to page 25.) RCA video output (yellow) RCA audio output (white, red) Commercial RCA cable (sold separately) To audio input (R) To audio input (L) Second display, video deck, etc.
Connecting the System Connecting ”REVERSE-GEAR SIGNAL INPUT“ Lead When using this product with a back-up camera, automatic switching to AV IN2 video when the gear shift is moved to the REVERSE (R) position is possible. Connect the back-up camera to the AV IN2 input. (Refer to page 26.) Hide-away Unit Connection method Clamp the reversing lamp lead. Power cable (Refer to page 25.) Clamp firmly with needlenosed pliers.
Installation ENGLISH CAUTION • For instructions on how to mount the display, consult your dealer. • Do not install the display where it may (i) obstruct the driver’s vision, (ii) impair the performance of any of the vehicle’s operating systems or safety features, including airbags, or (iii) impair the driver’s ability to safely operate the vehicle. ESPAÑOL • PIONEER does not recommend that you install or service your display yourself.
Installation • Use of this product is subject to any government laws regarding placement or use. PIONEER does not accept any liability for any problems, damage or loss incurred as a result of the product being used with an incorrect setting or in violation of any government laws. • To ensure proper installation, use the supplied parts in the manner specified. If any parts other than the supplied ones are used, they may damage internal parts of the unit or they may work loose and the unit may come off.
Installing the Display Using the Accessory Mounting Base ENGLISH Use the mounting base to fasten the display to the dashboard. 2. Install the display base and the mounting base on the display. 1. Paste the cushions onto the bottom of the display base. ESPAÑOL Paste the cushions onto the bottom of the display base to avoid scratching the dashboard.
Installation 3. Determine the display installation position. Without removing the protective sheet on the rear of the mounting base, place the display on the dashboard and determine the position for installing the display. 4. Paste the mounting base onto the dashboard. Make sure the surface is free of moisture, dust, grime, oil, etc. before affixing the mounting base. Note: • Install the display in a position that conforms to the cautions on pages 30 and 31.
6. Adjust the display vertical position and display angle. ENGLISH 5. Fasten the mounting base onto the dashboard with the tapping screws. In order to stabilize the display, adjust the display vertical position so that the bottom of the display base contacts the dashboard. Adjust the display to a good angle for viewing. ESPAÑOL If you turn this knob to the left, you can adjust the vertical position of the display.
Installation Installing the Hide-away Unit Installation Precautions • Never install in locations such as the following because of the danger of malfunction due to high temperatures or humidity: * Locations such as a dashboard or rear tray where there is exposure to direct sunlight. * Near heater outlets. * Near doors, etc., where there is danger of exposure to rain. • When installing under the front seat, make sure there is no hindrance to sliding of the seat.
Specifications General ENGLISH Power source ...................................................................... 14.4 V DC (10.8 — 15.1 V × allowed) Grounding system ................................................................ Negative type Max. current consumption .................................................. 1.5 A Display Unit ESPAÑOL Screen size/Aspect ratio ...................................................... 6.5 inch wide/16:9 (effective display area: 154 × 87 mm) Pixels ..............
Contenido Contenido .................................................... 1 Operación del menú de configuración .................................... 13 PRECAUCIÓNES IMPORTANTES ............ 2 Selección del menú de configuración .............. 13 Ajuste de la imagen ........................................ 14 - BRIGHTNESS/CONTRAST/COLOR/HUE - DIMMER (regulador de la intensidad luminosa) Ajuste de vídeo ................................................
PRECAUCIÓNES IMPORTANTES ENGLISH Lea todas estas instrucciones relacionadas con su pantalla y guárdelas para emplearlas como referencia en el futuro ESPAÑOL 1. Lea completa y cuidadosamente este manual antes de instalar su pantalla. 2. Guarde a mano este manual para utilizarlo como referencia en el futuro. 3. Ponga mucha atención a todas las advertencias de este manual y siga cuidadosamente las instrucciones. 4.
Instalación y extracción de la pantalla Precaución: • Para impedir fallos, asegúrese de poner el interruptor de encendido del vehículo o el interruptor de alimentación del sistema en OFF antes de instalar o extraer la pantalla. Tenga también cuidado para no sujetar la pantalla ni pulsar sus botones con mucha fuerza, y no permita que ésta se caiga. • No deje que se mojen los terminales de la pantalla o de la base, y no permita que los terminales sean cortocircuitados por un objeto metálico o algo similar.
Para extraer la pantalla ENGLISH • Tire de la palanca de liberación 3 hacia arriba y manténgala en esa posición, luego deslice la pantalla hacia arriba y sepárela de su base. • Para impedir que le roben la pantalla, llévela consigo cuando salga del automóvil. ESPAÑOL Base DEUTSCH PRECAUCIÓN FRANÇAIS El polvo y las materias extrañas pueden ocasionar un contacto deficiente del conector. Asegúrese de poner la tapa suministrada para proteger el conector cuando no se esté utilizando la pantalla.
INFORMACIÓN IMPORTANTE Sobre este producto • Este producto cumple con las Directivas EMC (89/336/CEE, 92/31/CEE) y Directiva de Marcación CE (93/68/CEE). • No ponga la pantalla en una posición donde obstruya la visibilidad del conductor o afecte al funcionamiento del air-bag o apoyacabezas de su vehículo. • Este producto ha sido diseñado para uso con la función de panel de toque de la unidad de navegación de Pioneer.
Antes de usar este producto Para evitar la descarga de la batería ENGLISH Siempre ponga el motor en marcha cuando utilice esta unidado. La utilización con el motor apagado podrá provocar la descarga de la batería. Para proteger la pantalla LCD de la pantalla ESPAÑOL • No permita que la luz directa del sol incida directamente sobre la pantalla cuando no está usando esta unidado.
Antes de usar este producto Para asegurar una conducción segura Esta unidado detecta si está aplicado o no el freno de estacionamiento. Cuando instalado, se encuentra diseñado de manera tal que la imagen no se visualice mientras el vehículo está en movimiento. Tampoco es posible realizar ajustes mientras se está conduciendo. (El siguiente mensaje se visualiza en la pantalla mientras el vehículo está en movimiento).
Guía de los botones Partes componentes y características ENGLISH 7 Unidad de pantalla ESPAÑOL 1 Receptor de señal 2 Sensor de luz ambiental Detecta la luz ambiental. Este sistema ajusta automáticamente el brillo de la pantalla para compensar la luz ambiental. Cambia entre las fuentes y activa/desactiva (ON/OFF) la alimentación. 4 Botón WIDE Cambia el formato de relación de aspecto de 4:3 a 16:9. Ajuste el volumen del altavoz incorporado 0.
Operación básica Encendido Antes de encender el sistema, ponga en marcha el motor del automóvil para preservar la vida de la batería. 1. Ponga en marcha el motor del automóvil. T LOCK AR C ON ST AC 2. Encienda el sistema. Presione el botón SOURCE/POWER. Para apagar el sistema, mantenga pulsado el botón SOURCE/POWER durante 2 segundos. Ajuste del volumen Ajuste el volumen de la salida de audio desde el altavoz incorporado. • Suba o baje el volumen del altavoz.
Selección de una fuente ENGLISH Cuando la unidad de navegación de Pioneer está combinada, puede seleccionar las imágenes de cada fuente. • Seleccione la fuente deseada.
Operación básica Cambio del modo de la pantalla ancha Es posible cambiar el modo en que el vídeo normal (relación de aspecto 4:3) aumenta a vídeo ancho (16:9). Seleccione los modos de pantalla ancha según el tipo de vídeo que desea ver. 1. Visualice el vídeo que desea ver. (Vea la página anterior.) 2. Seleccione un modo ancho.
Modos de pantalla ancha disponibles ENGLISH FULL (Pantalla completa) La imagen con una relación de aspecto de 4:3 se expande sólo horizontalmente. Le permite ver imágenes ampliadas eliminando los bordes negros alrededor de las mismas. ESPAÑOL JUST (Pantalla justa) DEUTSCH La imagen se extiende horizontalmente a medida que se acerca a ambos bordes de la pantalla.
Operación del menú de configuración Selección del menú de configuración Este sistema ofrece diversas funciones de configuración y ajuste que facilitan su uso. Personalice las configuraciones de acuerdo a sus preferencias y entorno de uso. 1. Presione el menú de configuración. Pulse el botón MENU-ENTER. MENU P I CTURE ADJUST V I DEO SET T I NG AUD I O SET T I NG RE TURN 2. Seleccione un ajuste.
Ajuste de la imagen ENGLISH BRIGHTNESS/CONTRAST/COLOR/HUE Las configuraciones se almacenan para cada fuente (NAVI SOURCE, AV IN1, AV IN2). Opciones Ajustes Hace el negro aparecer más oscuro o más brillante. Contraste [CONTRAST]: Disminuye o aumenta la amplitud entre el negro y el blanco (oscurecido). Color [COLOR]: Hace el color aparecer más brillante o más oscuro. Matiz [HUE]: Ajusta el rojo o verde de la imagen.
Operación del menú de configuración DIMMER (regulador de la intensidad luminosa) La visualización puede ponerse difícil si se ve vídeo durante un tiempo prolongado con la pantalla demasiado brillante de noche o cuando la luz ambiental se oscurece. Es posible seleccionar el nivel de brillo de tres configuraciones: visualización de día, al atardecer, o de noche.
Ajuste de vídeo ENGLISH Configuración de la entrada [AV IN2] Para ver vídeos de una videograbadora o reproductor de DVD, o de una cámara de marcha atrás conectada la unidad oculta-alejada. ESPAÑOL 1. Visualice el menú de configuración y seleccione [VIDEO SETTING]. (Consulte la página 13.) 2. Seleccione [AV IN2]. V I DEO SE T T I NG AV I N 2 O F F REAR SOURCE NAV I POLAR I T Y BA T TERY P I CTURE A D J UST S E T UP P I CTURE MODE ST D I MG RETURN DEUTSCH 3. Seleccione un modo de conexión.
Operación del menú de configuración Funciones para cámara de marcha atrás 7 Cambio automático para cámara de marcha atrás Utilizando una cámara de marcha atrás disponible comercial con ajuste apropiado, este producto conmuta automáticamente a la imagen de la cámara de marcha atrás cuando se desplaza la palanca de cambio a la posición REVERSE (R). Para más información, consulte su revendedor o centro de servicio Pioneer autorizado más cercano.
[PICTURE ADJUST] ENGLISH Pulse 5 o ∞ para seleccionar [SET UP] y, a continuación, pulse el botón MENU-ENTER. Se visualiza el menú [PICTURE ADJUST]. (Consulte la página 14.) [PICTURE MODE] ESPAÑOL Puede seleccionar [STD IMG] o [MIR IMG] para la imagen de la cámara de marcha atrás. [STD IMG]: Puede ver la imagen de la cámara de marcha atrás como una imagen no reversa. [MIR IMG]: Puede ver la imagen de la cámara de marcha atrás como una imagen de espejo retrovisor.
Operación del menú de configuración Ajuste de audio 7 [GUIDE] Este ajuste controla si el volumen de cada fuente se enmudece automáticamente durante la orientación de voz. Ajuste de la mezcla de voz de orientación [GUIDE] Al conectar la unidad de navegación de Pioneer a la entrada de 26 clavijas de esta unidad oculta-alejada, puede seleccionar tres tipos de ajustes para la voz de orientación de la unidad de navegación de Pioneer. 1. Visualice el menú de configuración y seleccione [AUDIO SETTING].
Uso correcto de la pantalla ENGLISH PRECAUCIÓN • Si la humedad o materias extrañas entran en la unidad, desconecte inmediatamente la alimentación y consulte a su concesionario o centro de servicio PIONEER autorizado más cercano. La utilización de la unidad en estas condiciones puede causar un incendio o descarga eléctrica, u otros fallos.
Uso correcto de la pantalla Acerca de la pantalla de cristal líquido (LCD) • Si la pantalla está cerca del viento del acondicionador de aire cuando está desplegada, asegúrese de que el aire del acondicionador de aire no sople en la pantalla. El calor del calentador puede romper la pantalla LCD, y el aire frío del enfriador puede formar humedad en el interior dela pantalla resultando en posibles daños.
Conexión del sistema ENGLISH PRECAUCIÓN • PIONEER no recomienda que sea usted mismo quien instale o revise su pantalla. La instalación o revisión del producto puede exponerle a descargas eléctricas u otros peligros. Solicite que todos los trabajos de instalación y revisión de su pantalla los realice el personal de servicio Pioneer autorizado. ESPAÑOL • Asegure todo el cableado con abrazaderas de cables o cinta para usos eléctricos. No permita que el cableado pelado permanezca expuesto.
Conexión del sistema Nota: • • 23 Posición ACC OF F O STAR • O N • ACC STAR • F N • Si se instala esta unidad en un vehículo que no tiene una posición ACC (accesorio) en el interruptor de encendido, el conductor rojo de la unidad deberá conectarse al terminal conectado con las operaciones del interruptor de encendido ON/OFF. Si no se hace esto, la batería del vehículo podría drenarse cuando usted esté lejos del vehículo por varias horas.
Nombres y funciones de los terminales de conexión ENGLISH ■ Unidad oculta-alejada ESPAÑOL Se conecta a la pantalla. 2 Entrada de audio AV IN1 RCA (blanco, rojo) Recibe audio estéreo, como de un VCR, reproductor de DVD u otro equipo de AV. Recibe vídeo, como de un VCR, reproductor de DVD u otro equipo de AV. 4 REMOTE OUT Genera las señales de control remoto. (Esta parte es para uso futuro.) Recibe audio estéreo, como de un VCR, reproductor de DVD u otro equipo de AV.
Conexión del sistema Conexión del cable de alimentación Unidad oculta-alejada Cable de alimentación Resistencia de fusible Violeta/Blanco (Vea la página 29.) Resistencia de fusible Negro (masa) A la carrocería (metal) del vehículo. Rojo Al terminal eléctrico controlado por el interruptor de encendido (12 V CC) ON/OFF. No conecte este cable a los terminales de alimentación a los que se suministra alimentación continuamente. Si el cable se conecta a estos terminales, la batería podrá agotarse.
Diagrama de conexión (entrada VIDEO) ENGLISH Unidad de pantalla ESPAÑOL 3m Entrada de audio AV IN1 RCA (blanco, rojo) Entrada de vídeo AV IN1 RCA (amarillo) DEUTSCH Unidad oculta-alejada Entrada AV IN1 Entrada AV IN2 FRANÇAIS Cable RCA comercial (vendido separadamente) A la salida de vídeo ITALIANO Componente de vídeo portátil o cámara de marcha atrás con salida RCA disponible comercialmente Marrón A la salida de audio Nota: NEDERLANDS • Cuando se conecta otro equipo de AV a la entrada AV IN
Conexión del sistema Diagrama de conexión (Entrada de 26 clavijas) Puede conectar una unidad de navegación de Pioneer vendida separadamente.
Conexión de las salidas de audio y vídeo RCA ENGLISH Unidad oculta-alejada ESPAÑOL Cable de alimentación (Vea la página 25.) Salida de vídeo RCA (amarillo) Salida de audio RCA (blanco, rojo) Cable RCA comercial (vendido separadamente) A la entrada de audio (R) A la entrada de audio (L) Segunda pantalla, vídeo, etc.
Conexión del sistema Conexión del conductor de entrada “REVERSE-GEAR SIGNAL INPUT” Cuando utilice este producto con una cámara de marcha atrás, es posible realizar la conmutación automática al vídeo AV IN2 cuando se desplaza la palanca de cambio de marchas a la posición REVERSE (R). Conecte la cámara de marcha atrás a la entrada AV IN2. (Vea la página 26.) Unidad oculta-alejada Método de conexión Apriete el cable de la luz de marcha atrás. Cable de alimentación (Vea la página 25.
Instalación ENGLISH PRECAUCIÓN • Con respecto a las instrucciones sobre cómo instalar la pantalla, consulte con su distribuidor. ESPAÑOL • No instale la pantalla donde (i) pueda obstruir la visión del conductor, (ii) afecte al rendimiento de cualquier sistema de funcionamiento o sistema de seguridad del vehículo, incluyendo el air-bag, o (iii) afecte a la habilidad del conductor para manejar con seguridad el vehículo. • PIONEER no recomienda que sea usted mismo quien instale o revise su pantalla.
Instalación • El uso de este producto está sometido a las leyes gubernamentales vigentes sobre su uso o emplazamiento. PIONEER no asume responsabilidad alguna por ningún tipo de problemas, daños o pérdidas resultantes de haber usado este producto con un ajuste incorrecto o infringiendo las leyes gubernamentales. • Para asegurar la instalación apropiada, utilice las piezas suministradas de la manera especificada.
Instalación de la pantalla utilizando la base de montaje de accesorios ENGLISH Utilice la base de montaje para sujetar la pantalla colocada en el salpicadero. 2. Instale la base de la pantalla y la base de montaje en la pantalla. 1. Pegue las almohadillas en la parte inferior de la base de la pantalla. ESPAÑOL Pegue las almohadillas en la parte inferior de la pantalla para evitar rayar el salpicadero.
Instalación 3. Determine la posición de instalación de la pantalla. Sin quitar la hoja de protección de la parte trasera de la base de montaje, ponga la pantalla en el salpicadero y determine su posición de instalación. 4. Pegue la base de montaje en el salpicadero. Asegúrese de que la superficie no tenga humedad, polvo, suciedad, aceite, etc. antes de fijar la base de montaje. Nota: • Instale la pantalla en una posición que cumpla con las precauciones de las páginas 30 y 31.
6. Ajuste la posición vertical y el ángulo de la pantalla. ENGLISH 5. Fije la base de montaje en el salpicadero con los tornillos autorroscantes. Para estabilizar la pantalla, ajuste su posición vertical de forma que la parte inferior de la base de la pantalla esté en contacto con el salpicadero. Ajuste la pantalla de forma que ofrezca un buen ángulo de visión. ESPAÑOL Si gira este mando hacia la izquierda podrá ajustar la posición vertical de la pantalla.
Instalación Instalación de la unidad oculta-alejada Precauciones de instalación • No instale nunca en lugares tales como los siguientes por causa del peligro de fallo de funcionamiento debido a altas temperaturas o humedad: * Lugares tales como el tablero de instrumentos o la bandeja trasera, expuestos a los rayos directos del sol. * Cerca de las bocas de salida del calefactor. * Cerca de las puertas, etc., donde existe el peligro de exposición a la lluvia.
Especificaciones General ENGLISH Fuente de alimentación ........................................................ 14,4 V CC (10,8 — 15,1 V permisible) Sistema de conexión a tierra ................................................ Tipo negativo Consumo de energía máximo .............................................. 1,5 A Unidad de visualización ESPAÑOL Tamaño de la pantalla/relación del ancho a la altura de la imagen ................................................................
Inhalt Inhalt ............................................................ 1 Bedienungsweise des Setup-Menüs ...................................... 13 WICHTIGE SICHERHEITSHINWEISE ...... 2 Befestigen des Displays .................................... 3 Entfernen des Displays ...................................... 4 Aufrufen des Setup-Menüs .............................. 13 Bildeinstellung ................................................ 14 - BRIGHTNESS/CONTRAST/COLOR/HUE - DIMMER Video-Einstellung ......
WICHTIGE SICHERHEITSHINWEISE ENGLISH Bitte lesen Sie diese Anleitung zum Einbau des Farbdisplays aufmerksam durch und bewahren Sie die Anleitung für späteres Nachschlagen auf 1. Bitte lesen Sie diese Anleitung vor dem Einbau des Farbdisplays aufmerksam durch. 2. Bewahren Sie die Anleitung für späteres Nachschlagen auf. ESPAÑOL 3. Beachten Sie alle Warnungen in dieser Anleitung, und folgen Sie den hier gegebenen Anweisungen genauestens. 4.
Befestigen und Entfernen des Displays Vorsichtsmaßregeln: • Um Beschädigungen zu vermeiden, stellen Sie den Zündschlüssel oder den Ein/AusSchalter des Systems vor dem Befestigen oder Entfernen des Displays auf “OFF”. Bei der Handhabung achten Sie darauf, den Bildschirm und die Tasten nicht mit zu festem Griff zu halten und das Display nicht fallen zu lassen.
Entfernen des Displays ENGLISH • Ziehen Sie den Freigabehebel 3 nach oben und halten Sie ihn in dieser Stellung. Anschließend ziehen Sie das Display nach oben hin vom Unterbau ab. • Um einen Diebstahl des Displays zu verhüten, nehmen Sie das Display vor dem Verlassen des Wagens ab. ESPAÑOL Unterbau DEUTSCH VORSICHTSMAßNAHME FRANÇAIS Staub oder sonstige Fremdkörper können mangelhaften Anschlusskontakt verursachen.
WICHTIGE INFORMATION Über dieses Produkt • Dieses Produkt entspricht den EMC-Richtlinien (89/336/EEC, 92/31/EEC) und CEMarkierungsrichtlinien (93/68/EEC). • Das Display darf nicht an einer Stelle angebracht werden, an der es die freie Sicht des Fahrers einschränkt oder die Funktion der Airbags bzw. der Kopfstützen des Fahrzeugs beeinträchtigt. • Dieses Produkt ist für Gebrauch mit dem Tastbedienpanel-System der Pioneer Navigationseinheit konzipiert.
Vor der Inbetriebnahme dieses Produktes Zur Vermeidung von Batterie-Erschöpfung ENGLISH Benutzen Sie dieses Gerät nur bei laufendem Motor. Die Benutzung dieses Gerätes bei abgestelltem Motor kann zu Erschöpfung der Batterie führen. Zum Schützen des LCD-Bildschirms des Display ESPAÑOL • Achten Sie darauf, dass bei Nichtbenutzung dieses Gerätes kein direktes Sonnenlicht auf das Display fällt.
Vor der Inbetriebnahme dieses Produktes Sicheres Fahren Dieses Gerät erkennt, ob die Feststellbremse angezogen oder gelöst ist. Wird das Gerät installiert, ist es so eingerichtet, dass die Bildwiedergabe während der Fahrt abgeschaltet ist. Auch jedwede Einstellungen sind während der Fahrt nicht möglich. (Die folgende Meldung wird während der Fahrt auf dem Bildschirm angezeigt.
Tastenübersicht Bestandteile und Ausstattungsmerkmale ENGLISH 7 Display-Einheit ESPAÑOL 1 Signalempfänger 2 Umgebungslichtsensor 3 Taste SOURCE/POWER Schaltet zwischen Programmquellen um und schaltet den Strom ein/aus (ON/OFF). 4 Taste WIDE 5 Lautstärkeregeltasten (–/+) Stellen Sie die Lautstärke des eingebauten Lautsprechers 0 ein. • Die Lautstärke darf niemals so hoch eingestellt werden, dass Umgebungsgeräusche und Notfahrzeuge nicht mehr wahrgenommen können.
Grundlegender Betrieb Einschalten Vor dem Einschalten sollten Sie stets den Motor des Wagens starten, um Batteriestrom zu sparen. 1. Starten Sie den Motor des Wagens. T LOCK AR C ON ST AC 2. Schalten Sie das System ein. Drücken Sie die Taste SOURCE/POWER. Zum Ausschalten des Systems drücken Sie die Taste SOURCE/POWER 2 Sekunden lang. Einstellung der Lautstärke Stellen Sie die Lautstärke des Audio-Ausgangs vom eingebauten Lautsprecher ein. • Erhöhen oder senken Sie die Lautstärke des Lautsprechers.
Wählen einer Programmquelle ENGLISH Bei Kombination mit der Pioneer Navigationseinheit können Sie die Bilder der jeweiligen Programmquelle wählen. • Wählen Sie die gewünschte Programmquelle.
Grundlegender Betrieb Ändern des Breitbildmodus Sie können das Verfahren wählen, auf das das normale Video (Bildverhältnis 4:3) zum Breitbild (16:9) vergrößert wird. Wählen Sie einen Breitbildmodus, der am besten zum jeweiligen Video passt. 1. Bringen Sie die zu betrachtende Programmquelle zur Anzeige. (Siehe vorige Seite.) 2. Wählen Sie einen Breitbildmodus.
Verfügbare Breitbildmodi ENGLISH FULL (VOLL) Bilder mit einem Seitenverhältnis von 4:3 werden nur horizontal gedehnt. Programme können im Breitbildformat ohne fehlende Teile wiedergegeben werden. ESPAÑOL JUST (JUSTIERT) DEUTSCH Das Bild wird zu beiden Seitenrändern hin zunehmend horizontal gedehnt. Da das Bild in Bildschirmmitte annähernd im Normalformat erscheint, kann es ohne ein Gefühl der Unnatürlichkeit betrachtet werden.
Bedienungsweise des Setup-Menüs Aufrufen des Setup-Menüs Dieses System zeichnet sich durch zahlreiche Funktionseinrichtungs- und Einstellfunktionen aus, um für höhere Bedienungsfreundlichkeit zu sorgen. Nehmen Sie die Einstellungen ganz nach Bedarf und Wunsch vor. 1. Bringen Sie das Setup-Menü zur Anzeige. Drücken Sie die Taste MENU-ENTER. MENU P I CTURE ADJUST V I DEO SET T I NG AUD I O SET T I NG RE TURN 2. Wählen Sie eine Einstellung.
Bildeinstellung ENGLISH BRIGHTNESS/CONTRAST/COLOR/HUE Die Einstellungen werden für jede Programmquelle (NAVI SOURCE, AV IN1, AV IN2) gespeichert. Optionen Einstellposten Lässt Schwarz dunkler oder heller erscheinen. Kontrast [CONTRAST]: Verkleinert bzw. vergrößert den Abstand zwischen Schwarz und Weiß (dunkler). Farbe [COLOR]: Lässt Farben heller oder dunkler erscheinen. Farbton [HUE]: Stellt Rot bzw. Grün des Bilds ein.
Bedienungsweise des Setup-Menüs DIMMER Wenn der Schirm nachts zu hell ist, oder wenn die Umgebungslichtstärke abnimmt, kann das Betrachten des Displays nach einiger Zeit anstrengend werden. Sie können eine von drei Helligkeitsstufen wählen: Tageslicht, Abendlicht oder Nachtlicht. Dieses Produkt bestimmt die Helligkeit dann automatisch optimal innerhalb des gewählten Einstellbereichs und in richtiger Relation zur Umgebungslichtstärke. 1.
Video-Einstellung ENGLISH Eingangseinstellung [AV IN2] Zum Betrachten von Videobildern von einem VCR, DVD-Player oder einer Rückwärtskamera mit Anschluss an der Hideaway-Einheit. ESPAÑOL 1. Bringen Sie das Setup-Menü zur Anzeige und wählen Sie [VIDEO SETTING]. (Siehe Seite 13.) 2. Wählen Sie [AV IN2]. V I DEO SE T T I NG AV I N 2 O F F REAR SOURCE NAV I POLAR I T Y BA T TERY P I CTURE A D J UST S E T UP P I CTURE MODE ST D I MG RETURN DEUTSCH 3. Wählen Sie ein Anschlussverfahren.
Bedienungsweise des Setup-Menüs Funktionen für eine Rückwärtskamera 7 Automatische Umschaltung für Rückwärtskamera Bei Gebrauch einer handelsüblichen Rückwärtskamera mit der richtigen Einstellung schaltet dieses Produkt automatisch auf Bildwiedergabe von der Rückwärtskamera, wenn der Rückwärtsgang (REVERSE (R)) eingelegt wird. Weitere Informationen hierzu erhalten Sie von Ihrem Händler oder einer autorisierten Pioneer-Kundendienststelle in Ihrer Nähe.
[PICTURE ADJUST] ENGLISH Wählen Sie [SET UP] mit 5 oder ∞, und drücken Sie die Taste MENU-ENTER. Das [PICTURE ADJUST]-Menü erscheint. (Siehe Seite 14.) [PICTURE MODE] Sie können entweder [STD IMG] oder [MIR IMG] für das Rückwärtskamerabild wählen. [STD IMG]: Sie sehen die Wiedergabe von der Rückwärtskamera als unverkehrtes Bild. [MIR IMG]: Sie sehen die Wiedergabe von der Rückwärtskamera wie durch einen Rückspiegel. ESPAÑOL Hinweis: • Die ursprüngliche Einstellung für [PICTURE MODE] ist [STD IMG].
Bedienungsweise des Setup-Menüs Audio-Einstellung 7 [GUIDE] Durch diese Einstellung wird bestimmt, ob die Lautstärke jeder Programmquelle während Sprachführung automatisch stummgeschaltet wird. Einstellen des Mischbetriebs der Sprachführung [GUIDE] Bei Anschluss der Pioneer Navigationseinheit an den 26-Pol-Eingang dieser HideawayEinheit können Sie unter drei Einstellungstypen für die Sprachführung der Pioneer Navigationseinheit wählen. 1.
Richtiger Gebrauch des Displays ENGLISH VORSICHT • Falls Feuchtigkeit oder Fremdkörper in das Display-Gehäuse eindringen, schalten Sie das Display sofort aus (OFF) und wenden Sie sich an einen Fachhändler oder die nächstgelegene PIONEER-Kundendienststelle. Der fortgesetzte Betrieb des Displays in diesem Zustand kann zu Bränden, elektrischen Schlägen oder zum Ausfall des Geräts führen.
Richtiger Gebrauch des Displays Hinweise zur Flüssigkristallanzeige (LCD) • Wenn das Display in geöffnetem Zustand in der Nähe einer Klimaanlagendüse ist, muss sichergestellt werden, dass Luft von der Klimaanlage nicht direkt auf das Display bläst. Wärme von der Heizung kann zu einer Beschädigung des LCD-Schirms führen, Kühlluft zu Feuchtigkeitsbildung im Inneren des Displays mit Folgeschäden.
Anschluss des Geräts ENGLISH VORSICHT • PIONEER rät nachdrücklich davon ab, das Display eigenhändig einzubauen oder zu warten, da hierbei die Möglichkeit elektrischer Schläge und anderer Gefahren besteht. Einbau und Wartung des Displays sind deshalb dem autorisierten Kundendienst-Fachpersonal zu überlassen. ESPAÑOL • Befestigen Sie alle Kabel mit Kabelklemmen oder Isolierband. Es dürfen keine offenliegenden Drähte vorhanden sein.
Anschluss des Geräts Hinweis: • • 23 ACC-Position OF F O STAR • O N • ACC STAR • F N • Wenn diese Einheit in einem Auto eingebaut wird, das auf dem Zündschalter keine ACC (Zubehör)-Position hat, sollte die rote Leitung dieser Einheit an eine Klemme angeschlossen werden, die mit der ON/OFF-Operation des Zündschalters gekoppelt ist. Andernfalls kann die Autobatterie entleert werden, wenn Sie mehrere Stunden von dem Fahrzeug weg sind.
Bezeichnung und Funktion der Anschlussbuchsen ENGLISH 7 Hideaway-Einheit ESPAÑOL Wird mit Display-Einheit verbunden. 2 AV IN1 RCA-Audio-Eingang (weiß, rot) Empfang von Stereo-Audio, wie z.B. von VCR, DVD-Player oder anderer AVAusrüstung. Empfang von Video, wie z.B. von VCR, DVD-Player oder anderer AV-Ausrüstung. 4 REMOTE OUT 5 AV IN2 RCA-Audio-Eingang (weiß, rot) Empfang von Stereo-Audio, wie z.B. von VCR, DVD-Player oder anderer AVAusrüstung. Rückstellung des Display-Mikroprozessors.
Anschluss des Geräts Anschließen des Stromkabels Hideaway-Einheit Stromversorgungskabel Sicherungswiderstand Violett/Weiß (Siehe Seite 29.) Schwarz (Masse) Fest mit einem Metallteil des Fahrzeugs verbinden. Sicherungswiderstand Rot An den Stromkreis anschließen, der in der Stellung ACC des Zündschalters Strom führend ist. Die Sicherung darf nur durch eine neue Sicherung mit der auf dem Sicherungshalter angegebenen Nennbelastung ersetzt werden.
Anschlussschema (VIDEO-Eingang) ENGLISH Display-Einheit ESPAÑOL 3m AV IN1 RCA-Audio-Eingang (weiß, rot) AV IN1 RCA-Video-Eingang (gelb) DEUTSCH Hideaway-Einheit AV IN1-Eingang AV IN2-Eingang FRANÇAIS Handelsübliches RCA-Kabel (getrennt erhältlich) Zu Video-Ausgang ITALIANO Im Handel erhältliche tragbare VideoKomponente oder Rückwärtskamera mit RCA-Ausgang Braun Zu Audio-Ausgang Hinweis: NEDERLANDS • Bei Anschluss anderer AV-Ausrüstung an den Eingang AV IN2 ist unter Umständen eine Einstellun
Anschluss des Geräts Anschlussschema (26-Pol-Eingang) Sie können eine im Handel erhältliche Pioneer Navigationseinheit anschließen.
Anschluss von RCA-Audio- und -Video-Ausgang ENGLISH Hideaway-Einheit ESPAÑOL Stromversorgungskabel (Siehe Seite 25.) RCA-Video-Ausgang (gelb) RCA-Audio-Ausgang (weiß, rot) Handelsübliches RCA-Kabel (getrennt erhältlich) Zu Audio-Eingang (R) Zu Audio-Eingang (L) Zweites Display, Video-Deck usw.
Anschluss des Geräts Anschließen der “REVERSE-GEAR SIGNAL INPUT”-Leitung Bei Gebrauch dieses Produkts mit einer Rückwärtskamera ist automatische Umschaltung auf AV IN2-Video möglich, wenn der Rückwärtsgang (REVERSE (R)) eingelegt wird. Schließen Sie die Rückwärtskamera an den AV IN2-Eingang an. (Siehe Seite 26.) Hideaway-Einheit Anschlussmethode Das Kabel der Rückfahrleuchte einklemmen. Stromversorgungskabel (Siehe Seite 25.) Mit einer Nadelzange fest zuklemmen.
Einbau ENGLISH VORSICHT • Anweisungen zur Montage des Bildschirms erhalten Sie bei Ihrem Händler. ESPAÑOL • Bringen Sie das Display nicht so an, dass es (i) die freie Sicht des Fahrer einschränkt, (ii) die Leistung des Fahrzeug-Betriebssystems oder der Sicherheitseinrichtungen, einschließlich der Airbags, beeinträchtigt und (iii) den Fahrer bei der Steuerung des Fahrzeugs behindert.
Einbau • Der Gebrauch dieses Produkts unterliegt jeglichen Landesgesetzen hinsichtlich Platzierung und Nutzung. PIONEER übernimmt keinerlei Verantwortung für jedwede Probleme, Schäden oder Verluste, die auf den Gebrauch des Produkts mit falscher Einrichtung oder unter Verletzung von Landesgesetzen zurückzuführen sind. • Um richtige Installation sicherzustellen, verwenden Sie die gelieferten Teile auf die angegebene Weise.
Befestigung des Displays mit der mitgelieferten Halterung 1. Bringen Sie die beiden Polster am Boden des Unterbaus an. ENGLISH Befestigen Sie das Display mit der Halterung auf dem Armaturenbrett. 2. Befestigen Sie den DisplayUnterbau und die Halterung am Display. ESPAÑOL Um Kratzer auf dem Armaturenbrett zu vermeiden, kleben Sie die Polster am Boden des Unterbaus an.
Einbau 3. Bestimmen Sie die Aufstellposition des Displays. Setzen Sie das Display ohne die Schutzfolie an der Rückseite zu entfernen auf das Armaturenbrett und bestimmen Sie die geeignete Aufstellposition. 4. Kleben Sie die Halterung auf das Armaturenbrett. Vergewissern Sie sich vor dem Aufkleben, dass die Klebefläche frei von Feuchtigkeit, Staub, Schmutz, Öl usw. ist. Hinweis: • Wählen Sie eine Befestigungsposition, die die auf Seite 30 und 31 genannten Bedingungen erfüllt.
6. Richten Sie die vertikale Stellung und den Winkel des Displays aus. ENGLISH 5. Befestigen Sie die Halterung mit den Schneidschrauben am Armaturenbrett. ESPAÑOL Um das Display zu stabilisieren, stellen Sie die vertikale Stellung so ein, dass die Unterseite der Displaybasis das Armaturenbrett berührt. Stellen Sie das Display auf einen Winkel ein, der gute Sichtbarkeit bietet. Durch Drehen dieses Knopfes nach links kann die vertikale Stellung des Displays ausgerichtet werden.
Einbau Einbau der Hideaway-Einheit Installationshinweise • Von der Installation an einer der folgenden Stellen ist wegen der Gefahr einer Funktionsstörung aufgrund hoher Temperatur bzw. Luftfeuchtigkeit in jedem Falle abzusehen: * Orte, wie Armaturenbrett oder Heckablage, die direktem Sonnenlicht ausgesetzt sind. * In der Nähe von Warmluftdüsen. * In der Nähe von Türen usw., wo das Gerät Regen ausgesetzt ist.
Technische Daten Allgemeines ENGLISH Stromversorgung ................................................................ 14,4 V Gleichspannung (Toleranz 10,8 — 15,1 V) Erdungssystem .................................................................... Negativ Max. Leistungsaufnahme .................................................... 1,5 A Display-Einheit ESPAÑOL Bildschirmgröße/Bildformat .............................................. 6,5 Zoll breit/16:9 (effektiver Bildbereich: 154 × 87 mm) Bildpunkte ...
ENGLISH ESPAÑOL DEUTSCH FRANÇAIS ITALIANO NEDERLANDS
PIONEER CORPORATION 4-1, MEGURO 1-CHOME, MEGURO-KU, TOKYO 153-8654, JAPAN PIONEER ELECTRONICS (USA) INC. P.O. Box 1540, Long Beach, California 90801-1540, U.S.A. TEL: (800) 421-1404 PIONEER EUROPE NV Haven 1087, Keetberglaan 1, B-9120 Melsele, Belgium TEL: (0) 3/570.05.11 PIONEER ELECTRONICS ASIACENTRE PTE. LTD. 253 Alexandra Road, #04-01, Singapore 159936 TEL: 65-6472-1111 PIONEER ELECTRONICS AUSTRALIA PTY. LTD.