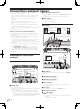
DDJ-S1 DJ Controller Contrôleur pour DJ DJ Controller ITCH 2.0 compatible edition Édition compatible avec ITCH 2.0 ITCH 2.0 kompatible Edition http://www.prodjnet.com/support/ The Pioneer website shown above offers FAQs, information on software and various other types of information and services to allow you to use your product in greater comfort.
Thank you for buying this Pioneer product. Please read through these operating instructions so you will know how to operate your model properly. After you have finished reading the instructions, put them away in a safe place for future reference. In some countries or regions, the shape of the power plug and power outlet may sometimes differ from that shown in the explanatory drawings. However the method of connecting and operating the unit is the same.
Contents How to read this manual ! ! In this manual, names of screens and menus displayed on the product and on the computer screen, as well as names of buttons and terminals, etc., are indicated within brackets. (e.g.
Before you start Features About the AC adapter This unit is an all-in-one DJ system combining the high operability hardware of Pioneer professional DJ players and DJ mixers that has achieved an excellent reputation among many professional DJs and clubs with the ITCH DJ software by Serato Audio Research. It is also equipped with audio interface, and allows full-fledged DJ performances without requiring other DJ equipment.
! Removing the power plug English When the product exhibits a distinct change in performance – this indicates a need for service. Check that there are no irregularities with the AC adapter or power plug, then insert the power plug into the specified position of the AC adapter using the specified procedure until a click is heard. For details, see Mounting the power plug on page 5.
Minimum operating environment Supported operating systems CPU and required memory Mac OS X 10.4.11 Intel® processor, Core™ Duo 1.8 GHz or better 1 GB or more of RAM Intel® processor, Core™ Duo 1.8 GHz or better Mac OS X 10.5.8 1 GB or more of RAM 32-bit version Intel® processor, Core™ Duo 1.8 GHz or better 64-bit version Intel® processor, Core™ Duo 2.4 GHz or better 1 GB or more of RAM Mac OS X 10.
Nothing in this License Agreement will operate, or is intended to operate, to limit or exclude any liability or obligation of Serato to the extent that such liability or obligation cannot be limited or excluded under applicable law.
2 The limitations or exclusions of warranties and liability contained in this Agreement do not affect or prejudice Your statutory rights as consumer and shall apply to You only to the extent such limitations or exclusions are permitted under the laws of the jurisdiction where You are located. 3 Severability and Waiver.
For Mac OS X The contents of the CD-ROM are displayed. In Finder, open the [Application] folder, next open [Serato] > [ITCH], then double-click the [ITCH] icon. 5 Double-click [ITCH_installer.mpkg]. The ITCH installer is launched. 6 Once the ITCH installer is launched, click [Continue]. English 4 Double-click the [ITCH CD] icon. About the driver software and setting utility software This unit functions as an audio device conforming to the ASIO standards.
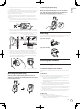
Connections and part names ! ! ! ! ! Wait until all connections between devices have been completed before connecting the AC adapter. Be sure to turn off the power and unplug the AC adapter from the power outlet before making or changing connections between devices. Refer to the operating instructions for the component to be connected. Only use the AC adapter included with this unit. Power to this unit is supplied by the AC adapter or by USB bus power.
8 ON/OFF switch English Part names and functions Turns this unit’s power on and off. 9 DC IN terminal Connect to a power outlet using the included AC adapter (with the power plug mounted). ! Wait until connection of all equipment is completed before connecting the AC adapter. ! Only use the included AC adapter. Deck section 1 2 a Cord hook OFF ON LOAD Catch the AC adapter’s power cord and USB cable on this hook when using this unit.
= Setting loops automatically (Auto loop) (p.24) ! The beat grid can be adjusted by turning the [AUTO LOOP (GRID SLIDE)] control while pressing the [SHIFT] button. 8 TEMPO RANGE button This switches the [TEMPO] slider’s adjustment range. = Selecting the range for adjusting the playing speed (p.22) 9 MASTER TEMPO button Use this to turn the master tempo function on and off. = Adjusting the playing speed without changing the pitch (Master Tempo) (p.
Switches the channel to which the effect is applied. = Using the effect function (p.29) Do not pull on the channel fader and crossfader knobs with excessive force. The knobs are not designed to be removed. Pulling the knobs strongly may result in damaging the unit. a MASTER LEVEL control Adjusts the master sound level output. Microphone/External input control section b EFFECT SELECT control MIC 1 Selects the type of effect. = Using the effect function (p.
Operation ITCH software screen Screen when this unit is connected (Windows) 12 3 4 5 6 7 89 s a a b b c d e r q f g h i j p k o n m l ! 1 Current time display 2 Simple display of CPU usage rate 3 Virtual deck display switches The positions of the virtual deck and waveform display can be changed. 6 Tempo match display This indicates the tempo of the tracks on decks (A) and (B) by measure, and is designed to help you match the tempo.
Displays the frequency bands of the track’s sound on a waveform, in blue for the treble range, green for the midrange and red for the bass range. The playback point is displayed as [b] (white). The temporary cue point is displayed as [a] (white) and the hot cue points are displayed as [a] in another color. ! Click to move the playing position to that position. ! Thin vertical gray lines are displayed in 1 minute intervals, thick lines are displayed in 5 minute intervals.
Effect panel 2 Library Displays the iTunes library. ! To display the iTunes library, change the settings at the [SETUP] menu. = Show iTunes Library (p.31) This is displayed when [DJ-FX] on the multiple console is clicked. 1 3 Crates ITCH uses digital crates for quick access to your favorite collections. There is no limit to the number of crates you can create, and any given track can be placed in multiple crates. The crate area is on the left hand side of the library.
Operating the Library English Screen when this unit is not connected Within the library, tracks can be imported and managed easily. 1 Adding music files to the library 2 3 4 5 ! ! 1 Offline player The offline player is available when your ITCH hardware is not connected and will output through the current default audio device. In most cases, this will be from your computer speakers.
For details, see the URL below. http://whitelabel.net/ Selecting items ! Analyzing files This function is operated not on the DDJ-S1 but on the computer. Before you play your music in ITCH it is very important to analyze your files first. The analyze files function processes the tracks in your library to detect file corruption, prepare the waveform overviews, and if enabled calculate the BPM values. ! This is function is performed in ITCH while in the offline player.
Double-click the crate’s name. ! The order of the tracks in the track list is indicated by the numbers displayed in the “#” column. You can now rename this crate. Deleting tracks Deleting crate 1 Turn the rotary selector. 1 Turn the rotary selector. 2 On the computer’s keyboard, press the [Delete] key while pressing the [Ctrl] key. Select the crate you want to delete. Select the track you want to delete. ! 2 On the computer’s keyboard, press the [Delete] key while pressing the [Ctrl] key.
Searching for tracks It is possible to quickly search among many tracks imported onto the track list for the track you want to play. There are several search methods. Searching by inputting characters Tracks can be searched for by inputting characters and searching for the tracks containing those characters. 1 Click in the search box. Moves the cursor to the crate list panel. 2 Click the item to be included in the search. Select the item to be searched from the crate list panel.
Layout FILES button A column of album art is displayed at the very left, followed by text. BROWSE button The tracks are arranged in a grid, with the album art displayed on the left side, the track information on the right side. PREPARE button The tracks are arranged in a grid, with the album art displayed above, the track information below. Inputting the track information manually You can add information for tracks not played in ITCH into your session (e.g.
! The confirmation message concerning the creation of a backup is again displayed in the following cases. — When over 1 week has passed since the last backup — When there is no backup Adjusting the playing speed (Tempo control) Loading tracks to decks Changing the playing speed 1 Select the track you want to load. Move the [TEMPO] slider forward or backward. Set the cursor to the track you want to load to the deck. ! For details, see Selecting items on page 18. 2 Press the [LOAD (INST.
Playback stops. 3 While pressing the top of jog dial, spin the jog dial in the desired direction and at the desired speed. The sound is played according to the spinning direction and speed of the jog dial. 4 Release your hand from the top of the jog dial. Normal playback resumes. Pitch bend During playback, spin the outer section of the jog dial. The playing speed increases when spun clockwise, decreases when spun counterclockwise. When spinning is stopped, playback returns to the normal speed.
Canceling Loop playback (Loop Exit) During loop playback, press the [RELOOP/EXIT (GRID CLEAR)] button. Playback continues beyond the Loop Out Point without returning to the Loop In Point. When a loop is set, it is automatically saved in the currently selected loop bank. ! Up to 9 loop banks can be set. ! When a loop is set while a bank number at which a loop is already saved is selected, the loop saved at that loop bank is overwritten.
In the pause mode or when pausing at a temporary hot cue point, press and hold one of the [HOT CUE (DELETE) 1] – [HOT CUE (DELETE) 5] buttons at which a hot cue is set. The playing position moves to that hot cue point and the hot cue is played while the hot cue button is being pressed. ! When the [PLAY/PAUSE f] button is pressed during hot cue sampling, playback continues from that point. Slip reverse 1 Press the [SLIP] button. The mode switches to the slip mode. 2 Press the [REV] button.
Editing the beat grid The beat grid is set automatically from the average value of the BPM when tracks are analyzed. If the beat grid does not match the track’s actual beat, the tracks in the left and right decks are synchronized more accurately after the beat grid is edited. ! To edit the beat grid, enable the [Enable beat grid] setting in the [SETUP] menu. The beat grid can also be edited through operations on the computer. To do so, the operations below must be performed.
: Playback starts when clicked again. ! : When is clicked, the track is played in sync with the track on the deck whose [SYNC] button is pressed or the sample slot whose this key is highlighted. is clicked, and stops when it is Setting the sample’s play start position The position at which the tracks loaded in the sample slots start playing can be set. 1 Click and select [Play form].
Using the crossfader reverse function Switch the [C.F. REV] switch. ! ! [ON]: The left side of the crossfader is set to deck (B), the right side to deck (A). [OFF]: The left side of the crossfader is set to deck (A), the right side to deck (B). Adjust the sound level output from [MIC1] and [MIC2]. ! Pay attention that rotating to the extreme right position outputs a very loud sound. 4 Input audio signals to the microphone.
When the [MIC/AUX THRU] selector switch is set to [ON], the audio signals of the connected external device and microphone are output directly without passing through the computer. Normally use with the switch set to [OFF]. DELAY A delay is when a part of the audio signal is repeated at a later stage. Increasing the level of [FX MIX] will blend the delay level into the original level, until you have 100 % delay blended into the original signal.
LEVEL/DEPTH control The further the control is turned clockwise, the more the effect is stressed. When turned all the way counterclockwise, only the original sound is output. CRUSHER Crusher adds distortion and lowers the bit rate resolution of the audio source. This effect can either sound glitchy or overdriven depending on what point your bit depth is set to. PARAMETER control Adjusts the degree of the effect.
ON SONG LOAD ! ! ! ! Play from start When a track is loaded, playback starts from the beginning of the track. If there is a blank section at the beginning of the track, playback starts from the position at which the sound starts. — When a track is loaded with this setting disabled, playback starts from the position played last on the track that was playing the previous time. Instant Doubles The same track is played on both tracks (doubled).
Additional information Troubleshooting ! ! Incorrect operation is often mistaken for trouble or malfunction. If you think that there is something wrong with this component, check the points below. Sometimes the trouble may lie in another component. Inspect the other components and electrical appliances being used. If the trouble cannot be rectified after checking the items below, ask your nearest Pioneer authorized service center or your dealer to carry out repair work.
Check Remedy No sound is produced. Are the connection cables properly connected? Connect the connection cables properly. (page 10) Is the included USB cable properly connected? Connect the computer and this unit directly using the included USB cable. USB hubs cannot be used. (page 10) Are terminals or plugs dirty? Wipe any dirt off terminals and plugs before connecting. Is the driver software properly set? Set the driver software properly. (page 7) Is ITCH properly set? Set ITCH properly.
File corruption messages An error code is displayed on the screen if this unit cannot operate properly. Check the error on the table below and take the appropriate action. Error code Description of error Cause and action Corrupt file : This MP3 contains invalid frames This file contains frames not conforming to formal MP3 standards. Normal playback is not guaranteed. We recommend that you remake the file.
Specifications The DDJ-S1 also outputs the operating data for the buttons and dials in MIDI format. If you connect a computer with a built-in MIDI-compatible DJ software via a USB cable, you can operate the DJ software on this unit. The sound of music files being played on the computer can also be output from the DDJ-S1. To use as a controller for other DJ software, first make the DJ software’s audio and MIDI related settings. For details, see your DJ software’s operating instructions.
Nous vous remercions d’avoir acquis un produit Pioneer. Veuillez lire attentivement ce mode d’emploi afin de connaître la manière d’utiliser l’appareil comme il convient. Cela fait, conservez le mode d’emploi de façon à pouvoir vous y référer en cas de nécessité. Dans certains pays ou certaines régions, la forme de la fiche et de la prise d’alimentation est un peu différente de ce qui est montré dans les illustrations. Toutefois, l’appareil se raccorde et fonctionne de la même façon.
Sommaire Comment lire ce manuel ! ! Dans ce manuel, les noms d’écrans et de menus s’affichant sur le produit et sur l’écran de l’ordinateur, de même que les noms de touches et de prises, etc. sont indiqués entre parenthèses. (Ex.
Avant de commencer Caractéristiques Contenu du carton d’emballage Cet appareil est un système complet DJ combinant le matériel hautement opérationnel des lecteurs DJ et tables de mixage DJ professionnels Pioneer, réputés auprès des DJs professionnels et des clubs, et le logiciel DJ ITCH de Serato Audio Research. Il est également équipé d’une interface audio et permet, sans autre appareil DJ, des prestations DJ sophistiquées.
Entretien L’ouverture ou le retrait du couvercle est susceptible de vous exposer à un choc électrique ou d’autres dangers. Contactez un service aprèsvente agréé Pioneer pour faire réparer ce produit (reportez-vous à la carte Réparation et Support jointe). Dommage exigeant une réparation Faites glisser la fiche d’alimentation dans l’adaptateur secteur le long des rainures, comme indiqué sur le schéma suivant, puis enfoncez-la jusqu’à ce qu’un clic soit audible.
Installation du logiciel Avant d’installer le pilote Divers Disque dur Espace libre suffisant sur le disque dur pour les données musicales Lecteur CD Lecteur de disque optique pouvant lire le CD-ROM Port USB Un port USB 2.0 est indispensable pour raccorder cet ordinateur à cet appareil. Résolution de l’écran Résolution de 1 024 x 768 ou plus À propos du logiciel à installer ! Selon l’ordinateur utilisé le logiciel à installer sera différent.
l'application Serato en question consiste en une offre groupée avec du matériel, vous transférez aussi la propriété du matériel à ladite personne. Toute personne bénéficiaire du transfert accepte de se soumettre aux conditions du présent Contrat de licence en vertu de l'article 1.
faites l’acquisition d’aucun droit, explicite ou implicite, hors de la licence limitée décrite dans cet accord. 4 Pas d’assistance. Pioneer n’a aucune obligation de fournir une assistance, une maintenance, des mises à niveau, des modifications ou des nouvelles versions pour le programme ou la documentation liés à cet accord. 3 Exclusion de garantie LE PROGRAMME ET LA DOCUMENTATION SONT FOURNIS “TELS QUELS” SANS CONDITION OU GARANTIE D’AUCUNE SORTE, ET VOUS ACCEPTEZ DE LES UTILISER À VOS RISQUES ET PÉRILS.
8 Sélectionnez le dossier où vous voulez installer ITCH, puis cliquez sur [Next]. 6 Lorsque l’installateur de ITCH a été lancé, cliquez sur [Continuer]. 9 Cliquez sur [Install]. Français L’installation commence. Lorsque l’installation du logiciel ITCH est terminée, l’installation du pilote commence. 7 Lisez attentivement le contenu du contrat de licence, cliquez sur [Continuer] puis sur [Accepter] pour accepter le contrat de licence.
À propos du pilote et de l’utilitaire de réglage Cet appareil est un dispositif audio conforme aux normes ASIO. Utilisation de l’utilitaire de réglages Lancement de l’utilitaire de réglages Cliquez sur le menu [Démarrer] de Windows >[Tous les programmes]>[Pioneer]>[DDJ]>[Utilitaire de réglages ASIO Pioneer DDJ]. Réglage de la taille de la mémoire tampon Le réglage effectué pour [USB BUFFER SIZE (LATENCY)] dans le menu [SETUP] du logiciel ITCH a priorité en ce qui concerne la taille de la mémoire.
Noms des liaisons et éléments ! ! ! Remarques sur l’alimentation de cet appareil par le bus USB ! ! ! Lorsque cet appareil est alimenté par le bus USB de l’ordinateur, raccordez l’ordinateur à une prise d’alimentation secteur. Ne faites pas fonctionner l’ordinateur sur sa batterie. Dans les cas suivants, l’alimentation peut être insuffisante et cet appareil ne pas fonctionner bien qu’alimenté par le bus USB. — L’alimentation fournie par le bus USB de l’ordinateur est insuffisante.
6 Fente de sécurité Kensington Noms et fonctions des éléments Prise USB 7 Pour raccorder un ordinateur. ! Raccordez cet appareil et l’ordinateur directement avec le câble USB fourni. ! Un concentrateur USB ne peut pas être utilisé. Section Platines 8 Commutateur ON/OFF 1 Pour allumer et éteindre cet appareil.
7 Commande AUTO LOOP (GRID SLIDE) Pose des boucles automatiques. = Pose automatique de boucles (Auto loop) (p.25) ! Il est possible d’ajuster la grille des temps en tenant la touche [SHIFT] enfoncée et tournant la commande [AUTO LOOP (GRID SLIDE)]. 8 Touche TEMPO RANGE 9 Touche MASTER TEMPO Sert à mettre la fonction de tempo principal en et hors service. = Réglage de la vitesse de lecture sans changement du pitch (Tempo principal) (p.
9 Commande FX CH SELECT Change le canal auquel l’effet sera appliqué. = Utilisation de la fonction Effets (p.31) a Commande MASTER LEVEL Ajuste le niveau du son principal. b Commande EFFECT SELECT N’exercez pas de force excessive lorsque vous tirez les boutons de fader de canal et de crossfader. Les boutons ne peuvent pas être détachés. L’appareil peut être endommagé par une force excessive. Section de commande des entrées microphone/externe Sélectionne le type d’effet.
Fonctionnement Écran du logiciel ITCH Français Écran lorsque cet appareil est raccordé (Windows) 12 3 4 5 6 7 89 s a a b b c d e r q f g h i j p k o n m 1 Affichage de l’heure actuelle l 6 Affichage de concordance des tempos Cet affichage indique le tempo des morceaux sur les platines (A) et (B) selon la mesure et aide à faire concorder les tempos.
! a Aperçu des morceaux Affiche les bandes de fréquences audio du morceau sous la forme d’une onde, bleue pour les aigus, verte pour les médiums et rouge pour les graves. Le point de lecture est indiqué par un [b] (blanc). Le point de repère temporaire est indiqué par un [a] (blanc) et les points de repère instantanés sont indiqués par des [a] d’une autre couleur. ! Cliquez dessus pour amener la position de lecture à cette position.
Liste de crates 3 Étiquette couleur Des couleurs peuvent être spécifiées pour différentier les morceaux. 1 2 4 Icône d’état L’état des morceaux est indiqué par des icônes. 3 4 Icône 5 6 Aucune Signification Morceaux ayant été directement importés dans la bibliothèque ITCH. Français Morceaux importés de la bibliothèque d’iTunes. Morceaux dont les fichiers sont endommagés. Ces morceaux doivent être recodés. 1 All... Tous les morceaux importés ou chargés sur les platines s’affichent.
Panneau de commande pour le contrôle MIC/ AUX 2 Raccordez le câble USB à cet appareil et à l’ordinateur. 3 Allumez l’ordinateur raccordé. 4 Faites glisser le commutateur [ON/OFF] vers [ON]. 1 5 Lorsque les indicateurs de cet appareil s’éclairent, lancez ITCH. 2 1 Cliquez ici pour sélectionner le canal de sortie pour le microphone et l’appareil auxiliaire raccordés. Ce réglage affecte seulement le canal [MASTER]. — [MIX] : Sortie sonore quelle que soit la position du crossfader.
3 Cliquez sur la plage que vous voulez spécifier pour l’analyse du BPM. La spécification de la plage par le menu déroulant [range] permet d’éviter les erreurs de BPM lors de l’analyse de morceaux. Lorsque [Set auto bpm] est coché, spécifiez la plage pour l’analyse du BPM si vous connaissez plus ou moins le BPM du morceau que vous voulez analyser. Analyse de tous les morceaux Formats de fichiers de musique lisibles 1 Débranchez cet appareil de l’ordinateur.
Changement de panneau secondaire Appuyez sur la touche [FILES], (ou sur la touche [BROWSE] ou [PREPARE]). ! Panneau [Files] Utilisé lors de l’importation des morceaux. ! Panneau [Browse] Utilisé pour réduire le nombre de morceaux importés en fonction du genre, BPM, etc. ! Panneau [Prepare] Utilisé pour sélectionner et préparer à l’avance les morceaux qui doivent être joués. Le panneau [History] apparaît lorsque l’onglet [History] sur l’écran de l’ordinateur est cliqué.
1 Tournez le sélecteur rotatif. Sélectionnez le morceau devant être édité. 2 Double-cliquez sur l’élément devant être édité. Le texte peut maintenant être saisi. 3 Saisissez le texte. Réglage des couleurs des morceaux dans la case de recherche. Un menu déroulant permettant de sélectionner l’élément à inclure dans la recherche apparaît. 2 Cliquez sur l’élément à inclure dans la recherche. 3 Appuyez sur la touche [CRATES]. Déplace le curseur sur le panneau comportant la liste de crates.
Touche 1 Appuyez sur la touche [CRATES]. Déplace le curseur sur le panneau comportant la liste de crates. Disposition Touche CRATES Affichage simple comprenant seulement du texte (défaut). L’illustration de l’album n’apparaît pas. Touche FILES Une illustration de l’album apparaît tout à gauche avec du texte. Touche BROWSE Les morceaux apparaissent dans une grille avec une illustration de l’album sur le côté gauche et les informations des morceaux sur le côté droit.
Saisie manuelle des informations des morceaux Vous pouvez ajouter à votre session des informations au sujet des morceaux non joués dans ITCH (par ex. s’il s’agit d’un de vos 33 tours ou CD de musique préférés). 1 Sélectionnez la position où les informations du morceau doivent être insérées, puis cliquez sur [INSERT TRACK]. Une nouvelle ligne est ajoutée sous la position sélectionnée. 2 Double-cliquez sur les champs du morceau inséré et modifiez les informations nécessaires.
Lecture et pause Fonctionnement de la molette jog Lecture Commutation du mode de la molette jog 1 Chargez un morceau sur une platine. ! Pour le fonctionnement détaillé, reportez-vous à la page 23, Chargement de morceaux sur les platines. 2 Appuyez sur la touche [PLAY/PAUSE f]. Pause Appuyez sur la touche [VINYL (ILLUMINATION)]. Pendant la lecture, appuyez sur [PLAY/PAUSE f]. ! La molette jog présente deux modes.
Le bord gauche du pad [NEEDLE SEARCH (ALPHABET SEARCH)] indique le début du morceau et le bord droit indique la fin du morceau. 1 Touchez le pad [NEEDLE SEARCH (ALPHABET SEARCH)]. La position de lecture du morceau change instantanément selon l’endroit où le pad est touché. La position de lecture du morceau se déplace lorsque vous faites glisser le doigt. 1 Pendant la lecture de la boucle, appuyez sur [LOOP IN (GRID SET)]. 2 Tournez la molette jog. Le point d’entrée de boucle peut être ajusté précisément.
Annulation du bouclage automatique Protection de points de boucle (Loop lock) Pendant le bouclage automatique, appuyez sur la commande [AUTO LOOP (GRID SLIDE)]. Cliquez sur boucle. La lecture continue après le point de sortie de la boucle sans revenir au point d’entrée de la boucle. à la gauche du numéro de banque de la Les opérations visant à écraser ou supprimer le point de boucle sauvegardé dans la banque sélectionnée sont désactivées. Un nouvel appui sur annule la protection.
Suppression de repères instantanés Appuyez sur une des touches de repères instantanés [HOT CUE (DELETE) 1] – [HOT CUE (DELETE) 5] tout en tenant la touche [SHIFT] enfoncée. Scratching avec slip 1 Appuyez sur la touche [VINYL (ILLUMINATION)]. Français La touche de repère instantané ([HOT CUE (DELETE) 1] – [HOT CUE (DELETE) 5]) dont le point de repère instantané a été supprimé s’éteint. La lecture normale se poursuit en arrière-plan même pendant la lecture arrière.
Édition de la grille des temps La grille des temps est automatiquement définie à partir de la valeur moyenne des BPM lors de l’analyse des morceaux. Si la grille des temps ne correspond pas au temps actuel du morceau, les morceaux des platines gauche et droite se synchroniseront plus précisément après l’édition de la grille des temps. ! Pour éditer la grille des temps, validez le réglage [Enable beat grid] dans le menu [SETUP]. La grille des temps peut aussi être éditée sur l’ordinateur.
3 Cliquez sur [A], [B], [C] ou [D] dans la fenêtre du lecteur d’échantillons. En changeant de banque, les échantillons préréglés peuvent être immédiatement rappelés. ! ! Côté droit : Seul le son du canal affecté à la droite du crossfader est restitué. L’affectation des platines peut être inversée de droite à gauche et inversement avec la touche [C.F. REV]. 4 Tournez la commande [MASTER LEVEL]. Commutation du mode de lecture 1 Cliquez sur et sélectionnez le mode.
Sélection des caractéristiques de la courbe du crossfader Réglez le sélecteur de courbe de crossfader. ! ! ! [ ]: Courbe croissant rapidement (quand le crossfader est éloigné du côté [A], les signaux audio sortent immédiatement du côté [B]). [ ]: Courbe croissant graduellement (quand le crossfader est éloigné du côté [A], le son du côté [B] augmente graduellement tandis que le son du côté [A] diminue graduellement). [THRU] : Choisissez cette option si vous ne voulez pas utiliser le crossfader.
3 Appuyez sur la touche [AREA MOVE (REC)] tout en appuyant sur la touche [SHIFT]. L’enregistrement commence. La touche [AREA MOVE (REC)] clignote. 4 Appuyez sur la touche [AREA MOVE (REC)] tout en appuyant sur la touche [SHIFT]. Appuyez sur la touche [TAP]. L’intervalle auquel la touche [TAP] est tapée avec le doigt spécifie le BPM. ! En mode manuel, la valeur BPM peut être remise en mode auto par une pression prolongée sur la touche [TAP]. Types d’effets 5 Saisissez le nom de fichier sur l’ordinateur.
PHASER Commande LEVEL/DEPTH Le phaseur utilise des filtres pour décaler le spectre de fréquences et créer un effet de balayage sur la source audio. Un oscillateur basse fréquence altère la vitesse du balayage. [FX MIX] change la profondeur et la rétroaction de l’effet. Commande PARAMETER Sert à spécifier une durée de 1/6 – 32/1 pour le cycle de déplacement de l’effet de phaseur selon la durée d’un temps du BPM.
PLATTER SPEED Custom Crate Columns La vitesse de lecture de la platine virtuelle peut être réglée sur 33 ou 45 RPM. L’en-tête de la liste des morceaux peut être spécifiée individuellement pour chaque crate. Lorsque cette option est désactivée, l’en-tête de colonne est le même pour toutes les listes de morceaux.
Règle la rapidité de l’augmentation ou de la diminution de volume quand le fader de canal est déplacé. CROSSFADER Pour les caractéristiques des courbes du crossfader, les sons se superposant lors du changement de canal peuvent être ajustés précisément. ! Les caractéristiques de la courbe peuvent être ajustées quand est sélectionné avec le sélecteur de courbe de crossfader. ! Les caractéristiques de la courbe peuvent être ajustées quand est sélectionné avec le sélecteur de courbe de crossfader.
Informations supplémentaires En cas de panne ! Une erreur de commande est souvent prise pour une anomalie de fonctionnement ou une panne. Si vous estimez que cet appareil ne fonctionne pas correctement, vérifiez les points ci-dessous. Parfois, le problème peut provenir d’un autre composant. Examinez les autres composants et les appareils électriques utilisés.
Problème Vérification Solution Aucun son n’est produit. Est-ce que les câbles de liaison sont correctement raccordés ? Raccordez correctement les câbles de liaison. (page 11) Est-ce que le câble USB fourni est correctement raccordé ? Raccordez l’ordinateur et cet appareil directement avec le câble USB fourni. Les concentrateurs USB ne peuvent pas être utilisés. (page 11) Est-ce que les prises ou fiches sont sales ? Essuyez la saleté des prises et des fiches avant de les raccorder.
Messages annonçant des fichiers corrompus Un code d’erreur apparaît sur l’écran si cet appareil ne peut pas fonctionner correctement. Vérifiez l’erreur dans le tableau suivant et prenez la mesure appropriée. Description de l’erreur Cause et solution Corrupt file : This MP3 contains invalid frames Ce fichier contient des trames non conformes aux normes MP3. La lecture normale n’est pas garantie. Il est conseillé de refaire le fichier.
Utilisation comme contrôleur pour un autre logiciel DJ Spécifications La DDJ-S1 fournit aussi les données de fonctionnement des touches et molettes dans le format MIDI. Si vous raccordez un ordinateur contenant un logiciel DJ compatible MIDI avec un câble USB, vous pourrez utiliser le logiciel DJ depuis cet appareil. Le son des fichiers de musique lus sur l’ordinateur peut aussi être restitué par le DDJ-S1.
Vielen Dank, dass Sie sich für dieses Pioneer-Produkt entschieden haben. Bitte lesen Sie diese Bedienungsanleitung gründlich durch, um sich mit der Bedienung des Geräts vertraut zu machen. Nachdem Sie die Bedienungsanleitung gelesen haben, legen Sie sie griffbereit zum Nachschlagen ab. In manchen Ländern oder Regionen können sich die Formen von Netzstecker und Netzsteckdose von denen in den Erklärungszeichnungen unterscheiden. Das Verfahren zum Anschließen und Bedienen des Geräts sind aber gleich.
Inhalt Zum Lesen dieser Anleitung ! ! In dieser Anleitung werden die Namen von auf dem Produkt und auf dem Computerbildschirm angezeigten Bildschirmen und Menüs, ebenso wie die Namen von Tasten und Buchsen usw. in Klammern angegeben.
Bevor Sie beginnen Merkmale Lieferumfang Dieses Produkt ist ein All-In-One DJ-System, das die hohe Bedienbarkeit von professionellen Pioneer DJ-Playern und DJ-Mixern kombiniert, die sich einen hervorragenden Ruf unter vielen professionellen DJs und Clubs mit der ITCH DJ-Software von Serato Audio Research erworben haben. Es ist auch mit einer Audioschnittstelle ausgeführt und erlaubt komplette DJ-Auftritte, ohne dass andere DJ-Ausrüstung erforderlich ist.
Eindringen von Gegenständen und Flüssigkeiten Drücken Sie niemals Fremdkörper in das Gerät. Verschütten Sie keine Flüssigkeiten in oder auf das Gerät. Wartung Beim Öffnen oder Entfernen der Abdeckung werden stromführende Teile freigelegt, so daß die Gefahr elektrischer Schläge und andere Gefahren bestehen. Wenden Sie sich an eine Pioneer-Kundendienstestelle oder einen Fachhändler bezüglich Reparatur des Produkts (siehe beiliegende Karte für Wartung und Support).
Installieren der Software Vor dem Installieren der Software Für die neuesten Informationen über die Betriebsumgebung und Kompatibilität und zum Übernehmen des neuesten Betriebssystems gehen Sie bitter zur folgenden Website von Serato Audio Research: http://serato.com Sonstiges Festplatte Ausreichend freier Platz auf Festplatte für Musikdaten CD-Laufwerk Optisches Disc-Laufwerk, auf dem die CD-ROM gelesen werden kann USB-Anschluss Ein USB 2.
haben keine anderen Rechte an der Software als die Rechte, die Ihnen durch diese Lizenzvereinbarung übertragen werden. gilt auch für Ihre Verwendung der Software-Funktion, die nach Updates sucht.
a Zur Installation einer einzigen Kopie dieses Programms auf der Festplatte Ihres Computers, um das Programm ausschließlich für Ihren persönlichen Gebrauch entsprechend dieser Vereinbarung und der Dokumentierung („Autorisierter Gebrauch“) zu verwenden; b Zur Verwendung der Dokumentierung für die Unterstützung des autorisierten Gebrauchs; und c Zur Anfertigung einer Programmkopie ausschließlich für Sicherungszwecke, vorausgesetzt, dass alle Titel und Warenzeichen, das Copyright und alle Hinweise auf eingesc
3 Setzen Sie die mitgelieferte CD-ROM in das CDLaufwerk Ihres Computers ein. 11 Akzeptieren Sie die Lizenzvereinbarung (wählen Sie [Ich stimme zu]), und klicken Sie auf [Installieren]. 4 Doppelklicken Sie aus dem Windows [Start]-Menü auf das Icon [Computer (oder Arbeitsplatz)] > [ITCH CD]. Die Inhalte der CD-ROM werden angezeigt. Wenn Sie nicht zustimmen, wählen Sie [Ich stimme nicht zu]. Wenn [Installieren] geklickt wird, beginnt die Installation.
8 Wählen Sie den Ordner, in dem ITCH installiert werden soll, und klicken Sie dann auf [Fortfahren]. 9 Klicken Sie auf [Installieren]. Die Installation beginnt. Der Installation-Fertig-Bildschirm erscheint, wenn die Installation fertig gestellt ist. Wenn Unterbrechungen im Sound mit der Standardeinstellung auftreten 1 Starten Sie [Pioneer DDJ ASIOEinstellungsdienstprogramm] und ändern Sie [Kernel Buffers] zu [4].
Bezeichnungen von Anschlüssen und Teilen ! ! ! ! Hinweise zum Betreiben dieses Geräts mit USB-Busstrom ! ! ! Bei Betrieb dieses Geräts mit USB-Busstrom führen Sie Strom zum angeschlossenen Computer über die Netzversorgung zu. Betreiben Sie den Computer nicht über seinen Akku. In Fällen wie den unten beschriebenen kann die Stromversorgung unzureichend sein, und dieses Gerät arbeitet möglicherweise nicht mit USB-Busstrom. — Wenn die USB-Stromversorgungskapazität des Computers unzureichend ist.
4 AUX IN-Buchse Bezeichnungen und Funktionen der Komponenten Schließen Sie an die Ausgangsbuchse eines externen Geräts (Sampler, portables Audiogerät usw.) an. 5 VOL-Regler Stellt den Audiopegeleingang für die Buchsen [AUX IN] ein. Deck-Sektion 6 Kensington-Diebstahlsicherung USB-Buchse 7 1 Schließen Sie einen Computer an. ! Verbinden Sie dieses Gerät und den Computer direkt mit dem mitgelieferten USB-Kabel. ! Ein USB-Hub kann nicht verwendet werden.
6 VINYL (ILLUMINATION)-Taste Dies schaltet den Modus [VINYL] ein/aus. = Umschalten des Jog-Scheiben-Modus (S.25) 7 AUTO LOOP (GRID SLIDE)-Regler Dies stellt Auto Loops ein. = Automatische Einstellung von Loops (Auto Loop) (S.27) ! Das Beatgrid kann eingestellt werden, indem der Regler [AUTO LOOP (GRID SLIDE)] gedreht wird, während die Taste [SHIFT] gedrückt gehalten wird. 8 TEMPO RANGE-Taste Dies schaltet den Einstellbereich des [TEMPO]-Schiebers ein.
c PARAMETER Regler Mixer/Effekt-Sektion 1 2 3 4 5 6 7 Stellt die Parameter ein, die für die verschiedenen Effekte geboten werden (Zeit, Obertöne usw.). = Verwendung der Effekt-Funktion (S.
Mikrofon-/Extern-Eingang-Steuersektion Verwendung mit abgenommenen Füßen Die beiden Füße dieses Geräts können abgenommen werden. MIC 1 EQ LEVEL OFF LOW HI TALK ON OVER MIC 1 MIN 1 MAX MIN 2 MAX MIN MAX MIN MAX 3 MIC 2 / AUX Entfernen Sie mit einem Kreuzschlitzschraubenzieher die Schrauben von den linken und rechten Füße (je 2 Schrauben).
Bedienung ITCH-Software-Bildschirm Bildschirm, wenn dieses Gerät angeschlossen ist (Windows) 12 3 4 5 6 7 89 s a a b b c d e r q f g h i j p k o n m l ! 1 Aktuelle Zeitanzeige 2 Einfache Anzeige der CPU-Verwendungsrate 3 Anzeige-Umschalttasten für virtuelles Deck Die Positionen des virtuellen Decks und der Wellenform-Anzeige können geändert werden.
! = Ändern der Einstellungen (S.34) a Track-Übersicht Zeigt die Frequenzbereiche des Sounds des Tracks in einer Wellenform an, in Blau für den Höhenbereich, Grün für den Mittenbereich und Rot für den Bassbereich. Der Wiedergabepunkt wird als [b] (Weiß) angezeigt. Der provisorische Cue-Punkt wird als [a] (Weiß) angezeigt, und die Hot Cue-Punkte werden als [a] in einer anderen Farbe angezeigt. ! Klicken Sie, um die Wiedergabeposition zu dieser Position zu bewegen.
Crate-Liste 2 Track Zeigt die Tracks an, die in dem bei Crate-Liste-Feld gewählten Eintrag enthalten sind. 1 2 3 Farblabel 3 4 5 6 Farben können gesetzt werden, um zwischen den Tracks zu unterscheiden. 4 Status-Icon Der Status der Tracks wird durch Icons angezeigt. Icon Keine 1 All... Alle in die Decks importierten oder geladenen Tracks werden angezeigt. Wenn nicht importierte Tracks in ein Deck geladen werden, werden sie zu [All...] hinzugefügt. 2 Library Zeigt die iTunes-Bibliothek an.
1 Verwenden Sie diese, um den im entsprechenden Sample-Slot geladenen Track abzuspielen. 2 Verwenden Sie diese, um den Wiedergabemodus umzuschalten. 3 Dies zeigt die Beat-Position an. 4 Wenn dies geklickt wird, kehrt der Track zum Anfang zurück, wenn das Ende erreicht ist. 5 Verwenden Sie dies zum Wählen der angezeigten Elemente. 6 Der Ausgabekanal für die gesamten Sample-Slots kann eingestellt werden. — [L]: Stellt den Ausgabekanal auf Kanal [A]. — [M]: Der Sample-Sound wird vom Kanal [MASTER] ausgegeben.
2 Wählen Sie den gewünschten Ordner mit der Computermaus. Klicken Sie mit der Computermaus auf den Ordner, der den Track enthält, den Sie zur Bibliothe im Feld [Files] hinzufügen wollen. 3 Bringen Sie den gewählten Ordner mit Ziehen und Ablegen mit der Computermaus zu dem Crate-Liste-Feld.
Bewegen des Cursors zwischen den Feldern Bearbeiten von Crate-Namen Drücken Sie die Taste [AREA MOVE (REC)]. Doppelklicken Sie auf den Namen des Crate. Wenn die Taste [AREA MOVE (REC)] an diesem Gerät gedrückt wird, bewegt sich der Cursor von Feld zu Feld. ! Der Cursor kann auch zwischen Feldern bewegt werden, indem die [Tab]-Taste des Computers gedrückt wird. Sie können jetzt diesen Crate umbenennen. Bewegen des Cursors nach oben und unten Drehen Sie den Drehregler.
2 Bringen Sie den Track mit Ziehen und Ablegen zu der gewünschten Position. Die Track-Reihenfolge ändert sich. ! Die Reihenfolge der Tracks in der Track-Liste wird durch die in der Spalte “#” angezeigten Zahlen angezeigt. Löschen von Tracks 1 Drehen Sie den Drehregler. Wählen Sie den zu löschen gewünschten Track. 2 Auf der Computer-Tastatur drücken Sie die [Delete]Taste, während Sie die [Ctrl]-Taste des Computers gedrückt halten.
Suche mit Verwendung des [NEEDLE SEARCH (ALPHABET SEARCH)]-Pad (“Alphabet-Suche”) Alphabetsuche erlaubt es Ihnen, schnell alphanumerisch Ihre Tracks mit dem [NEEDLE SEARCH (ALPHABET SEARCH)]-Pad zu sortieren. ! Sortieren nach Alphabetsuche wird auf Ihre Bibliothek oder den aktuell gewählten Crate angewendet.
zu markieren oder die Markierung manuell aufzuheben. Dazu wählen Sie den Track (oder die Tracks) und klicken Sie auf [MARK PLAYED] oder [MARK UNPLAYED]. Tracks, die abgespielt wurden, werden in Grün in der Bibliothek angezeigt. Wenn [CLEAR] angeklickt wird, wird die Liste der kürzlich abgespielten Tracks gelöscht und die Farbe der Bibliothek auf die vorherige zurückgesetzt. Über Sessions “Session” bezieht sich auf eine Einheit der Wiedergabe.
Sofortige Doppel Während der Wiedergabe auf einem der Decks kann der in dem Deck eingelegte Track in das andere Deck geladen und von der gleichen Position aus abgespielt werden. (Sofortige Doppel) Das obige Beispiel beschreibt die Bedienung für die Wiedergabe das Tracks von Deck (A) auf Deck (B) ebenso. 1 Laden Sie einen Track im Deck (A) und spielen ihn ab. 2 Während des Drückens der Taste [SHIFT] auf Deck (B) drücken Sie die Taste [LOAD (INST. DOUBLES)] an Deck (B).
Pitch bend Während der Wiedergabe wirbeln Sie die Außensektion der Jog-Scheibe. Die Wiedergabegeschwindigkeit nimmt zu beim Wirbeln im Uhrzeigersinn und nimmt ab beim Wirbeln gegen den Uhrzeigersinn. Wenn das Wirbeln stoppt, schaltet die Wiedergabe auf normale Geschwindigkeit zurück. ! Wenn der Jog-Modus auf den Normal-Modus gestellt ist, ist der gleiche Vorgang durch Wirbeln der Oberseite der Jog-Scheibe möglich.
Abbrechen der Loop-Wiedergabe (Loop Exit) 1 Drücken Sie die Taste [LOOP SELECT (GRID LOCK)], um die Loop Bank Nummer zu wählen, bei der der Loop gespeichert werden soll. Während der Loop-Wiedergabe drücken Sie die Taste [RELOOP/EXIT (GRID CLEAR)]. Bei jedem Drücken der Taste wird die Loop Bank Nummer umgeschaltet. ! Wenn kein Loop für den aktuell geladenen Track gesetzt wurde, wird Bank Nummer 1 zugewiesen. Die Wiedergabe wird nach dem Loop Out Point fortgesetzt, ohne zum Loop In Point zurückzukehren.
Spielen von Hot Cues ! Wenn die Taste [REC MODE] blinkt, wird der Hot-CueAufnahmemodus gesetzt. In diesem Fall drücken Sie die Taste [REC MODE], um auf den Hot-Cue-Wiedergabemodus umzuschalten. Die Taste [REC MODE] ist ausgeschaltet, wenn der Hot-CueSpielmodus eingestellt ist. Drücken Sie eine der Hot Cue Tasten ([HOT CUE (DELETE) 1] – [HOT CUE (DELETE) 5]), bei denen ein Hot Cue gesetzt ist. Die Wiedergabe beginnt sofort von dem in der Schaltfläche gespeicherten Punkt.
Synchronisieren von Track Beats (Beat Sync) Schieben des gesamten Beatgrid nach links und rechts Das Tempo (BPM) und das Beatgrid von Tracks auf mehrfachen Decks können automatisch synchronisiert werden. ! Bei Verwendung der Beat-Sync-Funktion bedienen Sie die Schieber [TEMPO] vorher, um sie so einzustellen, dass die BPMs der Tracks der anderen beiden Decks nahe aneinander sind.
Verriegeln von Beatgrids Einstellen anderer Punkte Dies schützt das gesamte Beatgrid, so dass es nicht in Einheiten einzelner Tracks bearbeitet werden kann. 1 Klicken Sie auf Drücken Sie die Taste [LOOP SELECT (GRID LOCK)], während Sie die Taste [SHIFT] drücken. 2 Aus dem Pulldown-Menü wählen Sie das anzuzeigende oder einzustellende Element. Verwendung von Sample-Playern Verwendung der Mixer-Funktionen . Diese Funktion wird nicht am DDJ-S1 sondern am Computer bedient.
2 Drücken Sie die Kopfhörer-Taste [CUE] für den Kanal, den Sie mithören wollen. Die Kopfhörer-Taste [CUE] leuchtet, und der Sound wird zum KopfhörerKanal [CUE] ausgegeben. ! Wenn Sie den Sound beider Kanäle gleichzeitig mithören wollen, drücken Sie auf beide Kopfhörer-Tasten [CUE] gleichzeitig. 3 Klicken Sie die Taste [CUE] für das Mikrofon oder das externe Gerät, das Sie mithören wollen. Die Taste [CUE] wird hervorgehoben, und der Sound wird zum Kopfhörer-Kanal [CUE] ausgegeben.
Verwendung eines externen Geräts 1 Stellen Sie den [MIC2/AUX]-Wahlschalter auf [AUX]. 1 Stellen Sie den [MIC/AUX THRU]-Wahlschalter auf [ON]. 2 Geben Sie Audiosignale zum Mikrofon ein oder gebe Sie Audiosignale vom externen Gerät aus. ! 2 Drehen Sie den Regler [LEVEL] in der Sektion Mikrofon/AUX im Uhrzeigersinn. Stellt den Pegel des Ausgabesounds ein.
DELAY Eine Verzögerung ist, wenn ein Teil des Audiosignals an einer späteren Stelle wiederholt wird. Durch Steigern des Pegels von [FX MIX] wird der Verzögerungspegel in den Originalpegel gemischt, bis Sie 100 % Verzögerung mit dem Originalsignal gemischt haben. PARAMETER Regler Verwenden Sie diese, um eine Zeitverzögerung von 1/16 – 8/1 im Hinblick auf die Zeit eines Beats von BPM einzustellen. LEVEL/DEPTH Regler Stellt die Balance zwischen Originalsound und Effektsound ein.
Ändern der Einstellungen Die Umgebungseinstellungen von ITCH können entsprechend den Verwendungsbedingungen Ihrer Hardware geändert werden. 1 Auf dem Computerbildschirm klicken Sie auf [SETUP]. ! ! Das Setup-Menü von ITCH wird geöffnet. 2 Klicken Sie auf das Register für den einzustellen gewünschten Punkt. ! Die Einzelheiten der Einstellpunkte werden angezeigt. ON SONG LOAD ! ! Einzelheiten über die verschiedenen Register siehe einzelne Erklärungen weiter unten.
include Subcrate tracks Tracks innerhalb von Subcrates werden innerhalb des Eltern-Crates angezeigt. Font SIZE Plugins SP-6 SAMPLE PLAYER ! Verwenden Sie dies zum Ändern der Schriftgröße der Bibliothek. ALBUM SIZE Verwenden Sie dies zum Ändern des Album-Covers der Bibliothek. PLAYLISTS ! DISPLAY ! MAXIMUM SCREEN UPDATES(PER SECOND) Enable Serato Playlists Plugin [Serato Playlist] erscheint in den [Export]-Optionen im Feld [History].
Zusätzliche Informationen Störungssuche ! ! Bedienungsfehler werden oft irrtümlich für Störungen oder Ausfälle gehalten. Wenn Sie den Eindruck haben, dass diese Komponente nicht ordnungsgemäß funktioniert, überprüfen Sie bitte die folgenden Punkte. Manchmal wird eine Störung auch durch ein externes Gerät verursacht. Überprüfen Sie die anderen verwendeten Komponenten und elektrischen Geräte.
Problem Prüfen Abhilfe Der spielende Sound wird unterbrochen. Sind das mitgelieferte Netzteil und das mitgelieferte USB-Kabel richtig angeschlossen? Der Sound wird unterbrochen, wenn das mitgelieferte Netzteil oder das mitgelieferte USB-Kabel während der Wiedergabe von diesem Gerät abgetrennt wird. Befestigen Sie das Netzkabel des mitgelieferten Netzteils und das mitgelieferte USB-Kabel, indem Sie sie an dem Kabelhaken dieses Geräts anhaken.
Filterkorruptionsmeldungen Ein Fehlercode wird auf dem Bildschirm angezeigt, wenn dieses Gerät nicht richtig arbeiten kann. Prüfen Sie den Fehler in der Tabelle unten und treffen Sie die erforderlichen Abhilfemaßnahmen. Fehlercode Beschreibung des Fehlers Ursache und Abhilfe Corrupt file : This MP3 contains invalid frames Diese Datei enthält Frames, die nicht dem formellen MP3-Standard entsprechen. Normale Wiedergabe kann nicht garantiert werden. Wir empfehlen, dass Sie die Datei neu erstellen.
Verwendung als Controller für andere DJ-Software Technische Daten Der DDJ-S1 gibt auch die Betriebsdaten für die Tasten und Regler im MIDI-Format aus. Wenn Sie einen Computer mit einer eingebauten MIDI-kompatiblen DJ-Software über ein USB-Kabel anschließen, können Sie die DJ-Software auf diesem Gerät bedienen. Der Ton von auf dem Computer abgespielten Musikdateien kann ebenfalls vom DDJ-S1 ausgegeben werden.
© 2011 PIONEER CORPORATION. All rights reserved. © 2011 PIONEER CORPORATION. Tous droits de reproduction et de traduction réservés. PIONEER CORPORATION 1-1, Shin-ogura, Saiwai-ku, Kawasaki-shi, Kanagawa 212-0031, Japan Корпорация Пайонир 1-1, Син-Огура, Сайвай-ку, г. Кавасаки, префектура Канагава, 212-0031, Япония Импортер: ООО "ПИОНЕР РУС" 125040, Россия, г. Москва, ул. Правды, д.26 Тел.: +7(495) 956-89-01 PIONEER EUROPE NV Haven 1087, Keetberglaan 1, B-9120 Melsele, Belgium TEL: 03/570.05.