
Installation Guide

Veranda Prefinished Reversible Vinyl Planking/Wainscot - is an innovative product made from
high-strength PVC composit e. This product will no t warp, corrode or rot and will not develop
mold or mildew build up. Since this produc t is prefinished in white, it does not require any
painting. However, if you would like to have it in a different color, you may also paint it.
For painting, wipe thoroughly with water or an appropriate cleaner such as ProClean Profes-
sional Prep Wash Concentrated Cleaner to clean any dust or residue from the surface. Allow it
to dry completely before applying primer. Then apply two coats of enamel paint such as Behr
Premium Plus Interior/Exterior Hi-Gloss Enamel or Glidden’s Evermore™ Interior & Exterior
Latex Enamel High-Gloss. Please use the manufacturer’s dry times between coats.
Prerequisites – The tools needed for installation are: a fine
tooth saw, 1” finishing nails, hammer, nail set, ruler, level,
carpenter’s combination square and panel adhesive such
as
Liquid Nails.
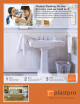
Pre-finished Reversible Planking – Available in two profiles. Perfect for in-
terior and exterior use, such as Sunroom, Kitchen, Bedroom, Garage and
Basement. Completely water resistant.
General – For easy installation, use Liquid Nails or a similar quality panel adhesive. For better
holding strength, use nails. Angle all nails and drive nails within ¼” of the surface with hammer.
Then tap the board into place with a hammer and a wood block to protect the planking. For a
better
square fit, slightly angle the tongue of the planking to the groove. Due to mild expansion
and contraction, do not press them against each other too tightly.
INSTALLATION
Base Trim – Measure the correct length and then cut for an accurate fit
on the wall. Saw into the surface for a cleaner edge. Apply Liquid Nails
or a similar panel adhesive in a zigzag pattern before installing. Apply
the panel to the wall, maki ng sure the base trim piece has the pre-
grooved
end up. Check to see if trim pieces are correctly aligned and
level. For better holding strength, u se nails (see Ge neral). Fill in any
gaps with caulk or wood putty
Planking/Wainscot – Insert each piece into the groove of the base trim.
Apply Liquid Nails or a similar panel adhesive in a zigzag pattern be-
fore installing. For better holding strength, use nails (see General). Each
piece is tongued and grooved for a better fit and simple application.
Begin
at an inside corner and work left to right if you are right-handed,
and right to left if you are left-handed. Keep the groove edge toward the
starting corner, and the tongue edges toward your work direction. Nail-
ing top, bottom, and every 16" to 32" will insure adhesive contact to the
boards. Allow space between planking for expansion and contraction.
Measure and fit the next boards carefully. The last board may have to
be trimmed to fit into a corner.
Chair Rail – To complete the job, make sure all planks have been applied
to the base trim correctly and check to see th at the product is level
against the wall. Then apply the chair rail on top of the planks after
measuring for the correct length. The chair rail is pre-grooved at the bot-
tom
fitting over the planks. For additional strength, also use nails (see
General). Fill in any gaps with caulk or wood putty.
Maintenance – Regular cleaning of your planking with a damp cloth will leave it looking just
like
new. If the product has been painted, make sure to follow the paint manufacturer’s in-
structions for maintaining the finish.
Entablado de Vinyl Rever sible, Preterminado - Se hace de compuesto de
alta resistencia del PVC. Evita la deformación, corrosión, descomposición y acumulación del
de moho. Puesto que este producto es preterm inado en blanco, no se necesita pintarlo.
Sin embargo, si usted quisiera tenerlo en cualquier color, puede pintarlo. Para pintarlo limpie a
fondo
con agua ó con un limpiador apropiado tal como ProClean Professional Prep Wash para
limpiar cualquier polvo ó residuo de la superficie. Permita que se seque totalmente antes de
aplicar la pintura. Entonces aplique dos capas de esmalte, tal como Behr Premium Plus
Interior/Exterior o Glidden’s Evermore Interior + Exterior. Use el tiempo de secado recomendado
por el fabricante entre cada capa.
Requisitos – Las herramientas que usted necesita para la instalación son: una si erra
fina, clavos de una pulgada, un martillo, un martill o, una regla, un nivel, u na escuadra de
carpintero
y un pegamento tal como clavos líquidos (Liquid Nails).
General – Para una facil instalación us e clavos líquidos (Liquid Nails) ó un producto similar.
PAra mejor sostenimiento use clavos regular. Conduzca los clavos dentro de ¼ de pulgada de
la superficie, con el mart i l l o . Golpee ligeramente con el martillo como medida de pr o f e c c i ó n.
Para un ajuste mejor fije levemente la lenqüeta. Debido a la exte nsión y a la contracción
no
presione con demasiada fuerza.
INSTALACIÓN
Ajuste de la Base – Mida la longitud correcta y corte con sequridad en la pared. Corte con la
sierra para un borde más limpio. Aplique los clavos líquidos (Liquid Nails) o el pegamento ante
de instalarse. Aplique el panel a la pared, cerciorándose que el pedazo bajo del ajuste tenga el
extremo del presuro para arriba. Para aplicar la fuerza adicional martille sobre el clavo. Llene
cualquier
boquete con la masilla de madera. Compruebe que los pedazos del ajuste estén alin-
eados correctamente.
Entablado de Vinyl – Insertar cada pieza dentro del ahusté de la base. Aplicar clavos líquidos
(Liquid Nails) ó pegamento similar informa de zigzag antes de la instalción. Para mejor ajuste
usé clavos de ¼”. Cada pieza es encajada pa ra un mejor asiento en apli cación simple.
Comience en la parte de adentro de la esquina y trabaje de izquirda a derecha si usted es dere-
cho
y de derecha a izquirda si usted es zurdo. Mantenga el filo de la ranura hacia la esquina de
comienzo y el filo de la lengüeta hacia la dirección del trabajo. Clavar arriba, abajo y cada 16”
a 32” para asegurar el contacto adhesivo a los entablados para expansión y contracción. Mida
y fije la próxima entablado cuidadosamente. La última entablado puede ser ajustada para que
quepa dentro de una esquina.
Baranda de Silla – Terminar el traba j o , cerciórese de todos los tablones haber sido aplicado
al ajuste bajo correctamente. Entonces aplique el carril de la silla en cima de los tablones
después
de medir para la longitud correcta. El carril de la silla pre-se acanala en la guarnición
inferior sobre los tablones. Para la fuerza adicion al, tambiénmartille en clavo. Ll ene adentro
cualquier boquete de calafatean o la masilla de madera. Compruebe para ver si los pedazos
del ajuste se alinean correctamente.
Mantenimiento – limpiando su tablaje con las hojas húmedas de un paño que parecía new.
If
el producto se ha pintado, se cerciora degeneralmente seguir las instrucciones de la fabri-
cación para elmantenimiento del final
INSTALLATION INSTRUCTIONS INSTUCCIONES DE INSTALACIÓN
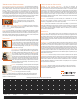
Wide
Bead
Narrow
Bead
2
Use this grid to plot out the lineal feet of your project area...
Package Coverage Package Coverage Your Project Divide coverate into wall
Thickness Size Description Square Feet Lineal Inches (wall measurement in inches) measuremnet=packages needed
3
1