
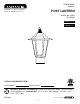
Installation Guide

4
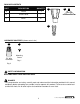
Before beginning assembly of product, make sure all parts are present. Compare parts with package
contents list and hardware contents list. If any part is missing or damaged, do not attempt to
assemble the product.
Estimated Assembly Time: 25 minutes
Tools Required for Assembly (not included): Flathead Screwdriver, Phillips Screwdriver, Wire
Strippers, Pliers, Wire Cutters, Safety Glasses, Stepladder, Electrical Tape, Silicone Weather Sealant
Helpful Tools (not included): A/C Tester Light, Do-It-Yourself Wiring Handbook, Soft Cloth
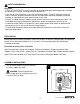
ON
OFF
ON
OFF
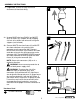
Turn off circuit breakers and wall switch to
the fixture supply line leads.
DANGER: Failure to disconnect
power supply prior to installation may result
in serious injury or death.
1
1.
PREPARATION
CAUTION
• TURN OFF ELECTRICITY at main fuse box (or circuit breaker box) before beginning installation
by removing the fuse (or switching the circuit breaker off).
• If you are not sure the lighting system has a grounding means, DO NOT attempt to install this
fixture. Contact a qualified, licensed electrician for information regarding the proper grounding
methods as required by the local electrical code in your area.
• DO NOT use bulbs having a wattage greater than the maximum value stated on the fixture. The
use of bulbs with higher wattage than specified will increase temperatures and risk of fire.
• If a dimmer control switch is used with this fixture, obtain professional advice to determine the
correct type to use as well as the electrical rating required.
• To avoid water damage to fixture or possible electrical malfunction, install fixture at least 4 ft.
above the ground/floor.
SAFETY INFORMATION
ASSEMBLY INSTRUCTIONS
Lowes.com/
p
ortfolio