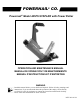
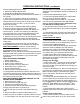
POWERNAIL® CO. Powernail® Model 445FS STAPLER with Power Roller OPERATION AND MAINTENANCE MANUAL MANUAL DE OPERACION Y DE MANTENIMIENTO MANUEL D’INSTRUCTIONS ET D’ENTRETIEN WARNING Read this manual before you use this PowerStapler®. Follow all safety warnings and instructions. If you are uncertain about the operation of the stapler, call us directly at 1-800-323-1653 for assistance or contact the closest Powernail Dealer for help. Please retain this information for future reference. REV 2021.03.
INTRODUCTION The Model 445FS Stapler with Power Roller is a state-of-the-art pneumatic Powerstapler® designed to bring flexibility and speed to tongue & groove flooring installation. The Model 445FS Power Roller is designed for use with 2", 1-3/4" and 1-1/2" (15.5 gauge) Powerstaples® nails and can nail down from 3/4" to 5/8" tongue and groove hardwood flooring. For superior pneumatic flooring tools, look to the company that has been the industry’s leader in quality—POWERNAIL® COMPANY, INC. INDEX Index....
SAFETY INSTRUCTIONS Always use approved SAFETY GLASSES and EAR PROTECTION when operating this stapler. The operator and others in the work area should always wear approved FRONT and SIDE eye protection when operating this stapler. Eye protection will help guard against flying staples and debris, which could cause severe eye injury. EYE AND EAR PROTECTION should be used to prevent hearing damage when there are high noise levels in the work area.
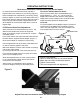
OPERATING INSTRUCTIONS Read these instructions carefully before you use the Stapler. To use the Powernail Flex Power Roller, adjust the stapler FLEX foot to a sample of your flooring (Figure 1). When the stapler foot is adjusted to your flooring, simply place the stapler on the floor and pull stapler back so the 9mm rollers catch the edge of the floor above the tongue. Tap the plunger with the rubber-capped mallet-end to let the stapler drive and set the staple at the correct 45 degree angle.
OPERATING INSTRUCTIONS, continued WARNING: It is not necessary to hit the Stapler hard to activate it. Never hit the Stapler with excessive force or with the metal end of the mallet, this will damage the Stapler. DO NOT USE THE METAL END OF THE MALLET TO STRIKE THE PLUNGER, use the rubber capped end only. Before each use, check all screws to be sure they are tight. Shock and vibration can loosen screws. Do not over tighten any screw. AIR SUPPLY: The air must be clean and dry.
OPERATING INSTRUCTIONS, continued Channel Assembly(#27) to the body. 3. Remove the Rubber Bumper(24). 4. Pull the Driving Blade(#15) with pliers until the Piston(#20) is fully extended outward towards the bottom of the cylinder. 5. Use a 15/16” box wrench (Part #: 09-445-29768) to unscrew the Driving Blade Jam Nut(#22) and remove it. Hold the Piston from turning while unscrewing the Jam Nut by holding the piston hex with a 1-1/8” box wrench (Part #: 09-445-29768). 6.
OPERATING INSTRUCTIONS, continued not to scratch the inside walls of the seal groove or the edge of the Piston with the wire hook. 2. Clean out the seal groove. Place a new U-Cup Lip Seal into the groove. Make sure the lips is not twisted in the groove and the lips face the top of the Stapler See the sketch below. 3. Carefully wipe off the U-Cup Lip Seal surface with a clean rag and lubricate it generously with Pneumatic Light Air Tool Oil lubricant. Return Cylinder U-Cup Lip Seal (#17): 1.
MODELS 445FS POWER ROLLER PARTS LIST ITEM PART NO.
MODELS 445FS POWER ROLLER PARTS LIST ITEM # 60 63 64 65 66 67 68 69 70 71 72 73 74 75 PART NO. 09-4453120 09-50P3077 09-50P3104 09-50P3103 09-44529334 09-50P3073 09-50P3072 09-50P3079 09-50P3078 09-44529875 09-50P3076 09-50P3075 09-50P3097 09-50P3084 09-44529801 09-44529802 DESCRIPTION QTY REQ ROLLER ADAPTER FOOT (445FSX) #10-32 X 1/2" B.H.C.S. ROLLER BEARING (9MM) W/ MOLDED COVER ROLLER AXLE (FOR ROLLER) FLEX FOOT BRACKET FLEX FOOT CAM PLATE FLEX FOOT CAM BELLEVILLE DISC SPRING 1/4 SH DIA X .50" SH.
Pneumatic Seal Part Numbers and Locations #11 #4 #12 #10 #17 #18 #21 10
SCHEMATIC - Model 445FS Power Roller 12 13 8 7 9 11 15 14 10 3 22 16 4 18 2 19 21 17 20 25XL 25L 1 23 24 38 39 26 33 37 34 6 5 41 30 27 40 35 29 31 36 63 32 71 28 60 27 64 72 65 73 66 67 68 74 69 For Step-by-Step Videos and Instructions, Visit our Web Site at: www.Powernail.com 70 75 FLEX Power Roller Conversion Parts.
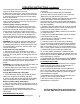
NAILER SAFETY DECALS Warning! • Read and understand the tool labels and manuals before operating. • Operators and others in work area MUST wear EYE and EAR protection. • Use safety glasses with side shields. • NEVER point tool at yourself or others in the work area. • Only connect air to an unloaded tool and always keep tool pointed in a safe direction. • Disconnect air when clearing jams, servicing or when tool is not in use. • Use only clean, dry, regulated air not exceed 110 psi.
PowerStapler 445FS Trouble Shooting Chart PROBLEM 1 POSSIBLE CAUSE SOLUTION 1. Zero of Low air pressure Check air supply for 80 psi minimum to 110 psi maximum 2. Lack of lubrication Manually lubricate through male air inlet fitting 3. Excessive dirt inside Stapler Driving blade does 4. Bent or burred driving blade not retract 5. Seals worn out 6.
POWERSTAPLE DEPTH CHART This chart will assist you in determining the proper length of PowerStaple® to use for various thicknesses of flooring. Approximate vertical penetration of the PowerStaple under the hardwood floor is shown for each application. This is only a guide. Results should be tested in the field before proceeding. 33/32" FLOORING 3/4" FLOORING 5/8" FLOORING 1/2" FLOORING 1-1/8" 1" 3/4" 3/4" UNDERLAYMENT 31/32" UNDERLAYMENT UNDERLAYMENT 2” POWERSTAPLE® 15.
Featured Accessory Products Powerjack® Model 500 Truly a Tinker's TOOL, the POWERJACK Model 500 is designed to push or pull flooring strips into place and hold them tightly. The PowerJack Model 500 self adjusts from 5/16” to 3/4" thickness flooring. It can be used to either push or pull wood flooring strips into place and ratchets tightly for hands free operation. The base of the PowerJack 500 has mounting holes for mid-floor use.
Visit www.Powernail.com • Dealer Locator • Rental Locator • Parts Store • Product Information • Repair Tech Videos • Cool Tools Cleat Calculator • Cleat Depth Chart • Training Schools POWERNAIL® Warranty Registration Register your warranty on the web and you will automatically be entered to win a FREE!!! PowerPalm™. Scan this code with your phone to be taken to our warranty registration form Register at https://www.powernail.com/warranty-registration/ POWERNAIL COMPANY, INC.