
User Manual


Item:
Process:
When:
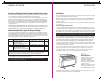
Battery Connections
Clean and tighten all battery connections. Follow battery manufacturer's
instructions for cleaning a battery. Clean all battery terminals with a wire brush
where required and tighten all battery connections.
Monthly
Item:
Process:
When:
Battery Electrolyte
Per battery manufacturer’s instructions, monitor, and maintain proper
levels of distilled water in each battery.
Monthly
Item:
Process:
When:
AC Power Cord and Mounting Hardware Inspection
Visually inspect the AC power cord. Confirm ground blade is present and
all plug blades are in good condition and not bent out of place.
Check all mounting hardware to ensure there is no loose hardware.
Tighten where required.
Monthly
Item:
Process:
When:
ProSport DC Output Wiring
Visually inspect all wiring for cuts and abrasions. Contact ProMariner if
your charger needs to be serviced.
Monthly
20
Maintenance
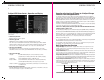
TROUBLESHOOTING
21
Troubleshooting
TROUBLESHOOTING
No Blue AC Power LED or Charge Mode Indicator or Battery Type LED
Check for loss of AC power at the 120 VAC outlet. Confirm GFCI (Ground Fault Circuit
Interrupter) has not tripped. Check with a meter or 120 VAC test light that AC power is present
at the end or your extension cord. Reset AC power if it was not present. Confirm all charger
cables are installed with the correct polarity connections at each battery and that all connections
are clean and tight. Wait 2 minutes while unit performs self test. If AC power is present and
all connections are correct and LEDs do not illuminate, contact ProMariner at 1-800-824-
0524 from 8:30 am to 5pm Eastern Time. If your ProSport is within the warranty period of
2 years from the date of purchase, you can go to www.promariner.com where you will find
our customer care return form and instructions.
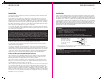
Green System Check OK Indicator is OFF & a Red Battery Bank Trouble Status LED is ON.
Identify the battery bank LED that is lit, remove AC power and check the battery bank indicated i.e 1, 2, 3
(model specific). The LED indicates there is a fault present. Listed below are typical faults and what can be
done to clear the red battery bank trouble status indicator (reapply AC power after making any corrections):
Poor battery connections - Make sure all connections are tight and clean
Blown DC cable fuse - Make sure all fuses are good with a digital ohm meter
or continuity tester and visually inspect the ProSport's DC battery cables to insure they
have not been compromised or shorted in any way.
Reverse polarity - Make sure all wiring connections are color coded and connected
properly and that each bank cable goes to one 12V battery where (+) = red (-) = black.
Battery too low to charge - with a digital voltmeter make sure the battery is over
2.0 volts DC (if not have your battery charged out of the boat and have it load tested
by your local battery dealer to insure optimum performance on the water.
High battery voltage input - Check to make sure one bank lead was not spread across 2 batteries
connected in series for 24 volts DC. If so correct by wiring to the diagrams on pages 11- 18.
Battery(s) not charging, Blue AC Power LED, RED Charging & Battery Type LEDs are ON
Confirm all charger cables are installed with the correct polarity connections at each battery,
and that all connections are clean and tight. Confirm that there are no bank trouble status
LED indicators on. With the charger on, read DC voltage at each battery. If any of the readings
are less than 13 volts DC proceed with the following:
A. Disconnect AC power at the 120 VAC outlet.
B. Go to pages 11-18 of this manual and confirm your ProSport model charger
is connected correctly as illustrated in the installation drawings.
C. Upon completing B above; plug your charger into AC power and observe the LED center.
Charger should be in the charging mode (charge status indicator should be red). If after
completing a full charge cycle, 10-12 hours or more for deeply discharged or completely dead
batteries, the charge mode indicator should be green as well as the blue AC power LED.
Note: If a Digital Volt Meter (DVM) is available to you, instead of waiting to complete a full charge cycle, you can simply use a
DVM and take DC voltage measurements across each 12 volt battery. As long as the voltage continues to increase while the
red charging LED is on, this will serve as a confirmation that the charger is properly connected and is properly charging.