
User manual


108
Add a hard driv e
Follow the steps below to add a hard drive member to a RAID 5 or RAID 6 disk configuration.
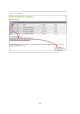
1. Make sure the status of the RAID 5 or RAID 6 configuration is “Ready”.
2. Install a hard drive on the NAS. If you have a hard drive which has already been formatted as
single disk volume on the NAS, you can add this hard drive to the RAID 5 or RAID 6
configuration. You are recommended to use hard disk drives of the same storage capacity for the
RAID configuration.
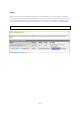
3. Select the RAID 5 or RAID 6 configuration on the “RAID Management” page and click “ADD HARD
DRIVE”.
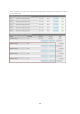
4. Select the new hard drive member. The total drive capacity after adding the drive will be shown.
Click “ADD HARD DRIVE”.
5. All the data on the new hard drive member will be deleted during this process. The data on the
original RAID 5 or RAID 6 configuration will be retained. Click “OK”. The NAS will beep twice.
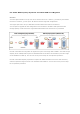
To add hard drives member to a RAID 10 disk volume, repeat the above steps. Note that you need to
add an even number of hard disk drives to a RAID 10 volume. The storage capacity of the RAID 10
volume will increase upon successful configuration.
This process may take a few hours to tens of hours to complete depending on the number and the size
of the hard drive. Please wait patiently for the process to finish. Do NOT turn off the NAS during this
process. You can use a RAID configuration of larger capacity after the process.