
Instructions / Assembly


4
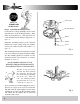
Fig. 1
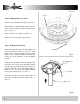
Fig. 2
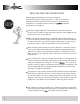
Have you
TURNED OFF
the Electricity?
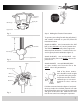
Loosen the two canopy mounting screws on the
downside face of the mounting bracket. Back
them out about half way. This will allow for
easier installation of the ceiling canopy later (see
figure 1).
Install the mounting bracket on the electrical
junction box in the ceiling using two machine
screws, two washers and two lock washers (see
figure 1).
The mounting bracket has slotted holes to enable
it to move sideways for proper alignment. Make
sure the mounting bracket is centered over the
electrical junction box and that it is securely
attached (see figure 1).
NO MOVEMENT SHOULD OCCUR
BETWEEN THE MOUNTING BRACKET
AND THE ELECTRICAL JUNCTION BOX.
Step 1 Attach the mounting bracket
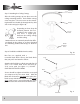
Pull the electric wires in the
junction box down through
the mounting bracket and
then bend them up and back
out of the way. This will
leave the mounting bracket
open and ready to receive the
ceiling fan (see figure 2).
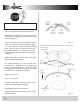
If you are using an extended support rod, (longer
than the one supplied with your fan) remove the
half ball from the small support rod that came
with the fan and put it on the extended support
rod. Make sure to retighten the set screw and
insert the safety screw.
Junction Box
Washer
Washer
Screw
Mounting Bracket