
Instructions / Assembly

2 | P a g e
Each model is a bit different
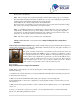
SF20 – This is a simple encased panel fan that flashes underneath the leading edge of your shingles.
This unit includes humidistat and thermostat. Make sure you remove the small plastic bag that has the
small thermostat and humidistat (underneath the fan near the blade)
after installation. Also, clip the small plastic tie that will allow the
thermostat to hang (approximately 2 feet) from the unit (to get an accurate attic temperature reading).
Fan operates above 82 degrees Fahrenheit. (26.7 degrees Celsius).
SF25 – See installation instructions for SF20. However, this fan allows the solar power panel to tilt.
Angle the tilt to maximize the sun exposure by tilting towards a south or west position. Typically,
steep pitched roofs will require higher tilt. This fan is also suitable for houses that face south, so the
fan needs to be on the back of the house, but tilted towards the south.
SF30 – This fan is simply a more powerful version of the SF25 fan.
SGF20 (GABLE MOUNT)– Get updated manual at http://remingtonsolar.com/product-
manuals/
Gable-mount fan installation ONLY. Simply install vertically using appropriate hardware. Mount against an
existing gable vent. Put plywood, cardboard, or flat insulation material on the part of the gable vent that is not
covered by a fan. (This will prevent backflow)
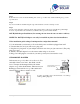
Run power cord either out the front, or back into the attic and out the roof. Drill a 7/8”
hole through the decking but AFTER you remove a shingle. You will want to position
the solar panel directly above the hole. While the solar panel will not protect from
weather, rather it is the shingle that you place back over the hole that will. Be sure to
use plenty of silicone sealant in the hole once the cord comes out. Then screw the
panel mounting bracket onto the roof. Use silicone sealant in the holes. Position
panel in sunny area (preferably south or south west) and run power
Before You Start
http://remingtonsolar.com/product-manuals/
NOTE: When you first unpack your solar attic fan and place it in the sunlight, it may not immediately turn on.
Check the following:
1. Determine if the outside temperature is 82 degrees Fahrenheit. The built-in thermostat will prevent the unit
from starting below 82 degrees.
2. Make sure the thermostat/humidistat (blue plastic piece) wiring is connected snugly. The
thermostat/humidistat is connected by a simple three pronged plug that should be connected when your solar
attic fan arrives.
3. Make sure the unit is getting sun with no clouds. Sometimes the unit will spin slowly or not at all with thick
cloud cover.
4. If it is cool outside and you want to test your fan, you may cup the thermostat in your hand and breathe
heavily on it. That will typically kick on the fan.