
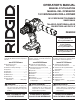
Use and Care Manual


6 - English
OPERATION
INSTALLING BELT HOOK
See Figure 3, page 10.
The belt hook may be installed on either side of the housing.
Align hole in belt hook with hole in tool’s base.
Install screw to secure belt hook in place.
To uninstall, remove screw and then belt hook.
VARIABLE SPEED SWITCH TRIGGER
See Figure 4, page 10.
The variable speed switch trigger delivers higher speed with
increased trigger pressure and lower speed with decreased
trigger pressure.
To turn the drill ON, depress the switch trigger. To turn it
OFF, release the switch trigger and allow the chuck to come
to a complete stop.
NOTE: A whistling or ringing noise coming from the switch
during use is a normal part of the switch function.
NOTE: Running at low speeds under constant usage may
cause the drill to become overheated. If this occurs, cool the
drill by running it without a load and at full speed.
DIRECTION OF ROTATION SELECTOR
(FORWARD/REVERSE/CENTER LOCK)
See Figure 4, page 10.
Set the direction of rotation selector in the OFF (center lock)
position to lock the switch trigger and help prevent accidental
starting when not in use.
Position the direction of rotation selector to the left of the
switch trigger for forward drilling. Position the selector to the
right of the switch trigger to reverse the direction.
NOTE: The drill will not run unless the direction of rotation
selector is pushed fully to the left or right.
NOTICE:
To prevent gear damage, always allow the chuck
to come to a complete stop before changing the
direction of rotation.
WARNING:
Battery tools are always in operating condition.
Lock the switch when not in use or carrying at your
side, when installing or removing the battery pack,
and when installing or removing bits.
INSTALLING/REMOVING BATTERY PACK
See Figure 5, page 10.
Lock the switch trigger.
Insert the battery pack into the product as shown.
Make sure the latches on each side of the battery pack
snap into place and that battery pack is secured in the
product before beginning operation.
Depress the latches to remove the battery pack.
For complete charging instructions, see the operator’s manu-
als for your battery pack and charger.
INSTALLING/REMOVING BITS
See Figures 6 - 7, page 10.
The arrows on the keyless chuck indicate which direction
to rotate the chuck body to tighten or release the drill bit.
Do not use a wrench to tighten or loosen the chuck jaws.
To install bits, lock the switch trigger.
Open or close the chuck jaws until the opening is slightly
larger than the bit size you intend to use.
Raise the front of the drill slightly and insert the drill bit.
WARNING:
Make sure to insert the drill bit straight into the
chuck jaws. Do not insert the drill bit into the chuck
jaws at an angle, then tighten. This could cause
the drill bit to be thrown from the drill, resulting in
possible serious personal injury or damage to the
chuck.
Rotate the chuck sleeve to close and tighten the chuck
jaws.
WARNING:
Do not hold the chuck sleeve with one hand and
use the power of the drill to tighten the chuck
jaws on the drill bit. The chuck sleeve could slip
in your hand, or your hand could slip and come in
contact with the rotating drill bit. This could cause
an accident resulting in serious personal injury.
To remove bits, lock the switch trigger and open the
chuck jaws.
The bit provided with the drill can be placed in the storage
area, located on the rear base of the drill.
LED LIGHT
See Figure 8, page 10.
The LED light, located on the front of the tool base, illumi-
nates when either the switch trigger or grip light switch is
depressed.
If the drill is not in use, the time-out feature will cause the
light to start fading and then shut off.
The LED light illuminates only when there is a charged bat-
tery pack in the tool.
HI-LO SPEED SWITCH
See Figure 9, page 11.
Select low (1) speed for applications requiring higher
power and torque.
Select high (2) speed for fast drilling or driving applica-
tions.