
Use and Care Manual

6 - English
In general, coarse grit will remove the most material and finer
grit will produce the best finish in all sanding operations. The
condition of the surface to be sanded will determine which
grit will do the job. If the surface is rough, start with a coarse
grit and sand until the surface is uniform. Medium grit may
then be used to remove scratches left by the coarser grit and
finer grit used for finishing of the surface. Always continue
sanding with each grit until surface is uniform.
NOTE: DO NOT use sander without sandpaper. Doing so
will damage the sanding pad.
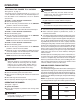
WARNING:
Always remove the battery pack when attaching
or changing sanding sheets. Failure to do so
could cause accidental starting, leading to serious
personal injury.
INSTALLING STANDARD SANDPAPER
See Figure 3, page 10.
Remove the battery pack.
Inspect sandpaper before installing; do not use if dam-
aged or defective.
If replacing sandpaper, remove old sandpaper. To remove
paper, release the rear paper clamp by lifting up on the
lever (marked 2) and allowing the rear clamp to open.
Push and hold the button (marked 1) on the front of the
sander to open the front paper clamp and remove the
sandpaper.
Push and hold button (marked 1) on the front of the sander
to open the front paper clamp and insert the sandpaper
into the clamp.
Wrap sandpaper around the cushion. Lift the lever on the
side of the sander to open the rear paper clamp (marked 2)
and insert the loose end of the sandpaper under the paper
clamp. Fit the sandpaper against the cushion tightly.
Push down on the lever to close the paper clamp and
lock into place.
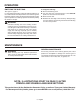
PAPER PUNCH
See Figure 3, page 10.
A paper punch template is supplied with the sander for align-
ing and punching holes in sandpaper. The punched holes
must align with the holes in the sanding pad.
An outline of the sander is printed onto the paper punch to
help you correctly position the sandpaper before punching.
Install sandpaper on the sander.
Align the sanding pad over the paper punch.
Push down on sander.
OPERATION
INSTALLING PRESSURE SENSITIVE ADHESIVE
(PSA) SANDPAPER
See Figure 4, page 11.
Inspect sandpaper before installing. DO NOT use damaged
or defective sandpaper.
Remove the battery pack.
If replacing sandpaper, remove old sandpaper by peeling
it off the sanding pad. If removing standard sandpaper,
see Installing Standard Sandpaper.
Carefully peel adhesive backing from new 1/4 sheet
sandpaper.
Position sandpaper, making sure front edge of sandpaper
is aligned with front edge of the sanding pad, then care-
fully press sticky side of sandpaper on pad.
NOTE: Sandpaper must be aligned with the front edge
of the pad for proper functioning of the flush sanding
feature.
REMOVING PSA SANDPAPER BEFORE
STORAGE
Do not store the sander with the sandpaper installed. Heat
generated from sanding causes the pressure sensitive ad-
hesive to flow and form a tight bond between the backing
pad and sandpaper.
Removing the sandpaper soon after you have finished a
sanding operation avoids letting the adhesive set up. If the
sandpaper is left on the backing pad for an extended period
of time after use, the adhesive will set up and cause the
sandpaper to become difficult to remove.
PSA sandpaper may also tear when removing. When this
situation occurs, it becomes difficult to clean the backing
pad for the next sheet of sandpaper.
NOTE: If you forget to remove the sandpaper after a sand-
ing operation, sand for a few minutes to soften the adhesive
backing before attempting to remove sandpaper.
INSTALLING THE DUST BAG
See Figure 5, page 11.
Align grooves on dust bag with notches on sander dust
exhaust.
Slide dust bag onto dust exhaust.
Turn clockwise until the bag is in the LOCK position.