
Instructions / Assembly
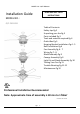


MODEL NO.: QCF-DB52061
Page
6
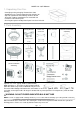
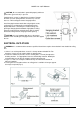
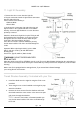
6. Bulbs Installation.
Installing bulbs in the Motor Housing, locate the four
access plates on the motor housing top. Remove two
screws per access plate to reach each socket, use
phillip screwdriver.
Do not remove the Center Screw on each Access Plate
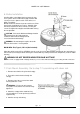
Install each candelabra base Type C, 7W bulbs (Not
Included). Reattach the Access Plates ensuring the
screws are tightened enough to avoid vibrations during
the fan operation.
CAUTION - Refer to the Maximum Wattage Caution
Label located near the lamp holder for
recommended maximum wattage-do not
exceed recommended wattage.
WARNING - Do not attempt to replace the bulbs
while the line breaker is in ON position.
BULB INFO: E12, Type C, 7W x 4 (Not Included)
Alternative bulbs usage: CFL or LED Bulbs may be used. Ensure the Max. Wattage indicated on the socket labels is
not exceeded, and verify the bulbs do not get in contact with any metal part of the fan components (shade or motor
housing)
WARNING: DO NOT EXCEED INDICATED BULB WATTAGE
NOTE: Your fan is equipped with a wattage limiter, if you exceed the indicated wattage your ceiling fan will not function.
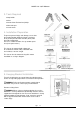
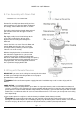
7. Flush Mount Assembly. Go to step 7 if assembling with down rod.
1. Remove round rubber ring from the Canopy
2. Thread the electrical wires through the
canopy.
3. Remove every other screw on the motor
housing total of 3 screws.
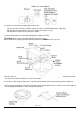
WARNING – Ensure you only remove
every other screw, others must remain firmly
tightened.
4. Attach the canopy to the motor housing
securely with the 3 screws previously removed.
Tighten firmly.
5. Continue to step 8 for wiring.