
Instructions for Use


- 06 -
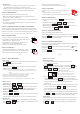
- 04 -- 03 -
1. Turn on radio
Press button to turn on radio, radio enter standby mode, press
butotn again to turn off radio.
2. Band
Repeatedly press button to switch from FM, AM, Shortwave,
Weather band or standby mode.
Chapter 11 RADIO OPERATION
7. Weather Alert Function
Manual Setting Mode
(1) To Enable All 7 NOAA Weather Stations for Receving Alert,
press button once.
(2) When the NOAA Weather Alert function is enabled, the and
icon will show on the LCD display, the red alert light will flash.
(3) Press or button to set timer for weather alert,
include 2H, 4H, 6H, 8H, 12H, 16H, 20H, 24H or OFF.
(4) Press button or wait 5 seconds to confirm the setting.
in this case, even you press button to turn off radio, the
Weather Alert function will also keep effective, but when the Weather
Alert timer which you set ends up, the radio will shut down
automatically .
(5) When a weather alert is received, there will be an audible siren comes
out, the red alert light, the and icon and the backlight
on the LCD display will flash.
(6) After a weather alert is received, press any button, the audible siren
will be turned off, the red alert light and the backlight will be turn off,
the and icon on the LCD will disappear. Radio will switch
to the weather channel which send weather alert automatically.
Standby Mode
Under standby mode, radio can also receive the weather alert, when it
receive weather alert, it will sound an audible siren, the red alert light,
the and icon and the backlight on the LCD display will
flash.
1. Flip up the solar panel by 90 degrees to be table lamp.
2.Press Reading Lamp Button and the lamp will be turn to
Brightness Level 1 (brightest level)
3.Press the button once again the lamp will be turn to
Brightness Level 2 (normal brightness)
4. Then press the button again to turn off the lamp
Chapter 5 READING LAMP
In a emergency, you can turn on the Alert light and Alert
sound.
1. Press SOS Button to turn on SOS alert.
2. Press SOS Button again, the SOS alert will be turned off.
Chapter 7 SOS ALERT
5. AAA Batteries
(1) Open the battery compartment on the back of the unit and insert
3pcs AAA batteries making sure the polarity is correct.
(2) When Li-ion Rechargeable Battery power is low, the power source
will be switched to AAA batteries power mode automatically.
Note: This feature is only for charging the USB devices for emergency use.
Connect your phone charging cable with the USB output port at the right
side of the Radio. If the CR1009Pro has no power, you can rotate the crack
handle for 8-15 minutes . then your phone will get enough power to start up.
Chapter 4 CHARGING PHONE or PORTABLE DIGITAL DEVICE
POWER
VOL+ VOL-
TUNE+ TUNE-
TUNE+
TUNE-
TUNE+ TUNE-
BAND
WX ALAERT
BAND
POWER
Brightness Lebel 2 (normal brightness)
3. Then press the button again to turn off the light
TUNE+
TUNE-
Weather Band: Receives all 7 weather band from NOAA, the U.S. National Weather
Service which broadcasts in all 50 states, Puerto Rico and the U.S. Virgin
Islands.
162.400 /162.425/162.450/162.475/162.50/162.525/162.55MHz
AM Band: Receives all local AM stations from 520KHz to 1710 Khz.
FM band: Receives all local FM stations from 87.00Mhz – 108MHz.
SW Band: Receives all Shortwave bands from 2.3MHz- 22Mhz
Standby mode: Device will exit radio mode ,display only shows time on the display.
- 05 -
Chapter 8 TIME SETTING
1. To enter time setting, hold press button for more than 2
seconds.
2. HOUR digit will flash, please or button to adjust
hour setting, press button to confirm.
3. MINUTE digit will flash, please or button to adjust
minute setting, press button to confirm
WX ALAERT
TUNE+ TUNE-
WX ALAERT
WX ALAERT
TUNE+ TUNE-
Chapter 3 POWER SWITCH
There is automatic power switch function in this radio.
1. When Li-ion Rechargeable Battery life is low, it will switch to AAA
batteries power mode automatically.
2.When AAA Battery life is low , it will switch to Li-ion rechargeable battery
power mode.
3. if Li-ion Rechargeable Battery life is low either, then the radio will be
turned off automatically.
3. Volume Control
Repeatedly press or button to adjust the sound volume.
4. Manual Tuning Channel
Repeatedly press or button to tune into the desired
channel. Each press button, FM frequency will tune up by 0.1.
Each press button, FM frequency will tune down by 0.1.
5. Auto Scanning Radio Channel
Hold press or button for more than 2 seconds to start
auto scanning.
Scanning will stop automatically once it receive an available channel.
6. Weather Band
Repeatedly press button to select WB band, then Repeatedly
press or button to choose one of the WB band which is
for your local weather station.
TUNE+
TUNE-
WX ALAERT
WX
WX
POWER
WX
WX
OFF means that the weather alert function will
always keep effective until batteries run out.
Chapter 9 LCD BACKLIGHT SETTING
There are 2 backlight setting: Default / OFF
Default:Backlight will be active for 15 seconds when any button is pressed.
Hold press button to swith to be OFF setting,hold press
button again to switch to Default setting.
VOL+
During the journey, in order to avoid accidentally pressing the buttons, you
can enable the lock button function
Hold press button, radio will lock all of buttons, the icon on
LCD will appear.
Chapter 10 LOCK BUTTON FUNCTION
means that the weather alert timer is 8 hours
VOL+
hold press button again, radio will unlock all of buttons, the
icon on LCD will disappear.
POWER
POWER
1. Press Flashlight Button to turn on flashlight, and the
light will be turn to Brightness Level 1 (brightest level)
2.Press the button once again the light will be turn to
Chapter 6 FLASHLIGHT
WX
WX
WX
WX