Owner’s Manual * 5 1 0 0 0 0 8 5 9 3 - 0 1 * PANTONE 444 BLACK
Information AFRICA EGYPT For the U.K. IMPORTANT: THE WIRES IN THIS MAINS LEAD ARE COLOURED IN ACCORDANCE WITH THE FOLLOWING CODE. BLUE: NEUTRAL BROWN: LIVE As the colours of the wires in the mains lead of this apparatus may not correspond with the coloured markings identifying the terminals in your plug, proceed as follows: The wire which is coloured BLUE must be connected to the terminal which is marked with the letter N or coloured BLACK.
F-110_r_e.book 3 ページ 2009年6月30日 火曜日 午後12時6分 Look what you can do with the Play the piano page 24 Play various sounds The F-110 contains more than three hundred sounds for you to enjoy playing. page 24 Adjust the keyboard touch You can adjust the keyboard touch sensitivity to suit your playing strength. Change the tuning of the keyboard page 26 You can use the “Transpose” function to transpose the pitch of the keyboard.
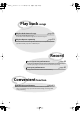
F-110_r_e.book 4 ページ 2009年6月30日 火曜日 午後12時6分 Play back songs Play back the internal songs page 32 The F-110 contains 65 piano songs. For the titles of the internal songs, refer to “Internal Song List.” Play back parts separately page 33 You can choose to have the right hand, left hand, or accompaniment part be played back while you practice a different part. Record Record your own performances page 36 It’s easy to record what you play.
F-110_r_e.book 5 ページ 2009年6月30日 火曜日 午後12時6分 Introduction Thank you, and congratulations on your choice of the F-110. To ensure that you obtain the maximum enjoyment and take full advantage of the F-110’s functionality, please read this owner’s manual carefully. About the Manual You should first read the “Before You Play” (p. 19) section of the owner’s manual (this document). This explains how to connect the AC adaptor and turn on the power.
F-110_r_e.book 6 ページ 2009年6月30日 火曜日 午後12時6分 Introduction Main Features Piano sounds with rich resonance and wide expressive range This instrument features a piano sound generator that utilizes stereo sampling, so it is capable of faithfully recreating the sound of a high-quality concert grand piano, realistically reproducing even the finest details, including the sound of the hammers striking the strings.
F-110_r_e.book 7 ページ 2009年6月30日 火曜日 午後12時6分 Introduction General MIDI The General MIDI is a set of recommendations which seeks to provide a way to go beyond the limitations of proprietary designs, and standardize the MIDI capabilities of sound generating devices. Sound generating devices and music files that meets the General MIDI standard bears the General MIDI logo.
F-110_r_e.book 8 ページ 2009年6月30日 火曜日 午後12時6分 Contents Introduction .................................................................................... 5 About the Manual.......................................................................................................................................................................................5 Conventions in this Manual ................................................................................................................................
F-110_r_e.book 9 ページ 2009年6月30日 火曜日 午後12時6分 Recording ......................................................................................36 Recording Your Keyboard Performance.......................................................................................................................................... 36 Recording Your Performance Separately for Each Hand...........................................................................................................
F-110_r_e.book 10 ページ 2009年6月30日 火曜日 午後12時6分 Connecting to Other Devices .......................................................62 Connecting to Audio Equipment....................................................................................................................................................... 62 Connecting External Powered Speakers to the F-110...............................................................................................
F-110_r_e.book 11 ページ 2009年6月30日 火曜日 午後12時6分 USING THE UNIT SAFELY About WARNING and CAUTION Notices Used for instructions intended to alert the user to the risk of death or severe injury should the unit be used improperly. Used for instructions intended to alert the user to the risk of injury or material damage should the unit be used improperly. * Material damage refers to damage or other adverse effects caused with respect to the home and all its furnishings, as well to domestic animals or pets.
F-110_r_e.book 12 ページ 2009年6月30日 火曜日 午後12時6分 USING THE UNIT SAFELY Avoid extended use at high volume This unit, either alone or in combination with an amplifier and headphones or speakers, may be capable of producing sound levels that could cause permanent hearing loss. Do not operate for a long period of time at a high volume level, or at a level that is uncomfortable. If you experience any hearing loss or ringing in the ears, you should immediately stop using the unit, and consult an audiologist. ...
F-110_r_e.book 13 ページ 2009年6月30日 火曜日 午後12時6分 USING THE UNIT SAFELY Do not stand or place heavy objects on this unit Never climb on top of, nor place heavy objects on the unit. Unplug the AC adaptor from the AC outlet before cleaning Before cleaning the unit, turn off the power and unplug the AC adaptor from the outlet (p. 19). ......................................................................................................................
F-110_r_e.book 14 ページ 2009年6月30日 火曜日 午後12時6分 IMPORTANT NOTES Power Supply • Do not connect this unit to same electrical outlet that is being used by an electrical appliance that is controlled by an inverter (such as a refrigerator, washing machine, microwave oven, or air conditioner), or that contains a motor. Depending on the way in which the electrical appliance is used, power supply noise may cause this unit to malfunction or may produce audible noise.
F-110_r_e.book 15 ページ 2009年6月30日 火曜日 午後12時6分 IMPORTANT NOTES • To avoid disturbing your neighbors, try to keep the unit’s volume at reasonable levels. You may prefer to use headphones, so you do not need to be concerned about those around you (especially when it is late at night). • When you need to transport the unit, package it in the box (including padding) that it came in, if possible. Otherwise, you will need to use equivalent packaging materials.
F-110_r_e.book 16 ページ 2009年6月30日 火曜日 午後12時6分 Names of Things and What They Do Front Panel fig.Front-j.eps_88 [Power] switch [–] button Turns the power on/off (p. 21). You can select the preceding song by pressing this button while the song select screen is displayed (p. 32). [Volume] knob If you hold down this button while a song is playing, the song will be rewound (p. 32). Adjusts the overall volume of the F-110 (p. 21). If headphones are connected, this adjusts the headphone volume (p. 22).
F-110_r_e.book 17 ページ 2009年6月30日 火曜日 午後12時6分 Names of Things and What They Do . Disabling the panel buttons By using the Panel Lock function you can disable all of the buttons. This allows you to prevent unintended changes in the settings during a performance. For details, refer to “Disabling the Buttons (Panel Lock)” (p. 61). Rear Panel fig.Rear-j.eps_88 MIDI In/Out connectors DC In jack (DC Inlet) You can connect these to external MIDI devices to transfer performance data (p. 64).
F-110_r_e.book 18 ページ 2009年6月30日 火曜日 午後12時6分 Names of Things and What They Do Bottom Panel (Front Left) Headphone jacks Here you can connect headphones. The F-110 lets you use two sets of headphones simultaneously (p. 22). Headphone hook Whenever you are not using the headphones, you can hang them on the headphone hook (p. 23). 18 fig.Bottom.
F-110_r_e.book 19 ページ 2009年6月30日 火曜日 午後12時6分 Before You Play 3. As shown in the diagram, loop the AC adaptor cord Getting Ready to Play around the cord hook to fasten it in place. fig.ACAdpt02.eps_88 Rear panel Connecting the Pedal Cord Connect the pedal cord to the Pedal connector on the rear panel of F-110. Plug the pedal cable all the way into the Pedal connector. Cord hook The cord of the supplied AC Adaptor fig.PedalCord.
F-110_r_e.book 20 ページ 2009年6月30日 火曜日 午後12時6分 Before You Play Opening and Closing the Lid Closing the Lid 1. Grasp and gently lower the lid with both hands. Always use two hands to open and close the lid. The F-110’s lid will close abruptly after it has been opened only slightly or when it is pushed open. Take care not to allow your fingers to become pinched by the lid. fig.lidclose2.eps_88 Opening the Lid 1. Grasp and push the lid towards the rear of the F-110 with both hands. fig.lidopen1.
F-110_r_e.book 21 ページ 2009年6月30日 火曜日 午後12時6分 Before You Play Turning the Power On/Off Turning the Power Off 1. Turn the [Volume] knob all the way toward the left to minimize the volume. Once the connections have been completed (p. 19), turn on power to your various devices in the order specified. By turning on devices in the wrong order, you risk causing malfunction and/or damage to speakers and other devices. fig.VolumeMin-j.eps_88 Turning the Power On 2. Press the [Power] switch. 1.
F-110_r_e.book 22 ページ 2009年6月30日 火曜日 午後12時6分 Before You Play About the Pedals The pedals perform the following operations. You’ll use them mainly when playing piano. fig.Pedals-e.eps_88 Soft Pedal Sostenuto Pedal Damper Pedal Damper Pedal (right pedal) Use this pedal to sustain the sound. While this pedal is held down, notes will be sustained for an extended time even if you release your fingers from the keyboard. You can switch the function of the sostenuto pedal and the soft pedal.
F-110_r_e.book 23 ページ 2009年6月30日 火曜日 午後12時6分 Before You Play Cautions when Using Headphones • To prevent damage to the cord’s internal conductors, avoid rough handling. When using headphones, mainly try to handle either the plug or the headset. • Your headphones may be damaged if the volume of a device is already turned up when you plug them in. Minimize the volume before you plug in the headphones. • Excessive input will not only damage your hearing, but may also strain the headphones.
F-110_r_e.book 24 ページ 2009年6月30日 火曜日 午後12時6分 Performing Performing with a Variety of Sounds The F-110 features over 300 different internal sounds, allowing you to enjoy performing with sounds suitable for many different types of music. These onboard sounds are called “Tones.” The Tones are divided into 4 different groups, each of which is assigned to a different Tone button. The Tone “Grand Piano 1” is selected when the instrument’s power is turned on. fig.SoundSelect.
F-110_r_e.book 25 ページ 2009年6月30日 火曜日 午後12時6分 Performing Message Medium Heavy Description This sets the standard keyboard touch. You can play with the most natural touch. This is the closest to the touch of an acoustic piano. Changing the Depth of the Reverb Effect You can select from ten levels of depth for the reverb effect. You have to finger the keyboard more forcefully than “medium” in order to play fortissimo (ff), so the keyboard touch feels heavier.
F-110_r_e.book 26 ページ 2009年6月30日 火曜日 午後12時6分 Performing Changing the Key of the Keyboard (Transpose) The “Transpose” function lets you play a song at a different key. If you’re accompanying a singer, you can use the Transpose function to shift the pitch to a key that’s comfortable for the singer while you continue playing in the same familiar key (fingering). You can also use this function to transpose the pitch of your playing without changing your fingering on the keyboard.
F-110_r_e.book 27 ページ 2009年6月30日 火曜日 午後12時6分 Performing Performing with Two Layered Tones (Dual Play) Turning Off Dual Play 1. Press any one of the Tone buttons. Now you’ll hear only the tone of the button you pressed. You can play two different sounds from a single key at the same time. This method of performance is called “Dual Play.” As an example, let’s try layering piano and strings sounds. fig.SoundSelect.eps_88 You can change the pitch of Tone 2 an octave at a time.
F-110_r_e.book 28 ページ 2009年6月30日 火曜日 午後12時6分 Performing Performing with Different Tones in the Left and Right Sides of the Keyboard (Split Play) Performing with the keyboard divided at a certain key into a left side and a right side is called “Split Play,” and the point at which the keyboard is divided is called the “split point.” In Split Play, you can have a different tone sound in the left and right sides. At the factory settings the split point is set to “F 3.
F-110_r_e.book 29 ページ 2009年6月30日 火曜日 午後12時6分 Performing Changing the Keyboard’s Split Point You can change the split point (the key at which the keyboard is divided). The split point can be set to any value from B1 through B6. This is set to “F 3” at the factory settings. 1. Hold down the [Split] button and press the key you wish to set as the split point.
F-110_r_e.book 30 ページ 2009年6月30日 火曜日 午後12時6分 Performing Performing with the Metronome You can perform while the metronome sounds. Changing the Tempo 1. Press the [Song] button a number of times until the tempo value is displayed. fig.SongPlusMin.eps_88 F-110 provides a versatile Metronome function. You can adjust the volume or beat of the metronome. If a song is playing, the metronome will sound at the tempo and beat of that song. fig.MetroF-110.
F-110_r_e.book 31 ページ 2009年6月30日 火曜日 午後12時6分 Performing 2. Press the [–] or [+] button to select the beat. Changing the Metronome Volume Display Beat 2/2 Display Beat 6/4 The volume of the metronome can be adjusted, with 11 volume levels available. This will be set to “5” when you turn on the power. fig.PlusMinMetro.eps_88 Only weak beats will be sounded. 7/4 2/4 3/8 3/4 6/8 1. While holding down the [Metronome] button, press the [-] or [+] button.
F-110_r_e.book 32 ページ 2009年6月30日 火曜日 午後12時6分 Playing Back Songs Listening to Songs When the following appears in the display Here’s how to listen to the internal preset songs. The F-110 provides sixty-five piano songs as internal preset songs. If you have recorded a song but have not yet saved it, “dEL” will appear, blinking, when you select a song. fig.d-dEL.eps_88 fig.PlusMinPlaySong.eps_88 You cannot play back another song if memory still contains an unsaved song.
F-110_r_e.book 33 ページ 2009年6月30日 火曜日 午後12時6分 Playing Back Songs Playing Back All Songs Continuously (All Song Play) Here’s how to repeatedly play all internal songs in succession. fig.PlusMinPlaySong.eps_88 Listening to Each Part Separately When playing back internal preset songs or songs from internal memory, you can select the performance parts that will play. You can also practice each hand separately while playing along with the song. fig.TrackSelectz.eps_88 1.
F-110_r_e.book 34 ページ 2009年6月30日 火曜日 午後12時6分 Playing Back Songs If you mute the accompaniment part before initiating playback, you can skip the intro. Changing the Tempo of a Song You can change the tempo at which the song plays. Mute settings will be cleared when you switch songs. Changing the Song Playback Volume Here’s how to change the volume at which the song will play.
F-110_r_e.book 35 ページ 2009年6月30日 火曜日 午後12時6分 Playing Back Songs Changing the Key of Song Playback (Playback Transpose) The “Playback Transpose” function lets you change the key of the song playback. fig.Transp.eps_88 1. Play back the song that you want to hear or play along with (p. 32). 2. While holding down the [Transpose] button, use the [–] [+] buttons to adjust the pitch. The pitch of the song will change in semitone steps.
F-110_r_e.book 36 ページ 2009年6月30日 火曜日 午後12時6分 Recording You can easily record your performances. You can play back a performance you have recorded to check what and how you played, and play melodies on the keyboard along with prerecorded accompaniment. Recording Your Keyboard Performance Here’s how to record just your own keyboard performance without using an internal song. You can perform the following types of recording. • Recording just your own keyboard performance: p. 36 fig.RecordButtonz-i.
F-110_r_e.book 37 ページ 2009年6月30日 火曜日 午後12時6分 Recording Starting Recording 5. Press the [ ] button or play the keyboard. Recording Your Performance Separately for Each Hand After two measures of count sound, recording begins. Recording starts when you start playing the keyboard (without pressing the [ ] button). In this case, a count is not sounded. When recording begins, the [ button will light. ] button and [ ] During the count-in, the measure is indicated in the display as “-2” then “-1.
F-110_r_e.book 38 ページ 2009年6月30日 火曜日 午後12時6分 Recording Settings for recording Recording an additional part 1. Press the [Song] button a number of times until the 6. If the indication “Usr.” is not displayed, press the indication “USr” (or a number preceded by a “P” or “U”) is displayed. If the display shows something like “P.01” or “U.01” (or any other value after the “P” or “U”), press the [–] button until the following indication appears. [Song] button repeatedly until it appears. 7.
F-110_r_e.book 39 ページ 2009年6月30日 火曜日 午後12時6分 Recording Listening to the Recorded Performance Performance Settings 12. If the indication “Usr.” is not displayed, press the 1. Select a song. [Song] button repeatedly until it appears. For details on how to select a song, refer to “Playing Back Songs” (p. 32). 13. Press the [–] button. You will return to the beginning of the recorded performance. 2. Select the Tone to be played (p. 24). 3. Specify the recording tempo (p. 34). 14.
F-110_r_e.book 40 ページ 2009年6月30日 火曜日 午後12時6分 Recording Stopping Recording 7. Press the [ Erasing Recorded Performances ] button. Recording will stop. You can also press the [ stop recording. You can erase recorded performances. ] button to fig.RecordButtonz.eps_88 Listening to the Recorded Performance 8. If the indication “Usr.” is not displayed, press the [Song] button repeatedly until it appears. 9. Press the [–] button. 1. Press the [Song] button a number of times until the indication “USr.
F-110_r_e.book 41 ページ 2009年6月30日 火曜日 午後12時6分 Saving Your Performance Saving Songs Saving the Song 4. Press the [ A song you’ve recorded can be saved in internal memory. The songs you record will be lost if you simply turn off the F-110’s power before they’ve been saved. You’ll need to save a song if you want to keep it. ] button. The display will indicate “Sur,” and the [ [ ] button will flash. ] button and fig.d-Sur.eps_88 fig.SaveButtonz.
F-110_r_e.book 42 ページ 2009年6月30日 火曜日 午後12時6分 Saving Your Performance Deleting a Song Deleting the Song 4. Press the [ Here’s how you can delete a previously saved song from internal memory. ] button. The display will indicate “Sur,” and the [ [ ] button will flash. ] button and fig.d-Sur.eps_88 If you want to delete all songs from internal memory, refer to “Deleting All Songs” (p. 43). fig.SaveButtonz.eps_88 If you decide not to delete the song, press the [ button. 5. Press the [ ] ] button.
F-110_r_e.book 43 ページ 2009年6月30日 火曜日 午後12時6分 Saving Your Performance 5. Press the [ Deleting All Songs ] button. fig.d-dEL.eps_88 Here’s how you can completely erase all songs that were saved in internal memory. The procedure described here erases all songs that have been saved in memory. The erased data cannot be recovered, so we recommend that you check the contents of memory before you proceed. The entire contents of the internal memory will be erased and the display will show the “non” message.
F-110_r_e.book 44 ページ 2009年6月30日 火曜日 午後12時6分 Various Settings In Function mode you can make various settings for performance and recording. Button Function Page Dual Balance p. 48 Basic Operation in Function Mode [Split] (& [–] [+]) Octave Shift p. 49 Twin Piano Mode 1. Hold down the [Reverb] button and press the p. 50 [Transpose] button. Master Tuning fig.F-110Function.eps_88 p. 52 Temperament p. 52 Tonic The [Reverb] button and [Transpose] button will light.
F-110_r_e.book 45 ページ 2009年6月30日 火曜日 午後12時6分 Various Settings Button Function Page Sound-related Settings Damper Pedal Part p. 51 Center Pedal Function [Strings] (& [–] [+]) p. 51 Adding Spatial Depth to the Sound (3D Sound Control) Left Pedal Function p. 51 Memory Backup p. 59 The F-110 provides a “3D Sound Control” function. This function adds the natural resonance and spaciousness that are characteristic of a grand piano. 1. Hold down the [Reverb] button and press the [Transpose] button.
F-110_r_e.book 46 ページ 2009年6月30日 火曜日 午後12時6分 Various Settings 4. Press the [Reverb] or [Transpose] button to leave Function mode. Changing the F-110’s Frequency Response (Equalizer) Turning off 3D Sound Control 1. Repeat steps (1)–(3) above, but select “OFF” this If required, you can increase or decrease the level of the bass, medium and high frequencies over a range of –12 through +12dB. time. 2. Press the [Reverb] or [Transpose] button to leave Function mode. 1.
F-110_r_e.book 47 ページ 2009年6月30日 火曜日 午後12時6分 Various Settings Adjusting the Volume (Master Gain) This parameter allows you to compensate for a markedly reduced or increased level as a result of the EQ settings you are using. There is probably no need to change this value if you do not change the “EqL,” “EqM” and “EqH” settings. Adding Liveliness to the Sound (Dynamics Sound Control) You can add liveliness to the sound to give it superb clarity and distinctness. fig.PluMinEpi.
F-110_r_e.book 48 ページ 2009年6月30日 火曜日 午後12時6分 Various Settings You can use the Memory Backup function to store this setting in internal memory (p. 59). Keyboard Settings For some sounds, this may cause distortion. Changing the Volume Balance for Dual Play (Dual Balance) Dynamics Sound Control does not affect the sound from the Input jack or the sound of external devices connected to the MIDI Out connector. You can change the volume balance of Tones 1 and 2. 1.
F-110_r_e.book 49 ページ 2009年6月30日 火曜日 午後12時6分 Various Settings Specifying what the Transpose Function will Affect (Transpose Mode) This setting specifies what the transpose function will affect. You can use the transpose function to change the pitch of both the song and the keyboard, the pitch of only the song, or the pitch of only the keyboard. → Transpose (p. 26), Playback Transpose (p. 35) Changing the Pitch in Octave Steps (Octave Shift) You can change the pitch of Tone 2 in Dual Play (p.
F-110_r_e.book 50 ページ 2009年6月30日 火曜日 午後12時6分 Various Settings Dividing the Keyboard for Two-person Performance (Twin Piano) You can divide the keyboard into left and right sections so that two people can play the same range of pitches. This means that you’ll be able to use the keyboard as though it were two separate pianos. For example, this provides a convenient way for one person to follow along with another person’s performance to check it. See the illustration at the bottom of this page.
F-110_r_e.book 51 ページ 2009年6月30日 火曜日 午後12時6分 Various Settings 1. Hold down the [Reverb] button and press the Pedal Settings Changing How the Damper Pedal is Applied (Damper Pedal Part) When you press the damper pedal during Dual performance or Split performance, the damper pedal effect is normally applied to both tones, but you can also select the tone to which the effect is to be applied. [Transpose] button. The display will indicate “Fnc” and you’ll be in Function mode. 2.
F-110_r_e.book 52 ページ 2009年6月30日 火曜日 午後12時6分 Various Settings Tuning Settings Matching the Pitch with Other Instruments (Master Tuning) When playing ensemble with other instruments and in other such instances, you can match the standard pitch to another instrument. The standard pitch generally refers to the pitch of the note that’s played when you finger the middle A key.
F-110_r_e.book 53 ページ 2009年6月30日 火曜日 午後12時6分 Various Settings Setting 5 6 7 8 Temperament Qualities Kirnberger This is an improvement of the Meantone and Just tunings that provides a high degree of freedom of modulation. Performances are possible in all keys (III). Meantone This scale makes some compromises in just intonation, enabling transposition to other keys. Pythagorean This tuning, devised by the philosopher Pythagoras, eliminates dissonance in fourths and fifths.
F-110_r_e.book 54 ページ 2009年6月30日 火曜日 午後12時6分 Various Settings Settings for Piano Sounds Producing Sympathetic Resonance When You Press the Damper Pedal (Damper Resonance) You can change the volume of the damper pedal resonance. On an acoustic piano, depressing the damper pedal makes the notes you play resonate with other strings, adding rich reverberations and fatness to the sound. The damper pedal on the F-110 recreates this resonance (Damper Resonance) when depressed. 1.
F-110_r_e.book 55 ページ 2009年6月30日 火曜日 午後12時6分 Various Settings 4. Use the [–] [+] buttons to change the setting. Setting Explanation OFF, 1–10 The volume of the Key Off sound decreases as the value is lowered, while raising the value increases the volume of the Key Off sound. The Key Off Resonance function is not active when the value is set to “OFF.” 5. Press the [Reverb] or [Transpose] button to leave Function mode.
F-110_r_e.book 56 ページ 2009年6月30日 火曜日 午後12時6分 Various Settings Song Playback Settings Selecting the Part that is Muted by the [E. Piano] Button (Accomp Track) Here’s how to switch the part that will be muted when you press the [E. Piano] track button and turn off its light. 1. Hold down the [Reverb] button and press the MIDI Settings Here you can make various MIDI-related settings for the F-110. For more about MIDI, refer to “Connecting to MIDI Devices” (p. 64).
F-110_r_e.book 57 ページ 2009年6月30日 火曜日 午後12時6分 Various Settings 3. Use the [-] [+] buttons to change the setting. Setting Explanation Local On: The keyboard and recorder are connected to the internal sound generator. fig.LocalOn.eps_88 When you select a song from a VIMA CD-ROM (VIMA TUNES), recommended tones will automatically be assigned to the F-110’s [E. Piano], [Strings] and [Others] tone buttons. The recommended tones are not used, and only the F-110’s internal tones can be selected.
F-110_r_e.book 58 ページ 2009年6月30日 火曜日 午後12時6分 Various Settings MIDI Transmit Channel Settings (MIDI Transmit Channel) This setting specifies the MIDI channel on which the F-110 will transmit. MIDI uses sixteen “MIDI channels,” which are numbered 1 through 16. By connecting MIDI devices and specifying the appropriate MIDI channel for each device, you can play or select sounds on those devices. The F-110 will receive all sixteen channels (1–16).
F-110_r_e.book 59 ページ 2009年6月30日 火曜日 午後12時6分 Various Settings 6. Press the [Reverb] or [Transpose] button to leave Other Settings Function mode. The button’s indicator will return to its previous state. Using the V-LINK Function (V-LINK) If V-LINK is on, the bars at the bottom of the display will be lit. fig.d-VLinkOn.eps_88 Connecting the F-110 to a V-LINK compatible image device allows you to control the images with the F-110.
F-110_r_e.book 60 ページ 2009年6月30日 火曜日 午後12時6分 Various Settings 2. Press and hold the [Others] button and use the [–] or [+] button to select “buP.” The display will indicate “buP” and the [ blink. ] button will Restoring the Settings to the Factory Condition (Factory Reset) fig.d-buP.eps_88 The settings you’ve changed in Function mode can be restored to their factory-set condition. This operation is called “Factory Reset.” 3.
F-110_r_e.book 61 ページ 2009年6月30日 火曜日 午後12時6分 Various Settings 4. To execute the Factory Reset, press the [ ] button. Never turn off the power while “Fct” is blinking in the display. When the Factory Reset has been completed, the following display will appear. fig.d-End.eps_88 Disabling the Buttons (Panel Lock) If you activate the Panel Lock function, all buttons will be locked and non-functional.
F-110_r_e.book 62 ページ 2009年6月30日 火曜日 午後12時6分 Connecting to Other Devices Connecting to Audio Equipment If you connect the F-110 to powered speakers or to an audio system that has line input jacks, you’ll be able to hear the F110’s sound from your powered speakers or audio system. • If you connect your digital audio player or other audio playback device to the F-110, you’ll be able to hear its sound via the F-110.
F-110_r_e.book 63 ページ 2009年6月30日 火曜日 午後12時6分 Connecting to Other Devices Playing Sounds of an Audio Player through the F-110 fig.F-110Audio2-e.eps_88 Input jacks Output (Line Out) Digital audio player, etc. 1. Turn the volume all the way down on the F-110 and Turning Off the Power on the audio player you’re about to connect. 2. Turn off the power to the F-110 and connected audio player. 3. Use audio cables (sold separately) to make the connection. 1.
F-110_r_e.book 64 ページ 2009年6月30日 火曜日 午後12時6分 Connecting to Other Devices Connecting to MIDI Devices By connecting an external MIDI device and exchanging performance data, you can control one device from the other. For instance, you can output sound from the other instrument or switch Tones on the other instrument. Connecting a MIDI Sequencer to the F-110 fig.MIDI1-e2.
F-110_r_e.book 65 ページ 2009年6月30日 火曜日 午後12時6分 Connecting to Other Devices Producing Sounds from a MIDI Sound Module by Playing the F-110 fig.F-110MIDI2-e.eps_88 MIDI Out connector Connecting a Computer You can use a USB MIDI interface cable (sold separately) to connect the F-110 to your computer. If the F-110 is connected to a computer in which sequencer software is installed, a song you’ve recorded on the F-110 can be saved on your computer.
F-110_r_e.book 66 ページ 2009年6月30日 火曜日 午後12時6分 Troubleshooting If you think there’s a problem, read this first. Symptom Cause/Action Page Power does not turn on Is the AC adaptor connected correctly? p. 19 Is the pedal connected correctly? Plug the cable firmly into the pedal connector. p. 19 If you disconnect the pedal cable from the F-110 while the power is on, the pedal effect may remain “stuck” in the On condition.
F-110_r_e.book 67 ページ 2009年6月30日 火曜日 午後12時6分 Troubleshooting Symptom Cause/Action Page The wrong instrument is selected when you press the [E. Piano], [Strings], or [Others] button The Tone buttons [E. Piano], [Strings], and [Others] also operate as buttons that select “Recommended Tones.
F-110_r_e.book 68 ページ 2009年6月30日 火曜日 午後12時6分 Error Messages 68 Indication Meaning E.11 There is not sufficient free memory in the save destination. Delete unneeded files (p. 42), and try again. E.30 The internal memory of the F-110 is full. E.40 The F-110 cannot deal with the excessive MIDI data sent from the external MIDI device. Reduce the amount of MIDI data sent to the F-110. E.41 A MIDI cable has been disconnected. Connect it properly and securely. E.
F-110_r_e.book 69 ページ 2009年6月30日 火曜日 午後12時6分 * The following numbers are necessary if you wish to use an external MIDI device to select sounds on the F-110 . MSB: Bank select MSB, LSB: Bank select LSB, PC: Program change Tone List Piano # Name 1 Grand Piano1 # Name MSB LSB PC 0 68 1 MSB LSB PC 14 Decay Choir* 1 64 53 25 15 Dcy ChoirPad* 1 66 90 * Tones indicated by “*” are suitable for playing layered with a piano tone.
F-110_r_e.book 70 ページ 2009年6月30日 火曜日 午後12時6分 * The following numbers are necessary if you wish to use an external MIDI device to select sounds on the F-110 . MSB: Bank select MSB, LSB: Bank select LSB, PC: Program change Tone List # Name MSB LSB PC # Name MSB LSB PC # Name MSB LSB PC 64 Chorus Organ 121 1 18 103 Picked Bass 121 0 35 142 Euro Hit 121 3 56 65 Perc.
F-110_r_e.book 71 ページ 2009年6月30日 火曜日 午後12時6分 * The following numbers are necessary if you wish to use an external MIDI device to select sounds on the F-110 .
F-110_r_e.
F-110_r_e.
F-110_r_e.
F-110_r_e.book 75 ページ 2009年6月30日 火曜日 午後12時6分 Internal Song List No. Song name No. Song name 1 La Fille aux Cheveux de Lin 36 Jägerlied 2 La Campanella 37 Menuet Antique 3 Trio Grande 38 Für Elise 4 Scherzo No.2 39 Türkischer Marsch (Mozart) 5 Sonate No.15 40 Ständchen 6 Liebesträume 3 41 Humoreske 7 Étude, op.10-3 42 Blumenlied 8 Je te veux 43 Alpenglöckchen 9 Valse, op.
F-110_r_e.book 76 ページ 2009年6月30日 火曜日 午後12時6分 Parameters Stored in Memory Backup 76 Settings Page Key Touch p. 24 3D Sound Control (On/Off, Depth) p. 45 Dynamics Sound Control (Off, Type) p. 47 Reverb (On/Off, Depth) p. 25 Dual Balance p. 48 Split Point p. 29 3D Mode p. 46 Transpose Mode p. 49 Damper Pedal Part p. 51 Tuning p. 52 Temperament (Temperament, Tonic) p. 52 Stretch Tuning p. 53 Damper Resonance p. 54 String Resonance p. 54 Key Off Resonance p.
F-110_r_e.book 77 ページ 2009年6月30日 火曜日 午後12時6分 MIDI Implementation Chart MIDI Implementation Chart Date : Mar. 1, 2009 Version : 1.
F-110_r_e.book 78 ページ 2009年6月30日 火曜日 午後12時6分 Main Specifications F-110: Digital Piano Keyboard 88 keys (PHA alpha II) Touch Sensitivity Off, L1, L2, M, H1, H2 Keyboard Modes Whole, Dual (volume balance adjustable), Split (split point adjustable), Twin piano 88-key Stereo Multi-sampled Piano Sound, Conforms to GM2/GS/XGlite Max.
F-110_r_e.
F-110_r_e.book 80 ページ 2009年6月30日 火曜日 午後12時6分 Index Numerics H 3D Mode .................................................................................................... 44, 46 3D Sound Control .................................................................................. 44–45 Headphone Hook .......................................................................................... 23 Headphones ....................................................................................................
F-110_r_e.book 81 ページ 2009年6月30日 火曜日 午後12時6分 Index S Save a Song ..................................................................................................... 45 Saving a song ................................................................................................. 41 Selecting a Song ............................................................................................ 32 Settings .....................................................................................................
F-110_r_e.
Information AFRICA EGYPT For the U.K. IMPORTANT: THE WIRES IN THIS MAINS LEAD ARE COLOURED IN ACCORDANCE WITH THE FOLLOWING CODE. BLUE: NEUTRAL BROWN: LIVE As the colours of the wires in the mains lead of this apparatus may not correspond with the coloured markings identifying the terminals in your plug, proceed as follows: The wire which is coloured BLUE must be connected to the terminal which is marked with the letter N or coloured BLACK.
Owner’s Manual * 5 1 0 0 0 0 8 5 9 3 - 0 1 * PANTONE 444 BLACK