* 5 1 0 0 0 1 3 6 2 1 - 0 1 *
Information AFRICA EGYPT Al Fanny Trading Office 9, EBN Hagar Al Askalany Street, ARD E1 Golf, Heliopolis, Cairo 11341, EGYPT TEL: (022)-417-1828 REUNION MARCEL FO-YAM Sarl 25 Rue Jules Hermann, Chaudron - BP79 97 491 Ste Clotilde Cedex, REUNION ISLAND TEL: (0262) 218-429 SOUTH AFRICA T.O.M.S. Sound & Music (Pty)Ltd. 2 ASTRON ROAD DENVER JOHANNESBURG ZA 2195, SOUTH AFRICA TEL: (011)417 3400 Paul Bothner(PTY)Ltd.
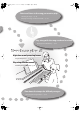
DP990F_e.book 3 ページ 2010年1月14日 木曜日 午後11時29分 IMPORTANT SAFETY INSTRUCTIONS Before using this unit, carefully read the sections entitled: “USING THE UNIT SAFELY” (p. 8), and “IMPORTANT NOTES” (p. 11). These sections provide important information concerning the proper operation of the unit. Additionally, in order to feel assured that you have gained a good grasp of every feature provided by your new unit, Owner’s manual should be read in its entirety.
DP990F_e.book 4 ページ 2010年1月14日 木曜日 午後11時29分 o ot l ita y o j n ou ey Us ig rd n pia E Lessons at home! Play together with your family Dividing the keyboard for two-person performance (Twin Piano) • • • p. 29 N Check your own performance Recording your performance • • • p. 40 Play along with a metronome Performing with the metronome • • • p.
DP990F_e.book 5 ページ 2010年1月14日 木曜日 午後11時29分 Select and listen to the song you want to play! Listening to songs • • • p. 36 Playing back songs on external media • • • p. 61 Play along with the song one hand at a time Playing parts individually • • • p. 37 Now I can play it! Night-time or early morning lessons Using the Headphones • • • p. 21 Play using different sounds Performing with various sounds • • • p. 22 Slow down the tempo for difficult passages Changing the song’s tempo • • • p.
DP990F_e.book 6 ページ 2010年1月14日 木曜日 午後11時29分 Contents USING THE UNIT SAFELY ..................... 8 IMPORTANT NOTES ........................... 11 Names of Things and What They Do 14 Before You Play.................................. 16 Getting Ready to Play ..................................................... 16 Connecting the Pedal Cord............................. 16 Connecting the AC Adaptor ........................... 16 Opening/Closing the Lid..................................
DP990F_e.book 7 ページ 2010年1月14日 木曜日 午後11時29分 Various Settings................................. 52 Connecting to Other Devices ............ 59 Basic Operation in Function Mode ............................ 52 Sounds Settings ................................................................ 54 Adjusting the Sound’s Brilliance (Brilliance).............................................................. 54 Performing Settings ........................................................
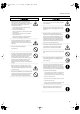
DP990F_e.book 8 ページ 2010年1月14日 木曜日 午後11時29分 USING THE UNIT SAFELY About WARNING and CAUTION Notices About the Symbols The symbol alerts the user to important instructions or warnings.The specific meaning of the symbol is determined by the design contained within the triangle. In the case of the symbol at left, it is used for general cautions, warnings, or alerts to danger. Used for instructions intended to alert the user to the risk of death or severe injury should the unit be used improperly.
DP990F_e.
DP990F_e.book 10 ページ 2010年1月14日 木曜日 午後11時29分 USING THE UNIT SAFELY Whenever you suspect the possibility of lightning in your area, disconnect the AC adaptor from the outlet. • .................................................................................................................................. Be careful when opening/closing the lid so you do not get your fingers pinched (p. 17). Adult supervision is recommended whenever small children use the unit. • ....................................
DP990F_e.book 11 ページ 2010年1月14日 木曜日 午後11時29分 IMPORTANT NOTES Power Supply Maintenance • • To clean the unit, use a dry, soft cloth; or one that is slightly dampened. Try to wipe the entire surface using an equal amount of strength, moving the cloth along with the grain of the wood. Rubbing too hard in the same area can damage the finish. • Never use benzine, thinners, alcohol or solvents of any kind, to avoid the possibility of discoloration and/or deformation.
DP990F_e.book 12 ページ 2010年1月14日 木曜日 午後11時29分 IMPORTANT NOTES Repairs and Data Additional Precautions • • Please be aware that the contents of memory can be irretrievably lost as a result of a malfunction, or the improper operation of the unit. To protect yourself against the risk of loosing important data, we recommend that you periodically save a backup copy of important data you have stored in the unit’s memory on a USB memory.
DP990F_e.book 13 ページ 2010年1月14日 木曜日 午後11時29分 IMPORTANT NOTES Handling the Floppy Disk Drive Handling Using USB memory (Using Optional Floppy Disk Drive) (Using Optional USB memory) • Never attempt to remove a floppy disk from the drive while the drive is operating (the indicator is lit); damage could result to both the disk and the drive. • Do not connect or disconnect USB memory while it is being read from, or written to (i.e., while the USB memory access indicator will blink).
DP990F_e.book 14 ページ 2010年1月14日 木曜日 午後11時29分 Names of Things and What They Do 1 2 3 4 5 6 15 22 24 23 1 [Volume] slider 6 Adjusts the overall volume of the DP990F (p. 19). 2 [Reverb] button Here you can select the sound you’ll hear when you play the keyboard (p. 22). 7 Adds reverberation similar to what you would hear when performing in a concert hall (p. 26). 3 4 5 Indicators These indicate the content shown in the display. • Song indicator: The display shows the song number.
DP990F_e.book 15 ページ 2010年1月14日 木曜日 午後11時29分 Names of Things and What They Do 7 8 9 10 11 12 14 13 18 17 16 19 11 [Metronome] button 18 [ ] (Play/Stop) button • Stops/starts playback of an internal song or a recorded performance (p. 36). • Starts/stops recording of your performance (p. 40). 13 [ 19 20 ] (Rec) button Track buttons • Allows you to play back your performance separately for each hand (p. 37). • Records your performance separately for each hand (p. 47).
DP990F_e.book 16 ページ 2010年1月14日 木曜日 午後11時29分 Before You Play Getting Ready to Play Connecting the Pedal Cord Connect the pedal cord to the Pedal jack on the rear panel of DP990F, at the rear. 924 Plug the pedal cord all the way into the Pedal jack. 3. Plug the Power cord into a power outlet. If necessary, secure the AC adaptor cord with the cord clamps (leaflet: Assembling the DP990F). Be sure to use only the AC adaptor supplied with the unit.
DP990F_e.book 17 ページ 2010年1月14日 木曜日 午後11時29分 Before You Play Closing the Lid Opening/Closing the Lid Always use two hands to open and close the lid. Although the DP990F’s lid is designed to close slowly and gently when it is released, the lid immediately closes if it has been opened only slightly. Take care not to allow your fingers to become pinched by the lid. 1. When closing the lid, be sure to close the music rest and open the blind. fig.
DP990F_e.book 18 ページ 2010年1月14日 木曜日 午後11時29分 Before You Play Turning the Power On/Off Once the connections have been completed (p. 16), turn on power to your various devices in the order specified. By turning on devices in the wrong order, you risk causing malfunction and/or damage to speakers and other devices. On Off 1 2 Turning the Power On Turning the Power Off 1. Move the [Volume] slider all the way to the 1. Move the [Volume] slider all the way to the left to minimize the volume. 2.
DP990F_e.book 19 ページ 2010年1月14日 木曜日 午後11時29分 Before You Play Adjusting the Sound’s Volume Here’s how to adjust the volume of your keyboard playing or the playback volume of an internal song or USB memory song. If headphones are connected, use the [Volume] slider to adjust the headphone volume. Min Max 1. Turn the [Volume] slider to adjust the overall volume. Adjust the volume while you play the keyboard to produce sound.
DP990F_e.book 20 ページ 2010年1月14日 木曜日 午後11時29分 Before You Play Using the Pedals The pedals perform the following operations. You’ll use them mainly when playing piano. Soft Pedal Sostenuto Pedal Damper Pedal Damper Pedal (right pedal) Use this pedal to sustain the sound. While this pedal is held down, notes will be sustained for an extended time even if you release your fingers from the keyboard. The length of sustain will change subtly depending on how deeply you press the pedal.
DP990F_e.book 21 ページ 2010年1月14日 木曜日 午後11時29分 Before You Play Using the Headphones You can use headphones to enjoy the DP990F without disturbing those around you, such as at night. Connecting the Headphones The DP990F has two headphone jacks, two people can also use headphones simultaneously. Using the Headphone Hook Whenever you are not using the headphones, you can hang them on the headphone hook of the DP990F. Attaching the Headphone Hook Headphone Hook Wing Nut 1.
DP990F_e.book 22 ページ 2010年1月14日 木曜日 午後11時29分 Performing Performing with Various Sounds In addition to piano sounds, the DP990F lets you enjoy performing with many other sounds (over 300 types). These sounds are called “Tones.” The Tones are divided into four groups, each of which is assigned to a different Tone button. Let’s start by performing with a piano tone. When you turn on the power, the “Grand Piano1” Tone is selected. fig.Panel 2 1 1. Press the [Piano] button.
DP990F_e.book 23 ページ 2010年1月14日 木曜日 午後11時29分 Performing Performing with the Metronome You can sound the metronome while you perform. The DP990F contains a versatile metronome feature. You can also change the metronome’s volume and time signature. While the song plays, the metronome will sound at the tempo and time signature of the song. fig.Panel 1. Press the [Metronome] button. The [Metronome] button will blink, and the display will indicate “Tempo.” The metronome will sound.
DP990F_e.book 24 ページ 2010年1月14日 木曜日 午後11時29分 Performing Changing the Metronome’s Time Signature 3 2 1. 1 Press the [Metronome] button. The metronome will sound. 2. Press the [Display] button. The Beat indicator will light, and the display will indicate the time signature. 3. Press the [-] or [+] button. If you specify “0/4” only the weak beats will sound. If you record your performance, it will be recorded with the time signature you specify here.
DP990F_e.book 25 ページ 2010年1月14日 木曜日 午後11時29分 Performing Adjusting the Metronome’s Volume fig.Panel 1. While holding down the [Metronome] button, press the [-] or [+] button. The display will indicate the metronome’s volume. If you set the metronome’s volume to “0” the metronome will not sound. Metronome volume range 0–10 Adding a Count-in to Synchronize Your Performance (Count-in) A series of sounds rhythmically played to indicate the tempo before a song starts is called a “count-in.
DP990F_e.book 26 ページ 2010年1月14日 木曜日 午後11時29分 Performing Adding Reverberation to the Sound (Reverb) You can add a pleasant reverberation to the sounds you play from the keyboard, producing the impression that you are performing in a concert hall. This effect is called “Reverb.” fig.Panel 1. Press the [Reverb] button. The [Reverb] button will light. If you press the [Reverb] button once again, the button will go out and the reverb effect will be eliminated. Adjusting the Depth of the Reverb Effect fig.
DP990F_e.book 27 ページ 2010年1月14日 木曜日 午後11時29分 Performing Adjusting the Keyboard Sensitivity (Key Touch) You can change the touch sensitivity, or response of the keys. You can adjust the keyboard touch as appropriate for the playing strength of the person who is performing. fig.Panel 1 1. Press the [Key Touch] button so it’s flash. 2. Press the [-] or [+] button to select the keyboard touch.
DP990F_e.book 28 ページ 2010年1月14日 木曜日 午後11時29分 Performing Performing with Two Layered Tones (Dual Play) You can play two tones simultaneously from each note of the keyboard. This feature is called “Dual Play.” As an example, here’s how to layer piano and strings tones. fig.Panel 1. Hold down the [Piano] button and press the [Strings] button. Both buttons will light. When you play the keyboard, you’ll hear both the piano and the strings tones.
DP990F_e.book 29 ページ 2010年1月14日 木曜日 午後11時29分 Performing Dividing the Keyboard for Two-person Performance (Twin Piano) You can divide the keyboard into left and right zones so that two people can play the same range of pitches, just as though there were two pianos. This function is called “Twin Piano.” For example, you could use Twin Piano to allow a student to play along with their teacher. fig.Panel 1. Press the [Twin Piano] button. The [Twin Piano] button will light.
DP990F_e.book 30 ページ 2010年1月14日 木曜日 午後11時29分 Performing Changing the Way in Which the Sound is Heard (Twin Piano Mode) fig.Panel 1. Hold down the [Twin Piano] button and press the [-] or [+] button. Value Description 1 (Pair) The sound of the right-hand keyboard zone will be heard more loudly from the right speaker than from the left speaker. The sound of the left-hand keyboard zone will be heard more loudly from the left speaker than from the right speaker.
DP990F_e.book 31 ページ 2010年1月14日 木曜日 午後11時29分 Performing Playing Different Tones in the Left and Right Sides of the Keyboard (Split Play) You can play different tones in the left and right sides of the keyboard, divided at a certain key. This feature is called “Split Play,” and the key at which the keyboard is divided is called the “Split Point.” fig.Panel 1. Press the [Twin Piano] button a number of times so the Split screen will appear.
DP990F_e.book 32 ページ 2010年1月14日 木曜日 午後11時29分 Performing Changing the Tones of the Left and Right Zones Changing the right-hand tone fig.Panel 2 1 1. Press a tone button. The number of the currently selected for the right-hand zone are shown. 2. Press the [-] or [+] button. A different tone is selected. Changing the left-hand tone fig.Panel 1 2 1. Hold down the [Twin Piano] button and press a tone button. The number of the tone currently selected for the left-hand zone are shown. 2.
DP990F_e.book 33 ページ 2010年1月14日 木曜日 午後11時29分 Performing Changing the Keyboard’s Split Point fig.Panel Range in which you can specify the split point (B1–B6) A0 C1 B1 C2 C3 C4 C5 C6 B6 C7 C8 Split Point Factory default: F 3 The key belongs to the left-hand section 1. Hold down the [Twin Piano] button and press the key that you want to be the new split point. The key you pressed becomes the new split point, and that key will be shown in the display.
DP990F_e.book 34 ページ 2010年1月14日 木曜日 午後11時29分 Performing Transposing the Keyboard (Transpose) “Transpose” means to shift the pitches produced by the keyboard. The Transpose function makes it easy to do the following. • The pitch of your accompaniment can be adjusted to a singer’s vocal range without changing your fingering (i.e., without changing the keys you play). • A song written in a difficult key with numerous sharps ( ) or flats ( ) can be performed in a key that’s easier for you to play. 1.
DP990F_e.book 35 ページ 2010年1月14日 木曜日 午後11時29分 Performing Disabling the Buttons (Panel Lock) The Panel Lock setting lets you disable all of the DP990F’s buttons. In this state, the settings will not change even if you inadvertently press a button while performing. fig.Panel 1. Hold down the [Right] button for a while. Panel Lock will be activated. To cancel Panel Lock, once again hold down the [Right] button for a while. Panel Lock will also be cancelled when you turn off the power.
DP990F_e.book 36 ページ 2010年1月14日 木曜日 午後11時29分 Listening to Songs Playing Back Songs Here’s how to listen to the built-in songs. The DP990F provides 72 built-in piano songs. You can also play back songs from a separately sold floppy disk drive, CD drive, or USB memory (p. 61). fig.Panel 1 2 3 1. Press the [Display] button a number of times so the Song indicator will light. 2. Press the [-] or [+] button to select a song. 3. Press the [ ] button.
DP990F_e.book 37 ページ 2010年1月14日 木曜日 午後11時29分 Listening to Songs Playing Parts Individually The parts of an internal song can be selected and played individually. This allows you to practice playing the left or right-hand part of a song while listening to the other hand played automatically. Performance parts and tracks Track button Each part is assigned to the track buttons as shown in the illustration. Muting You can “mute” a specific part so that it will not be heard.
DP990F_e.book 38 ページ 2010年1月14日 木曜日 午後11時29分 Listening to Songs Playing All Songs Consecutively (All Songs Play) You can have the DP990F play all internal songs (or all songs in internal memory, or all songs in USB memory) repeatedly in succession. This function is called “All Songs Play.” fig.Panel 1. Hold down the [Display] button and press the [ ] button. All Songs Play will be selected, and the display will indicate “ALL.
DP990F_e.book 39 ページ 2010年1月14日 木曜日 午後11時29分 Listening to Songs Changing the Song’s Tempo You can change the tempo at which a song plays back. When you’re practicing along with an internal song, this allows you to slow down the tempo of a difficult song in order to play it more comfortably. fig.Panel 1 1. 2 Press the [Display] button a number of times so the Tempo indicator will light. The Tempo indicator will light. 2. Press the [-] or [+] button. The tempo will change.
DP990F_e.book 40 ページ 2010年1月14日 木曜日 午後11時29分 Recording Your Performance Recording Your Keyboard Performance It’s easy to record your own performances. You can play back a recorded performance to check your playing, or perform along with a recorded performance. Getting ready to record fig.Panel 2 1 1. Press the [Display] button a number of times so the Song indicator will light. 2. Press the [-] button a number of times so the display will indicate “USr.” 3.
DP990F_e.book 41 ページ 2010年1月14日 木曜日 午後11時29分 Recording Your Performance Listening to the recorded performance fig.Panel 1 1. Press the [ 2 ] button. You will return to the beginning of the recorded performance. 2. Press the [ ] button. The recorded performance will play. Playback will stop when you press the [ ] button once again. ] button while the metronome is sounding, there will be a two-measure count If you press the [ (count-in) before playback begins.
DP990F_e.book 42 ページ 2010年1月14日 木曜日 午後11時29分 Recording Your Performance Erasing Your Recorded Performance Here’s how to erase your recorded performance. fig.Panel 2 1 1. Hold down the [Display] button and press the [ A confirmation message will appear and the [ If you decide not to erase the performance, press the [ 2. Press the [ ] button. ] button and [ ] button will blink. ] button. ] button. The recorded performance will be erased. If you hold down the [ be erased.
DP990F_e.book 43 ページ 2010年1月14日 木曜日 午後11時29分 Recording Your Performance Saving Your Recorded Performance If you’ve recorded a performance, your recorded performance will be lost if you turn off the DP990F’s power before saving the song. If you want to keep your recorded performance, it is convenient to save it in internal memory. Songs saved in internal memory will not be lost when you turn off the power.
DP990F_e.book 44 ページ 2010年1月14日 木曜日 午後11時29分 Recording Your Performance Selecting the save destination for the song fig.Panel 1 4 1. 2 3 Press the [-] or [+] button to select the save destination. If the dot in the lower right of the display is lit, a song has already been saved in that number. Select a number at which no song has been saved. If you want to erase an unwanted song and replace it with the newly saved song, select the number of the unwanted song. 2. Press the [ ] button.
DP990F_e.book 45 ページ 2010年1月14日 木曜日 午後11時29分 Recording Your Performance Deleting a Saved Song Here’s how to delete a song that you saved to internal memory. If you want to delete all the songs that are saved in internal memory, initialize the memory (p. 60). You can also delete songs from USB memory (sold separately) or a floppy disk (sold separately) (p. 64). fig.Panel 1 2 4 Getting ready to delete 1. Hold down the [Twin Piano] button and press the [Key Touch] button.
DP990F_e.book 46 ページ 2010年1月14日 木曜日 午後11時29分 Recording Your Performance Choosing the song to delete fig.Panel 1 1. Press the [-] or [+] button to select the song that you want to delete. Deleting the song fig.Panel 1 3 1. Press the [ ] button. The display will indicate “Sur,” and the [ ] button and [ If you decide not to delete the song, press the [ 2. Press the [ ] button will blink. ] button. ] button. The selected song will be deleted. 3.
DP990F_e.book 47 ページ 2010年1月14日 木曜日 午後11時29分 Recording Your Performance Advanced Recording Methods Recording Each Hand Separately You can separately record your left-hand performance to the [Left] button and your right-hand performance to the [Right] button. You can also separately re-record each hand afterward. Getting ready to record fig.Panel 1 1. 2 4 3 Press the [Display] button a number of times so the song indicator is lit. The display will indicate the song number. 2. 3.
DP990F_e.book 48 ページ 2010年1月14日 木曜日 午後11時29分 Recording Your Performance Recording and stopping fig.Panel 1. Press the [ ] button. You’ll hear a two-measure count, and then recording will begin. Alternatively, you can start recording by playing the keyboard instead of pressing the [ case, there will be no count-in. When recording begins, the [ ] button and [ ] button. In this ] button will light. During the count, “-2” then “-1” will be shown as the measure number in the screen. 2.
DP990F_e.book 49 ページ 2010年1月14日 木曜日 午後11時29分 Recording Your Performance 4. Press the [ ] button. You’ll hear a two-measure count, and then recording will begin. Alternatively, you can start recording by playing the keyboard instead of pressing the [ case, there will be no count-in. When recording begins, the [ ] button and [ ] button. In this ] button will light. During the count, “-2” then “-1” will be shown as the measure number in the screen.
DP990F_e.book 50 ページ 2010年1月14日 木曜日 午後11時29分 Recording Your Performance Recording a Performance You Play Along with a Song Here’s how you can record a performance that you play along with an internal song or a song from internal memory. The part you select using the track buttons will be recorded, replacing the previous content of that part. During recording, you won’t hear the sound of the track whose button you selected.
DP990F_e.book 51 ページ 2010年1月14日 木曜日 午後11時29分 Recording Your Performance Recording and stopping fig.Panel 1. Press the [ ] button. You’ll hear a two-measure count, and then recording will begin. Alternatively, you can start recording by playing the keyboard instead of pressing the [ case, there will be no count-in. When recording begins, the [ ] button and [ ] button. In this ] button will light. During the count, “-2” then “-1” will be shown as the measure number in the screen. 2.
DP990F_e.book 52 ページ 2010年1月14日 木曜日 午後11時29分 Various Settings Basic Operation in Function Mode “Function mode” lets you make various settings for playback and recording. Entering Function mode fig.Panel 1 1. Hold down the [Twin Piano] button and press the [Key Touch] button. The [Twin Piano] button and [Key Touch] button will light. The display will indicate “Fnc” and you’ll be in Function mode. Selecting the setting that you want to edit fig.Panel 1.
DP990F_e.book 53 ページ 2010年1月14日 木曜日 午後11時29分 Various Settings Editing a setting fig.Panel 1 3 1. Press the [-] or [+] button to edit the setting. By pressing the [-] [+] buttons simultaneously you can return the setting to its factory-set value. 2. If you wish to change other settings, refer to step 1 under “Selecting the setting that you want to edit,” and select the setting you want to change. 3. Press the [Twin Piano] button or the [Key Touch] button to exit Function mode.
DP990F_e.book 54 ページ 2010年1月14日 木曜日 午後11時29分 Various Settings Button Function Page Tempo Mute Sounds Settings p. 57 Adjusting the Sound’s Brilliance (Brilliance) Local Control p. 68 MIDI Transmit Channel p. 68 Composer MIDI Out Here’s how to adjust the brilliance of your keyboard playing or the playback brilliance of an internal song or USB memory song. Increasing the value will make the sound brighter. Setting p. 68 -10 (Mellow)–10 (Bright) V-LINK Transmit Channel p.
DP990F_e.book 55 ページ 2010年1月14日 木曜日 午後11時29分 Various Settings Adjusting the Dual Play Volume Balance (Dual Balance) You can adjust the volume balance between the two tones (tone 1 and tone 2) used for Dual play. Volume of Tone 1 Volume of Tone 2 Adjusting the Tuning (Temperament) You can play classical music such as baroque pieces using their original tuning.
DP990F_e.book 56 ページ 2010年1月14日 木曜日 午後11時29分 Various Settings Specifying the Temperament Key Producing the Resonance of the Strings When the Keys Are Played (String Resonance) When playing with tuning other than equal temperament, you need to specify the temperament key for tuning the song to be performed (that is, the note that corresponds to C for a major key or to A for a minor key). If you choose an equal temperament, there’s no need to select a temperament key.
DP990F_e.book 57 ページ 2010年1月14日 木曜日 午後11時29分 Various Settings Changing How the Pedals Work (Center/Left Pedal Function) When you turn on the power, the left pedal functions as the soft pedal, and the center pedal functions as the sostenuto pedal (p. 20). You can change the function of the pedal to a variety of other operations. Function Sostenuto Soft pedal Description Sets function to Sostenuto pedal. * Selectable only for the center pedal. Sets function to soft pedal.
DP990F_e.book 58 ページ 2010年1月14日 木曜日 午後11時29分 Various Settings Setting the Type of CD To be Played Back (CD/Audio Type) The DP990F may be unable to correctly recognize the type of CD being used. In such instances, you can specify the type of CD manually. Setting Description Auto Restoring the Factory Settings (Factory Reset) When you execute the “Factory Reset” function, the settings you’ve edited in Function mode will be restored to their factory-set state.
DP990F_e.book 59 ページ 2010年1月14日 木曜日 午後11時29分 Connecting to Other Devices Connecting a Media You will be able to accomplish the following once you’ve connected external media (CD drive, floppy disk drive, or USB memory).
DP990F_e.book 60 ページ 2010年1月14日 木曜日 午後11時29分 Connecting to Other Devices Initializing the Memory 4. Press the [ ] button. Initialization will begin. The entire contents of the selected memory will be erased. Here’s how you can completely erase all songs that were saved in internal memory, USB memory (sold separately), or a floppy disk (sold separately). Once the memory has been initialized, the following screen will appear.
DP990F_e.book 61 ページ 2010年1月14日 木曜日 午後11時29分 Connecting to Other Devices Playing Back Songs on External Media You can play back songs from a CD, USB memory, or a floppy disk. You can play back songs that are music files (p. 80) or audio files (p. 73). 1. Prepare the external media that contains the song you want to play. Insert the floppy disk into the floppy disk drive, or the CD into the CD drive. 2. Press the [Display] button a number of times so the Song indicator will light. 3.
DP990F_e.book 62 ページ 2010年1月14日 木曜日 午後11時29分 Connecting to Other Devices Adjusting the Volume of an Audio File or Music CD You can adjust only the volume of an audio file or music CD. 1. Play back the audio file or music CD (p. 61). 2. Hold down the [ [+] button. ] button and press the [-] or Minimizing the Sounds in the Center (Center Cancel) Sounds on a music CD or audio file that are heard from the center (typically the vocal or melody instrument) can be minimized in the playback. 1.
DP990F_e.book 63 ページ 2010年1月14日 木曜日 午後11時29分 Connecting to Other Devices Saving Your Recorded Performance on External Memory Here’s how to save your recorded performance to USB memory or a floppy disk. Saving the Song 1. Press the [ ] button. The display will indicate “Sur.” Getting ready to save 1. Enter Function mode, choose “SAv”(p. 52). If you decide not to save the song, press the [ button. 2. Press the [ ] ] button. The song will be saved.
DP990F_e.book 64 ページ 2010年1月14日 木曜日 午後11時29分 Connecting to Other Devices Deleting a Song from External Memory Here’s how to delete a song that you saved on USB memory or a floppy disk. Deleting the song 1. Press the [ ] button. The display will indicate “Sur.” Getting ready to delete 1. Enter Function mode, choose “dEL”(p. 52). If you decide not to delete the song, press the [ button. 2. Press the [ ] ] button. The selected song will be deleted.
DP990F_e.book 65 ページ 2010年1月14日 木曜日 午後11時29分 Connecting to Other Devices Connecting to Audio Equipment If you connect the DP990F to powered speakers or to an audio system that has line input jacks, you’ll be able to hear the DP990F’s sound from your powered speakers or audio system. If you connect your portable audio player or other audio playback device to the DP990F’s, you’ll be able to hear its sound via the DP990F. Use audio cables (sold separately) to make connections.
DP990F_e.book 66 ページ 2010年1月14日 木曜日 午後11時29分 Connecting to Other Devices Connecting Speakers to the DP990F and Outputting Sounds fig.aaaa Output jacks 1/4” plug Amplified Speakers, Audio System, etc. Input (Line In) jacks 1. Turn the volume all the way down on the DP990F and on the device you’re about to connect. Turning Off the Power 2. Turn off the power to the DP990F and speakers. 1. Turn the volume all the way down on the DP990F and on the speakers you’re about to connect. 3.
DP990F_e.book 67 ページ 2010年1月14日 木曜日 午後11時29分 Connecting to Other Devices Connecting to MIDI Devices By connecting an external MIDI device and exchanging performance data, you can control one device from the other. For instance, you can output sound from the other instrument or switch Tones on the other instrument. Producing Sounds from a MIDI Sound Module by Playing the DP990F fig.
DP990F_e.book 68 ページ 2010年1月14日 木曜日 午後11時29分 Connecting to Other Devices Preventing Doubled Notes When Connected to a Sequencer (Local Control) When you have a MIDI sequencer connected, set this parameter to Local Off.
DP990F_e.book 69 ページ 2010年1月14日 木曜日 午後11時29分 Connecting to Other Devices Connecting a Computer You can use a USB MIDI interface cable (sold separately) to connect the DP990F to your computer. If the DP990F is connected to a computer in which sequencer software is installed, a song you’ve recorded on the DP990F can be saved on your computer.
DP990F_e.book 70 ページ 2010年1月14日 木曜日 午後11時29分 Connecting to Other Devices Using the V-LINK Function Connecting the DP990F to a V-LINK compatible image device allows you to control the images with the DP990F. * To prevent malfunction and/or damage to speakers or other devices, always turn down the volume, and turn off the power on all devices before making any connections. V-LINK V-LINK ( ) is a function that allows music and images to be performed together.
DP990F_e.book 71 ページ 2010年1月14日 木曜日 午後11時29分 Troubleshooting If you think there’s a problem, read this first. Symptom Cause/Action Page Power does not turn on Is the power cord connected correctly? p. 18 Is the pedal connected correctly? Plug the cable firmly into the pedal connector. p. 16 If you disconnect the pedal cord from the DP990F while the power is on, the pedal effect may remain “stuck” in the On condition.
DP990F_e.book 72 ページ 2010年1月14日 木曜日 午後11時29分 Troubleshooting Symptom Cause/Action Page Could you have made Transpose settings? p. 34 Is the Master Tune setting appropriate? p. 55 Is the setting for the Temperament correct? p. 55 Is the settings for the Stretch Tuning correct? p. 55 The maximum simultaneous polyphony is 128 voices.
DP990F_e.book 73 ページ 2010年1月14日 木曜日 午後11時29分 Troubleshooting Symptom Cause/Action Page Song won’t play Could the screen be indicating “dEL”? You can’t play back an internal song if internal memory contains performance data you recorded. Erase the performance data you recorded before you play back the song. p. 41 Only the sound of a particular instrument in a song does not play Could a track be muted? If the button indicator is out, the music on that track is not heard.
DP990F_e.book 74 ページ 2010年1月14日 木曜日 午後11時29分 Error Messages Indication Meaning You can only read the music file. It can not be saved. An error occurred during writing. The external media’s protect tab may be in the “Protect” (writing prohibited) position, or the external media may not yet be initialized. No external media is inserted. Insert the external media and try again. There is not sufficient free memory in the save destination.
DP990F_e.book 75 ページ 2010年1月14日 木曜日 午後11時29分 Tone List Piano Others No. Name Detuned EP 1 Vintage EP Name Grand Piano1 No. 1 54 55 ChurchOrgan1 56 ’60s E.Piano Piano + Str. Harpsichord Grand Piano2 2 3 4 ChurchOrgan2 Combo Jz.Org Ballad Organ 57 58 59 E.Piano 2 Detuned EP 2 St.FM EP 5 6 Piano + Pad Grand Piano3 5 6 Accordion Nason flt 8’ 60 61 EP Legend EP Phase 7 8 MagicalPiano Rock Piano 7 8 Gospel Spin Full Stops 62 63 Harpsichord Coupled Hps.
DP990F_e.book 76 ページ 2010年1月14日 木曜日 午後11時29分 Tone List 76 No. Name No. Name No. Name 111 168 169 Bright Tb Tuba 225 112 Funk Guitar1 Funk Guitar2 226 Ice Rain Soundtrack 113 Chorus Gt 2 170 MuteTrumpet1 227 Crystal 114 115 116 Overdrive Gt Guitar Pinch DistortionGt 171 172 173 MuteTrumpet2 French Horn1 French Horn2 228 229 230 Synth Mallet Atmosphere Brightness 117 118 Gt Feedback1 Dist.
DP990F_e.book 77 ページ 2010年1月14日 木曜日 午後11時29分 Tone List No. Name 282 283 Car Stop Car Pass 284 Car Crash 285 286 287 Siren Train Jetplane 288 289 Starship Burst Noise 290 291 Applause Laughing 292 Screaming 293 294 Punch Heart Beat 295 296 Footsteps Gun Shot 297 298 299 Machine Gun Laser Gun Explosion * In the tone group “Others” when you hold down the [-] or [+] button to switch tone in succession, the tones will stop changing at number 35 and number 44.
DP990F_e.book 78 ページ 2010年1月14日 木曜日 午後11時29分 Internal Song List No. 1 Song Name Polonaise op.53 No.
DP990F_e.book 79 ページ 2010年1月14日 木曜日 午後11時29分 Parameters Stored in Memory Backup Items Page Brilliance p. 54 Transpose Mode p. 54 Dual Balance p. 55 Master Tuning p. 55 Stretch Tuning p. 55 Temperament (Temperament, Temperament Key) p. 55 Damper Resonance p. 56 String Resonance p. 56 Key Off Resonance p. 56 Damper Pedal Part p. 56 MIDI Transmit Channel p. 68 V-LINK Transmit Channel p. 70 Track Assign p. 57 CD/Audio Type p. 58 Reverb (On/Off, Depth) p. 26 Split Point p.
DP990F_e.book 80 ページ 2010年1月14日 木曜日 午後11時29分 Music Files That the DP990F Can Use What Are Music Files? Music files contains musical information such as how long the key for a corresponding pitch is played, the force applied to the key played, and other such information. When the performance data (music file) is sent by the USB memory or CD-ROM, the song will be played exactly as specified by the data.
DP990F_e.book 81 ページ 2010年1月14日 木曜日 午後11時29分 Main Specifications DP990F/DP990RF: Digital Piano DP990F: 88 keys (PHA II with Escapement) Keyboard DP990RF: 88 keys (PHA II Ivory Feel Keyboard with Escapement) Touch Sensitivity Touch: 5 levels, Fixed Touch Keyboard Mode Whole, Dual (volume balance adjustable), Split (split point adjustable), Twin Piano Conforms to GM2/GS/XGlite Piano Sound SuperNATURAL Piano Sound Max.
DP990F_e.book 82 ページ 2010年1月14日 木曜日 午後11時29分 Main Specifications Songs Max. 99 songs Storage format Standard MIDI Files (Format 0) External Storage USB Memory Floppy Disk (when using an optional floppy disk drive) Types of data that can be played Standard MIDI Files (Format 0/1) Roland Original Format (i-Format) Audio File (WAV 44.
DP990F_e.book 83 ページ 2010年1月14日 木曜日 午後11時29分 Index A K AC Adaptor ..................................................................................... 16 All Songs Play ................................................................................ 38 Audio File ........................................................................................ 62 Key ..................................................................................................... 53 Key Off Resonance ......................
DP990F_e.book 84 ページ 2010年1月14日 木曜日 午後11時29分 Index SMF with Lyrics ............................................................................. 80 Soft Pedal ........................................................................................ 20 Sostenuto Pedal ........................................................................... 20 Speakers .......................................................................................... 66 Split Play ................................................
DP990F_e.
DP990F_e.book 86 ページ 2010年1月14日 木曜日 午後11時29分 For EU Countries This product complies with the requirements of EMC Directive 2004/108/EC. For the USA FEDERAL COMMUNICATIONS COMMISSION RADIO FREQUENCY INTERFERENCE STATEMENT This equipment has been tested and found to comply with the limits for a Class B digital device, pursuant to Part 15 of the FCC Rules. These limits are designed to provide reasonable protection against harmful interference in a residential installation.
Information AFRICA EGYPT Al Fanny Trading Office 9, EBN Hagar Al Askalany Street, ARD E1 Golf, Heliopolis, Cairo 11341, EGYPT TEL: (022)-417-1828 REUNION MARCEL FO-YAM Sarl 25 Rue Jules Hermann, Chaudron - BP79 97 491 Ste Clotilde Cedex, REUNION ISLAND TEL: (0262) 218-429 SOUTH AFRICA T.O.M.S. Sound & Music (Pty)Ltd. 2 ASTRON ROAD DENVER JOHANNESBURG ZA 2195, SOUTH AFRICA TEL: (011)417 3400 Paul Bothner(PTY)Ltd.
* 5 1 0 0 0 1 3 6 2 1 - 0 1 *