To resize thickness, move all items on the front cover and center registration marks to left or right Information When you need repair service, call your nearest Roland Service Center or authorized Roland distributor in your country as shown below.
To resize thickness, move all items on the front cover and center registration marks to left or right. For EU Countries USING THE UNIT SAFELY This product complies with the requirements of European Directives EMC 89/336/EEC and LVD 73/23/EEC. For the USA The symbol alerts the user to important instructions or warnings.The specific meaning of the symbol is determined by the design contained within the triangle.
015 • Do not force the unit’s power-supply cord to share an outlet with an unreasonable number of other devices. Be especially careful when using extension cords—the total power used by all devices you have connected to the extension cord’s outlet must never exceed the power rating (watts/amperes) for the extension cord. Excessive loads can cause the insulation on the cord to heat up and eventually melt through. ...............................................................................................
IMPORTANT NOTES 291b In addition to the items listed under “IMPORTANT SAFETY INSTRUCTIONS” and “USING THE UNIT SAFELY” on pages 2, 3 and 166, please read and observe the following: Power Supply Additional Precautions 301 551 • Do not use this unit on the same power circuit with any device that will generate line noise (such as an electric motor or variable lighting system).
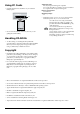
Using PC Cards 704 • Carefully insert the PC card all the way in—until it is firmly in place. fig.PC card Eject Supported cards: PC card, Compact Flash Type II compliant You can use microdrives or media conversion cards that are compliant with "Compact Flash Type II." Interface specification: PC Card ATA Operating voltage: 5V * Cards that operate on 5 V or 5 V/3.3 V can be inserted. Cards that operate only on 3.3 V cannot be used. 705 • Never touch the terminals of the PC card.
Contents IMPORTANT NOTES ...............................................................................4 Contents ..................................................................................................6 Introduction ...........................................................................................11 Check the contents of the package......................................................................................................... 12 Startup .......................................
Contents Operation Guide: Software (V-Producer) ................................. 51 An overview of V-Producer ..................................................................52 What is VariPhrase?...................................................................................................................... 54 What is encoding? ......................................................................................................................... 55 Loading wave files (Load Wave Files) .........
Contents Editing the Pitch/Time/Formant/Dynamics ...................................................................................... 78 Erasing controller data ................................................................................................................. 80 Editing notes ............................................................................................................................................. 81 Grid Snap setting.......................................................
Contents Operation guide: Sound module (VariOS) ................ 99 An overview of the VariOS .................................................................100 Internal structure of the VariOS ........................................................................................................... 100 “Samples” and “performances”................................................................................................ 100 To play sounds ...........................................................
Contents Appendix ................................... 125 Synchronization settings ...................................................................126 Synchronizing as a slave (MIDI Clock) ............................................................................................... 126 V-Producer synchronization settings....................................................................................... 127 ProTools....................................................................................
Introduction Thank you, and congratulations on your choice of the VariOS. The VariOS is a completely new type of audio-based music production environment, which consists of a VariPhrase sound generator (VariOS) and software (V-Producer for VariOS). VariPhrase not only lets you edit the tempo and pitch of audio material as easily as you can with MIDI data, it also provides pinpoint control—graphically, and in real time—over any region within a phrase sample that you choose to focus in on.
Introduction Check the contents of the package This package contains the following items. When you open the package, check that no items are missing. If any items are missing, please contact your dealer. ❏ VariOS fig.01-00aPanel_50 ❏ AC cable This is the only AC cable you should use with the VariOS. Do not use any AC cable other than the supplied one, since doing so may cause malfunction. ❏ Rackmount adaptor Use this if you want to install the VariOS in an audio rack.
Startup This section introduces the basic concepts of the VariOS, and explains how to install the software and drivers, and how to make connections with external devices.
Names of Things and What They Do Front Panel fig.01-01PanelFront_75 E F A B C D G H I J K A. PC Card Slot This is used when saving VariOS data (p. 122). B. PITCH/TIME/FORMANT Knobs PITCH (C1) Knob TIME (C2) Knob FORMANT (C3) Knob Modifies the pitch. Modifies the playback speed (time). Modifies the tonal character (formant). You are free to assign the parameter that will be adjusted by each knob (p. 116). The above assignments are the power-on defaults. C.
Names of Things and What They Do Rear Panel fig.01-02PanelRear_75 L M N O P Q R L. AC Inlet Connect the supplied power cord here. * For details on the power consumption, refer to p. 162. The unit should be connected to a power source only of the type marked on the side of unit. M.
Names of Things and What They Do V-Producer screen fig.02-03_75 A E F d b' C B D b g G A. Locator (p. 47) The locator contains functions for controlling the playback of V-Producer, such as song play/ stop. B. Sample List (p. 58) Sample List displays a list of the samples that are loaded into the VariOS. To load a sample into the VariOS, press the [b’] (Load Wave Files) button (p. 56) and load a wave file (.wav or aiff) from your computer.
Names of Things and What They Do D. Wave Edit (p. 65) Wave Edit lets you re-encode samples from the sample list (e.g., to change their encoding type or modify the tempo data). To display Wave Edit, click the [b] (Sample Info) button located at the bottom of the screen, and then click the [d] (Wave Edit) tab. E. Vari Track (p. 68) Vari Track is the basic screen you will use when creating a song. Drag and drop samples from the sample list to arrange them into a song.
Names of Things and What They Do Restoring the factory settings (Factory Reset) Here’s how to restore the VariOS to the factory-set condition. 1. Press the [MENU] button so it’s lighted. The MENU screen will appear. * Initially, the MENU screen will show the most recently selected menu. You need to go to the top level menu. You can get there by pressing and continuing to hold the [MENU] button for a few moments (when the [MENU] button is not illuminated), or by pressing the [EXIT] button. 2.
Connections with external devices Attaching the rackmount adaptors If you want to install the VariOS in a rack, attach the rackmount adaptors as shown in the diagram. fig.angle 1 2 Remove three screws (on each side) from the right and left panels of the VariOS. Using the screws you removed in step 1, attach the rackmount brackets to the VariOS. You must use the screws that you removed. Do not use any other screws.
Connections with external devices Connecting MIDI and audio devices Connect your MIDI and audio devices to the VariOS as shown in the diagram below. Do not connect the USB cable at this time. You will connect it later during the “Installation” (p. 21) procedure. (If you connect the USB cable to your computer, installation of the USB driver will begin.) fig.02-connect.
Installation This chapter explains how to install the software and connect the VariOS with your equipment. The installation procedure will differ depending on your system. Please proceed to one of the following sections, depending on the system you use. • Windows users.....................................................p. 21 • Macintosh users ...................................................p.
Installation ■ Installing the Driver Here's how to install the driver that allows the VariOS to be detected and handled as a MIDI device and an external storage device (expansion drive) of your computer. The installation procedure will differ depending on your system. Please proceed to one of the following sections, depending on the system you use. • Windows XP users ..............................................p. 22 • Windows 2000 users............................................p. 26 • Windows Me users.
Installation 5 6 Click [OK] to close the System Properties dialog box. Exit all currently running software (applications). Also close any open windows. If you are using virus checking or similar software, be sure to exit it as well. 7 Prepare the CD-ROM. Insert the CD-ROM into the CD-ROM drive of your computer. 8 Click the Windows start menu, and from the menu, select “Run...”. Open the “Run...” dialog box. 9 In the dialog box that appears, input the following into the “Open” field, and click [OK].
Installation 13 The Found New Hardware Wizard will appear. Make sure that the screen indicates “Roland VariOS,” select “Install from a list or specific location (Advanced),” and click [Next]. fig.2-7_20 14 The screen will indicate “Please choose your search and installation options.” Select “Don’t search. I will choose the driver to install,” and click [Next]. 15 Make sure that the “Model” field indicates “Roland VariOS,” and click [Next]. Driver installation will begin.
Installation 16 The Insert Disk dialog box will appear. Click [OK]. The Insert Disk dialog may not appear. In that case, proceed to next step. 17 The Files Needed dialog box will appear. Input the following into the “Copy files from” field, and click [OK]. D:\ENGLISH\Driver\USB_XP2K 18 The drive name “D:” may be different for your system. Specify the drive name of your CD-ROM drive. The Found New Hardware Wizard will appear. Make sure that the display indicated “Roland VariOS,” and click Finish.
Installation Windows 2000 users ◆ Preparations for installing the driver 1 2 3 With the VariOS disconnected, start up Windows. Log on to Windows as a user with administrative privileges (such as Administrator). Disconnect all USB cables except for a USB keyboard and USB mouse (if used). Open the System Properties dialog box. Click the Windows start menu, and from the menu, select Settings | Control Panel. In Control Panel, double-click the System icon. fig.
Installation 10 In the dialog box that appears, input the following into the “Open” field, and click [OK]. D:\ENGLISH\DRIVER\USB_XP2K\SETUPINF.EXE 11 The drive name “D:” may be different for your system. Specify the drive name of your CD-ROM drive. The SetupInf dialog box will appear. You are now ready to install the driver. ◆ Installing the driver 12 Use the USB cable to connect the VariOS to your computer. fig.
Installation 14 The Insert Disk dialog box will appear. Click [OK]. 15 The Files Needed dialog box will appear. Input the following into the “Copy files from” field, and click [OK]. D:\ENGLISH\DRIVER\USB_XP2K 16 The drive name “D:” may be different for your system. Specify the drive name of your CD-ROM drive. The “Find New Hardware Wizard” may be displayed. Verify that “Roland VariOS” is displayed, and click [Finish]. 17 The System Settings Change dialog box may appear. Click [Yes].
Installation Windows Me users ◆ Preparations for installing the driver 1 2 With the VariOS disconnected, start up Windows. Disconnect all USB cables other than those for a USB keyboard or USB mouse. Exit all currently running software (applications). Also, close any open windows. If you are using a virus checker or similar software, be sure to exit this as well. 3 Prepare the CD-ROM. Insert the CD-ROM into the CD-ROM drive of your computer.
Installation 10 Once the driver has been installed, the New Hardware Found dialog box will close. In the SetupInf dialog box, click [OK]. The SetupInf dialog box will close. You have finished installing the VariOS driver. Next, proceed to “MIDI and audio settings” (p. 44). 30 If you were unable to install the VariOS driver as directed, or if you are unable to use the VariOS even after installing the driver, please delete the driver. (->Deleting the driver (p.
Installation Windows 98SE users ◆ Preparations for installing the driver 1 2 With the VariOS disconnected, start up Windows. Disconnect all USB cables other than those for a USB keyboard or USB mouse. Exit all currently running software (applications). Also, close any open windows. If you are using a virus checker or similar software, be sure to exit this as well. 3 Prepare the CD-ROM. Insert the CD-ROM into the CD-ROM drive of your computer. fig.
Installation ◆ Installing the driver 7 Use the USB cable to connect the VariOS to your computer. fig.02-USB VariOS (Rear) Computer USB cable USB connector 8 9 Set the VariOS’s power switch to the ON position. You must power up the VariOS according to the procedure given on p. 49. The Add New Hardware Wizard dialog box will appear. Click [Next]. fig.02-98-3 10 Select “Search for the best driver for your device,” and click [Next]. fig.
Installation 14 The Insert Disk dialog box will appear. Click [OK]. fig.02-USB 15 The New Hardware Found dialog box will appear. Input the following into the Copy files from field, and click [OK]. D:\ENGLISH\DRIVER\USB_98ME 16 The drive name “D:” may be different depending on your system. Type the name of your CD-ROM drive. The Add New Hardware Wizard dialog box will appear. Click [Next]. fig.02-98-3 17 Select “Search for the best driver for your device,” and click [Next]. fig.
Installation 20 The screen will indicate “Windows has finished installing the software that your new hardware device requires.” Click [Finish]. In the SetupInf dialog box, click [OK]. The SetupInf dialog box will close. You have finished installing the VariOS driver. Next, proceed to “MIDI and audio settings” (p. 44). 34 If you were unable to install the VariOS driver as directed, or if you are unable to use the VariOS even after installing the driver, please delete the driver.
Installation Macintosh users The installation procedure will differ depending on your system. Please proceed to the appropriate page for your system. • Mac OS X users ....................................................p. 35 • Mac OS 9 users.....................................................p. 37 ■ Mac OS X users Installing V-Producer 1 2 3 Insert the CD-ROM into the Macintosh CD-ROM drive. On the CD-ROM, open the English - for OS X - V-Producer 2 folder.
Installation 5 The screen will indicate “Welcome to Roland VariOS USB Driver Installation.” Click [Continue]. 6 The screen will indicate “Choose location for installation.” Click to select the drive in which the system is installed, and then click [Continue]. 7 The screen will indicate “Default installation.” Click [Install] or [Upgrade]. 8 A message like this appears: “If you install this software, you will need to restart your computer after the installation is complete.
Installation ■ Mac OS 9 users Before installation ● To ensure that V-Producer will operate correctly, please make the following settings on your Macintosh. 1. Open Control Panels from the Apple menu. 2. Make the following settings: • In the Memory control panel, turn virtual memory “off.” * If virtual memory is “on,” the performance of the Preview function will be impaired. V-Producer will operate regardless of whether virtual memory is turned on or off.
Installation ■ About the included MIDI drivers This product contains the following MIDI drivers. Driver for OMS This is a driver for using the VariOS with OMS. Driver for FreeMIDI This is a driver for using the VariOS with FreeMIDI. In order to use this driver, you will need to separately obtain version 1.35 or higher of FreeMIDI. For instruction on how to install the VariOS Driver and how to make the FreeMIDI settings, refer to Readme FM-E.
Installation ■ Installing V-Producer 1 2 3 4 5 Exit all currently running software (applications). If you are using a virus checker or similar software, be sure to exit this as well. Insert the CD-ROM into the CD-ROM drive. Double-click the V-Producer Installer Installer icon (found in the English - for OS 9 folder of the CD-ROM) to start up the installer. Verify the [Install location], and click [Install]. Follow the on-screen instructions to proceed with the installation.
Installation ■ Connections and OMS setup Installing the VariOS OMS driver Use the following procedure to install the VariOS driver. The included VariOS OMS Driver-E is an add-on module for using the VariOS with OMS. In order for you to use it, OMS must already be installed on the hard disk from which you started up. * Disconnect the VariOS from the Macintosh before you perform the installation. 1 2 3 4 Exit all currently running software (applications). Insert the CD-ROM into the CD-ROM drive.
Installation OMS settings Here’s how to make OMS settings. Before you make these settings, make sure that the MIDI devices connected to your Macintosh and all peripherals are powered up. 1 Use a USB cable to connect the VariOS to your computer, and turn on the power of the VariOS. fig.02-USB VariOS (Rear) Computer You must power up the VariOS according to the procedure given on p. 49.
Installation fig.02-oms-set-3.eps_30 6 The OMS MIDI Device Setup window will appear. A problem with the OMS Setup program causes the third port to be displayed as “DX7 II.” Please rename this port in step 8. Add a check mark to all of the VariOS USB IF ports (Port 1, Port 2, DX7 II), and click [OK]. 7 8 In the screen for saving the studio setup, click [Save] to save the setup. The ports for VariOS USB IF will be displayed. Each port has the following function.
Installation • Set “Port 2” to “Roland VariOS External MIDI” • Set “DX7 II” to Roland VariOS Sync” * For “DX7 II,” you must check all of the items in field . (By default these are unchecked.) If these are left unchecked, synchronization will not operate correctly. fig.02-oms-set-6.eps * If a dialog box similar to this appears, click “No More Warnings.” fig.02-oms-set-5.eps_50 9 10 11 From the Edit menu choose OMS MIDI Setup.
MIDI and audio settings Here’s how to make settings for the MIDI port and the computer’s audio device that will be used to communicate with the VariOS. 1 Turn on the power of the VariOS. Before starting up V-Producer, you must power up the VariOS and connect the VariOS to your computer via a USB cable.
MIDI and audio settings (OS 9) MacOS On the Macintosh, the name you assigned in step 8 of “OMS Settings” (p. 42) will be displayed. Select the port that corresponds to the VariOS sound generator port (Port 1). If you will not be using the USB MIDI functionality of the VariOS (i.e., When not using the USB MIDI functionality of the VariOS (Connecting the VariOS to an external MIDI interface)), refer to page 139.
MIDI and audio settings fig.02-midi04 7 (Windows only) In the Audio Device (Preview) field, select the audio device that you will use for V-Producer’s preview function. OS On the Macintosh version there is no Audio Device (Preview) field. The internal MacOS sound functionality of the Mac will be selected. The Preview function lets you use the audio device of your computer to audition sample data stored on your computer without loading it into the VariOS.
Listening to the demo songs Loading the demo songs 1 Start up V-Producer. Before starting up V-Producer, you must power up the VariOS and connect the VariOS to your computer via a USB cable. If you inadvertently start up V-Producer before powering up the VariOS or connecting the USB cable, or if you power down the VariOS or disconnect the USB cable while V-Producer is running, you must exit V-Producer, and then restart it. 2 In V-Producer, choose Open Song from the File menu.
Listening to the demo songs Playing the demo song You will use V-Producer’s Locator to play back the songs. fig.02-locator Current time To beginning 1 Upper value: measure.beat.tick Lower value: hours:minutes:seconds:frames Rewind Fast-forward Stop Tempo Pitch Speed Play Click the [Play] button in the Locator to play back the song. When you play the song, the current time will change. * If the demo song does not play, read “Q.
Turning the VariOS on/off * Once the connections have been completed, turn on power to your various devices in the order specified. By turning on devices in the wrong order, you risk causing malfunction and/or damage to speakers and other devices. * This unit is equipped with a protection circuit. A brief interval (a few seconds) after power up is required before the unit will operate normally. Turning on the VariOS when connected to a computer 1 2 Start up your computer.
Turning the VariOS on/off Turning off the VariOS when connected to a computer Use the following procedure to turn off the power of the VariOS. If you fail to use the correct procedure to turn off the power, your computer may display a warning message. In Windows Me, powering down the VariOS before unmounting the drive may cause an error to occur in Windows. You must use the following procedure when powering down. 1 2 If V-Producer is running, exit the program.
Operation Guide: Software (V-Producer) This chapter explains the basic operation for V-Producer in the order of your actual workflow. Once you have read through this chapter, you will have mastered its basic operation.
An overview of V-Producer V-Producer is software that controls a sound module (VariOS). It reads wave files stored on your computer and sends them to the VariOS. At the same time, it also displays the files on the screen as samples. Simply by placing samples on a screen that corresponds to the six "parts" of the VariOS, you can automatically control the VariOS, making it sound accordingly. This lets you easily create a song using multiple tracks on the VariOS.
An overview of V-Producer 1. Loading wave files (Load Wave Files) (p. 56) Load wave files (.wav, aiff, or SD2) from your computer into V-Producer. At this time the following processes will be performed automatically. • The wave file will be converted into a VariPhrase format file that can be handled as VariPhrase data (Encoding, p. 55) • The VariPhrase format file (.vpw) will be sent to the sound module (VariOS) via USB. • The VariPhrase format file (.vpw) will be saved on the computer’s hard disk. 2.
An overview of V-Producer What is VariPhrase? VariPhrase is proprietary Roland technology that uses newly developed encoding methods with several algorithms to analyze and extract the three elements of sound—pitch, time, and formant (tonal character)—from the sample, allowing you to control these independently in real time. fig.
An overview of V-Producer What is encoding? In order use VariPhrase to freely control the pitch or time, the sample must be encoded in order to extract its pitch/time/formant data. There are three encoding types. Choose the encoding type that is most suitable for each phrase. ● SOLO This type accurately extracts the pitch, time, and formant data. This encoding type is ideal for singlenote and melodic audio phrases such as vocals or sax, and lets you take full advantage of VariPhrase’s potential.
Loading wave files (Load Wave Files) Here’s how you can load wave files from the hard disk of your computer and send them to the VariOS. When you execute this command, the Load Wave Files dialog box will appear. 1. Start up V-Producer. * Before starting up V-Producer, you must power up the VariOS and connect the VariOS to your computer via a USB cable.
Loading wave files (Load Wave Files) 3. Load the wave file as described in the illustration below. fig.02-04Loadwavefile This area shows the wave files that are on your computer. The wave files within the folder you selected at the left will be listed at the right. - Conventional wave files (.wav, .aiff) - SD2 format files - VariPhrase format files (.vpw) In the list at the right, click the wave file that you want to load into the VariOS.
Make settings for samples and play them (Sample List) At the bottom of the screen, click the [Sample Info] button ( ) to access the Sample List screen. fig.03-03de Opens the "Load Wave Files" dialog box that lets you load samples Preview button: Auditions the sample Copies the sample Deletes the sample from the VariOS's memory (the file will not be deleted) This switches the keyboard map.
Make settings for samples and play them (Sample List) Auditioning a sample 1. Use the mouse to select the sample you want to audition. You can also use the [ ][ ] keys of your computer keyboard to select a sample. fig.03-03maru 2. Click the [Preview] button shown in the diagram, or press the [P] key of your computer keyboard to audition the sample. • The sound will be heard from the VariOS. 3. You can play your MIDI keyboard to audition the selected sample. * * * One free part in the Vari Track (p.
Make settings for samples and play them (Sample List) Switching the keyboard map “Keyboard Map” is a parameter that specifies how a sample loaded by V-Producer will be sounded when it is triggered via MIDI. You can select one of the following two modes. To switch between modes, press the button that is shown at the far right of each sample in the sample list. ■ (Phrase Map) The sample will be sounded at the pitch corresponding to the note number.
Make settings for samples and play them (Sample List) Deleting a sample To make best use of the memory of the VariOS, here’s how you can delete unwanted samples from VariOS memory. 1. At the bottom of the screen, click the [Sample Info] button ( list. ) to display the sample 2. Click the sample that you want to delete. 3. Click the [Delete Sample] ( ) button. The selected sample will be deleted from the memory of the VariOS.
Editing the sample parameters (Sample Edit) fig.sampleedit In this screen you can edit various parameters for a sample that was sent to the VariOS. Click the [Sample Info] button ( ) located at the bottom of the screen to display this screen. Here we will explain the basic parameters used to play a sample on the VariOS. fig.03-06 ■ Key Assign mode The Key Assign mode selects whether the sample will be played polyphonically (POLY) or monophonically (SOLO).
Editing the sample parameters (Sample Edit) ■ Playback mode The Playback mode selects how the sample will be played. If you want to use legato (*) playing to play a melody different than the original sample, choose “Time Sync.” If you want the sample to play back from the beginning each time you press a key, choose “Retrigger.
Editing the sample parameters (Sample Edit) ■ Robot (robot voice switch) Turn this ON if you want to remove the sense of pitch from the sample (i.e., to ignore the original pitch of the sample and sound it at the pitch that you play). In the case of a phrase sample, you can use your keyboard to play a melody that is entirely different than the original sample, in this way using a single sample to play a variety of melodies.
Re-encoding a sample (Wave Edit) If you want to change the encoding type of a sample that is already loaded into the VariOS (for example, if the sample is a solo vocal phrase, and you want to change it from “Backing” to “Solo”), or if you want to change the original tempo of the sample (for example, if the sample tempo does not match the song, you can re-encode the sample in the Wave Edit screen).
Re-encoding a sample (Wave Edit) Loop If you want playback to occur repeatedly, turn looping on. Display Grid Switches the display grid. Zoom tool Expands or contracts the waveform display. ■ Changing the encoding type For details on the encoding type, refer to “What is encoding?” (p. 55). 1. At the bottom of the screen, click the [Sample Info] button ( [Wave Edit] tab ( ), and then click the ) to access the Wave Edit screen. 2.
Re-encoding a sample (Wave Edit) ■ Changing the location of a event Events demarcate the notes that you edit in the Scope Editor screens (p. 76). In the Groove Scope (p. 87), you can slice the sample at the locations of the events you specify here, and reassemble the slices as desired. Initially, V-Producer will automatically place events in the sample, but you are free to add, delete, or adjust the location of the events. 1. As described in steps 1–3 of “Changing the encoding type,” enter Edit mode. 2.
Creating a song (Vari Track) Now let’s actually create a song. Songs are created using the Vari Track. To create a song, you will drag and drop samples from the sample list into the Vari Track. The samples placed in this way are called “frames.” You can also use your MIDI keyboard to play samples in real time and record your performance. fig.03-28E Auto Scroll button Grid Snap button MARKER TEMPO METER (time signature) area Time ruler Frame Playback cursor Zoom tool Changing the tempo 1.
Creating a song (Vari Track) Arranging samples The Vari Track consists of six parts, which correspond to the six parts of the sound module (VariOS). The time ruler in the upper area of the screen indicates the measure numbers. Now let’s place some samples in the Vari Track. 1. Drag a sample from the sample list (hold down the mouse button). 2. Continuing to hold the mouse button, move the sample over the Vari Track, and release the mouse button (i.e., drag and drop the sample). 3.
Creating a song (Vari Track) Editing a frame Samples placed in the Vari Track are shown as rectangular bars, which are called “frames.” You can edit the structure of your song by moving, copying, and pasting frames. ■ Select the frame to edit First you need to select the frame(s) that you want to edit. There are several ways to do this. To select one frame Use the mouse to click the frame To select multiple frames Drag the mouse to describe a rectangle that includes the desired frames. fig.
Creating a song (Vari Track) ■ Moving a frame 1. Select the frame that you want to move. It will be highlighted. 2. Press and hold the mouse button on the selected frame, drag it to the desired destination, and release the mouse button (“drag and drop”). * You cannot move multiple frames that were selected as a time region (p. 70). * If you turn off the Grid Snap button ( the grid size.
Creating a song (Vari Track) Copy by using the Copy and Paste commands 1. Select the frame that you want to copy. 2. Use one of the following methods to copy the frame. • Choose Copy from the Edit menu. • Right-click ( in MacOS, Control-click) the selected frame, and choose Copy from the menu that appears. • Press [Ctrl] + [C] on your keyboard ( in MacOS, [ ] + [C]). 3. Click the copy-destination location.
Creating a song (Vari Track) Loop playback You can use loop playback to listen repeatedly to a specific region. 1. In the locator, turn on the loop button. fig.03-37 2. The loop markers will be displayed in the time ruler. fig.03-38_75 3. Drag the loop markers to left or right to specify the start point and end point of the loop. 4. Press the play button, and playback will loop between the loop markers.
Creating a song (Vari Track) Editing the settings of a frame (Frame Properties) You can edit the frame properties to change the settings (volume, pan, pitch, etc.) of a frame that was placed on the Vari Track. Click to select the frame you want to edit. (It will be enclosed in a red border.) Switches the frame properties between displayed/hidden.
Creating a song (Vari Track) Playing your MIDI keyboard and recording (RealTime Rec) 1. In the sample list, click to select the sample that you want to record. When you play your MIDI keyboard you will hear the selected sample. * If you do not hear sound when you play your MIDI keyboard, make sure that your keyboard is connected as described in “Connecting MIDI and audio devices” (p. 20).
Phrase editing (Scope Editor) The scope editor lets you edit the performance data within a frame. By using the scope editor you can visually edit pitch, time, and formant data for any location within a phrase. The scope editor will be either the Phrase Scope or the Groove Scope, depending on the keyboard map (p. 60) setting in the sample list. Since you can edit while listening to the playback loop, you can hear the results of your editing while you work.
Editing in the Phrase Scope The phrase scope will open when you double-click a green frame that was pasted with the sample’s “Keyboard Map” (p. 60) set to (Phrase Map). fig.03-ps01e Modify record Tool buttons Auto scroll Grid snap Quantize Ruler Waveform display area Note display area Curve select Reset curve Controller display area Controller select Curve view Time keep Sample data Zoom tool Time zero input ● Waveform display area The waveform of the encoded sample is displayed here.
Editing in the Phrase Scope Editing the Pitch/Time/Formant/Dynamics Here’s how to edit the Pitch/Time/Formant/Dynamics in the specified region of the phrase. 1. Select the parameter that you want to edit. At the left of the controller display area, press one of the [Controller select] buttons to select the parameter you want to edit: [PITCH], [TIME], [FORMANT], or [DYNAMICS].
Editing in the Phrase Scope ● Rounded : The parameter will be increased or decreased in a rounded curve. * You can also right-click ( in MacOS, control-click) the controller display area and choose a curve from the menu that appears. ● Reset curve : Resets the curve in the selected region. 4. Hold down the mouse button on the selected region in the controller display area, and drag upward or downward. When you reach the desired value, release the mouse button.
Editing in the Phrase Scope ■ Erasing controller data There are two ways to erase controller data. ● Using the Reset Curve button 1. Select a region. 2. Click the Reset Curve button ( ). ● Using the eraser tool 1. Select the eraser ( ) tool button. 2. When you drag the eraser tool over the controller display area to select a region, the controller data in the selected region will be erased. You can also erase this data by clicking the selected region of the controller display area.
Editing in the Phrase Scope Editing notes By editing notes you can modify the melody of a phrase or create chords. By default (when a frame is first pasted), a note is placed at the original pitch of the sample (the key that will sound the sample at its original pitch). One note will be displayed for each event. In the phrase scope you can move or add notes to freely play the sample just as if you were controlling the VariOS from your keyboard.
Editing in the Phrase Scope ■ Changing the pitch (fixed movement of the note upward or downward) 1. Choose the arrow ( ) from the tool buttons. 2. Use the mouse to drag the note, and then press the [SHIFT] key of your computer. The mouse cursor will be shown as an up/down arrow. 3. Drag the note upward or downward. The waveform display area will show how the phrase has changed. The keyboard shown in the vertical axis of the waveform display area will give you an idea of the pitch that will sound.
Editing in the Phrase Scope ■ Changing the length of a note You are free to change the length of a purple note. 1. Choose the arrow ( ) from the tool buttons. 2. Move the mouse near either end of the note. 3. Drag the note to left or right. ■ Erasing a note Purple notes can be erased. Light blue notes cannot be erased. 1. Choose the eraser ( ) from the tool buttons. 2. Click the mouse on the note that you want to erase.
Editing in the Phrase Scope ■ Joining two notes You can join two notes that were divided. 1. Adjust the two notes so that they are horizontally aligned. 2. Choose the bond ( ) from the tool buttons. 3. Click between the two notes that you want to join. ■ Editing the velocity 1. Using the [Controller select buttons] located at the left of the controller display area, choose [VELOCITY]. A graph of the velocities will be displayed. 2.
Editing in the Phrase Scope Modify Recording This function lets you modify or edit the selected frame in real time. Modify Recording differs from conventional realtime recording (p. 75) in that when you loop-record, the data will be added to the same take. For example, you would use Modify Recording if you want to record the kick on the first cycle, snare on the second, and hi-hat on the third.
Editing in the Phrase Scope Quantize Quantize is a function that adjusts the note locations to left or right so that the notes line up with intervals of the displayed grid. 1. As described in “Selecting multiple notes” (p. 81), specify the region that you want to quantize. 2. Set the numeric value at the right of the quantize button to specify the quantization rate (the amount of adjustment). You can adjust the quantization rate in a range of 0%–100% by dragging the numeric value upward or downward.
Editing in the Groove Scope The groove scope will open when you double-click a purple frame that was pasted with the sample’s “Keyboard Map” (p. 60) set to (Groove Map). fig.
Editing in the Groove Scope Editing the Pitch/Time/Formant/Dynamics You can edit the Pitch/Time/Formant/Dynamics in the desired region of the phrase. The procedure is the same as in the phrase scope, as described in “Editing the Pitch/Time/Formant/Dynamics” (p. 78). * Unlike the phrase scope, the groove scope does not change the timing of a slice (note) when you edit the TIME parameter.
Editing in the Groove Scope ■ Adding a slice Here’s how to add a new slice. 1. Choose the pen ( ) from the tool buttons. 2. Hold down the mouse button at the location where you want to add a slice, drag to the right, and then release the mouse button. If you extend the slice beyond the length of its original waveform, the waveform display of the slice will be a straight line.
Editing in the Groove Scope ■ Copying a slice with the Copy and Paste commands 1. Select the slice that you want to copy. 2. Use one of the following methods to copy the slice. • Choose Copy from the Edit menu. • Right-click ( that appears. in MacOS, control-click) the selected slice, and choose Copy from the menu • Press [Ctrl] + [C] ( in MacOS, [ ] + [C]) on your keyboard. 3.
Saving Saving a song In the same way as in most programs, you will save your work by choosing [Save Song] or [Save As] from the File menu. The song will be saved in V-Producer format (in Windows, the file name extension is .vpd). In V-Producer, the actual audio data used by a song (.vpw files) is handled separately from the song file (.vpd file) that uses this audio data. The song file contains only references to these audio files.
Using the effects of the VariOS (Mixer) V-Producer has a Mixer window in which you can control the level, pan, etc., of the six parts of the VariOS, and an Effect window in which you can adjust the effect parameters. The following diagram shows the effect signal flow. fig.
Using the effects of the VariOS (Mixer) Using effects When you press the [MULTI], [REVERB], or [CHORUS] button of the mixer window, the corresponding effect window will open. ■ MULTI (Multi-effect) fig.
Using the effects of the VariOS (Mixer) ■ Switching the effect type There are 40 types of multi-effect, eight types of chorus, and nine types of reverb. 1. Click the type select buttons ( ) located above the displayed effect type name. The effect type will change. Alternatively, you can click the TYPE field ( ) to view a list of effect types, and directly select the desired type. * For details on the parameters of each effect, refer to the Reference Manual (pdf).
Taking advantage of the VariOS Keyboard (VariOS Keyboard) Using the VariOS Keyboard fig.toolbar Click the keyboard button in the toolbar to open the keyboard. PITCH/TIME/FORMANT knobs Screen Part buttons Velocity fader Keyboard Control the pitch/time/formant of the part. Shows the MIDI messages of the part being auditioned and the part(s) specified by the MONITOR PART buttons. Specify the part(s) whose MIDI messages will be displayed in the screen. Adjusts the velocity of the notes.
Taking advantage of the VariOS Keyboard (VariOS Keyboard) ■ Turning a note on/off from your computer keyboard 1. Press the [Shift]+[K] keys. fig.5 If you place the mouse pointer on the keyboard and right-click ( in MacOS, control-click), and choose “Change PC Keyboard” from the menu that appears, you will be able to turn notes on/off from the keyboard of your computer. fig.trackkey The keys of your computer keyboard will correspond to notes as shown in the diagram..
Taking advantage of the VariOS Keyboard (VariOS Keyboard) ■ Resetting PITCH/TIME/FORMANT When you press the [X] key, any pitch/time/formant values that have been modified by means of the knobs or Surface controller will be reset to their center values. ■ Inputting TIME zero TIME zero will be input while you hold down the [Z] key. When you release the key, the time will return to the center value. This is a convenient way to rhythmically input a TIME zero value to create the distinctive VariPhrase “buzz.
Taking advantage of the VariOS Keyboard (VariOS Keyboard) 98
Operation guide: Sound module (VariOS) 99
An overview of the VariOS Internal structure of the VariOS ■ “Samples” and “performances” The VariOS uses two units of sound: “samples” and “performances.” A “sample” consists of a wave with VariOS sample parameters. Data that assigns samples to the six parts is called a “performance.” The internal memory of the VariOS can contain only one performance. A performance has six parts, and can use up to a total of 128 samples.
An overview of the VariOS fig.041-VariOSGaiyou-E Computer Wave file (WAV) Encode Wave file (AIFF) Vari Phrase format file (VPW) Re-encode Send samples Internal memory Save samples No. (PC#) 001 002 003 : 016 : 128 Name SAMPLE 1 SAMPLE 2 SAMPLE 3 : SAMPLE 16 : NO WAVE DATA Save performance Internal flash ROM Part 1 2 3 4 5 6 Sample No.
Basic operation of the VariOS The screen and basic operation The VariOS has the following two modes. Sample select mode (MENU button dark) In this screen you can select a sample to play. Here you can also select parts and adjust the tempo of the sample. MENU mode (MENU button lit) Here you can make various settings for the VariOS. Switching the screen fig.042-002 Sample select switch Press the [MENU] button so it's not lighted, and the sample select screen wil0l appear.
Basic operation of the VariOS Editing a value fig.042-003 Moving the cursor Use the [CURSOR] buttons to move the cursor to the value you want to edit. * If the screen contains only one value that can be edited, the cursor will not move. Cursor (underline) Editing the value Turn the [VALUE] knob to edit the value. If you press in on the [VALUE] knob while you turn it, the value will change in larger steps.
Basic operation of the VariOS Assigning a name Several screens of the VariOS allow you to assign a name. (For example, Menu 6-2 Sample Rename or 8-2 Save.) Regardless of the type of name you are assigning, the procedure is the same. Performance: Sample: Folder: Volume label: up to 16 characters up to 12 characters up to 16 characters up to 11 characters Access the screen in which you want to assign a name, and use the following procedure. 1.
Basic operation of the VariOS Selecting a sample * When the VariOS has just been powered up, it is not ready to produce sound. You must load samples into its internal memory. Before you continue with the following procedure, you must use the V-Producer’s “Load Wave Files” command to send samples to the VariOS (p. 56). 1. Press the [MENU] button so it’s not lighted. The sample select screen will appear. fig.042-004 Sample number Cursor (underline) Part number Dark Sample name 2.
Basic operation of the VariOS Changing the tempo of a sample 1. Press the [MENU] button so it’s not lighted. Access the sample select screen, and then press the [VALUE] knob to access the tempo change screen. fig.042-005 Tempo Clock source Dark Cursor (underline) 2. Move the cursor to ClockSrc (clock source), and use the [VALUE] knob to select either INT or MIDI. Clock Src (clock source) specifies whether the tempo clock of the VariOS will use its own internal clock (INT) or an external clock (MIDI).
Basic operation of the VariOS ■ Tempo sync setting If you want to play back the sample at its original tempo, turn off Tempo Sync (this is a part parameter). Tempo Sync specifies whether the playback speed of the sample assigned to each part will synchronize to the master tempo or external clock (ON), or will not synchronize (OFF). Procedure: 1. Press the [MENU] button so it’s lighted, and access the MENU screen. fig.
Basic operation of the VariOS Playing the VariOS from a connected keyboard (MIDI Mode) You can connect your MIDI keyboard to the VariOS. In this case, you can change the MIDI routing in the following ways. ■ PC mode When using a USB connection, the MIDI connectors on the rear panel of the VariOS will function as a USB MIDI interface (Roland VariOS External MIDI).
Basic operation of the VariOS Procedure: 1. Press the [MENU] button so it’s lighted, and access the MENU screen. * The MENU screen displays the menu that you selected most recently. You need to go to the top level menu. You can get there by pressing and continuing to hold the [MENU] button for a few moments (when the [MENU] button is not illuminated), or by pressing the [EXIT] button. 2. Turn the [VALUE] knob to select “Menu7 System,” and press the [VALUE] knob. 3.
Basic operation of the VariOS Changing how the sounds are produced Parameters determining how the sound is produced, such as keyboard map (p. 115), key assign mode (p. 113), and playback mode (p. 113), which you set using V-Producer, can also be set from the front panel of the VariOS itself. ■ Changing the Keyboard Map setting * For details on the Keyboard Map parameter, refer to “2-1 Keyboard Map” (p. 115). Procedure: 1. Press the [MENU] button so it’s lighted, and access the MENU screen.
Basic operation of the VariOS ■ Changing the Playback Mode * For details on the Playback Mode, refer to “1-2 Playback Mode” (p. 113)). Procedure: 1. Press the [MENU] button so it’s lighted, and access the MENU screen. * The MENU screen displays the menu that you selected most recently. You need to go to the top level menu. You can get there by pressing and continuing to hold the [MENU] button for a few moments (when the [MENU] button is not illuminated), or by pressing the [EXIT] button. 2.
VariOS Menu Reference * For details on how to switch between the screens of MENU mode and how to edit the settings, refer to “Basic operation of the VariOS” (p. 102). Menu structure 112 Menu1 Sample Edit 1-1 Key Assign Mode 1-2 Playback Mode 1-3 Trigger Mode 1-4 Loop Switch 1-5 Robot Voice 1-6 Wave Gain 1-7 Fade In/Out Sample settings Solo/poly selection (p. 113) How a sample is played (p. 113) How a key is sounded (p. 114) Loop on/off (p. 114) Robot Voice on/off (p. 114) Sample volume (p.
VariOS Menu Reference Menu 1 Sample Edit (sample settings) 1-1 Key Assign mode Selects whether a sample will be played polyphonically (POLY) or monophonically (MONO). It is effective to select SOLO when you want to play a monophonic instrument (such as sax or flute) legato. Available Settings: Poly: Solo: Multiple notes can be played simultaneously. Only the last-played note will be sounded, one note at a time. 1-2 Playback Mode Selects how the sample will be played.
VariOS Menu Reference 1-3 Trigger mode 1-7 Fade In/Out Specifies how the sample will be triggered when you press a key. Available Settings: Fade-in gradually increases the volume of the sample from the moment of note-on. Set the time over which the volume will rise from zero up to the specified volume. Available Settings: 0.00–2.00 [sec] GATE: TRIGGER: DRUM: The sample will sound only while you continue holding down the key.
VariOS Menu Reference Menu 2 Part Edit (part settings) 2-1 Keyboard Map Specifies the keyboard status of each part. When you play a sample via MIDI, this parameter will determine how the sample is sounded. Available Settings: Phrase Map The sample will be sounded at a pitch that corresponds to the note number. Example: When using a vocal sample of “Here comes VariPhrase,” the pitch will change depending on the key that you play. fig.
VariOS Menu Reference Menu 3 Controller Edit (Controller settings) 3-1 CTRL Setting Here you can specify the amount of change produced by the three knobs or by external MIDI controllers. Turn the [VALUE] knob to access the desired screen. When you press the [VALUE] knob, the setting can be edited. Use the [CURSOR] buttons (left/right) to select the item that you want to edit.
VariOS Menu Reference 3-1-6 Pitch Bend fig.R05-031-exp For pitch bend, you can set the bend range (the range over which the pitch can be changed) in addition to the items listed in the preceding section. Wave start Loop Start Loop End Wave end Range U (bend range up) Specify how far the pitch will rise when the pitch bend lever is moved to the far right (or in the case of a wheel, fully upward). With a setting of +12, moving the pitch bend lever to the far right will raise the pitch one octave.
VariOS Menu Reference STEPD (step direction): This function reverses the direction of the step. When using this, set the Playback Mode (p. 63, p. 113) to STEP. As long as you do not press the pedal, each key you play (each note-on that is received) will cause playback to continue to the next event, and then stop. If you play a key while holding down the pedal, the previous region divided by events will sound.
VariOS Menu Reference Menu 4 Effect Edit (Effect settings) Producer. * For details on each effect, refer to “The effects of the sound generator section” in the reference manual (PDF). 4-5 Effect Type Rev 4-1 Effect Switch Switches the effects on/off. Switch the multi-effect (MULTI), chorus (CHORUS), and reverb (REVERB) on/off.
VariOS Menu Reference Menu 5 Tune (Tuning settings) 5-1 Master Tune Adjusts the tuning of the entire VariOS. The displayed value is the frequency of the A4 key. Available Settings: 427.4–452.6 [Hz] * This value is remembered even when the power is turned off. 5-2 Master Coarse/Fine Tune Coarse adjusts the basic pitch of the performance in semitone steps over a +/-1 octave range.
VariOS Menu Reference Menu 7 System Menu 8 DISK 7-1 Control Channel 8-1 Load This specifies the channel on which MIDI messages from an external device will simultaneously control all parts of the VariOS. If you do not need to control all parts simultaneously, turn this setting “OFF.” Available Settings: 1–16, OFF Here you can load performances or samples that you saved in internal flash ROM or on a PC card.
VariOS Menu Reference 8-2 Save 8-3 Delete When you save a performance, all samples in internal memory at that time will be saved along with the performance. Since you can create a folder when you save a performance, we recommend that you save a performance in its own folder. If you do so, it will be easy to see which samples belong to which performance when you look at the contents of the disk. * A sample for which there is no wave cannot be saved.
VariOS Menu Reference 8-4 Rename 8-5 Format Here’s how to rename a file or folder. Here’s how to format (initialize) the internal flash ROM or a PC card. A PC card must be formatted for use by the VariOS before it can be used. 1. As described in “Switching the screen” (p. 102), access MENU “8-4 Rename,” and press the [VALUE] knob. 2. When the display indicates “Select Media,” turn the [VALUE] knob to select the media that contains the file (or folder) you want to rename, and press the [VALUE] knob.
VariOS Menu Reference 124
Appendix 125
Synchronization settings V-Producer can use MIDI Clock or MTC (MIDI Time Code) to synchronize with a variety of other software. This section explains various methods of synchronization. Synchronizing as a slave (MIDI Clock) If you want to synchronize V-Producer to a MIDI sequencer (ProTools, Logic, Cubase, Digital Performer, etc.) installed in the same computer, using MIDI Clock for synchronization is the simplest, so it is the recommended method.
Synchronization settings V-Producer synchronization settings Make the following settings so that V-Producer will operate (as a slave) according to the MIDI clock of your MIDI sequencer. 1 Choose Option - MIDI Sync. fig.05sync02 2 In the Sync IN area of the Sync Mode dialog box, set the IN field to the MIDI device you are using as the synchronization input. * If you are synchronizing with a MIDI sequencer that is running on the same computer, select “Roland VariOS Sync” as the MIDI device. fig.
Synchronization settings ProTools 1 The explanation in this manual uses Pro Tools LE 5.0.1 for MacOS. Please be aware that some screens and menu names may differ in other versions. Choose MIDI - MIDI Beat clock. fig.05syncProTools.eps 2 3 Check the “Enable MIDI Beat Clock” and “Roland VariOS Sync” check boxes. If you are running ProTools and V-Producer on the same computer and synchronizing them, you must first start up ProTools and then V-Producer.
Synchronization settings MacOS 1 2 If you are using Logic for Mac, and you experience hangups even after making the settings on the preceding page, please try making the following settings. Choose [Options] - [Preferences] - [OMS Preferences] - [Input Mapping...]. Uncheck the “Connect all Real OMS Input Instruments with Logic” check box. Do not select “Roland VariOS Sync” for “Input Connections.” Uncheck 3 Close the dialog box. Cubase VST 1 2 Choose Options - Synchronization.
Synchronization settings Digital Performer FreeMIDI settings for using the VariOS 1 Create the following FreeMIDI Configuration for the VariOS. fig.05syncDigiPfm01 The explanation in this manual uses Digital Performer 3.0. Please be aware that some screens or menu names may differ in other versions. For details on installing the FreeMIDI driver for VariOS and on making FreeMIDI Configuration settings, refer to [ReadmeFME.HTM] located in the [VariOS FreeMIDI DriverE] folder on the CD-ROM.
Synchronization settings Next, make settings so that V-Producer will synchronize to the MIDI clock data transmitted from Digital Performer. fig.05syncDigiPfm04 5 6 From V-Producer’s [Option] menu, choose “MIDI Sync...” In the Sync Mode dialog box, set the Sync IN “IN” field to “Roland VariOS Sync” as shown below. fig.05syncDigiPfm05 Select Roland VariOS Sync 7 8 In the Sync IN “Type of sync” field, select “MIDI Clock.” Click [OK] to close the Sync Mode dialog box. fig.
Synchronization settings Digital Performer settings fig.05syncDigiPfm08 12 13 From Digital Performer’s [Basics] menu, choose “Transmit Sync...” In the Transmit dialog box, set the “Transmit beat clocks via port(s)” field to “VariOS Port.” fig.05syncDigiPfm09 14 132 Click [OK] to close the Transmit dialog box.
Synchronization settings SONAR 2.0 1 2 Choose Options - MIDI Devices. In the MIDI Device dialog box, choose “Roland VariOS Sync” in the Output Devices field. At this time, make a note of the port number for Roland VariOS Sync. The top MIDI device that is selected in the list of output devices is assigned to MIDI output port 1, and the next MIDI device is assigned to MIDI output port 2, and so on. 3 4 5 The explanation in this manual uses SONAR 2.0.
Synchronization settings Synchronizing as a slave (MTC) V-Producer can synchronize as a MTC slave. Use the following procedure to set V-Producer so that it will operate according to MTC. 1 2 ChooseOption - MIDI Sync. In the Sync Mode dialog box, set the Sync IN field IN to the MIDI device that you will use to input the synchronization signal. * If you are synchronizing to a MIDI sequencer that is running on the same computer, select “Roland VariOS Sync” as the MIDI device. fig.
Synchronization settings Synchronizing as the master (MIDI Clock) 1 2 Choose Option - MIDI Sync. In the Sync Mode dialog box’s Sync IN area, set Type of sync to “Internal.” * You can obtain the same result by pressing the [INT] button of the locator section. 3 4 5 In the Sync OUT area, set the OUT field to the MIDI device that you will use to output the synchronization data. In the Sync OUT field, select MIDI Clock. Click [OK]. Now V-Producer will transmit MIDI clock data as the master.
Synchronization settings Synchronizing as the master (MTC) 1 2 Choose Option - MIDI Sync. In the Sync Mode dialog box’s Sync IN area, set Type of sync to “Internal.” * You can obtain the same result by pressing th [INT] button of the locator section. 3 4 5 6 7 In the Sync OUT area, set the OUT field to the MIDI device that you will use to output the synchronization data. In the Sync OUT field, select MIDI Time Code.
Controlling the VariOS from your MIDI sequencer When using the VariOS with your MIDI sequencer (ProTools, Logic, Cubase, Digital Performer, etc.), you can set the VariOS’s clock source to “MIDI” so that the VariOS’s internal tempo will synchronize to the tempo of your MIDI sequencer. 1 2 3 4 Turn on the power of the VariOS, and load the samples that you want to play (p. 121). Set the VariOS clock source to “MIDI” (p. 106).
Using your MIDI sequencer to play data (SMF) created by V-Producer Here’s how SMF data you’ve exported from V-Producer using the File Export SMF... command can be played on your MIDI sequencer (ProTools, Logic, Cubase, Digital Performer, etc.). ■ Export SMF data 1 2 In V-Producer, execute File - Export SMF... to export the SMF data. In the VariOS, save the samples that are used by the SMF (p. 122). ■ Load the SMF data into your MIDI sequencer 1 2 3 4 Set the clock source of the VariOS to “MIDI” (p.
When not using the USB MIDI functionality of the VariOS (Connecting the VariOS to an external MIDI interface) Here’s how to make connections and settings when you are not using the USB MIDI functionality of the VariOS (i.e., when you are connecting the VariOS to an external MIDI interface). Normally, you will not need to use these connections unless you have problems, such as the VariOS’s USB MIDI functionality failing to operate reliably on your computer. Connections fig.
Reloading the internal demo song into the VariOS Since the demo song inside the VariOS is saved in the internal flash ROM of the VariOS, it will not play back correctly if you format the internal flash ROM of the VariOS or if you delete the demo song data. Reload the demo song using the following procedure. If you execute this procedure, all user data will be erased from the internal flash ROM. Please re-save the user data to a PC card before you proceed.
Reloading the internal demo song into the VariOS 8 A message of “Are You Sure? Format OK?” will ask you for confirmation. Press the [VALUE] knob once again to execute formatting. If you press the [EXIT] button you will return to the previous screen. During formatting, the display will indicate “Now Processing...” When formatting is finished, the display will indicate “Completed!” The demo song has now been reloaded.
Troubleshooting Problems related to the USB driver (Windows) ●Q. When I start (or restart) my computer with the VariOS connected via USB, it freezes at the startup screen and fails to work • Switch off the VariOS and then restart your computer. It has been found that on some computers, starting (or restarting) the computer while the VariOS is powered up and USB is connected will cause the computer to freeze at the startup screen and fail to work.
Troubleshooting ●Q. “Find new hardware wizard” does not execute automatically ●Q. The “Insert Disk” dialog box does not appear ●Q. “Find new hardware wizard” ends before the process is completed It may take about 15 seconds (or more) after the USB cable is connected for the VariOS to be detected. • Is the USB cable connected correctly? Make sure that the VariOS and your computer are correctly connected via a USB cable.
Troubleshooting 4. Click the Windows Start button, and from the menu that appears, choose Settings | Control Panel. 5. Double-click the System icon. The System Properties dialog box will appear. 6. Click the Device Manager tab. In Windows XP, select the System Properties Hardware tab, and click Device Manager. 7. Check whether “Roland VariOS” with an “!” or “?” symbol is displayed below “Other Devices,” “Sound, Video, and Game Controllers,” or “Universal Serial Bus Controller.
Troubleshooting ●Q. Windows XP/2000 displays a “Hardware Installation” or “Digital Signature Not Found” dialog box • Did you make “Driver Signing Options”? In order to install/re-install the driver, you must make the settings described in “Driver Signing Options.” (Windows XP ➝ p. 22, Windows 2000 ➝ p. 26) Problems related to the USB driver (Macintosh) ●Q. USB indicator on the VariOS's panel is not lit The USB indicator will not light if the VariOS is not recognized by the computer.
Troubleshooting Problems when using the VariOS ●Q. Can’t install • Make sure that the CD-ROM is inserted correctly. • If other applications are running, exit all of them before you begin the installation. • Make sure that your hard disk has enough free space. If it does not have enough free space, delete unneeded files and then empty the recycle bin. ●Q. Can’t start up V-Producer • Are numerous applications running? Sometimes a new application cannot start up if there is not enough memory.
Troubleshooting ●Q. MIDI device is not displayed in the PORT field of the MIDI/Audio settings ( Macintosh, MIDI Settings) dialog box on the Before starting up V-Producer, you must power up the VariOS and connect the VariOS to your computer via a USB cable. If you inadvertently start up V-Producer before powering up the VariOS or connecting the USB cable, or if you power down the VariOS or disconnect the USB cable while V-Producer is running, you must exit V-Producer, and then restart it.
Troubleshooting ●Q. No sound when you play back the demo song • Make sure that the VariOS is powered on. • Make sure that the VariOS is connected correctly. (“Connections with external devices” (p. 19)) • Make sure that MIDI device settings are correct. (“MIDI and audio settings” (p. 44)) • Exit all other MIDI software, and re-start V-Producer. ●Q.
Troubleshooting ●Q.No sound • Is the power of the connected equipment turned on? Make sure that the power of the connected amp/mixer system is turned on. • Has the volume been lowered? Check the volume of the VariOS, and the volume of the connected amp/mixer system. • Are the connections correct? If there is sound in the headphones, it is possible that theconnection cables are broken, or that your amp/mixer has malfunctioned. Check the connection cables and your equipment once again.
Troubleshooting ●Q. Notes are stuck • In the Sample Edit screen (p. 62), the Trigger mode of the sample may be set to “Trigger.” Set the Trigger mode of the sample to “GATE.” If it is set to TRIGGER, the sample will continue sounding if you forget the key that you pressed. Sometimes if you are playing the VP-9000 from a sequencer, the sample may continue sounding even when you stop the sequencer. If this occurs, choose "Panic" from the Option menu in V-Producer.
Troubleshooting ●Q. An exported SMF does not play correctly on your sequencer • An SMF file exported by V-Producer contains song setup data at 1:1:0. This means that if you have pasted a frame at a timing location of 1:1:0, and export the song using Export SMF, the setup data and the note-on data will be output at the identical timing. Some sequencers may be unable to play this correctly.
Troubleshooting ●Q. The PITCH, TIME, and FORMANT knobs don't work when using the VariOS by itself • Could the Knob Output Mode be set to OFF or MIDI? When V-Producer starts up, it changes the Knob Output Mode to MIDI. When V-Producer shuts down, it changes this setting to INT&MIDI. If the setting is still MIDI, the knobs will not work when the VariOS is used by itself. Please change the setting to INT or INT&MIDI. ●Q.
Troubleshooting ●Q. Can’t transfer data successfully to the VariOS. • If a Zip or similar drive is connected, the drive name of the VariOS will change each time you start up your system, causing it not to be recognized by V-Producer. In this case, choose Options MIDI/Audio Settings ( “MIDI Settings” on the Macintosh), and re-specify “VariOS Drive.” Press the [Scan] button to select the drive automatically. • Make sure that the VariOS is powered on. • Make sure that the VariOS is connected correctly.
Troubleshooting Deleting the driver If you were unable to install the driver according to the procedure given, the VariOS may not be recognized correctly by the computer. In this case, use the following procedure to delete the driver, and then follow the procedure in Installing the Driver (Windows, p. 22; Macintosh, p. 35) to install the driver once again.
Troubleshooting Windows Me/98 users 1. With all USB cables disconnected, start up Windows. (USB keyboard and USB mouse excepted) 2. After connecting the VariOS to your computer via a USB cable, turn on the power of the VariOS. 3. Exit all applications before deleting the driver. 4. Open the Control Panel, and double-click System. * Depending on the state of your computer, System may not appear in the Control Panel. In this case, click “Show all control panel options.” 5. Click the Device Manager tab. 6.
List of messages Error messages displayed by V-Producer ● VariOS (sound module) related errors USB communication with VariOS (sound module) is not possible. Please exit Disk mode on the VariOS. This will appear if USB communication with the VariOS (sound module) is not possible. Check the connection between the VariOS and your computer. This error may also appear if a Disk mode operation is being performed on the VariOS. In this case, please exit Disk mode.
List of messages Discard edits? When you cancel your editing in the Wave Edit screen, this message asks whether you want to discard the changes made by your editing. Save the sample by overwriting it? After you perform editing in the Wave Edit screen, this message asks whether you want to save the sample. Since this sample is being used in the Vari Track, it cannot be deleted. This sample on the Vari Track will be selected, so press the [Delete] key to delete it.
List of messages Errors displayed by the VariOS (sound module) ● MIDI-related MIDI OFFLINE! This will be displayed if there is a problem with the MIDI cable connected to MIDI IN, or if the connected MIDI cable was disconnected. MIDI BUFFER FULL! This will be displayed if an extremely large amount of MIDI data was received. MIDI Error! This will be displayed if a problem occurs in the hardware that transmits and receives MIDI data.
List of messages No File/Folder This will be displayed if the specified file is not in the folder, or if the folder does not exist. Please specify the correct file. Media Full This will be displayed if writing is not possible because the media is full. Either delete unneeded files, or write the data to different media (PC card). Not Save Sample Since it has no wave data, this sample cannot be saved. Memory Full Since the wave memory has become full, the operation was halted.
List of shortcuts Command 160 Windows New [Ctrl] + N Open Song [Ctrl] + O Save Song [Ctrl] + S Load WaveFiles... [Ctrl] + 1 Macintosh [ ]+N [ ]+O [ ]+S [ ]+1 Quit [ ]+Q Close Window [ ]+W [ ]+Z [ ]+X [ ]+C Undo [Ctrl] + Z Cut [Ctrl] + X Copy [Ctrl] + C Paste [Ctrl] + V Delete Select All [Del] [Ctrl] + A Repeat...
List of shortcuts Command Windows Macintosh Help [F1] [help] Solo Current Part Show Current PhraseEditor [SampleList] Preview [SampleList] Select Prev Phrase [SampleList] Select Next Phrase S [Enter] P [Up] [Down] S [Return] P [Up] [Down] 161
Specifications VariOS: Open System Module ●Sound Generator VariPhrase ●Parts 1 to 6 ●Maximum Polyphony 14 voices ●Internal Memory Performance: 1 Samples: 128 Wave memory (RAM): 46 M bytes Backup memory (FLASH): 32 M bytes ●External Storage Device PC CARD slot (Microdrive, SmartMedia or CompactFlash can be used with PC card adapter.) ●Sampling Frequency 44.
INDEX A AC cable .......................................................................... 12 AC Inlet ........................................................................... 15 Add Meter ...................................................................... 68 Adjust slider ................................................................... 46 Arrow .............................................................................. 67 audio device ...........................................................
INDEX keyboard map ........................................................ 60, 100 Knob Assign ................................................................. 118 Knob Control ............................................................... 118 Knob Output Mode ..................................................... 118 L LCD Contrast ............................................................... 121 legato ............................................................................... 82 length ........
INDEX R Rackmount adaptor ...................................................... 12 rackmount adaptors ...................................................... 19 RealTime Rec ................................................................. 75 Realtime Recording ....................................................... 85 Rear Panel ....................................................................... 15 Receive Channel .......................................................... 115 Record ..................
IMPORTANT SAFETY INSTRUCTIONS CAUTION RISK OF ELECTRIC SHOCK DO NOT OPEN ATTENTION: RISQUE DE CHOC ELECTRIQUE NE PAS OUVRIR CAUTION: TO REDUCE THE RISK OF ELECTRIC SHOCK, DO NOT REMOVE COVER (OR BACK). NO USER-SERVICEABLE PARTS INSIDE. REFER SERVICING TO QUALIFIED SERVICE PERSONNEL.
To resize thickness, move all items on the front cover and center registration marks to left or right. For EU Countries USING THE UNIT SAFELY This product complies with the requirements of European Directives EMC 89/336/EEC and LVD 73/23/EEC. For the USA The symbol alerts the user to important instructions or warnings.The specific meaning of the symbol is determined by the design contained within the triangle.
To resize thickness, move all items on the front cover and center registration marks to left or right Information When you need repair service, call your nearest Roland Service Center or authorized Roland distributor in your country as shown below.
About the VariOS Trial Applications The included CD contains two trial applications (VariOS-8 and VariOS 303), which let you experience the open system architecture of the VariOS. If you install these trial application programs into the internal flash ROM of the VariOS, you will be able to start up the VariOS as a synthesizer module by pressing a few buttons.
New functionality added to the V-Producer VariOS Keyboard HOLD button fig Owner’s Manual p.95 The design of the VariOS Keyboard has been revised, and a new arpeggiator function has been added. fig (Click this icon to) Start up the VariOS Keyboard. By clicking this button, you can have arpeggios continue even after you've released your fingers from the keyboard. If you play a different chord or notes while an arpeggio is being held, the arpeggio will change accordingly.
LEGATO button Target Part button fig fig If this button is ON, each note of the arpeggio will be played legato; the gate time knob setting will be ignored. You can use this to produce a distinctive arpeggio effect that occupies the entire phrase. Keyboard fig When you click the Part button, VariOS Pad control data will be sent to the selected part. Pitch, time, and formant data for the selected part will be reflected by the Surface controller and knobs.
Editing in the Phrase Scope: Waveform display area Owner’s Manual p.77 You can now use your mouse to directly edit the waveform area of the PhraseScope. In the waveform display area you can use the Arrow button, Scissors button, and Bond button. Arrow button fig • To select a region in units of events, click and drag in an area that does not contain a waveform. • To edit the pitch of a selected region, drag upward or downward on the waveform.
Even if the sound does not clip (distort) when played back by the VariOS's sound generator, there may be cases in which clipping (distortion) is present in the exported sample. If this occurs, use the mixer to lower the overall level, or lower the Master Level of the effect. If you use an effect of a type that varies cyclically, the sound will be slightly different each time you play something back.