SyncMaster 570DXn Model SyncMaster 570DXn Select Language Install Programs PDF Manuals Registration Safety Instructions Introduction Connections Using the Software Adjusting the LCD Display Troubleshooting Specifications Information Appendix © 2007 Samsung Electronics Co., Ltd. All rights reserved.
Select Language Main Page Model SyncMaster 570DXn Safety Instructions Notational Power Installation Clean Others Introduction The color and appearance of the product may vary depending on the model, and the product specifications are Connections subject to change without prior notice for reasons of performance enhancement.
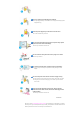
Use only a properly grounded plug and receptacle. z An improper ground may cause electric shock or equipment damage.(Class l Equipment only.) Insert the power plug firmly so that it does not come loose. z A bad connection may cause fire. Do not excessively bend the plug and wire nor place heavy objects upon them, which could cause damage. z This may cause electric shock or fire. Do not connect too many extension cords or plugs to one outlet. z This may cause fire.
Failure to do so may cause serious damage to your LCD Display. Place your LCD Display in a location with low humidity and a minimum of dust. z Failure to do so may cause electric shock or fire inside the LCD Display. Do not drop the LCD Display when moving it. z This may cause damage to the product or the person carrying it. Install the LCD Display base in a showcase or shelf so that the end of the base does not protrude from the showcase or shelf.
Put down the LCD Display carefully. z Failing to do so may damage the LCD Display. Do not place the LCD Display face down. z This may damage the TFT-LCD surface. The installation of the bracket must be done by a qualified professional. z Installing the bracket by unqualified personnel may result in injury. z Always use the mounting device specified in the owner's manual. When installing the product, make sure to keep it away from the wall (more than 10 cm / 4 inches) for ventilation purposes.
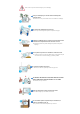
If the connector between the plug and the pin is dusty or dirty, clean it properly using a dry cloth. z A dirty connector may cause electric shock or fire. Make sure to unplug the power cord before cleaning the product. z Otherwise, this may cause electric shock or fire. Unplug the power cord from the power outlet and wipe the product using a soft, dry cloth. z Do not use any chemicals such as wax, benzene, alcohol, thinners, insecticide, air freshener, lubricant or detergent.
Do not try to move the LCD Display by pulling only the wire or the signal cable. z This may cause a breakdown, electric shock or fire due to damage to the cable. Do not move the LCD Display right or left by pulling only the wire or the signal cable. z This may cause a breakdown, electric shock or fire due to damage to the cable. Do not cover the vents on the LCD Display cabinet. z Bad ventilation may cause a breakdown or fire.
outlet and contact the Service Center. When viewing a fixed screen for an extended period of time, residual image or blurriness may appear. z Change the mode to energy saving mode or set a screensaver to a changing picture when away from the LCD Display for an extended period of time. Adjusts the resolution and frequency to the level appropriate for the model. z An inappropriate resolution may cause undesirable picture quality.
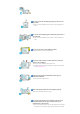
Place the product out of children’s reach, as they could damage by hanging onto it. z A falling product may cause injury to the person or even fatality. When not using the product for an extended period of time, keep the product unplugged. z Otherwise, this may cause heat emission from the accumulated dirt or degraded insulation, causing electric shock or fire. Do not place your children's favorite toys or any other objects of interest on the product.
recycling center or to a store selling the same type of the battery or rechargeable battery. © 1995~2007 SAMSUNG.
Select Language Main Page Model SyncMaster 570DXn Safety Instructions Introduction Package Contents Your LCD Display Machanical Layout Connections Using the Software Adjusting the LCD Display Troubleshooting Specifications The color and appearance of the product may vary depending on the model, and the product specifications are subject to change without prior notice for reasons of performance enhancement.
Remote Control BNC to RCA Adaptor Jack USB Holder & Screw (1EA) Batteries (AAA X 2) (Not available in all locations) Semi Stand Cover-Hole Screw: 4 EA HDD Cover Sold separately Wall Mount KIT Speaker Set BNC Cable LAN Cable DVI Cable Your LCD Display Front
1) MENU Opens the on-screen menu and exits from the menu or closes the adjustment menu. 2) Navigate buttons (Up-Down buttons) Moves from one menu item to another vertically or adjusts selected menu values. 3) Adjust buttons (Left-Right buttons)/ Volume buttons Moves from one menu item to another horizontally or adjusts selected menu values. Adjusts the audio volume. 4) ENTER Activates a highlighted menu item. 5) SOURCE Switches from PC mode to Video mode.
Rear Note • For detailed information concerning cable connections, refer to Connecting Cables under Setup. The LCD Display 's configuration at the back may vary slightly depending on the LCD Display model. 1) POWER S/W ON [ | ] / OFF [O] Switches the LCD Display On/Off. 2) POWER IN The power cord plugs into the LCD Display and the wall plug. 3) REMOTE OUT/IN You can use a wired remote control by connecting it to your monitor.
9) COMPONENT AUDIO IN [L-AUDIO-R] (Component Audio Connection Terminal (Input)) 10) BNC/COMPONENT OUT [R/PR, G/Y, B/PB, H, V] (BNC/Component Connection Terminal (Output)) BNC (Analog PC) Connection: connecting the R, G, B, H, V ports Component Connection: connecting the PR, Y, PB ports 11) BNC/COMPONENT IN [R/PR, G/Y, B/PB, H, V] (BNC/Component Connection Terminal (Input)) 12) AV AUDIO IN [L-AUDIO-R] (LCD Display Audio Connection Terminal (Input)) 13) AV OUT [VIDEO] (VIDEO Connection Terminal): AV mode
Note • See Connecting the LCD Display for further information regarding cable connections. Remote Control Note • The performance of the remote control may be affected by a TV or other electronic device operating near the LCD Display , causing a malfunction due to interference with the frequency. 1. ON / OFF 2. MAGICNET 3. MDC 4. LOCK 5. MagicNet buttons 6.+100 -/-7. VOL 8. MUTE 9. TTX/MIX 10. MENU 11. ENTER 12. P.MODE 13. AUTO 14. ENTER/PRE-CH 15 . CH/P 16. SOURCE 17. INFO 18. EXIT 19.
For example, to select channel 121, press "+100", then press "2" and "1". - This fuction does not work for this monitor. 7) VOL Adjusts the audio volume. 8) MUTE Pauses (mutes) the audio output temporarily. This is displayed on the lower left corner of the screen. The audio resumes if MUTE or - VOL + is pressed in the Mute mode. TTX/MIX 9) TV channels provide text information services via teletext. - This fuction does not work for this monitor.
In areas where the signal is weak, noise may occur during FM radio broadcasts. - This fuction does not work for this monitor. 23) P.SIZE Press to change the screen size. SRS 24) SRS DUAL/MTS 25) DUALSTEREO/MONO, DUAL l / DUAL ll and MONO/NICAM MONO/NICAM STEREO can be operated depending on the broadcasting type by using the DUAL button on the remote control while watching TV. MTSYou can select MTS (Multichannel Television Stereo) mode.
Mechanical Layout | Monitor Head | Speaker | Installation VESA Bracket | Wall Bracket Installation 1. Mechanical Layout 2.
3.
4. Installation VESA Bracket z z z z When installing VESA, make sure to comply with the international VESA standards. Purchasing VESA Bracket and Installation Information : Please contact your nearest Samsung Distributor to place an order. After your order is placed, installation professionals will visit you and install the bracket. At least 2 persons are needed in order to move the LCD Monitor.
For securing the bracket on a wall, use only machine screws of 6 mm diameter and 8 to 12 mm length. 5. Wall Bracket Installation z z z Contact a technician for installing the wall bracket. Samsung Electronics is not responsible for any damages to the product or harm to customers when the installation is done by the customer. This product is for installing on cement walls. The product may not stay in place when installed on plaster or wood.
There are two hinges(left and right). Use the correct one. Before drilling into the wall, check if the length between the two locking holes at the back of the product is correct. If the length is too short or long, loosen all or some of the 4screws on the wall bracket to adjust the length. A. Length between the two locking holes Check the installation diagram and mark the drill points on the wall. Use the 5.0 mm bit to drill holes deeper than 35 mm. Fix each anchor in the corresponding hole.
To mount the product on the wall bracket The shape of the product may vary depending on the model. (The assemblies of the plastic hanger and the screw are the same) Remove the 4 screws on the back of the product. Insert the screw B into the plastic hanger. 1. Mount the product on the wall bracket and make sure it is properly fixed to the left and right plastic hangers. 2. Be careful when installing the product on the bracket as fingers can be caught in the holes. 3.
Wall Bracket Angle Adjustment Adjust the bracket angle to -2°before installing it on the wall. 1. Fix the product to the wall bracket. 2. Hold the product at the top in the center and pull it forward (direction of the arrow) to adjust the angle. 3. You can adjust the bracket angle between -2°and 15 °. Make sure to use the top center, and not the leftor the right side of the product to adjust the angle.
Select Language Main Page Model SyncMaster 570DXn Safety Instructions Introduction Connections Installing the Stand KIT Connecting the LCD Display Using the Software Adjusting the LCD Display Troubleshooting Specifications The color and appearance of the product may vary depending on the model, and the product specifications are subject to change without prior notice for reasons of performance enhancement.
Connecting the LCD Display Using a Power cord with Earth In the event of failure, the earth lead may cause electric shock. Make sure to wire the earth lead in correctly, before connecting the AC power. When un-wiring the earth lead, make sure to disconnect the AC power in advance. Note • AV input devices such as DVD players, VCR's or camcorders as well as your computer can be connected to the LCD Display.
3) Connect the audio cable for your LCD Display to the audio port on the back of your computer. Note • Turn on both your computer and the LCD Display. Note • The DVI cable or BNC cable is optional. Contact a local Samsung Electronics Service Center to buy optional items. Connecting a VCR 1) AV input devices such as VCRs or Camcorders are connected via the AV IN [VIDEO] or AV IN [S-VIDEO] of the LCD Display using an S-VHS or BNC cable.
1) Connect a set of audio cables between the COMPONENT AUDIO IN [L-AUDIO-R] on the LCD Display and the AUDIO OUT jacks on the DVD player. 2) Connect a Component cable between the BNC/COMPONENT IN - PR, Y, PB port on the LCD Display and the PR, Y, PB jacks on the DVD player. Note • Select Component for the connection to a DVD player using the SOURCE button on the front of the LCD Display or on the remote control. • Then, start the DVD Player with a DVD disc inserted.
• The audio-video cables shown here are usually included with a Camcorder. (If not, check your local electronics store.) If your camcorder is stereo, you need to connect a set of two cables. Connecting a DTV Set Top Box Note • The connections for a typical Set Top Box are shown below. 1) Connect a Component cable between the BNC / COMPONENT IN - PR, Y, PB port on the LCD Display and the PR, Y, PB jacks on the Set Top Box.
Note • Connect the speaker connection cable between the speaker connection jack on the back of the SET and the speaker connection jack on the back of the speaker. Note • Do not move the SET while the SET is connected to the speakers. The speaker-bracket for connecting the SET speaker my become damaged. Connecting to an Audio System Note • Connect a set of audio cables between the AUX L, R jacks on the AUDIO SYSTEM and the AUDIO OUT [L-AUDIO-R] on LCD Display.
Note • You can control your monitor by allowing it to receive the remote control signals of other devices through the REMOTE OUT terminal. • You can control a device by allowing it to receive remote control signals from other devices through the REMOTE IN terminal. Note • Restrictions: Available only if other devices support the wired remote control I/O terminals. Connecting HDMI Note • Input devices such as digital DVD are connected to the HDMI IN terminal of the monitor using the HDMI cable.
1) Connect the LAN cable. Connecting a USB device 1) You can connect USB devices such as a mouse or keyboard. Using a USB Holder When using a small external device such as a portable memory stick and it is connected to the USB terminal at the back of your monitor, it is exposed to the possiblity of theft or loss. By installing a USB holder after the installation of an external device, you can prevent theft or loss.
1) Insert part of your USB holder into the groove in part 2) Align part of your USB holder with the groove at the bottom of part Align part of your USB holder with the bottom of part 3) at the back of your monitor. Insert a screw into the groove aligned in step [2], and fasten it. Align with and use a screw to fix them. Using the HDD Cover You can install an external 2.5" USB hard disk. at the back of your monitor. at the back of your monitor.
1) Insert . into the groove at the top of , and then place and press The USB cable of the external hard disk can be connected via the into the groove at the bottom of part to the USB connector of the monitor. 2) Check whether the parts are fixed correctly. Note • When removing the HDD Cover, pull the part slightly. © 1995~2007 SAMSUNG.
Select Language Main Page Model Safety Instructions Introduction Connections Using the Software Installation MagicNet MDC MagicNet Adjusting the LCD Display Troubleshooting Specifications The color and appearance of the product may vary depending on the model, and the product specifications are subject to change without prior notice for reasons of performance enhancement. Using the Software Information Appendix Installation MagicNet Installation 1. Insert the installation CD into the CD-ROM drive.
6. Choose a folder to install the MagicNet program. 7. Click "Install." 8. The "Installation Status" window appears.
9. It is recommended restarting the system for the normal operation of the MagicNet Server program. Click "Finish." 10. When the installation is complete, the MagicNet executable icon appears on your desktop. 11. Double-click the icon to start the program. System Requirements CPU RAM Minimum P1.8 256M Recommended P3.0Ghz 512M Ethernet OS Application Windows XP 100M/1G Windows 2000 WMP 9 or later (Service Pack 4) © 1995~2007 SAMSUNG.
What is MagicNet? | Using MagicNet | Library | Remote Management | Message | Option | Screen Client / Contents Server | Schedule | Troubleshooting What is MagicNet? MagicNet uses an Ethernet network for servers and monitors, and transfers media files (image files, music files, and movies) and office files (HTML, PDF) from the server to the monitors over the network.
schedules. 5. Instants message → You can display a message on selected monitors regardless of schedules. 6. MDC and System → The MDC and System functions allow you to control, view the status of, and diagnose monitors. 7. VNC → The VNC function allows you to connect to a monitor remotely and view the status of and control and diagnose it. 8. Update and PXE → The Update function allows you to easily update the programs on the monitor. The PXE allows you to recover the operating system image for a monitor.
What is MagicNet? | Using MagicNet | Library | Remote Management | Message | Option | Screen Client / Contents Server | Schedule | Troubleshooting Using MagicNet Running MagicNet 1. Click Programs -> MagicNetPro -> MagicNetPro. 2. When MagicNetPro runs, select Log In from the File menu. 3. Enter the user name and password and click OK. If you log in for the first time, select 'Administrator' as enter the user name and the password you set when installing the program.
2. Configure the Network Connection settings In the General tab. Enter the server name on the monitor identical to the name of the server. To change the server name, double-click the Value field of the Server Name item. 3. If there is more than one network card in the server, select a network card in the Network Device item. 4.
File Sub-Menus Registering a Library 1. Select Library from the File menu to open the Library View. 2. Select a photo file, music file, movie file, document, or Flash file etc. on the server. 3. Right-click on the selected file and select Send To Library from the displayed menu to register it to the library. 4. The registered library files are used by the monitor when the Operating Mode of the monitor is set to Player or is used when registering a screen.
Registering a Screen 1. Select Screen from the File menu to open a Screen View. 2. Right-click on the background view. Click on the Area and click either Photo, Movie, Flash, Web, Text, or Source from the displayed menu. 3. When the mouse pointer changes to the crosshair (+) icon, drag it to the Edit View to set the area for the file to be displayed. 4. When an area is set, tree items are added to the Tree View in the same order as shown under the Background item.
2. Select the monitors to which the schedule is to be registered in the Tree View at the left. The Operating Mode of the selected monitors must be set to Schedule if they can display the schedule registered on the server. 3. Click a date and time in the Edit View at the right to select the date and time when the schedule is to be performed. Right-click the Edit View and select Add from the displayed menu. At this time, you can only select the schedules for the screens you saved using the Screen menu. 4.
4. To display the message on the selected monitors, click the Send Message icon in the toolbar under the menu bar. To hide the message which will be displayed on the selected monitors, click the Stop Message icon in the toolbar.
What is MagicNet? | Using MagicNet | Library | Remote Management | Message | Option | Screen Client / Contents Server | Schedule | Troubleshooting Library File Menu Library / Screen / Schedule / Remote Management / Message z Creates a view or selects a created view for each menu item so that you can perform a screen schedule and have basic control over the monitors from the server. Close z Closes the screen view you are working in.
Synchronize z Synchronizes the library files of the main server with the files of the content server. Option z Changes the server settings. For more information, refer to the Options section. Library Tree View List View Output View Tree View All the folders under My Computer on the Windows Desktop, library, screen, and content server are displayed in a tree view.
view in the right pane. Exploring Normal Files Exploring Libraries Exploring Screen Files Exploring Content Servers Exploring Normal Files Displays all the folders in the computer on which a server is installed in a tree view. Function: If you select a folder below the Desktop, its subfolders and the files that you can register to a library are displayed in the list view in the right pane. Exploring Libraries Displays all the folders which are created in the libraries in a tree view.
Exploring Content Servers Displays the management folders for the content servers in a tree view. Function: If you select a folder, its subfolders and a list of content servers are displayed in the list view in the right pane. Hot Key z z F2 key: Renames the selected folder. Delete key: Deletes selected folder, its sub folder(s) and all the files under the selected folder and its subfolder.
z z Open: If you click Open for a folder, you are moved to that folder. If you click Open for a file, the file is run. Send To Library: If you click Send To Library for the selected files, they are registered to the library. Exploring Libraries Displays the subfolders and files under the selected folder. Function: Double-Click z z z Double-click to move to the upper folder. Double-click to move to the lower folder. Double-click a file to run the file.
z z z z z z z Open: If you click Open for a folder, you are moved to that folder. If you click Open for a file, the file is run. Send To Library: Moves the selected library files to the topmost folder for each content item. However, this menu item is deactivated when a folder is selected. Cut: Cuts the selected screen files to the clipboard so that you can paste them to another location. However, this menu item is deactivated when a folder is selected.
Displays the subfolders and files under the selected folder. Function: Double-Click z z Double-click Double-click to move to the upper folder. to move to that lower folder. Drag & Drop z If you drag and drop screen files to a screen folder in the tree view or the list view, they are moved to that folder. However, the drag & drop function is not supported for folders. Context Menu z z z Open: If you click Open for a folder, you are moved to that folder.
z z z Cut: Cuts the selected screen files to the clipboard so that you can paste them to another location. However, this menu item is deactivated when a folder is selected. Delete: Deletes the selected screen files and folders. However, if the selection includes ".." which refers to a higher level folder, this menu item is deactivated. Property: Displays detailed information for the selected screen file. You can enter a comment on it.
z z z z F2 key: Renames the selected folder. However, you cannot rename a file. Delete key: Deletes the selected folders, subfolders, and screen files. Ctrl + X keys: Cuts the selected screen files to the clipboard so that you can paste them to another location. However, this hot key is not supported for a folder. Ctrl + V keys: Pastes the screen files cut to the clipboard to the selected location. Exploring the Content Server Displays the subfolders and content servers below the selected folder.
1) Mac Address: The MAC address of the selected content server. You can edit this. 2) Server Name: The server name of the selected content server. You can edit this. 3) IP Address: The IP address of the selected content server. You cannot edit this. * The IP address is displayed if the content server is connected at least once. 4) Comments: Comments about the selected content server. 5) History : Displays the synchronization history records for the content server.
What is MagicNet? | Using MagicNet | Library | Remote Management | Message | Option | Screen Client / Contents Server | Schedule | Troubleshooting Screen File Menu Library / Screen / Schedule / Remote Management / Message z Creates a view or selects a created view for each menu item so that you can perform a screen schedule and performs basic control for the monitors from the server. Create Workspace z Creates a new screen view to design more than one screen view.
{ Administrator: Has privileges for all server functions. { User: Has privileges for all server functions except for changing server options and user account features. Exit z Exits the program. If there are any unsaved changes, a new window is displayed so that you can save them. Tool Menu Undo / Redo z Cancels the previously performed command or performs the canceled command again. You can change the maximum number of commands that you can undo using the Options menu.
Screen Tree View Edit View List View Tree View A tree is created in accordance with the order of the areas created in the Edit View. You can check the area currently selected in the Edit View using the Tree View. If you select a property of an area, the detailed property information is displayed in the List View. Context Menu z New: Initializes the screen view you are currently working with. If there are any unsaved changes, a new window is displayed so that you can save them.
You cannot preview the office files for the source and background. Background This is for configuring the background for all screens. The background consists of the Area, Screen, Music, and Effect functions. If a color or photo is used as the background, you can freely place other areas such as a movie and text on the background to compose a varied screen.
Resolution: Changes the resolution for the background. You can add a new resolution and set the default resolution using the Options menu. Start Time, Stop Time, Duration: Sets the playing time of the background in minutes. The playing time of the background changes to that of the screen. It cannot be less than the playing time of the area contained in the background. Screen Type: Sets the type of background (Color, Photo File, Office File, Source List).
Changes the detailed properties and transfer mode for the selected file of each type. z Transfer Mode: Changes the mode in which the selected file is transferred to the monitor. z Download: Downloads the file to the monitor and plays it. z Stream: Streams the file to the monitor. z Context Menu: Add, Delete, Up, Down: Adds and deletes a file and changes the playing order. Music Sound: Turns the background sound on or off. Music File: Selects a music file for the background.
Effect: Selects the type of effect to be applied when the background is created. z z z z None: No effect is used. Slide: The background is created while it is moving. Block: The background is created with blocks. Fade In: The background fades in when it is created. Effect Speed: Adjusts the speed of an effect being created. Effect Direction: Sets the direction when the Slide effect is selected. Effect Size: Sets the size of the blocks when the Block effect is selected.
Area Name: Changes the area name. You cannot use a name already used for another area name. Lock Position: Locks the position of the area. Left, Top, Width, Height: Changes the position and size of the area. The area positions must be within the background and the area size cannot be larger than the background size. Start Time, Stop Time, Duration: Sets the playing time in seconds. It cannot be longer than the background playing time. Screen Photo File: Selects a photo file to play in the Photo area.
Background Type: Sets the background type (Color, Picture File) for the Photo area. Color: Selects the color when the background type for the Photo area is set to Color. Transparency: Selects the degree of transparency when the background type for the Photo area is set to Color. If the Transparency is set to a value under 100, the area which is placed beneath the present area is shown transparently. However, if a Movie is playing in one of the areas, the transparency doesn't affect the movie area.
Changes the detailed properties and the transfer mode for the selected file of each type. z Transfer Mode: Changes the mode in which the selected file is transferred to the monitor. z Download: Downloads the file to the monitor and plays it. z Stream: Streams the file to the monitor. z Context Menu: Add, Delete, Up, Down: Adds and deletes a file and changes the playing order. Effect z Effect: Selects the type of effect to be applied when the Photo area is created. { None: No effect is used.
This function is for configuring screens using movie files and consists of Area, Screen, Background, Effect functions. The Area function allows you to set the position where the movie is played and when and for how long it is played. The Screen function allows you to select the movie file and how to play it. The Background function allows you to set the background image and music when the movie is displayed. The Effect function allows you to set an effect for when the background changes.
Movie File: Selects the movie file to be played in the Movie area. Aspect Ratio: Selects the aspect ratio for the movie file to be played in the Movie area. z Full: The movie file is enlarged or reduced to fit the entire background. z Original: The movie file is displayed at the original size. z Auto: The movie file is enlarged or reduced to fit the entire background and keeps the original aspect ratio. Mute: Mutes the sound of the movie file to be played in the Movie area.
File. Only one picture file can be selected in the Movie area. Picture Aspect Ratio: Selects the aspect ratio for the photo file to be played in the Movie area when the background type of the Movie area is set to Picture File. z Full: The photo file is enlarged or reduced to fit the entire background. z Original: The photo file is displayed at the original size. z Auto: The photo file is enlarged or reduced to fit the entire background, and keeps the original aspect ratio.
z Effect: Selects the type of effect to be applied when the Movie area is created. { None: No effect is used. { Slide: The Movie area is created while it is moving. { Block: The Movie area is created with blocks. { Fade In: The Movie area fades in when it is created. z Effect Speed: Adjusts the speed of an effect being created. z Effect Direction: Sets the direction when the Slide effect is selected. z Effect Size: Sets the size of the blocks when the Block effect is selected.
Name: Changes the area name. You cannot use a name already used for another area name. Lock Position: Locks the position of the area. Left, Top, Width, Height: Changes the position and size of the area. The area positions must be within the background and the area size cannot be larger than the background size. Start Time, Stop Time, Duration: Sets the playing time in seconds. It cannot be longer than the background playing time. Screen Flash File: Selects the flash file to be played in the Flash area.
Type: Sets the background type (Color, Picture File) for the Flash area. Color: Selects the color when the background type for the Flash area is set to Color. Transparency: Selects the degree of transparency when the background type for the Flash area is set to Color. If the Transparency is set to a value under 100, the area which is placed beneath the present area is shown transparently. However, if a Movie is playing in one of the areas, the transparency doesn't affect the movie area.
Changes the detailed properties and the transfer mode for the selected file of each type. z Transfer Mode: Changes the mode in which the selected file is transferred to the monitor. z Download: Downloads the file to the monitor and plays it. z Stream: Streams to the monitor. z Context Menu: Add, Delete, Up, Down: Adds and deletes a file and changes the playing order. Effect z Effect: Selects the type of effect to be applied when the Flash area is created. { None: No effect is used.
This function is for configuring screens by connecting website files and consists of the Area, Screen, Background and Effect functions. The Area function allows you to set the position of the webpage and when and for how long it is displayed. The Screen function allows you to set the website file to connect to and the location of the web page. The Background function allows you to set the background image and music when the web page is displayed.
Website: Sets a web page to display in the Web area. Only one URL can be selected in the Web Area. Refresh: Sets the refresh time for the URL displayed in the Web area. Input Enable: You can input using the mouse in the Web area. Offset Left /Top / Right / Bottom: Moves the position of the web page in the Web area. Scroll: Turns the scrollbar for web pages on or off. Border: Shows or hides the border for web pages in the Web area.
z Full: The photo file is enlarged or reduced to fit the entire background. z Original: The photo file is displayed at the original size. z Auto: The photo file is enlarged or reduced to fit the entire background and keeps the original aspect ratio. z Tile: The photo file is tiled continuously across the entire background. Picture Time Interval: Sets the slide show time between photo files when the background type for the Web area is set to Picture File.
z Effect: Selects the type of effect to be applied when the Web area is created. { None: No effect is used. { Slide: The Web area is created while it is moving. { Block: The Web area is created with blocks. { Fade In: The Web area fades in when it is created. z Effect Speed: Adjusts the speed of an effect being created. z Effect Direction: Sets the direction when the Slide effect is selected. z Effect Size: Sets the size of the blocks when the Block effect is selected.
Name: Changes the area name. You cannot use a name already used for another area name. Lock Position: Locks the position of the area. Left, Top, Width, Height: Changes the position and size of the area. The area positions must be within the background and the area size cannot be larger than the background size. Start Time, Stop Time, Duration: Sets the playing time in seconds. It cannot be longer than the background playing time. Screen Text: Sets the text to be displayed in the Text area.
the Text area. The font type shows the font of the computer where the server is operating. The same font should be installed in the monitor so that the monitor can display the same font. Align Horizontal, Vertical: Aligns the text in the Text area. Background Type: Sets the background type (Color) for the Text area. You can only select Color for the background type (Color) for the Text area. Color: Selects the color to use when the background type for the Text area is set to Color.
Changes the detailed properties and the transfer mode for the selected file of each type. z Transfer Mode: Changes the mode in which the selected file is transferred to the monitor. z Download: Downloads the file to the monitor and plays it. z Stream: Streams the file to the monitor. z Context Menu: Add, Delete, Up, Down: Adds and deletes a file and changes the playing order. Effect z Effect: Selects the type of effect to be applied when the Text area is created. { None: No effect is used.
Area Name: Changes the area name. You cannot use a name already used for another area name. Lock Position: Locks the position of the area. Left, Top, Width, Height: Changes the position and size of the area. The area positions must be within the background and the area size cannot be larger than the background size. Start Time, Stop Time, Duration: Sets the playing time in seconds. It cannot be longer than the background playing time. Screen Source List: Selects the source to be played in the Source area.
(TV: General broadcasting channel range - 2~69, Cable broadcasting channel range 1, 14~135) (DTV : Main channel range - 0 to 999, Sub channel range - 0 to 999) Edit View This view is used for screen design and allows you to create, move and change the size of an area using your mouse. You can preview the current state by selecting Preview Area from the context menu or doubleclicking on an area. Context Menu z Area: Selects the type of area you wish to create.
What is MagicNet? | Using MagicNet | Library | Remote Management | Message | Option | Screen Client / Contents Server | Schedule | Troubleshooting Schedule File Menu Library / Screen / Schedule / Remote Management / Message z Creates a view or selects a created view for each menu item so that you can perform a screen schedule and performs basic control for the monitors from the server. Save z Saves all the schedule information currently configured in the EPG view in the database.
Tool Menu Undo / Redo z Cancels the previously performed command or performs the canceled command again. You can change the maximum number of commands that you can undo using the Option menu. z Adds the screen you wish to schedule after selecting a monitor and time by clicking in the EPG window. Add Delete z Deletes the screen currently selected in the EPG window. Copy / Paste z Copies the currently selected screen and pastes it after selecting a monitor and time by clicking in the EPG window.
Tree View EPG View List View Publish View Tree View Displays the connection state of the monitors currently connected to the server depending on the monitor icon. You can also efficiently manage the monitors by creating network groups. You can move a networked monitor by dragging and dropping it into a group. z z z z Network : : : : The The The The server server server server is is is is connected to the connected to the connected to the not connected to monitor in Player mode.
Network: A monitor which is connected to the server over a network. New Group: Creates a new group that can include some networked monitors. You can drag and drop a networked monitor to a group. Copy/Paste: Copies all the schedules configured on the selected monitor to the clipboard and pastes them to another monitor. Rename: Changes the name of a monitor connected to the server. You cannot use a name already used for another monitor. Delete: Deletes a monitor which is not connected to the server.
This is a virtual monitor used to create schedules for a monitor used without being connected to the network. Local publishing can be performed for a local monitor to create schedules for it. New Monitor: Creates a new virtual local monitor. Copy / Paste: Copies the schedules set on the selected monitor and pastes them to another monitor. Rename: Renames the selected monitor. You cannot use a name already used for another monitor. Delete: Deletes the selected monitor.
Add: Adds the screen you wish to schedule after selecting a monitor and time by clicking in the EPG window. Delete: Deletes the screen currently selected in the EPG window. Copy / Paste: Copies the currently selected screen and pastes it after selecting a monitor and time by clicking in the EPG window. Auto Size: Changes the currently selected screen in accordance with the time of the background set when editing automatically. Time Combo Box: Changes the unit of the time axis to be currently displayed.
Start Time / Stop Time / Duration: Sets the time information for the selected screen in minutes. Periodic: Sets how frequently the selected screen recurs. (None / Daily / Weekly / Monthly) End on: Sets an end date for the selected schedule to recur. Publish View Publishes the schedules which are configured by the EPG view and the List view to the checked monitors. Beginning Day/ Start Time / End Day / Stop Time: Sets the time information for the schedules to be published to the monitors.
What is MagicNet? | Using MagicNet | Library | Remote Management | Message | Option | Screen Client / Contents Server | Schedule | Troubleshooting Remote Management File Menu Library / Screen / Schedule / Remote Management / Message z Creates a view or selects a created view for each menu item so that you can perform a screen schedule and have basic control over the monitors from the server. Close z Closes the screen view you are working in.
Refresh z Refreshes the value of each client for the currently selected remote control item. Option z Changes the server settings. For more information, refer to the Options section.
Tree View Displays various control items for the client in a tree view. If you select an item, the current state of the selected item is displayed and you can control it in the list view. MDC Displays the items for which remote management is required from among the OSD menus of each client monitor in a tree view. If you select an item, the current state of the selected item is displayed and you can control it in the list view.
-On Timer 1) 2) 3) 4) 5) 6) Hour: Enter the hour. Minute: Enter the minutes. AM/PM: Enter AM or PM. Status: Select whether to use the turn-on time. Source: Select the external input Volume: Select the volume -Off Timer 1) 2) 3) 4) Hour: Enter the hour. Minute: Enter the minutes. AM/PM: Enter AM or PM. Status: Select whether to use the turn-on time. PIP: Displays the PIP information. You can control it in the list view. Sound: Displays the current sound state. You can control it in the list view.
Displays the items required to manage the client in the tree view separately from MDC. If you select an item, the current state of the selected item is displayed and you can control it in the list view. Detailed Items System: Displays the product information for the client in a list view. General: Displays general information for the client, such as the computer name and username, etc. in the list view.
Phase, Gain, and Sharpness. You can control each item by clicking on it and changing the setting in the list view. z The R Phase, G Phase, B Phase, Gain, and Sharpness items are only applicable if the Signal Balance item is set to On. Maintenance: Displays the state of the Lamp Control, Screensaver, Screen Matrix Display, Screen Settings, and Safety Lock. You can control each item by clicking it and changing the setting in the list view.
Power On/Off: This item is only enabled when a monitor name is selected and used to turn the client (monitor) on or off. Copy: Copies the settings of the selected item. z z z z If you select a monitor name and click Copy, all the items displayed in the list are copied. If you select an item and click Copy, only the item is copied. If the setting is not yet displayed or the item has no setting, the item cannot be copied. You cannot copy write-only items. Paste: Pastes the copied setting to the monitor.
- Network Adapter: Displays the network adapter for the selected client. - Mac Address: Displays the MAC address of the selected client. : Select an IP address type. - IP Address: Enter the IP address. Subnet mask: Enter the subnet mask. Default gateway: Enter the address of the default gateway. Preferred DNS server: Enter the address of the preferred DNS server. Altermate DNS server: Enter the address of the alternate DNS server. The Network Adapter and Mac Address items cannot be changed.
1) Startup: Select the program to be performed when the client starts. 2) Automatic update: Select how to perform automatic updates. 3) Use password lock: Select whether to use the password lock. 4) Content Server: Select whether to use the content server. 5) Preferred content server: Enter the IP address of the preferred content server to use a content server.
z Only available if the copied item is the same as the currently selected item. z Only applied to clients which are turned on. Refresh: Refreshes items for the selected monitor. Monitor Status z z z z : : : : The The The The server server server server is is is is connected to the connected to the connected to the not connected to monitor in Player mode. monitor in Scheduler mode. monitor in an unknown mode. the monitor or the monitor is a local monitor.
What is MagicNet? | Using MagicNet | Library | Remote Management | Message | Option | Screen Client / Contents Server | Schedule | Troubleshooting Message File Menu Library / Screen / Schedule / Remote Management / Message z Creates a view or selects a created view for each menu item so that you can run a screen schedule and perform basic control for the monitors from the server. New z Initializes the message view you are currently working with.
Exit z Exits the program. If there are any unsaved changes, a new window is displayed so that you can save them. Tool Menu Undo / Redo z Cancels the previously performed command or performs the canceled command again. You can change the maximum number of commands that you can undo using the Option menu. Send / Stop z Checks the edited message data in a tree view and sends (or stops) them to the selected monitor. Option z SChanges the server settings. Refer to the Option tab for more information.
Tree View List View Tree View You can select the monitors to which the message is sent by checking the checkbox next to each monitor and group. List View Changes the detailed functions for the message to be sent to the monitors by double-clicking it or by clicking the created button. Message: Sets a message to be displayed on the monitor. The set message is not applied to the preview window. Duration: Selects the time of the message to be displayed on the monitor in minutes.
What is MagicNet? | Using MagicNet | Library | Remote Management | Message | Option | Screen Client / Contents Server | Schedule | Troubleshooting Option Option General Network Connection: Selects the connection method between the server and the monitor. The server and monitor can be connected to each other only if the same connection method is used. z z Automatic connection: The monitor automatically connects a server on the same network.
If the server and monitor are on a different private network, they cannot connect to each other. However, if the server has a public IP address, a monitor with a private IP address can be connected to it using the direct connection method. Server Name: Changes the server name. The server and monitor can connect to each other only if their server names are the same. Network Device: Selects the LAN card used in the server.
z z Use the equal disk space of each monitor: Sets the size to the value entered in the edit box. Do not check disk space when schedule is published: Publishing continues even though the total size of the schedules to be published is larger than that of the free disk space of the monitor. Publishing sequence: Specifies the order when publishing is performed for multiple monitors. z z Publish schedules at the same time: Publishes the schedules to multiple monitors at the same time.
What is MagicNet? | Using MagicNet | Library | Screen | Schedule Remote Management | Message | Option | Client / Contents Server | Troubleshooting Contents Server A program run on the additional PC where the content server is operating. Version: The version of the content Server. MAC ID: The MAC address of the network device on the PC where the content server is installed. Used when the MagicNet Server checks whether it is registered as the content server.
EWF Displays or changes the drive settings. Password Manages the password. Setup Rotation Rotates the screen with the selected option. Program Runs or exits the program. Exit Exits mnMain. If you exit mnMain, MagicNet X and the Schedule program are also exited together. EWF: Displays and changes the Drive settings EWF State z z Current state: Displays the current EWF state. Boot command: Displays the EWF state which will be applied at the next boot-up.
Old password z Enter the existing password. New password z Enter the new password. Change z Change the password. Use password lock z Verifies your password before you enter the Setup screen. Setup Connection Tab Schedule server z Server Connection Settings { The client automatically connects to the server. { When a connection is disconnected, the client connects to another server automatically. { The client connects to the server manually. (Enter the IP address of the server).
{ { 1 Schedule server z z z 2 Automatic connection using server name : If the schedule server and client are on the same sub network, the client connects to the servers using their name. Reconnecting another server when disconnected : If a connection is disconnected, the client connects to another server on the same sub network automatically. Direct connection using IP address : The client connects to the schedule server with the entered IP address.
z Select the program performed when the client starts. Automatic updates z Select how to perform automatic updates. 1 Startup z z z z 2 Sets the program to be performed when the client starts. You can select one of two programs, or select neither of them. Player: Runs a media player program that can be run using the remote control and can receive and play the content that exists on the server. (MagicNet X) Runs the program that displays the information.
{ { 2 Schedule folder z 3 Background: Sets the background for the entire screen. File: Sets the logo screen to be displayed on the background. (A flash, photo, or movie file can be set.) Sets the directory which the content to be scheduled is downloaded to and managed in and manages the size of the disk. { Target: Sets the target directory. (You should set a directory on the D: drive or a removable disk, as the C: drive is used for the system.) { Space: Sets the disk size limit used for the schedule.
What is MagicNet? | Using MagicNet | Library | Remote Management | Message | Option | Screen Client / Contents Server | Schedule | Troubleshooting Troubleshooting When a monitor is not connected to the server z z z z z z z Check whether the network environment for the server and monitor is normal..
When the monitor update function does not work Check the monitor version. If it is the latest version, no updating is performed. When a movie file is not registered to the library Check whether the proper codec is installed for the movie file the server wants to register to the monitor. If more than one codec of the same type has been installed or an incomplete codec is installed on the PC, it may cause a problem.
Introduction A Multiple Display Control (MDC) is an application allowing various displays to be easily and simultaneously operated on a PC. RS-232C, a standard of serial communication, is used for the communication between a PC and a display. Therefore, a serial cable should be connected between the serial port on a PC and the serial port on a display. Main Screen Click Start > Program > Samsung > MDC System to start the program. Select a set to see the volume of the selected set within the slider.
Main Icons Select Button Remocon Info Grid Safety Lock Display Selection Port Selection Control Tools 1. Use the main icons to switch into each screen. 2. Allows you to enable or disable the remote control signal receiving function of the display unit. 3. Set the Safety Lock function. When setting the Lock function, you can only operate power and lock buttons on the remote control and set. 4. The setting for the PC Serial Port can change. The original value is COM1. 5.
1. The Multiple Display Control is originally set to COM1. 2. If any port other than COM1 is used, COM1 through COM4 can be selected in the Port Selection Menu. 3. If the exact port name that is connected to the LCD Display using a serial cable is not selected, communication will be unavailable. 4. The selected port is stored in the program and used for the next program as well. Power Control 1. Click Power Control of the main icons and the Power Control screen appears.
Info Grid shows some basic information necessary to Power Control. 1) (Power Status) 2) Input 3) Image Size 4) On Timer 5) Off Timer 2. Use the Select All button or Check Box to choose a display to control. Power Control allows controlling some of the functions of the selected display.
- Turns the power of the selected display On/Off. 2) Volume - Controls the volume level of the selected display. It receives the volume value of the selected display from the sets and displays it in the slider. (When you cancel the selection or choose Select All, the value returns to the default value 10) 3) (Mute On/Off) - Turns on/off the Mute function of the selected display. When selecting one set at a time, turn on the Mute function for the selected set.
Info Grid shows some basic information necessary to Input Source Control. 1) PC - Changes the Input Source of the selected display to PC. 2) BNC - Changes the Input Source of the selected display to BNC. 3) DVI - Changes the Input Source of the selected display to DVI. 4) TV - Changes the Input Source of the selected display to TV. 5) DTV - Changes the Input Source of the selected display to DTV. 6) AV - Changes the Input Source of the selected display to AV.
Info Grid shows some basic information necessary to Image Size Control. 1) ( Power Status) - Shows the power status of the current display. 2) Image Size - Shows the current Image Size of the display in use. 3) Input - Shows the current Input Source of the display in use. 4) Info Grid displays only the displays whose Input Source is PC, BNC, DVI. 5) PC Source - When you click Image Size, the PC Source tab first appear. - The Image Size Control button controls Image Size available for PC, BNC, DVI.
Info Grid shows some basic information necessary to Image Size Control. 1) Click the Video Source tab to adjust Image Size for TV, AV, S-Video, Component, DVI(HDCP), HDMI, DTV. Click Select All or use Check Box to select a display to control. 2) Info Grid displays only the display having TV, AV, S-Video, Component or DVI(HDCP) as input source. 3) Switch Image Size of the selected display randomly.
Info Grid shows some basic information necessary to Time Control. 1) Current Time - Set the current time for the selected display (PC Time). - To change the current time, first change the PC Time. 2) On Time Setup - Set the Hour, Minute, AM/PM of On Time Setup, Status, Source, Volume of the selected display. 3) Off Time Setup - Set the Hour, Minute, and AM/PM, Status for Off Time Setup of the selected display. 4) Shows the On Time settings. 5) Shows the Off Time settings.
Info Grid shows some basic information necessary to PIP Size Control. 1) PIP Size - Shows the current PIP Size of the display in use. 2) OFF - Turns off the PIP of the selected display. 3) Large - Turns on the PIP of the selected display and changes the size to Large. 4) Small - Turns on the PIP of the selected display and changes the size to Small. 5) Double 1 - Turns on the PIP of the selected display and changes the size to Double 1.
Info Grid shows some basic information necessary to PIP Source Control. 1) PIP Source - PIP Source can be controlled with turning on the LCD Display power. 2) PC - Changes the source of the PIP of the selected display to PC. 3) BNC - Changes the source of the PIP of the selected display to BNC. 4) DVI - Changes the source of the PIP of the selected display to DVI. 5) AV - Changes the source of the PIP of the selected display to AV.
Info Grid shows some basic information necessary to Settings Control. When each function is selected, the set value of the selected function is displayed in the slide.When selected, each function fetches the value for the set and displays it on the slide bar. When "Select All" is chosen, the default value is displayed. Changing a value in this screen will automatically change the mode to "CUSTOM." 1) Picture - Available only for TV, AV, S-Video, Component, HDMI, DTV.
1. Click Settings of the main icons and the Settings Control screen appears. Info Grid shows some basic information necessary to Settings Control. When each function is selected, the set value of the selected function is displayed in the slide. When selected, each function fetches the value for the set and displays it on the slide bar. When "Select All" is chosen, the default value is displayed. Changing a value in this screen will automatically change the mode to "CUSTOM.
Audio 1. Click Settings of the main icons and the Settings Control screen appears. Info Grid shows some basic information necessary to Settings Control. When each function is selected, the set value of the selected function is displayed in the slide. When selected, each function fetches the value for the set and displays it on the slide bar. When "Select All" is chosen, the default value is displayed. Changing a value in this screen will automatically change the mode to "CUSTOM.
Info Grid shows some basic information necessary to Settings Control. 1) Image Lock - Available only for PC, BNC. 2) Coarse - Adjusts Coarse of the selected display. 3) Fine - Adjusts Fine of the selected display. 4) Position - Adjusts Position of the selected display. 5) Auto Adjustment - Self-Adjust to the incoming PC signal. The Input source of MagicNet works only on MagicNet model. The Input source of TV works only on TV model.
An "Info Grid" showing several basic data items appears. 1) Maintenance - Allows the Maintenance Control function for all input sources. 2) Auto Lamp Control - Automatically adjusts the backlight of the selected display at a specified time. The Manual Lamp Control automatically turns off if you adjust using the Auto Lamp Control. 3) Manual Lamp Control - Allows you to adjust the backlight of the selected display regardless of the time.
1) Safety Screen - Eliminates the afterimages that can result when the selected display stays in Pause mode for an extended period of time. You can set the repeat cycle timer by selecting the "Interval" by hour and "Second" by second. It can be set to Scroll, Pixel, Bar and Eraser by Screen Type. The Input source of MagicNet works only on MagicNet model. The Input source of TV works only on TV model.
1) Video Wall - A Video Wall is a set of video screens that are connected together, so that each screen shows a part of the whole picture or so that the same picture is repeated on each screen. 2) Video Wall (Screen divider) - The screen can be divided into. You can select a number of screens with a different layout when dividing. z Select a mode from Screen divider. z Select a display from Display Selection. z The place will be set up by pressing a number in the selected mode.
- Check the displays to see if any of the other displays connected have the same ID. If more than one displays have the same ID, those displays are not properly detected by the program due to data conflict. - Check if the Display Set ID is a number between 0 and 25. (Adjust using the Display menu) Note : A Display Set ID must be a value between 0 and 25 . 2. The display you wish to control does not appear on the other Control Info Grids - Check to see if the display power is ON.
Select Language Main Page Model SyncMaster 570DXn Safety Instructions Introduction Connections Using the Software Adjusting the LCD Display Input Picture [PC / BNC /DVI Mode] Picture [AV / S-Video / Component / HDMI Mode] Sound Setup Multi Control Direct Functions MagicNet Troubleshooting Specifications Information Appendix The color and appearance of the product may vary depending on the model, and the product specifications are subject to change without prior notice for reasons of performance enhancem
- DVI : AV / S-Video / Component Mode - AV / S-Video : PC / BNC / DVI Mode - Component : PC / DVI Mode - HDMI : PC / BNC Mode [The direct button on the remote control is the 'SOURCE' button.] 3) Swap [MENU] → [ENTER] → [∧ / ∨] → [ENTER] → [∧ / ∨] → [ENTER] Swaps the contents of the PIP and main image. The image in the PIP window will appear on the main screen, and the main screen image will appear in the PIP window. [The direct button on the remote control is the 'SWAP' button.
1) Entertain High brightness For watching motion pictures such as a DVD or VCD. 2) Internet Medium brightness For working with a mixture of images such as the text with graphics added. 3) Text Normal brightness For documentations or work involving a lot of text. 4) Custom Although the values are carefully chosen by our engineers, the pre-configured values may not be comfortable for your eyes depending on your taste. If this is the case, Adjusts the brightness and contrast by using the OSD menu.
(This function is only enabled if the Color Tone is set to Off.) Brightness Sensor [MENU] → [∧ / ∨] → [ENTER] → [∧ / ∨] → [ENTER] → [< / >] → [ENTER] Brightness Sensor is to automatically detect distribution of inputted visual signal and adjust to create optimum brightness. 1) On 2) Off Image Lock Image Lock is used to fine-tune and get the best image by removing noise that creates unstable images with jitters and shakiness.
1) 16:9 2) 4:3 PIP Picture [MENU] → [∧ / ∨] → [ENTER] → [∧ / ∨] → [ENTER] → [∧ / ∨] → [ENTER] → [∧ / ∨] → [ENTER] → [∧ / ∨] → [ENTER] → [< / >] → [ENTER] Adjusts the PIP Screen Settings. 1) Contrast Adjusts the Contrast of the PIP window on the screen. 2) Brightness Adjusts the Brightness of the PIP window on the screen. 3) Sharpness Adjusts the difference between the lightest and darkest areas of the PIP window. 4) Color Adjusts the Color of the PIP window on the screen.
Color Tone [MENU] → [∧ / ∨] → [ENTER] → [∧ / ∨] → [ENTER] → [∧ / ∨] → [ENTER] The color tones can be changed. The individual Color components are also user adjustable. 1) Off 2) Cool2 3) Cool1 4) Normal 5) Warm1 6) Warm2 Note • If you set the Color Tone to Cool1, Cool2, Normal, Warm1, or Warm2, the Color Temp function is disabled. Color Temp [MENU] → [∧ / ∨] → [ENTER] → [∧ / ∨] → [ENTER] → [< / >] → [ENTER] Color temp is a measure of the 'warmth' of the image colors.
2) On Film Mode [MENU] → [∧ / ∨] → [ENTER] → [∧ / ∨] → [ENTER] → [∧ / ∨] → [ENTER] Turns Film Mode Off/On. The Film Mode feature offers you a theater-quality viewing experience. i(Not available in HDMI Mode) 1) Off 2) On PIP Picture [MENU] → [∧ / ∨] → [ENTER] → [∧ / ∨] → [ENTER] → [∧ / ∨] → [ENTER] → [∧ / ∨] → [ENTER] →[< / >] → [ENTER] Adjusts the PIP Screen Settings. 1) Contrast Adjusts the Contrast of the PIP window on the screen.
[You can hear the sound even when sound value is set to 0.] Note • If you adjust picture using Sound Custom function, Sound Mode will turn to Custom mode. Auto Volume [MENU] → [∧ / ∨] → [ENTER] → [∧ / ∨] → [ENTER] → [∧ / ∨] → [ENTER] Reduces the difference in volume control between broadcasters. 1) Off 2) On SRS TS XT [MENU] → [∧ / ∨] → [ENTER] → [∧ / ∨] → [ENTER] → [∧ / ∨] → [ENTER] SRS TS XT is a patented SRS technology that solves the problem of playing 5.1 multichannel content over two speakers.
[MENU] → [∧ / ∨] → [ENTER] → [∧ / ∨] → [ENTER] → [ENTER] → [< / >] → [ENTER] Current Time Setting. 2) Sleep Timer [MENU] → [∧ / ∨] → [ENTER] → [∧ / ∨] → [ENTER] → [∧ / ∨] → [ENTER] →[< / >] → [∧ / ∨] → [ENTER] →[< / >] → [∧ / ∨] → [ENTER] Turns the LCD Display off automatically at certain times. (Off, 30, 60, 90, 120, 150, 180) 3) On Timer [MENU] → [∧ / ∨] → [ENTER] → [∧ / ∨] → [ENTER] → [∧ / ∨] → [ENTER] → [< / >] → [∧ / ∨] → [ENTER] Turns the LCD Display on automatically at a preset time.
Video Wall A Video Wall is a set of video screens connected together, so that each screen shows a part of the whole picture or where the same picture is repeated on each screen. When the Video Wall is on, you can adjust the Video Wall screen setting. 1) Video Wall [MENU] → [∧ / ∨] → [ENTER] → [∧ / ∨] → [ENTER] → [ENTER] → [∧ / ∨] → [ENTER] Turns Off/On the Video Wall function of the selected display Off/On.
4) Type [MENU] → [∧ / ∨] → [ENTER] → [∧ / ∨] → [ENTER] → [∧ / ∨] → [ENTER] → [∧ / ∨] → [ENTER] You can change the Safety Screen Type.
Available in PC/BNC mode only 2) Color Reset [MENU] → [∧ / ∨] → [ENTER] → [∧ / ∨] → [ENTER] → [∧ / ∨] → [ENTER] → [< / >]→ [ENTER] Available in PC/BNC mode only Note • The Reset function is not available when Video Wall is On. Multi Control Available Modes PC / BNC / DVI AV S-Video Component HDMI MagicNet Multi Control Assigns an individual ID to the SET. 1) ID Setup [MENU] → [∧ / ∨] → [ENTER] → [∧ / ∨] → [ENTER] → [ENTER] → [0~9] Assigns distinctive IDs to the SET.
and set. The preset password on the LCD Display is "0000". Note • Resetting the password for the function key lock. Press MUTE → 1 → 8 → 6 → On. The password will be reset to '0000'. The remote control is required for resetting the password. MagicNet Available Modes PC / BNC / DVI AV S-Video Component HDMI MagicNet Note • The operating system for this set only supports English so the other languages might be corrupted on the screen. • For MagicNet, a remote control is available for MagicNet.
4) Rotation Displays an image file by turning it clockwise by 90 degrees. 5) Zoom Displays a reduced picture. 6) Close Closes the image control Menu. Music The MP3 file format is supported. Movie The MPEG1, WMV file format are supported. 1) Play Plays a movie file. 2) Full Size Plays a movie file in full screen. OFFICE / HTML PPT(Power Point), DOC(MS Word), XLS(MS Excel), PDF, HTML, HTM files are displayed.
You can set the repeat play and screen settings. Repeat : Determines the repeat option for playing movies and music. • None - Select No Repeat to play a movie or tune in the list only once. • File Repeat - Select Repeat File to play a movie or tune in the list repeatedly. • List Repeat - Select Repeat List to play movies or tunes in the list in sequence repeatedly. Rotation - Sets the picture orientation.. • Landscape - Sets the screen resolution to 1366x768 pixels.
Select Language Main Page Model SyncMaster 570DXn Safety Instructions Introduction Connections Using the Software Adjusting the LCD Display Troubleshooting Self-Test Feature Check Check List Q&A Specifications The color and appearance of the product may vary depending on the model, and the product specifications are subject to change without prior notice for reasons of performance enhancement.
Maintenance and Cleaning 1) Maintaining the LCD Display Case. Clean with a soft cloth after disconnecting the power cord. • Do not use benzene, thinner or other flammable substances, or a wet cloth. • We recommend that a Samsung cleansing agent is used to prevent damage to the screen. 2) Maintaining the Flat Panel Display Screen. Clean with a soft cloth (cotton flannel) smoothly. • Never use acetone, benzene or thinner. (They may cause flaws or deformation of the screen surface.
The LCD Display screen flickers. Display is securely connected. (Refer to Connecting a Computer) Problems related to the Screen Note • Problems related to the LCD Display screen and their solutions are listed. Problems Solutions The screen is blank and the power z Ensure that the power cord is firmly connected and the LCD indicator is off. LCD Display is on. (Refer to the Connecting the LCD Display ) "Check Signal Cable" message.
• Problems related to audio signals and their solutions are listed below. Problems Solutions z Ensure that the audio cable is firmly connected to both the No sound. audio-in port on your LCD Display and the audio-out port on your sound card. (Refer to the Connecting the LCD Display ) z Check the volume level. The sound level is too low. z Check the volume level.
Set the resolution in the Control Panel → Appearance and Themes → Display → Settings. z Windows ME/2000: Set the resolution in the Control Panel → Display → Settings. * Contact the video card manufacturer for details. How can I set the Power Saving function? z Windows XP: Set the resolution in the Control Panel → Appearance and Themes → Display → Screen Saver. Set the function in the BIOS-SETUP of the computer. (Refer to the Windows / Computer Manual).
Select Language Main Page Model SyncMaster 570DXn Safety Instructions Introduction Connections Using the Software Adjusting the Monitor Troubleshooting Specifications General PowerSaver Preset Timing Modes The color and appearance of the product may vary depending on the model, and the product specifications are subject to change without prior notice for reasons of performance enhancement.
PC Audio Input 3.5 Ø Stereo Jack, 0.5 Vrms (-9 dB) Frequency RF: 80 Hz ~ 15 kHz (at -3 dB) Response A/V: 80 Hz ~ 20 kHz (at -3 dB) Plug and Play Capability This monitor can be installed on any Plug & Play compatible system. The interaction of the monitor and the computer systems will provide the best operating conditions and monitor settings. In most cases, the monitor installation will proceed automatically, unless the user wishes to select alternate settings.
operates with a VESA DPM compliant video card installed in your computer. Use the software utility installed on your computer to set up this feature.
Vertical Frequency Like a fluorescent lamp, the screen has to repeat the same image many times per second to display an image to the user. The frequency of this repetition is called the Vertical Frequency or Refresh Rate. Unit: Hz © 1995~2007 SAMSUNG.
Select Language Main Page Model SyncMaster 570DXn Safety Instructions Introduction Connections Using the Software Adjusting the LCD Display Troubleshooting Specifications Information For Better Display PRODUCT INFORMATION (Image Retention Free) The color and appearance of the product may vary depending on the model, and the product specifications are subject to change without prior notice for reasons of performance enhancement.
Power Off, Screen Saver, or Power Save Mode z Turn the power off for 4 hours after 20 hours in use z Turn the power off for 2 hours after 12 hours in use z Set the Monitor to power off with the PC Display Properties Power Scheme. z Use a Screen saver if possible - Screen saver in one color or a moving image is recommended. Change the Color Information periodically Note • Use Two different colors Rotate the Color Information with 2 different colors every 30 minutes.
z Every 30 minutes, change the characters with movement. z All area display Moving image together with Logo periodically. - Cycle: Display moving image together with Logo for 60 seconds after 4 hours in use. z The best way to protect your monitor from Image retention is to turn Power off, or set your PC, or System to operate a Screen Saver program when you are not using it. Also Warranty service will be limited based on instruction guide.
- Select method . Instruction Guide : OSD Menu -> Set Up -> Safety Screen -> Bar . Time Interval : 1 ~ 10 hours ( Recommend : 1 ) . Time Period : 10 ~ 50 second ( Recommend : 50 ) Note • ( Please check CD's User Guide at "OSD Function", some model's will not available. ) Apply the Screen Erasing function on Product z Apply the Screen Erasing function - Symptom: 2 Vertical blocks move with erasing the display - Select method . Instruction Guide : OSD Menu -> Set Up -> Safety Screen -> Eraser .
Select Language Main Page Model SyncMaster 570DXn Safety Instructions Introduction Connections Using the Software Adjusting the LCD Display Troubleshooting Specifications Information Appendix Contact SAMSUNG WORLDWIDE Terms Correct Disposal Authority The color and appearance of the product may vary depending on the model, and the product specifications are subject to change without prior notice for reasons of performance enhancement.
CZECH REPUBLIC DENMARK 70 70 19 70 http://www.samsung.com/dk FINLAND 030-6227 515 http://www.samsung.com/fi FRANCE GERMANY 3260 SAMSUNG(726-7864) 08 25 08 65 65 (€ 0,15/min) 01805-SAMSUNG(726-7864) (€ 0,14/Min) http://www.samsung.com/fr http://www.samsung.de HUNGARY 06-80-SAMSUNG(726-7864) http://www.samsung.com/hu ITALIA 800-SAMSUNG(726-7864) http://www.samsung.com/it LUXEMBURG 0035 (0)2 261 03 710 http://www.samsung.
THAILAND 1800-29-3232, 02-689-3232 http://www.samsung.com/th TAIWAN 0800-329-999 http://www.samsung.com/tw VIETNAM 1 800 588 889 http://www.samsung.com/vn Middle East & Africa SOUTH AFRICA 0860-SAMSUNG(726-7864 ) http://www.samsung.com/za TURKEY 444 77 11 http://www.samsung.com.tr 800-SAMSUNG (726-7864) U.A.E 8000-4726 http://www.samsung.com/mea Terms Sync Signal Sync (Synchronized) Signals refer to the standard signals that are required to display desired colors on the LCD Display.
Correct Disposal Correct Disposal of This Product (Waste Electrical & Electronic Equipment) - Europe only (Applicable in the European Union and other European countries with separate collection systems) This marking shown on the product or its literature, indicates that it should not be disposed with other household waste at the end of its working life.