
Product specifications

3-1
3. Disassembly and Assembly
3. Disassembly and Assembly
This section describes the disassembly and reassembly sequences for this monitor.
Warning: As this monitor has parts that are sensitive to static electricity, be careful when handling them.
3-1. SIMPLE STAND Disassembly
Caution: 1. Turn the monitor off before beginning the disassembly process.
2. Disassemble the monitor carefully as directed in the following procedures.
3. When disassembling the monitor, do not use any metal tools except for the provided jig.
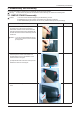
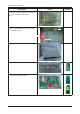
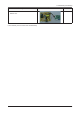
Description Photo Screws
1. Place a soft cloth on the table and place
the monitor onto it with the front part facing
downwards. Hold the monitor set with one hand
and hold and pull the stand body backwards with
the other hand to remove the stand body from the
monitor set.
Caution : : If you do not tilt the stand and use too
much force to remove it, the connection
pin may break.
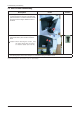
2. ① Turn the monitor over and insert your hands
into the top of the monitor at the center and
separate the front cover in the direction of the
arrow as shown in the gure.
② Separate the sides of the front cover up to the
directed line as shown in the gure.
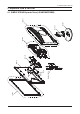
3. Turn the monitor over again to remove the back
cover.
①
②