
User Manual (ver.1.0)
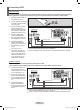
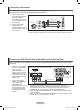
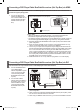
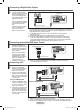
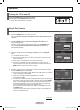
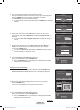

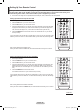
Table Of Contents
- Important Warranty Information Regarding Television Format Viewing
- User Instructions
- Contents
- General Information
- Connections
- Connecting VHF and UHF Antennas
- Connecting Cable TV
- Connecting a VCR
- Connecting a Camcorder
- Connecting a DVD Player/Cable Box/Satellite receiver (Set-Top Box)
- Connecting a DVD Player/Cable Box/Satellite receiver (Set-Top Box) via HDMI
- Connecting a DVD Player/Cable Box/Satellite receiver (Set-Top Box) via DVI
- Connecting a Digital Audio System
- Connecting an Amplifier/DVD Home Theater
- Connecting a PC
- Operation
- Picture Control
- Sound Control
- Using Automatic Sound Settings
- Customizing the Sound
- Setting the TruSurround XT
- Choosing a Multi-Channel Sound (MTS) Track - Digital
- Choosing a Multi-Channel Sound (MTS) Track - Analog
- Automatic Volume Control
- Selecting the Internal Mute
- Adjusting the TV On/Off Melody Sound
- Listening to the Sound of the Sub (PIP) Picture
- Channel Control
- PC Display
- Time Setting
- Function Description
- Selecting a Menu Language
- Using the Game Mode
- Viewing Closed Captions (On-Screen Text Messages) - Digital
- Viewing Closed Captions (On-Screen Text Messages) - Analog
- Menu Transparency Level
- Setting the Light Effect
- Using the Energy Saving Feature
- Preventing Screen Burn-in
- Reducing the Effects of Screen Burn
- Setting the Function Help
- Using the V-Chip
- Upgrading the Software
- WISELINK
- About Anynet+
- Appendix

English - 20
Setting Up the Remote to Operate Your VCR
1 Turn off your VCR.
2 Press the
VCR button on your TV’s remote control.
3 Press the SET button on your TV’s remote control.
4 Using the number buttons on your remote control, enter three digits of the VCR code listed
on page 22 of this manual for your brand of VCR. Make sure you enter three digits of the
code, even if the first digit is a “0”. (If more than one code is listed, try the first one.)
5 Press the POWER button on the remote control. Your VCR should turn on if your remote
is set up correctly.
If your VCR does not turn on after set-up, repeat steps 2, 3 and 4, but try one of the other codes
listed for your brand of VCR. If no other codes are listed, try each VCR code, 000 through 080.
Note on Using Remote Control Modes: VCR
When your remote control is in VCR mode, the volume buttons still control your TV’s volume.
Setting Up the Remote to Operate Your Cable Box
1 Turn off your cable box.
2 Press the CABLE button on your TV’s remote control.
3 Press the
SET button on your TV’s remote control.
4 Using the number buttons on your remote control, enter three digits of the cable box code
listed on page 23 of this manual for your brand of cable box. Make sure you enter three
digits of the code, even if the first digit is a “0”. (If more than one code is listed, try the first
one.)
5 Press the
POWER button on the remote control.
Your cable box should turn on if your remote is set up correctly.
If your cable box does not turn on after set-up, repeat steps 2, 3 and 4, but try one of the other
codes listed for your brand of cable box. If no other codes are listed, try each code, 000 through
046.
Note on Using Remote Control Modes: Cable Box
When your remote control is in CABLE mode, the volume buttons still control your TV’s volume.
Continued...
Setting Up Your Remote Control
After your remote control has been properly set up, your remote control can operate in five different modes:
TV, VCR, Cable, DVD, or Set-Top Box. Pressing the corresponding button on the remote control allows you to
switch among these modes, and control whichever piece of equipment you choose.
➢
The remote control might not be compatible with all DVD Players, VCRs, Cable boxes, and Set-Top Boxes.
BN68-01183Z-00Eng.indb 20 2007-07-02 ¿ÀÈÄ 4:28:09