
User Manual (ver.1.0)
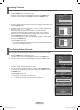
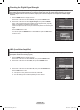
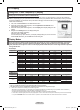
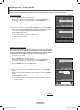
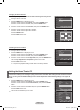
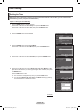
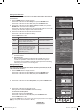
Table Of Contents
- Important Warranty Information Regarding Television Format Viewing
- User Instructions
- Contents
- General Information
- Connections
- Connecting VHF and UHF Antennas
- Connecting Cable TV
- Connecting a VCR
- Connecting a Camcorder
- Connecting a DVD Player/Cable Box/Satellite receiver (Set-Top Box)
- Connecting a DVD Player/Cable Box/Satellite receiver (Set-Top Box) via HDMI
- Connecting a DVD Player/Cable Box/Satellite receiver (Set-Top Box) via DVI
- Connecting a Digital Audio System
- Connecting an Amplifier/DVD Home Theater
- Connecting a PC
- Operation
- Picture Control
- Sound Control
- Using Automatic Sound Settings
- Customizing the Sound
- Setting the TruSurround XT
- Choosing a Multi-Channel Sound (MTS) Track - Digital
- Choosing a Multi-Channel Sound (MTS) Track - Analog
- Automatic Volume Control
- Selecting the Internal Mute
- Adjusting the TV On/Off Melody Sound
- Listening to the Sound of the Sub (PIP) Picture
- Channel Control
- PC Display
- Time Setting
- Function Description
- Selecting a Menu Language
- Using the Game Mode
- Viewing Closed Captions (On-Screen Text Messages) - Digital
- Viewing Closed Captions (On-Screen Text Messages) - Analog
- Menu Transparency Level
- Setting the Light Effect
- Using the Energy Saving Feature
- Preventing Screen Burn-in
- Reducing the Effects of Screen Burn
- Setting the Function Help
- Using the V-Chip
- Upgrading the Software
- WISELINK
- About Anynet+
- Appendix
English - 44
Setting up the TV with your PC
Use the Auto Adjust function to have the TV set automatically adjust the video signals it receives from the PC.
The function also automatically fine-tunes the settings and adjusts the frequency values and positions.
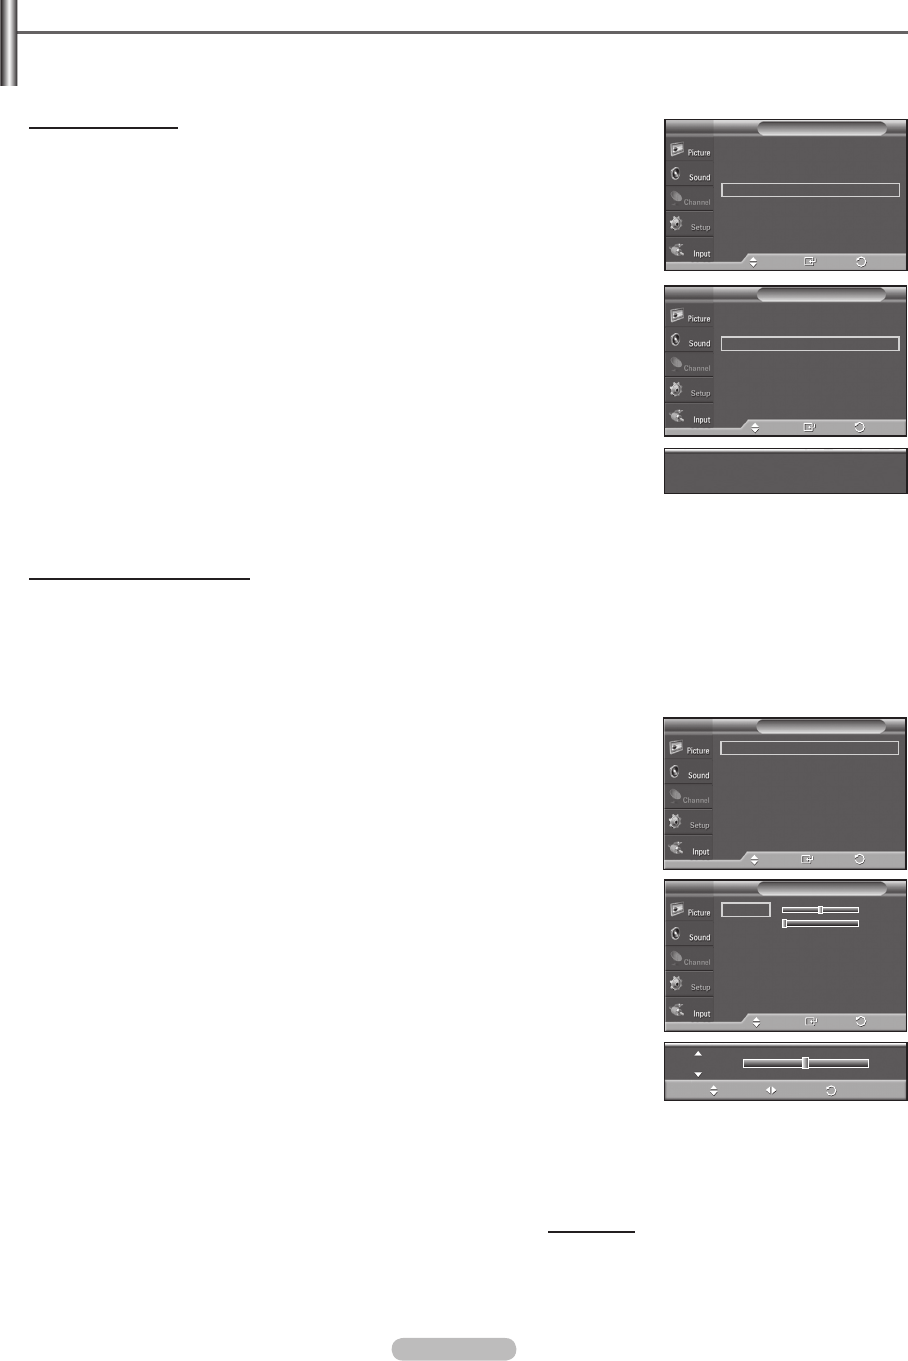
How to Auto Adjust
1 Press the MENU button to display the menu.
Press the ▲ or ▼ button to select Setup, then press the ENTER button.
Press the ▲ or ▼ button to select PC, then press the ENTER button.
2 Press the ▲ or ▼ button to select Auto Adjustment, then press the ENTER
button. The message Auto Adjustment in progress. Please wait.
appears on
the screen and the picture adjustments are automatically activated.
Press the
EXIT button to exit.
➢
This function does not work in DVI-Digital mode.
➢
You must be in PC mode.
Adjusting the Screen Quality
The purpose of the picture quality adjustment is to remove or reduce picture
noise. If the noise is not removed by fine tuning alone, then make the vertical
frequency adjustments and fine tune again. After the noise has been reduced,
re-adjust the picture so that it is aligned in the center of the screen.
➢
You must be in PC mode.
1 Press the MENU button to display the menu.
Press the ▲ or ▼ button to select Setup, then press the ENTER button.
Press the ▲ or ▼ button to select PC, then press the ENTER button.
2 Press the ENTER button to select Image Lock.
3 Press the ▲ or ▼ button to select Coarse or Fine, then press the ENTER
button.
Press the ◄ or ► button to adjust the screen quality, then press the
ENTER
button.
Press the
EXIT button to exit.
➢
This feature may change the width of the image. If necessary, adjust the
position to center.
Continued...
Auto Adjustment in progress. Please wait.
Image Lock
►
Position
►
Auto Adjustment
Image Reset
PCT V
Enter
Move
Image Lock
►
Position
►
Auto Adjustment
Image Reset
PCT V
Enter
Move
▲
More
Blue Screen : Off
►
Melody : Medium
►
PC
►
Home Theater PC : Off
►
Light Effect :
In Watching TV
►
Energy Saving : Off
►
▼
More
Setup
T V
Enter
Move
Return
Return
Return
Image LockT V
Coarse 50
Fine 0
Enter
Move
Return
Coarse 50
Move Adjust
Return
BN68-01183Z-00Eng.indb 44 2007-07-02 ¿ÀÈÄ 4:28:53