HT-EM53C 5.1CH Blu-ray™ Home Entertainment System user manual imagine the possibilities Thank you for purchasing this Samsung product. To receive more complete service, please register your product at www.samsung.com/register HT-EM53C_ZA_0417-1(D2D).
Safety Information Warning TO REDUCE THE RISK OF ELECTRIC SHOCK, DO NOT REMOVE THE COVER (OR BACK). NO USER-SERVICEABLE PARTS ARE INSIDE. REFER SERVICING TO QUALIFIED SERVICE PERSONNEL. CAUTION RISK OF ELECTRIC SHOCK DO NOT OPEN The lighting flash and Arrowhead within the triangle is a warning sign alerting you of dangerous voltage inside the product. CAUTION: TO REDUCE THE RISK OF ELECTRIC SHOCK, DO NOT REMOVE COVER (OR BACK) NO USER SERVICEABLE PARTS INSIDE.
Precautions 1 . Read these instructions. Safety Information Read these operating instructions carefully before using the unit. Follow all the safety instructions listed below. Keep these operating instructions handy for future reference. 14 . Refer all servicing to qualified service personnel.
Safety Information • Do not plug multiple electric devices into the same wall socket. Ovedrloading a socket can cause it to overheat, resulting in a fire. • Maintenance of the Cabinet - Before connecting other components to this product, be sure to turn them off. - If you move your product suddenly from a cold place to a warm place, condensation may occur on the operating parts and lens and cause abnormal disc playback.
License 01 • Manufactured under license under U.S. Patent Nos: 5,956,674; 5,974,380; 6,226,616; 6,487,535; 7,392,195; 7,272,567; 7,333,929; 7,212,872 & other U.S. and worldwide patents issued & pending. DTS-HD, the Symbol, & DTSHD and the Symbol together are registered trademarks & DTS-HD Master Audio | Essential is a trademark of DTS, Inc. Product includes software. © DTS, Inc. All Rights Reserved.
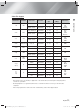
Contents SAFETY INFORMATION 2 3 3 3 4 4 5 Warning Precautions Disc Storage & Management Handling Cautions Using the 3D Function Copyright License SETTINGS 23 25 25 26 31 35 MEDIA PLAY GETTING STARTED 7 8 11 12 12 13 Disk and Format Compatibility Logos of Discs the product can play Accessories Front Panel Rear Panel Remote Control CONNECTIONS 15 16 16 17 18 19 19 19 20 20 20 21 21 21 22 22 22 Connecting the Speakers Speaker Components Connecting The Speakers Connecting the Optional Wireless Receiver
Getting Started Disk and Format Compatibility 02 Disc types and contents your product can play Disc Type Blu-ray Disc 3D Blu-ray Disc VIDEO DVD-VIDEO, DVD-RW, DVD-R, DVD+RW, DVD+R Getting Started Media Details BD-ROM or BD-RE/-R disc recorded in the BD-RE format. DVD-VIDEO, recorded DVD+RW/DVD-RW(V)/DVDR/+R discs that have been recorded and finalized, or a USB storage media containing MKV, MP4 contents.
Getting Started Region Code Logos of Discs the product can play Both products and discs are coded by region. These regional codes must match for a disc to play. If the codes do not match, the disc will not play. The Region Number for this product is displayed on the rear panel of the product. Disc Type Blu-ray Disc DVD-VIDEO Region Code Area A North America, Central America, South America, Korea, Japan, Taiwan, Hong Kong and South East Asia.
Video File Support *.avi AVI *.mkv *.asf *.mp4 MP4 *.mpg *.mpeg *.ts *.tp *.trp Frame rate (fps) Bitrate (Mbps) H.264 BP/MP/HP 1920x1080 6 ~ 30 25 MPEG4 SP/ASP 1920x1080 6 ~ 30 8 H.264 BP/MP/HP 1920x1080 6 ~ 30 25 MPEG4 SP/ASP 1920x1080 6 ~ 30 8 H.264 BP/MP/HP 1920x1080 6 ~ 30 25 MPEG4 SP/ASP 1920x1080 6 ~ 30 8 Window Media Video v9 1920x1080 6 ~ 30 25 WMA H.264 BP/MP/HP 1920x1080 6 ~ 30 25 MPEG4 SP/ASP 1920x1080 6 ~ 30 8 MP3 AAC H.
Getting Started - The Seek (skip) function is not available if the file’s index table is damaged. - When you playback a file remotely through a network connection, video playback may stutter depending on the network speed. Video decoder - Supports up to H.264 Level 4.1 - Does not support H.
| NOTE | Some AVCHD format discs may not play, depending on the recording conditions. 02 AVCHD format discs need to be finalized. Getting Started “x.v.Color” offers a wider color range than normal DVD camcorder discs. Some MKV and MP4 format discs may not play, depending on their video resolution and frame rate. Accessories Check for the supplied accessories below.
Getting Started Front Panel PLAY/PAUSE ENTER STOP OPEN/CLOSE VOLUME CONTROL FUNCTION 5V 500mA DISPLAY DISC TRAY USB HOST POWER REMOTE CONTROL SENSOR | NOTE | To upgrade the product's software through the USB Host jack, you must use a USB memory stick. When the product displays the Blu-ray Disc menu, you cannot start the movie by pressing the 6 button on the product or the remote. To play the movie, you must select Play Movie or Start in the disc menu, and then press the E button.
Remote Control 02 Tour of the Remote Control FUNCTION TV SOURCE To change to TV mode, press the TV button. RECEIVER To change to Home Theater, press the BD button. Press numeric buttons to operate options. SLEEP BD To open and close the disc tray. 1 2 3 4 5 6 7 8 9 TITLE MENU 0 Press to view the disc menu. POPUP Press to stop/play a disc. Press to pause a disc. Cut off the sound temporarily. MUTE VOL S/W LEVEL TUNING / CH Press to use Netflix.
Getting Started Installing batteries in the Remote Control Battery size: AAA 1 2 | NOTE | Make sure to match the “+” and “–” ends of the batteries with the diagram inside the compartment. Assuming typical TV usage, the batteries last for about one year. The remote control can be used up to approximately 23 feet (7 meters) from the product in a straight line. Setting the Remote Control You can control certain functions of your TV with this remote control.
Connections This section describes various methods of connecting the product to other external components. Before moving or installing the product, be sure to turn off the power and disconnect the power cord. 03 Position of the product Place it on a stand or cabinet shelf, or under the TV stand. Center Subwoofer Front (R) Product Front (L) Surround (L) Surround (R) Selecting the Listening Position The listening position should be located about 2.
Connections Speaker Components (L) (R) FRONT (L) (R) SURROUND CENTER SUBWOOFER Connecting The Speakers 1. Connect the connecting plugs to the back of the product by matching the colors of the speaker plugs to the speaker jacks. Front Speaker (L) Surround Speaker (L) Center Speaker Surround Speaker (R) SURROUND IMPEDANCE : 3 SPEAKERS OUT SURROUND Front Speaker (R) SURROUND Subwoofer IMPEDANCE : 3 SPEAKERS OUT SURROUND LAN WIRELESS HDM | 16 English HT-EM53C_ZA_0417-1(D2D).
Connecting the Optional Wireless Receiver Module 03 To connect the surround speakers wirelessly, you have to purchase the wireless receiver module and TX card from your Samsung retailer. Connections • This product should be connected with the SWA-5000 only.
Connections | CAUTION | If you want to install the product on the wall, fasten the screws or nails on the wall firmly and use the holes on the rear of speaker to install. However, when you install it, accessories (nails or screws) and installation is not provided by the company. Do not let children play with or near the speakers. They could get hurt if a speaker falls.
Connecting to an iPod/iPhone 03 Using a USB Cable Connections Connect an iPod/iPhone using the USB cable to the front USB port. 5V 500mA 5V 500mA Attaching the Toroidal Ferrite Core to the Power Cord of the Main Unit If you attach a Toroidal ferrite core to the power cord of the main unit, it will help to prevent RF interference from radio signals. AUX IN SURROUND VIDEO OUT IMPEDANCE : 3 SPEAKERS OUT SURROUND OPTICAL LAN WIRELESS HDMI OUT DIGITAL AUDIO IN FM ANT 1.
Connections Connecting to a TV Select either Method 1 or Method 2. • If you have set the product's remote control to operate your TV, press the TV SOURCE button on the remote control, and then select the correct external source from the TV's source list (HDMI, Video In, etc.) to view video from the home theater.
Connecting to External Devices W Red AUX IN White AUX IN SURROUND VIDEO OUT VIDEO OUT IMPEDANCE : 3 SPEAKERS OUT Connections R 03 To select the correct mode for an external device, press the FUNCTION button. Each time you press the button, the mode changes in this order : BD/DVD D. IN AUX R. IPOD FM SURROUND OPTICAL OPTICAL LAN WIRELESS HDMI OUT DIGITAL AUDIO IN FM ANT DIGITAL AUDIO IN FM ANT Method 2 Method 1 (Cable not supplied.) (Cable not supplied.
Connections Connecting to a Network Router Wireless Network You can connect your product to your network router using one of the methods illustrated below.
Settings The Initial Settings Procedure If you skip wireless network setup here, go to "Wireless Network" on page 32 to set up the product's wireless network connection later. 5 . The product searches for and then displays all available wireless router network connections.
Settings | NOTE | Enter numbers by pressing the number buttons on your remote. Enter letters by selecting a letter using the ▲▼◄► buttons, and then press E button. To display capital letters (or redisplay small letters if capital letters are displayed), select A/a, and then press the E button. To display symbols and punctuation, select , and then press the E button. To redisplay letters, select , and then press the E button. 9 .
| NOTE | 3 4 5 2 1 Disc to Digital Function If you leave the product in the stop mode for more than 5 minutes without using it, a screen saver will appear on your TV. If the product is left in the screen saver mode for more than 20 minutes, the power will automatically turn off. Settings AllShare Play Play videos, photos, or music from Disc or connected devices. Smart Hub 04 2 .
Settings Settings Menu Functions Display 3D Settings Set up the 3D related functions. 3D Blu-ray Playback Mode: Select whether to play a Bluray Disc with 3D contents in 3D Mode. If you move to the Home or Smart Hub Home menu while in 3D mode, the product will switch to 2D automatically. Screen Size: Enter the size of the TV attached to the product. The product will automatically adjust the 3D output to the screen size of the TV.
Audio You can set the speaker options. Equalizer Let you configure the Equalizer settings manually. 04 Speaker Settings Lets you set the product so that the volume remains stable when a scene change occurs or when you change the channel. Speaker Selection Lets you select which speakers you want active, either the TV's speakers or the Home theater's speakers. Settings Smart Volume Audio Return Channel Lets you direct the sound from the TV to the Home Theater speakers.
Settings Network Network Settings For more information about Network Settings and network functions, see "Networks and the Internet" starting on page 31. Network Status Let you check whether a connection to the network and the Internet have been established. Wi-Fi Direct Lets you connect a Wi-Fi Direct device to the product using a Peer-to-Peer network, without a wireless router. You can use the device to control the product.
System Initial Settings Lets you re-run the Initial Settings procedure. See page 23 for details. 04 Settings You can connect a wireless USB keyboard or mouse to the USB port on the front of the product. Keyboard Settings: Lets you configure a wireless USB keyboard connected to the product. | NOTE | You can use the keyboard only when a QWERTY keyboard screen or window appears in the Web Browser. Mouse Settings: Lets you configure a wireless USB mouse connected to the product.
Settings The default PIN is 0000. Enter the default PIN to access the security function if you haven't created your own password. Security BD Parental Rating: Prevents playback of Blu-ray Discs with a rating equal to or above a specific age rating you enter unless the PIN is entered. DVD Parental Rating: Prevents playback of DVDs with a rating above a specific numerical rating you select unless the PIN is entered. Change PIN: Change the 4-digit PIN used to access security functions.
Networks and the Internet Wired - Manual If you have a static IP address or the Automatic procedure does not work, you'll need to set the Network Settings values manually. 04 After following Steps 1 to 3 above: Settings When you connect this product to a network, you can use network based applications and functions such as Smart Hub and BD-LIVE, and upgrade the product's software through the network connection.
Settings 2 . In the pop-up menu, click Status. Network Settings 3 . On the dialog that appears, click the Support tab. Select your wireless router from the list: Refresh ELT 5 . The Network settings are displayed. Previous KT_WLAN_C361 Mirhenge_edu 4 . On the Support tab, click the Details button. The Network settings are displayed. | NOTE | Depending on your Windows version, the information may differ.
6 . When done, select Next at the right of the screen, and then press the E button. 7 . The Network Status screen appears. The product attempts to verify the network connection and fails. 8 . Select IP Settings on the right of the screen, and press the E button. The IP Settings screen appears. 9 . Select the IP Mode field, and then set it to Manual. 10 . Use the number keypad on your remote to enter the Network values. Use the ▲▼◄► buttons on the remote to move from entry field to entry field.
Settings 5 . You have three ways to complete the Wi-Fi connection: • Through the Wi-Fi device. • Through the product using PBC. • Through the product using a PIN. Each is covered below. Through the Wi-Fi Device 1 . On the Wi-Fi device, follow the procedure on the device for connecting to another Wi-Fi Direct device. See the device's user manual for instructions. 2 .
3 . Select AllShare Settings, and then press the E button. The AllShare Settings screen only displays devices if you have established networked connections to AllShare devices. For more information about AllShare networked devices, see pages 37~38. Upgrading Software The Software Update menu allows you to upgrade the product’s software for performance improvements or additional services. • Never turn the product off or back on manually during the update process. 1 .
Settings 11 . In the product’s menu, go to Settings > Support > Software Update. 12 . Select By USB. | NOTE | There should be no disc in the product when you upgrade the software using the USB Host jack. When the Software Update is done, check the software details in the Software Update menu. Do not turn off the product during the Software Update. It may cause the product to malfunction.
Media Play Playing Video, Photo, or Music Content To access the AllShare Play screen, select the AllShare Play icon on the Main screen, and then press the E button. 1 . Make sure that the source of the content you want to play or view is connected to or inserted into the product. Using the AllShare Play Screen 2 . Use the ▲▼ buttons to select Videos, Photos, or Music, and then press the E button. The first source selection on the right side is highlighted. AllShare Play / My List / 3 .
Media Play Playing Files on a USB Storage Device or iPod/iPhone You can play multimedia files located on a connected USB device. 1 . With the product turned off, connect a USB storage device or an iPod/iPhone. 2 . Turn on the product. When the Main screen appears, select AllShare Play > Videos, Photos or Music > Connected Device, and then press the E button. 3 . The kind of content you selected on the connected device is displayed.
The Function Screen You can also change sources by pressing the Function button in the upper right of the remote. AllShare Play / Music / To access the Function Screen, select the Function icon on the Main screen, and then press the E button. Options on the Function Screen To select, highlight an option using the ▲▼ buttons, and then press the E button.
Media Play Playing a Disc with User Recorded Content You can play multimedia files you have recorded on DVD or CD discs. 1 . Place a user recorded disc into the disc tray with the disc’s label facing up, and then close the tray. The Device Connected pop-up appears. 2 . Use the ▲▼ buttons to select the type of content you want to view or play - Videos, Photos, or Music - and then press the E button.
Playing Content Located on Your PC or DLNA Device through the Product Product PC Product 5V 500mA Play back PC's files 5V 500mA Play back PC's files AllShare Connection 1 . Connect the product, your PC, and/or your DLNA compatible cell phone to the same wireless network. 2 . Follow the directions in the AllShare software Installation/Instruction manual to set up devices and files for playing or viewing. 3 . Select AllShare Play in the product's Home screen, and then press the E button.
Media Play Controlling Video Playback You can control the playback of video files located on Blu-ray, DVD, and CD discs, and on USB storage devices. Depending on the disc, some of the functions described in this manual may not be available. Buttons on the Remote Control used for Video Playback DISC MENU TITLE MENU 0 POPUP Using the disc menu, title menu, popup menu and title list DISC MENU During playback, press this button to display the Disc menu.
Menu that appears only when BD/DVD disc During playback, press the TOOLS button. plays Repeat Mode Select to repeat a specific Title, Chapter (BD/DVD discs only) or marked section. Works the same as the REPEAT button. See page 42. Full Screen Select to set the desired full screen size. You can select Original, Mode1 (larger), and Mode2 (largest). Picture Mode Select to set the picture mode. - Dynamic : Choose this setting to increase sharpness.
Media Play Shuffling Tracks on an Audio CD Controlling Music Playback You can control the playback of music content located on a DVD, CD, or a USB storage device. You can set the product to play tracks on an audio CD (CD-DA/MP3) at random. Buttons on the Remote Control used for Music Playback 1 . During playback, use the ► button to select in the lower right corner of the screen, and then press the E button.
• Use Deselect All to deselect all selected tracks at once. Then, select individual tracks or use Select All to select all the tracks, and then press the RETURN (') button on your remote or select PLAY and then press the E button. If you do not use Select All or select individual tracks, the Playlist will not change. You can play photo contents located on a DVD, USB, mobile device or PC. • Cancel cancels any changes you made on the Play Select screen.
Media Play | NOTE | Depending on the disc or storage device, the Tools menu may differ. All options may not be displayed. Earliest Date To enable the background music function, the photo file must be in the same storage media as the music file. However, the sound quality can be affected by the bitrate of the MP3 file, the size of the photo, and the encoding method. Appears on the View function screen.
Send 2. Repeat for each track or file you want to upload. | NOTE | You can also move to Select All on the right, and then press the E button to select all tracks or files. Depending on the screen you are viewing, select Delete to erase a file Delete (Playlist) from erasable media (such as a USB device) or to delete a playlist. Select Edit Playlist to remove files or tracks from an existing playlist. The storage device containing the playlist must be inserted into or attached to the product. 3.
Media Play Encoding Information Encoding - which changes by language or by geographical area - modifies how the product sorts, arranges, and presents files or tracks, displays dates, etc. Select Encoding to change the encoding to match your language or geographical area. Displays media file and content information. | NOTE | Depending on the disc or storage device, the Tools menu may differ. All options may not be displayed. Presetting Stations Example : Presetting FM 89.10 into memory. 1 .
Dolby Pro Logic II Movie Music Game Matrix Prologic Off Playing a 2D video in 3D mode 05 • Movie : Adds realism to a movie soundtrack. • Game : Enhances the excitement of the game’s sound. You can enjoy an ordinary 2D video in 3D mode. | NOTE | If you move to the Home or Smart Hub Home menu in 3D mode, it will switch to 2D automatically. Media Play • Music : When listening to music, you can experience sound effects as if you are listening to the actual performance.
Network Services You can enjoy various network services such as Smart Hub or BD-LIVE by connecting the product to your network. Smart Hub at a Glance 1 To use network services, you must first: 2 34 Search 1 . Connect the product to the network. (See page 22) 2 . Configure the network settings.
0 Samsung Apps : Open Samsung Apps to download various for pay or free-of-charge application services. Web Browser at a Glance 1 Network Services My Applications : Displays your personal gallery of applications which you can add to, modify, and delete. 06 9 http://www.google.com/ Using the Web Browser You can access the internet using the Web Browser application which is installed in the Smart Hub screen by default. Google Search b Control Panel Link Browsing / Tools ' Exit 1 .
Network Services 2 Navigation Help : Displays the remote control buttons you can use to navigate in Web Browser. • GREEN (B) : To display the Control Panel. • YELLOW (C) : You can change the cursor to Link Browsing mode or Pointer Browsing mode. • Tools : To display Tools window. • Exit : To return to the previous menu. BD-LIVE™ Once the product is connected to your network, you can enjoy various movie-related service contents available on BD-LIVE compliant discs.
Appendix Additional Information 07 Note Connections • Certain HDMI output resolutions may not work, depending on your TV. • You must have an HDMI connection to enjoy videos with 3D technology. • A long HDMI cable may cause screen noise. If this occurs, set HDMI Deep Color to Off in the menu. Appendix HDMI OUT 3D Settings • For some 3D discs, to stop a movie during 3D playback, press the 5 button once. The movie stops and the 3D mode option is de-activated.
Appendix Anynet+ (HDMI-CEC) • Depending on your TV, certain HDMI output resolutions may not work. Please refer to the user manual of your TV. • This function is not available if the HDMI cable does not support CEC. • If your Samsung TV has an Anynet+ logo, then it supports the Anynet+ function. BD Data Management • In the external memory mode, disc playback may be stopped if you disconnect the USB device in the middle of playback. • Only those USB devices formatted in the FAT file system (DOS 8.
Selecting the Subtitle Language 07 Appendix Playback • Depending on the Blu-ray Disc / DVD, you may be able to change the subtitle language in the Disc Menu. Press the DISC MENU button. • This function depends on the selection of subtitles that are encoded on the disc and may not be available on all Blu-ray Discs/DVDs. • Information about the main feature BONUSVIEW mode will also appear if the Blu-ray Disc has a BONUSVIEW section.
Appendix Resolution according to the output mode Blu-ray Disc/E-contents/Digital Contents playback HDMI/not connected HDMI/connected Output HDMI Mode Setup E-contents/ Digital contents Blu-ray Disc VIDEO Mode VIDEO Mode - BD Wise Resolution of Blu-ray Disc 1080p@60F 480i Auto Max. Resolution of TV input Max.
Digital Output Selection PCM Bitstream (Re-encoded DTS) Bitstream (Re-encoded Dolby D) HDMI supported AV receiver PCM Up to PCM 7.1ch PCM DTS re-encoded Re-encoded Dolby Digital * Dolby Digital Up to PCM 7.1ch Dolby Digital DTS re-encoded Re-encoded Dolby Digital * Dolby Digital Plus Up to PCM 7.1ch Dolby Digital Plus DTS re-encoded Re-encoded Dolby Digital * Up to PCM 7.1ch Dolby TrueHD DTS re-encoded Re-encoded Dolby Digital * Up to PCM 6.
Appendix Troubleshooting Refer to the table below when this product does not function properly. If the problem you are experiencing is not listed below or if the instructions below do not help, turn off the product, disconnect the power cord, and contact Samsung Electronics at 1-800-SAMSUNG (1-800-726-7864). Symptom Check/Remedy I cannot eject the disc. • Is the power cord plugged securely into the outlet? • Turn off the power and then turn it back on. The iPod fails to connect.
Symptom • The product is not working. (Example: The power goes out or a strange noise is heard.) • You can play 16:9 Blu-ray/DVD discs in 16:9 Full mode, 4:3 Letter Box mode, or 4:3 Pan-Scan mode, but 4:3 Blu-ray/DVD discs are played in 4:3 ratio only. Refer to the Blu-ray Disc jacket and then select the appropriate function. Appendix The aspect ratio cannot be changed. • Are you using a disc that does not contain menus? 07 The menu screen does not appear even when the menu function is selected.
Appendix Symptom Check/Remedy AllShare Play function I can see folders shared through AllShare Play, but I cannot see the files. • AllShare Play shows only files corresponding to the Photo, Music, and Movie categories. Files that do not correspond to these categories may not be displayed. Video is played intermittently. • Check if the network is stable. • Check if the network cable is properly connected and if the network is not overloaded.
Specifications FM Tuner 92.2 W Weight 5.6 Ibs Dimensions 16.9 (W) x 2.3 (H) x 10.1 (D) inches Operating Temperature Range +41°F to +95°F Operating Humidity Range 10 % to 75 % Signal/noise ratio 55 dB Usable sensitivity 12 dB Total harmonic distortion 0.5 % BD (Blu-ray Disc) Reading Speed : 9.
Appendix 5.1ch speaker system Speaker system Speaker • • • • Front Surround Center Subwoofer Impedance 3Ω 3Ω 3Ω 3Ω Frequency range 140Hz~20kHz 140Hz~20kHz 140Hz~20kHz 40Hz ~ 160Hz Output sound pressure level 87dB/W/M 87dB/W/M 87dB/W/M 88dB/W/M Rated input 165W 165W 170W 170W Maximum input 330W 330W 340W 340W Dimensions (W x H x D) Front : 3.54 x 5.47 x 2.75 inches Surround : 3.54 x 5.47 x 2.75 inches Center : 8.97 x 3.03 x 2.75 inches Subwoofer : 6.61 x 13.78 x 11.
LIMITED WARRANTY TO ORIGINAL PURCHASER This SAMSUNG brand product, as supplied and distributed by SAMSUNG and delivered new, in the original carton to the original consumer purchaser, is warranted by SAMSUNG against manufacturing defects in materials and workmanship for a limited warranty period of: One (1) Year Parts and Labor* (*90 Days Parts and Labor for Commercial Use) This limited warranty begins on the original date of purchase, and is valid only on products purchased and used in the United States.
QUESTIONS OR COMMENTS? COUNTRY CALL OR VISIT US ONLINE AT WRITE IN THE US 1-800-SAMSUNG (726-7864) www.samsung.com Samsung Electronics America, Inc. 85 Challenger Road Ridgefield Park, NJ 07660-2112 AH68-02446F-03 HT-EM53C_ZA_0417-1(D2D).