E-MANUAL Thank you for purchasing this Samsung product. To receive more complete service, please register your product at www.samsung.com Model__________________Serial No.__________________ To directly go to the page that provides instructions on how to use the manual for visually impaired users, select the Menu Learning Screen link below.
Contents Quick Guides Troubleshooting Internet Connectivity Issues 26 Connecting the Samsung Smart Remote to the TV Using Smart Hub Using the Ambient mode 10 Screen states related to Ambient mode 11 Changing the content and settings for Ambient mode Using Voice Interaction Troubleshooting Internet connectivity issues Connecting Video Devices 28 Connecting with an HDMI cable 29 Connecting with a component cable (Only for models with COMPONENT IN / AV IN) 30 Connecting with a composite cable (Onl
Remote Control and Peripherals About the Samsung Smart Remote (QLED TV) About the Samsung Smart Remote (UHD TV) About the Samsung Smart Remote (THE FRAME) Connecting the Samsung Smart Remote to the TV Controlling External Devices with the Samsung Smart Remote - Using the Universal Remote Using Anynet+ (HDMI-CEC) 52 Connecting an external device through Anynet+ and using their menus Controlling the TV with a Keyboard or Mouse 53 Connecting a USB keyboard or mouse 53 Connecting a Bluetooth keyboard or mo
Using Timeshift Buttons and functions available while recording a programme or Timeshift Using the Channel List Editing channels 94 Removing registered channels 94 Editing registered channels Creating a Personal Favourites List 95 Registering channels as favourites 95 Viewing and selecting channels on Favourites lists only Editing a Favourites List 96 Adding channels to favourites list 96 Removing channels from a favourites list 96 Rearranging a favourites list 96 Renaming a favourites list
Updating the TV’s Software 115 Updating the TV’s software to the latest version 115 Updating the TV automatically Protecting the TV from Hacking and Malicious Code 116 Scanning the TV and connected storage for malicious code Using Other Functions Troubleshooting Getting Support 127 Getting support through Remote Management 128 Finding the contact information for service 128 Requesting service Diagnosing TV operational issues 116 Running the accessibility functions 116 Running Accessibility Sho
Read Before Playing Photo, Video, or Music Files Accessibility Guidance 146 Limitations on use of photo, video, and music files 147 Supported external subtitles 147 Supported internal subtitles 148 Supported image formats and resolutions 148 Supported music formats and codecs 149 Video codecs supported by NU7100 model series or higher 150 Video codecs supported by NU7090 model series or lower Read After Installing the TV 152 Picture sizes and input signals 152 Installing an anti-theft lock Supported
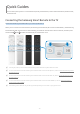
Quick Guides You can learn quickly how to run and use the frequently used functions, such as Voice Interaction, Ambient mode, and Smart Hub. Connecting the Samsung Smart Remote to the TV Connect the Samsung Smart Remote to your TV to operate the TV. When you turn on the TV for the first time, the Samsung Smart Remote pairs to the TV automatically.
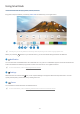
Using Smart Hub Connect to Smart Hub for apps, games, movies, and more. Enjoy the multiple functions provided by Smart Hub simultaneously on a single screen. Sources TV HDMI 1 HDMI 2 USB 1 USB 2 Connection Guide Universal Remote Source "" The image on your TV may differ from the image above depending on the model and geographical area. When you press the 1 button on your remote control, you can use the following functions and features.
Search 4 You can search for channels, programmes, movie titles, and apps from Smart Hub. "" To use this feature, the TV must be connected to the Internet. 5 APPS You can enjoy a wide range of content including news, sports, weather, and games by installing the corresponding apps on your TV. "" To use this feature, the TV must be connected to the Internet. "" For more information, refer to "Using the Apps Service".
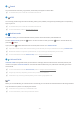
Using the Ambient mode Learn about the functions available in Ambient mode, which is a QLED TV-specific function. Ambient mode In Ambient mode, you can view beautiful screens, various visual information, and notifications. To enter Ambient mode, press the press the button. To return to the TV mode, press the button. To shut off the TV, button. If you press the button when the TV is turned off, the TV turns on in Ambient mode.
●● Black screen state In Ambient mode, if the surroundings get to a specific level of darkness, the TV turns soft-off. To turn the screen back on in Ambient mode, press the button on the remote control. ●● "" You can change the auto brightness setting for Ambient mode by using "" In this state, the TV cannot process voice guides and voice commands. in the Ambient mode browser screen. TV off state To enter Ambient mode when the TV is turned off, press the button on the remote control.
Setting up the content for Ambient mode The Ambient mode browser screen displays content at the top and categories at the bottom. Use the left or right directional buttons in the content list at the top to move the focus to content you want, and then press the Select button. The selected content is played in Ambient mode. In the future, more content that you can set up in the Ambient mode browser will be provided. You can select the following categories and content: ●● Décor: Provides beautiful screens.
Using Voice Interaction Speak into the microphone on your Samsung Smart Remote to control your TV. "" This function may not be supported depending on the model or geographical area. "" The supported language may differ depending on the geographical area. Running Voice Interaction Press and hold the button on your Samsung Smart Remote, say a command, and then release the button. The TV recognises the voice command.
Learning about Voice Command Guide Voice Command Guide Here are some of the things I can do for you. "" The image on your TV may differ from the image above depending on the model and geographical area. 1 Voice Command Guide You can learn the voice commands to use the Voice Interaction in various situations. Use the directional buttons to move to the desired command, and then press the Select button. You can operate the TV with various voice commands.
Read Before Using Voice Interaction Precautions for Voice Interaction ●● The supported voice interaction languages and features may differ depending on the geographical area. ●● If the language set differs from the language of your country, some features are not available. ●● Voice Interaction is available only when the TV is connected to the Internet. ●● Even if the TV is connected to the Internet, there may be no response due to a Voice Interaction server error.
Updating the TV’s Software View your TV's software version and update it if necessary. Settings Support Software Update Try Now Updating the TV’s software to the latest version [[ DO NOT turn off the TV’s power until the update is complete. The TV will turn off and on automatically after completing the software update. Video and audio settings will be reset to their defaults after a software update.
Getting Support Get help directly from Samsung if you have a problem with your TV. Getting support through Remote Management Settings Support Remote Management Try Now After consenting to our service agreement, you can use Remote Management to access Remote Support and have a Samsung service technician diagnose your TV, correct problems, and update your TV's software remotely via the web. You can also turn Remote Management on and off. "" This function requires an Internet connection.
Finding the contact information for service Settings Support About This TV Try Now You can view the address of the Samsung website, the call centre phone number, your TV's model number, your TV's software version, Open Source Licence and other information you may need to get service support from a Samsung call agent or the Samsung website. "" You can also view information by scanning the QR code of your TV.
Connections You can watch live broadcasts by connecting an antenna and antenna cable to your TV and can get access to the Internet by using a LAN cable or wireless router. Using various connectors, you can also connect external devices. Connection Guide You can view detailed information about external devices that can be connected to the TV. Source Connection Guide It guides you the way to connect various external devices such as the cable box, game console, and PC through pictures.
Connecting an Antenna (Aerial) You can connect an antenna cable to your TV. "" An antenna connection is not necessary if you connect a cable box or satellite box. "" Depending on the model or geographical area.
Connecting to the Internet You can get access to the Internet through your TV. Connecting to your Internet network Settings General Network Open Network Settings Try Now Connect to an available network. Establishing a wired Internet connection Settings General Network Open Network Settings Wired If you connect a LAN cable, the TV automatically accesses the Internet. "" Use a CAT 7 (*STP type) cable for the connection.
Establishing a wireless Internet connection Settings General Network Open Network Settings Wireless Make sure that you have the wireless router's SSID (name) and password settings before attempting to connect. The network name (SSID) and security key are available on the wireless router's configuration screen. See the wireless router's user manual for more information. Wireless Connection Select your wireless network.
Checking the Internet connection status Settings General Network Network Status Try Now View the current network and Internet status. Resetting Your Network Settings General Network Reset Network Try Now Restore the network settings to the factory defaults. Turning on the TV with a Mobile Device Settings General Network Expert Settings Power On with Mobile You can turn on the TV using a mobile device connected to the same network as the TV.
Setting up an Internet connection over IPv6 Configuring the IPv6 connection settings Settings General Network Expert Settings IPv6 "" This function may not be supported depending on the model or geographical area. Checking an Internet connection set up over IPv6 Settings General Network Expert Settings IPv6 Status "" This function may not be supported depending on the model or geographical area.
Connecting to a Network via a Mobile Dongle (For India Only) Make network connection by connecting a mobile dongle to the TV. You can make the TV to connect to a network via a mobile device by connecting a mobile dongle to the TV. Connect the mobile dongle to the USB port that are marked as Dongle in the TV. "" This function is not available on certain models in specific geographical areas.
Troubleshooting Internet Connectivity Issues If your TV won't connect to the Internet, try the solutions below. Troubleshooting Internet connectivity issues Try Now After reading the following content, troubleshoot the Internet connection issue. If the problem persists, contact your Internet Service Provider. No network cable found Make sure that the LAN cable is plugged in on both ends. If it is plugged in, make sure that the router is turned on. If the router is on, try turning it off and then on.
Unable to connect to a wireless router 1. Check if the router is turned on. If it is, turn it off and then on. 2. Enter the correct password if required. IP auto setting failed 1. Configure the settings in IP Settings. Settings –– General Network Network Status IP Settings 2. Make sure that the DHCP server is enabled on the router, and then unplug the router and plug it back in. 3. Reset the router if required. –– For wireless connection, enter the correct password if required.
Connecting Video Devices Make the correct video connections between your TV and your external devices.
Connecting with a component cable (Only for models with COMPONENT IN / AV IN) A Component connection lets you enjoy video resolutions up to 1080p. To watch video from most DVD and Blu-ray players, use the Component connection. Review the illustration below, and then connect Component IN and AV IN on the TV to Component OUT on the external device by using the provided component and AV adaptors. Make sure to connect the same colour connectors together. (blue to blue, yellow to yellow, etc.
Connecting with a composite cable (Only for models with COMPONENT IN / AV IN) Through the AV connection, you can enjoy the resolution up to 576i. Review the illustration below, and then connect AV IN on the TV to AV OUT on the external device by using the provided composite cable and AV adaptor. When connecting the cables, be sure to match the colours of the cables to the colours of the ports. COMPONENT IN / AV IN AV IN COMPONENT IN "" Connect AV (composite) equipment to AV In only.
Audio Input and Output Connections Make the correct audio connections between your TV and your external devices. "" For more information about how to select external speakers, refer to "Selecting speakers". Connecting with an HDMI (ARC) cable HDMI IN (ARC) Connecting with a digital audio (optical) cable DIGITAL AUDIO OUT (OPTICAL) Connecting through a wireless network You can connect the TV to a Samsung audio device that supports the Wi-Fi function through your wireless network.
Connecting Bluetooth Devices For more information about how to connect and use external speakers, refer to the Connection Guide ( Source Connection Guide Audio device Bluetooth) and their user manuals. "" This function may not be supported depending on the model or geographical area. Connecting a Computer Use the TV as a computer monitor or connect the TV to a computer via your network and access the computer's content.
Connecting Your Mobile Device Connect your mobile device to the TV on the same network to control the TV with the mobile device or enjoy the content of the mobile device on the TV. Use the SmartThings app on your mobile device to quickly and easily connect to the TV and control its main settings. In addition, you can remotely check and control the statuses of various devices such as Samsung smart devices, home appliances, and speakers registered to the server. "" Make sure that your TV supports SmartThings.
Bidirectionally mirroring your TV and mobile device using the SmartThings app Bidirectional mirroring refers to either outputting the same screen and sound of a mobile device on a TV or outputting the same screen and sound of a TV on a mobile device. You can use the SmartThings app to enjoy the screen and sound of the TV on your mobile device or to play the screen and sound of your mobile device on the TV. Start the SmartThings app on your mobile device. Tap your TV from the dashboard or device.
ADB (Auto Data Backup) functions (For India Only) Your mobile device comes close to the TV, the ADB (Auto Data Backup) feature backs up your mobile data such as images and videos into a pre-configured specific folder on a USB storage device or an external hard disk drive connected to the TV. You can also transfer files from the ADB (Auto Data Backup) folder to a Samsung mobile device over Wi-Fi Direct.
Switching between external devices connected to the TV You can switch between TV programmes and the content of external devices. Changing the input signal Source When you select a connected external device on the Source screen, the output of the selected device is displayed on the TV's screen. On the standard remote control, press the SOURCE button. "" To control a device (Blu-ray player, game console, etc.
Editing the name and icon of an external device Source You can change the port name for a connected external device or add it to Home Screen. Universal Remote Edit Information Add to Home Sources Source "" The image on your TV may differ from the image above depending on the model and geographical area. 1. Move the focus to a connected external device. 2. Press the Up directional button. The following functions become available. "" Available functions may differ depending on the port type.
Using additional functions You can use the following features on the Source screen. ●● Connection Guide: The guide to device connections ●● Universal Remote: The function that lets you register external devices to your Samsung Smart Remote and control them using the standard remote control. "" This function may not be supported depending on the model or geographical area. "" For more information, refer to "Controlling External Devices with the Samsung Smart Remote - Using the Universal Remote".
●● Use a cable shorter than 10 feet (3 m) to get the best UHD contents viewing quality. ●● Many computer graphics adaptors do not have HDMI ports, but have DVI ports instead. If your PC does not support HDMI video out, connect your PC with an HDMI-DVI cable. ●● For One Connect supported models, when the TV is connected to an external device such as a DVD/BD player or a set-top box via HDMI, power sync mode will be automatically activated.
Connection notes for computers ●● For the resolutions supported by the TV, refer to "Read Before Connecting a Computer (Supported Resolutions)". ●● As long as file sharing is activated, unauthorised access may occur. When you do not need to access data, disable file sharing. ●● If you want to connect your PC and TV wirelessly, both of them must be connected to each other on the same network.
Remote Control and Peripherals You can control TV operations with your Samsung Smart Remote. Pair external devices such as a keyboard for ease of use. About the Samsung Smart Remote (QLED TV) Learn about the buttons on the Samsung Smart Remote that comes with the QLED TV.
Button Description Runs Voice Interaction. Press and hold the button, say a command, and then release the button to run Voice Interaction. (Voice Interaction) When you press the button, the Enter Voice Command Guide menu appears at the bottom of the screen. "" The supported languages and features for voice interaction may differ depending on the geographical area. Each time you press this button, the coloured buttons window and the virtual numeric pad are displayed alternately.
Button Description (Return) Press to return to the previous menu. When pressed for 1 second or more, the running function is terminated. When pressed while you are watching a programme, the previous channel appears. (Smart Hub) Press to return to the Home Screen. (Play/pause) When pressed, the playback controls appear. Using these controls, you can control the media content that is playing. VOL (Volume) CH (Channel) Move the button up or down to adjust the volume.
About the Samsung Smart Remote (UHD TV) Learn about the buttons on the Samsung Smart Remote that comes with the UHD TV.
Button Description Runs Voice Interaction. Press and hold the button, say a command, and then release the button to run Voice Interaction. (Voice Interaction) When you press the button, the Enter Voice Command Guide menu appears at the bottom of the screen. "" The supported languages and features for voice interaction may differ depending on the geographical area. When pressed, the virtual numeric pad appears on the screen so that you can enter a numeric value using it.
Button Description (Return) Press to return to the previous menu. When pressed for 1 second or more, the running function is terminated. When pressed while you are watching a programme, the previous channel appears. (Smart Hub) Press to return to the Home Screen. (Play/pause) When pressed, the playback controls appear. Using these controls, you can control the media content that is playing. VOL (Volume) CH (Channel) Move the button up or down to adjust the volume.
About the Samsung Smart Remote (THE FRAME) Learn about the buttons on the Samsung Smart Remote that comes with the THE FRAME TV.
Button Description When watching TV, press to switch to Art mode. In Art mode, press to switch to watching TV. (POWER) Press and hold to turn off the TV completely. "" When the TV turns off and on again, display the last used mode. Runs Voice Interaction. Press and hold the button, say a command, and then release the button to run Voice Interaction. (Voice Interaction) When you press the button, the Enter Voice Command Guide menu appears at the bottom of the screen.
Button Description (Return) Press to return to the previous menu. When pressed for 1 second or more, the running function is terminated. When pressed while you are watching a programme, the previous channel appears. (Smart Hub) Press to return to the Home Screen. (Play/pause) When pressed, the playback controls appear. Using these controls, you can control the media content that is playing. VOL (Volume) CH (Channel) Move the button up or down to adjust the volume.
Connecting the Samsung Smart Remote to the TV Connect the Samsung Smart Remote to your TV to operate the TV. When you turn on the TV for the first time, the Samsung Smart Remote pairs to the TV automatically. If the Samsung Smart Remote does not pair to the TV automatically, point it at the remote control sensor of the TV, and then press and hold the and buttons simultaneously for 3 seconds or more. "" The images, buttons, and functions of the Samsung Smart Remote may differ with the model.
Controlling External Devices with the Samsung Smart Remote Using the Universal Remote Control the TV and connected external devices with the Samsung Smart Remote. Source Universal Remote You can control external devices connected to the TV using the Samsung Smart Remote. To control external devices, register them by following the instructions on the screen. "" This function may not be supported depending on the model or geographical area.
Using Anynet+ (HDMI-CEC) Control an external device connected via Anynet+ (HDMI-CEC) with the remote control. You can use the TV's remote control to control external devices that are connected to the TV by an HDMI cable and that support Anynet+ (HDMI-CEC). Note that you can only set up and operate Anynet+ (HDMI-CEC) with the remote control. Connecting an external device through Anynet+ and using their menus Settings General External Device Manager Anynet+ (HDMI-CEC) Try Now 1.
"" Anynet+ (HDMI-CEC) works only with external devices that support HDMI-CEC and only when those devices are either in standby mode or turned on. "" Anynet+ (HDMI-CEC) can control up to 12 compliant external devices (up to 3 of the same type) except for home theatres. Anynet+ (HDMI-CEC) can control only one home theatre system. "" To listen to 5.1 channel audio from an external device, connect the device to the TV via an HDMI cable and connect a 5.
Using the keyboard and mouse Button Description Directional keys Moves the focus Windows key Displays the TV settings Enter key Selects or runs a focused item ESC key Returns to the previous screen F1 / F2 / F3 / F4 key Colour buttons ― F5 key Displays the Home Screen F6 key Displays the Source screen F7 key Displays the Channel List F8 key Mutes the sound F9 / F10 key Adjusts the volume F11 / F12 key Changes the channel Page Up / Page Down Scrolls a web page displayed on the Intern
Setting up the input devices Setting up the keyboard Settings General External Device Manager Input Device Manager Keyboard Input Device Manager Mouse Settings You can set up the keyboard with the following functions: ●● Keyboard Language ●● Keyboard type Setting up the mouse Settings General External Device Manager Settings You can set up the mouse with the following functions: ●● Primary Button ●● Pointer Speed - 55 -
Entering Text using the On-Screen Virtual Keyboard Use the Virtual keyboard to enter text on your TV. Recommend text Options Predict Next Character "" The image on your TV may differ from the image above depending on the model and geographical area. 1 Recommend text When you type a word you want to search for, this function shows related suggestions from which you can choose one.
2 Options Select on the Virtual keyboard screen. The following options are available: "" The options available may differ depending on the function running currently.
Smart Features You can enjoy various apps with Smart Hub. Smart Hub View descriptions of Smart Hub's basic functions. From Smart Hub, you can use the Internet search function, install and use various apps, view photos and videos or listen to music stored on external storage devices, and perform more functions. "" Some of the Smart Hub services are paid services. "" To use Smart Hub, the TV must be connected to the Internet.
Displaying the Home Screen Press the button. Sources TV HDMI 1 HDMI 2 USB 1 USB 2 Connection Guide Universal Remote Source "" The image on your TV may differ from the image above depending on the model and geographical area. On the Home Screen, you can easily run the apps you have used previously or frequently. The apps can also be moved or deleted from the screen. 1 Notification You can view a list of notifications for all events that occur on your TV.
2 Settings When the focus is moved to the icon, a list of quick settings icons appears above the top of the menu. You can quickly set frequently used functions by clicking the icons. ●● Picture Mode You can select the picture mode that provides the best viewing experience. To change the picture mode, press the Select button. To make fine adjustments, press the up directional button, and then select Picture Setup. ●● Sound Mode You can select a sound mode to optimise your listening experience.
●● Subtitle You can watch TV broadcasts with subtitles. To activate/deactivate the Subtitle function, press the Select button. To run Accessibility Shortcuts, press the up directional button, and then select Accessibility Shortcuts. ●● Sleep Timer You can automatically shut off the TV after a pre-set period of time. To set the sleep time to up to 180 minutes, press the select button. To make detail off timer, press the up directional button, and then select Set Up Off Timer.
6 Ambient mode In Ambient mode, you can view beautiful screens, various visual information, and notifications. To enter Ambient mode, press the press the button. To return to the TV mode, press the button. To shut off the TV, button. If you press the button when the TV is turned off, the TV turns on in Ambient mode. "" If you use a remote control other than the Samsung Smart Remote, there may be restrictions to entering Ambient mode.
Move Remove "" The image on your TV may differ from the image above depending on the model and geographical area. 8 Moving an item on the Home Screen Move the focus to the app you want to move, press the down directional button on the remote control, and then select Move. Move the app to the desired position by pressing the left or right directional button, and then press the Select button. The selected app is moved on the Home screen.
Launching Smart Hub automatically Settings General Smart Features Autorun Smart Hub Try Now When you set Autorun Smart Hub to On, the TV displays the Home Screen automatically when you turn the TV on. You can also turn on or off this function, use the Select button. Launching the last used app automatically Settings General Smart Features Autorun Last App Try Now If Autorun Last App is set to On, the last used app is automatically run when you turn on the TV.
Using a Samsung account Create and manage your own Samsung account. Settings General System Manager Samsung Account Try Now Creating and managing your Samsung account "" You can view the entire text of the Terms and Privacy Policy in Samsung Account My Account Settings General System Manager Terms & Conditions, Privacy Policy after logging in to your Samsung account. "" You can also create a Samsung account at http://account.samsung.com.
Signing in to a Samsung account Settings General System Manager Samsung Account Sign In Changing and adding information to a Samsung account Settings General System Manager Samsung Account My Account Edit My Account Payment My Account Sync profile "" To change the account information, you must be logged in to your Samsung account.
Signing out of your Samsung account To sign out of your Samsung account, move the focus to your account at Manager General Settings General Samsung Account, and then press the Select button. Or move to My Account ( System Manager Samsung Account System Settings My Account), and then select Sign out.
Screen states related to Ambient mode ●● Ambient mode In Ambient mode, you can set up and enjoy visual information and design. In this state, less power is consumed and brightness is automatically adjusted by the illuminance sensor. ●● Getting dark state In Ambient mode, the TV screen changes automatically according to the surroundings. When the surroundings get dark, the TV screen becomes darker.
Changing the content and settings for Ambient mode Décor Info Photo "" The image on your TV may differ from the image above depending on the model and geographical area. When you press the or button in Ambient mode, the Ambient mode browser screen appears. In the Ambient mode browser screen, you can select content and change the Ambient mode settings. Setting up the content for Ambient mode The Ambient mode browser screen displays content at the top and categories at the bottom.
Setting up the Ambient mode details In the Ambient mode browser screen, move the focus to , and then press the Select button. You can change the following settings: ●● Brightness: Adjust the screen brightness for Ambient mode. ●● Colour Tone: Adjust the colours of the screen for Ambient mode. ●● Auto Brightness: Change the auto brightness setting for Ambient mode.
Using the Apps Service Download and run various apps from Smart Hub. APPS You can enjoy a wide range of content including news, sports, weather, and games by installing the corresponding apps on your TV. "" To use this feature, the TV must be connected to the Internet. "" When Smart Hub is launched for the first time, the default apps are automatically installed. The default apps may differ depending on the geographical area.
Installing and running an app Installing an app 1. Move to the app you want to install, and then press the Select button. The detailed information screen appears. 2. Select Install. When the installation is completed, the Open menu appears. 3. Select Open to run the app immediately. "" You can view installed apps on the Settings screen. "" If the TV's internal memory is insufficient, you can install some specific apps on a USB device.
Managing purchased or installed apps Select Settings on APPS. You can manage installed apps. Settings Auto update : ON Delete Add to Home Lock/Unlock Move Reinstall View Details "" The image on your TV may differ from the image above depending on the model and geographical area. 1 Removing an app 1. Move the focus to an app to delete. 2. Select Delete. 3. The selected app is deleted. "" Ensure that the related app data is also removed when you remove an app.
3 Locking and unlocking apps 1. Move the focus to an app to lock or unlock. 2. Select Lock/Unlock. 3. The selected app is locked or unlocked. "" To lock or unlock an app, enter the PIN. The default PIN is "0000". You can set the PIN in System Manager Settings General Change PIN. 4 Moving apps 1. Move the focus to an app to move. 2. Select Move. 3. Move the selected app to the desired location. 4. Press the Select button. 5. The selected app is moved.
Using the Gallery App View photos and videos synchronised with the Samsung Cloud. Gallery Gallery View: Daily "" The image on your TV may differ from the image above depending on the model and geographical area. You can enjoy various content synchronised with a mobile device that supports the Samsung Cloud. The available content types are photos, videos, stories, and other content shared through your groups. If you have shared content from your groups, you can access them in notifications.
Using the Universal Guide App Search for and enjoy content such as TV shows, dramas, movies, and sports broadcasts. Universal Guide For You TV Shows Movies Sports On Now "" The image on your TV may differ from the image above depending on the model and geographical area. Universal Guide is an app that allows you to search for and enjoy various content such as TV shows, dramas, and movies in one place.
Using the SmartThings App Monitor and configure the smart devices you have connected to the SmartThings service. SmartThings All Devices Scenes Devices "" The image on your TV may differ from the image above depending on the model and geographical area. From the TV, you can monitor and configure your smart devices connected to the SmartThings service via the SmartThings app installed on them. You can receive notifications about the statuses of your smart devices.
2 Sign In Go to the Samsung Account screen to create a new account or sign in to your account. 3 Settings Turn notifications on or off for the connected smart devices. 4 Scenes Control multiple devices with one command after setting scenes via the SmartThings app on your mobile device. "" The Scenes function is only available on a connected smart device. 5 Device list View a list of the connected smart devices and their statuses.
Using the buttons in the e-Manual (Search): Select an item from the search results to load the corresponding page. ●● (Index): Select a keyword to navigate to the relevant page. ●● "" The menus may not appear depending on the geographical area. ●● (Recent pages): Select a topic from the list of recently viewed topics. ●● (Try Now): Allows you to access the corresponding menu item and try out the feature right away. ●● (Link): Access an underlined topic referred to on an e-Manual page immediately.
Playing pictures/video/music Play media content stored on your TV, USB devices, smartphones, cameras, PCs, etc. Source Connected Device Try Now Samsung USB Samsung USB Filter By : All Sort By : Title Options "" The image on your TV may differ from the image above depending on the model and geographical area. You can play media content saved on storage devices, such as USB devices, mobile devices, and cameras, on the TV.
3 Options Deletes or plays the selected media content in the media content list. When you select Refresh, the content list is reloaded. "" You can delete only the recorded content. To delete content, change the Filter By option to Recorded. Playing media content Playing multimedia content on PC or mobile device 1. Select a device with media content in 2. Select a media content item from the list. 3. The content is played. Source. The media content list in the device appears.
Using Voice Interaction Speak into the microphone on your Samsung Smart Remote to control your TV. "" This function may not be supported depending on the model or geographical area. "" The supported language may differ depending on the geographical area. Running Voice Interaction Press and hold the button on your Samsung Smart Remote, say a command, and then release the button. The TV recognises the voice command.
Learning about Voice Command Guide Voice Command Guide Here are some of the things I can do for you. "" The image on your TV may differ from the image above depending on the model and geographical area. 1 Voice Command Guide You can learn the voice commands to use the Voice Interaction in various situations. Use the directional buttons to move to the desired command, and then press the Select button. You can operate the TV with various voice commands.
Read Before Using Voice Interaction Precautions for Voice Interaction ●● The supported voice interaction languages and features may differ depending on the geographical area. ●● If the language set differs from the language of your country, some features are not available. ●● Voice Interaction is available only when the TV is connected to the Internet. ●● Even if the TV is connected to the Internet, there may be no response due to a Voice Interaction server error.
TV Viewing You can use convenient features while watching TV. Additionally, you can edit the channel list or create favourite channel lists. Viewing Digital Broadcast Information at a Glance See an overview of each channel's programme lineup. Using the guide Live TV Guide Try Now Channel List Guide Recordings Live TV "" The image on your TV may differ from the image above depending on the model and geographical area.
To start schedule viewing, schedule recording, and other function for a programme listed in the Guide, first move the cursor to it and then press and hold Select button on the remote control to use follows functions: ●● Record: You can record the programme that you are currently watching or a programme on another channel. "" ●● ●● ●● This function may not be supported depending on the model or geographical area. Schedule Viewing: You can schedule viewing of a broadcast scheduled programme.
Recording Programmes Record a current or upcoming programme using a USB device instead of a video recorder. "" Read all precautions before using the recording feature. Refer to "Before Using the Recording and Timeshift Functions" for more information. "" You can record only the programmes that have been received through an aerial. "" The appears next to the programmes and channels scheduled for recording. "" This function may not be supported depending on the model or geographical area.
Scheduling a video recording after entering the date and time Live TV Schedule Manager or Recordings Schedules Add Recording To schedule a recording, set the values for Aerial, Channel, Repeat, Date, Start Time, and End Time of the broadcast programme to record, and then select Save. "" Check the current time in Settings General System Manager Time Clock. "" The menus may not appear depending on the model or geographical area.
Viewing recorded programmes Live TV Schedule Manager or Recordings Recordings Select a file containing a recording from the list. The file is played back. "" Buttons that appear may differ depending on the file being played. For more information about control buttons, refer to "Buttons and functions available while recording a programme or Timeshift". "" The menus may not appear depending on the model or geographical area.
Using the schedule viewing options in the programme info window Press the Select button while watching TV. The Programme Info window appears. Select a programme that will be broadcast using the left or right directional buttons. Press the Select button, and then select Schedule Viewing to schedule viewing of that programme.
Using Timeshift Play, pause, or rewind live TV. You can pause and rewind live TV by using Timeshift. Activating this function disables the Broadcasting function. Try Now To activate the Timeshift function while watching TV, press the select Timeshift, or press the or button, press the Select button and then button. "" When the Timeshift function is running, some of function are not available in Settings Broadcasting. "" To use Timeshift, you must connect a USB device for recording.
●● Go to Live TV Select to return to the current scenes of the programme when the recording or Timeshift function is playing its past scenes. ●● Stop Recording / Stop Timeshift Ends the recording or Timeshift function. ●● Info Displays the programme info window about the programme on which the recording or Timeshift function is working. ●● Pause / Play You can use the following functions when the video is paused. Note that with the video paused, the TV does not play audio.
Using the Channel List Change the channel or check programmes on other digital channels. Live TV Channel List Using the Channel List, you can change the channel or check programmes on other digital channels while watching TV. On standard remote control, press the CH LIST button. The Channel List screen contains the following icons: ●● : A favourite channel ●● : A locked channel.
Editing channels Edit the channels stored on your TV. Live TV Channel List All Edit Channels The Edit Channels screen icons indicate the following: ●● : A favourite channel ●● : A locked channel. Removing registered channels To remove a channel, select it from the Edit Channels screen, and then select Delete. Removed channels do not appear in the Channel List.
●● Restore TV PLUS You can re-scan and store TV PLUS channels that have been received. "" If there are TV PLUS channels on the TV, after deleting the stored channels, the system stores the newly scanned channels. "" If the TV has saved TV PLUS channels, Restore TV PLUS deletes the existing list, and then saves the newly scanned channels. "" This function may not be supported depending on the model or geographical area.
Editing a Favourites List Use the functions that are available while watching TV. Live TV Channel List After pressing the right directional button on your remote control, select Favourites Favourites 1 - Favourites 5 Edit Favourites. The Edit Favourites screen appears. Adding channels to favourites list Select channels to add and select the icon. The selected channels are added to Favourites. Removing channels from a favourites list Select channels in a favourites list, and then select the icon.
TV-Viewing Support Functions Use the functions that are supported by digital or analogue channels. Changing the broadcast signal Live TV Channel List After pressing the right directional button on your remote control, and then move the focus to Terrestrial or Cable, press the Select button. "" You do not need to use this function if your TV is connected to a cable box or satellite box. "" The Cable may not appear depending on the model or geographical area.
Restricting Viewing to Specific Channels Settings Broadcasting Apply Channel Lock Try Now By selecting the menu, you can turn on or off the Apply Channel Lock function. Selecting the broadcasting audio option Settings Broadcasting Dual Sound Try Now Set audio options for stereo or bilingual broadcasts. For more information, refer to "Supported broadcasting audio options". "" This function may not be supported depending on the model or geographical area.
Selecting the broadcast audio language Settings Broadcasting Expert Settings Audio Options Try Now This is the language you will hear while watching TV if the language is included in the broadcast signal. Audio Options functions differently for analogue and digital channels. "" This function may not be supported depending on the model or geographical area.
Tuning analogue channels Settings Broadcasting Expert Settings Manual Tuning Analogue Channel Tuning Select New and configure Programme, Colour System, Sound System, Channel, and Search to scan for analogue channels. Then, select Store to store the scanned channels in the TV. "" This function is only available for analogue broadcasts. Channel mode ●● P (programme mode) When tuning is complete, the broadcasting stations in your area have been assigned to position numbers from P0 to P99.
Enabling/Disabling Edit Channel Numbers Settings Broadcasting Expert Settings Edit Channel Numbers Use this to change channel number. When channel number is changed, channel information is not updated automatically. "" This function may not be supported depending on the model or geographical area. Changing teletext language Settings Language Broadcasting Expert Settings Teletext Language Settings Teletext You can set or change the teletext language.
Picture and Sound You can change the settings for the picture and the sound according to your preference. Adjusting the Picture Quality Change the Picture Mode and adjust Expert Settings. Choosing a picture mode Settings Picture Picture Mode Try Now You can select the Picture Mode that provides the best viewing experience. ●● Dynamic Makes the picture brighter and clearer in bright viewing environments. ●● Standard Is the default mode suitable for general viewing environments.
Configuring advanced picture settings Settings Picture Expert Settings Try Now Configure the screen settings to your taste by using the following functions: ●● Backlight Try Now ●● Brightness Try Now ●● Contrast Try Now ●● Sharpness Try Now ●● Colour Try Now ●● Tint (G/R) Try Now ●● Apply Picture Settings Try Now ●● Digital Clean View Try Now ●● Auto Motion Plus Settings Try Now "" ●● When LED Clear Motion is set to On, the screen appears darker than when it is Off.
●● Film Mode Try Now "" This function is only available when the input signal is TV, AV, Component (480i, 576i, 1080i), or HDMI (1080i). ●● Colour Tone Try Now ●● White Balance Try Now ●● Gamma Try Now ●● RGB Only Mode Try Now ●● Colour Space Settings Try Now ●● Reset Picture Try Now Setting the Viewing Environment for External Devices You can optimise the TV for viewing specific video formats.
Configuring game mode details Configuring Game Motion Plus Settings Plus Settings General External Device Manager Game Mode Settings Game Motion You can configure the Game Motion Plus settings. "" This function may not be supported depending on the model or geographical area. Setting the FreeSync function Settings General External Device Manager Game Mode Settings FreeSync You can play your gaming experience more pleasantly by eliminating screen tearing and stuttering.
Viewing UHD videos Settings General External Device Manager HDMI UHD Color Try Now If an external UHD player is connected to the TV, use the HDMI UHD Color function to convert the TV's HDMI connector to a mode optimised for the UHD 50P/60P signals. "" If you move to the HDMI connector with which you want to use the HDMI UHD Color function and press the Select button to set the function to On, the TV screen flickers.
Picture Support Functions Configure the picture settings for your TV. Changing the picture size Settings Picture Picture Size Settings Picture Size Try Now You can change the size of the picture displayed on the TV screen. ●● 16:9 Standard ●● Custom ●● 4:3 "" Supported picture sizes differ with the input signal. For more information about supported picture sizes, refer to "Picture sizes and input signals".
Fitting the picture to the screen Settings Picture Picture Size Settings Fit to screen Try Now "" This function may not be supported depending on the Picture Size setting. "" This function may not be supported depending on broadcasting signals. Adjusting the picture size and/or position Settings Picture Picture Size Settings Zoom and Position Try Now "" This function is available only if Picture Size is set to Custom.
Configuring advanced sound settings Settings Sound Expert Settings Try Now You can personalise the sound quality by adjusting the following settings. ●● Balance Try Now ●● Equaliser Try Now ●● HDMI Input Audio Format Try Now ●● Digital Output Audio Format Try Now "" If you use a receiver that does not support Dolby Digital Plus, you will hear no sound if you select Dolby Digital+. "" The Dolby Digital+ option is only available via ARC(HDMI) for external devices that support the format.
Using the Sound Support Functions Configure the sound settings for your TV. Selecting speakers Settings Sound Sound Output Try Now You can select which speakers the TV uses for audio output. "" External speakers may not be controlled with the Samsung Smart Remote. When an external speaker is enabled, some sound menus are not supported. Listening to the TV through Bluetooth devices Settings Sound Sound Output Speaker List You can connect Bluetooth audio devices to the TV.
Listening to the TV through a Samsung audio device that supports the Wi-Fi function For more information about how to connect and use a Samsung audio device that supports the Wi-Fi function, refer to its user manual. "" This function may not be supported depending on the model or geographical area.
System and Support You can configure system and support settings such as clock, timers, energy usage and software updates. Using the Time Functions and the Timers Set the current time and use the timer function. Setting the current time Settings General System Manager Time Try Now You can set the Clock manually or automatically. Once the Clock is set, you can view the current time on the TV anytime. You must set the clock in the following cases: ●● The power cable is disconnected and then connected.
Adjusting the clock for time zone Settings General System Manager Time Clock Time Zone Selects your time zone. "" This function is only available when the Clock Mode is set to Auto. "" This function may not be supported depending on the geographical area. Changing the current time Settings General System Manager Time Clock Time Offset Time Offset adjusts the time through a network connection.
Using the Auto Protection Time and Energy Saving Functions Setting the Auto Protection Time and reduce the TV's energy consumption. Setting the Auto Protection Time Settings General System Manager Auto Protection Time Try Now Activate a screensaver when your TV displays a still image for two hours or more. "" This function may not be supported depending on the model or geographical area.
Updating the TV’s Software View your TV's software version and update it if necessary. Settings Support Software Update Try Now Updating the TV’s software to the latest version [[ DO NOT turn off the TV’s power until the update is complete. The TV will turn off and on automatically after completing the software update. Video and audio settings will be reset to their defaults after a software update.
Protecting the TV from Hacking and Malicious Code Protect your TV from hacking attempts and malicious code. Settings General System Manager Smart Security Try Now You can use Smart Security to protect the TV from hacking and malicious code when it is connected to the Internet. Scanning the TV and connected storage for malicious code Settings General System Manager Smart Security Scan If malicious code is found, the results of the scan will appear on the screen.
Enabling voice guides for the visually impaired Settings General Accessibility Voice Guide Settings Try Now You can activate voice guides that describe the menu options aloud to aid the visually impaired. To activate this function, set Voice Guide to On. With Voice Guide on, the TV provides voice guides for channel change, volume adjust, information on current and upcoming programmes, schedule viewing, other TV functions, various content in the Internet, and in Search.
White text on black background (high contrast) Settings General Accessibility High Contrast Try Now You can change Smart Hub and setting menu screens to white text on a black background or change the transparent TV menus to opaque so that text can be more easily read. To activate this function, set High Contrast to On. "" If High Contrast is on, some Accessibility menus are not available.
Learning about the TV menu Settings General Accessibility Menu Learning Screen Try Now Learn the menus on the TV screen. Once enabled, your TV will tell you the structure and features of the menus you select. "" This function is only available when Voice Guide is enabled. Watching TV broadcasts with subtitles Settings General Accessibility Subtitle Settings Try Now Set Subtitle to On. Then you can watch the programme with the subtitle displayed.
Listening to the TV through Bluetooth devices (for the hearing impaired) Settings General Accessibility Multi-output Audio You can turn on both the TV speaker and Bluetooth devices at the same time. When this function is active, you can set the volume of the Bluetooth devices higher than the volume of the TV speaker. "" This function may not be supported depending on the model or geographical area. "" When you connect Bluetooth devices to the TV, Multi-output Audio is activated.
Selecting Usage or Retail Mode Settings General System Manager Usage Mode Try Now You can using the TV for retail environments by setting Usage Mode to Retail Mode. "" For all other uses, select Home Mode. "" With Retail Mode, some functions are disabled, and the TV automatically resets itself after a preset amount of time.
HbbTV Access services from entertainment providers, online providers and CE manufactures through HbbTV. "" This function may not be supported depending on the model or geographical area. "" Some channels may not include the HbbTV service. In some countries, HbbTV is disabled by default. In this case, HbbTV can be used by installing the HbbTV application (the HbbTV Installer Application) from Samsung APPS.
Teletext Feature Learn how to use Teletext and run the functions provided by Teletext Service. "" This function is available only in the channel that supports the teletext service. "" This function may not be supported depending on the model or geographical area. "" To enter the Teletext feature, On the Samsung Smart Remote: Press the or button and then select TTX/MIX on the pop-up list. On the standard remote control: Press the / TTX/MIX button.
Colour buttons (red, green, yellow, blue): If the FASTEXT system is used by the broadcasting company, the different topics on a Teletext page are colour-coded and can be selected by coloured buttons. Press the colour corresponding to the topic of your choice. A new colour coded page appears. Items can be selected in the same way. To display the previous or next page, select corresponding coloured button. 6 Index: Displays the index (contents) page at any time while you are viewing Teletext.
On the standard remote control "" On the standard remote control, the Teletext function icons are printed on some remote control buttons. To run a Teletext function, find its icon printed on a remote control button, and then press the found button. / TTX/MIX Full TTX / Double TTX / Mix / Live TV: The teletext mode is activated in the channel that is being watched. Each time you press the / button, the teletext mode changes in the order of Full TTX → Double TTX → Mix → Live TV.
5 INFO Reveal/Conceal: Displays or hides the hidden text (answers to quiz games, for example). To display the normal screen, press it again. 4 E-MANUAL / REC "" Depending on the model or geographical area. Size: Displays the teletext on the upper half of the screen in double-size. To move the text to the lower half of the screen, press it again. For normal display, press it once again.
Troubleshooting If you have a problem with your TV, you can access various solutions while watching TV. If your problem is not addressed in the Troubleshooting section, contact the Samsung Call Centre. Getting Support Get help directly from Samsung if you have a problem with your TV.
Finding the contact information for service Settings Support About This TV Try Now You can view the address of the Samsung website, the call centre phone number, your TV's model number, your TV's software version, Open Source Licence and other information you may need to get service support from a Samsung call agent or the Samsung website. "" You can also view information by scanning the QR code of your TV.
There Is a Problem with the Picture When the TV has trouble with the picture, these steps may help resolve the problem. Testing the picture Settings Support Self Diagnosis Start Picture Test Try Now Before you review the list of problems and solutions below, use Start Picture Test to determine if the problem is caused by the TV. Start Picture Test displays a high definition picture you can examine for flaws or faults.
The problem Blurring, or Juddering Try this! If you notice blurring or juddering on the screen, use the Auto Motion Plus Settings function to resolve the issue. ●● Settings Picture Expert Settings Auto Motion Plus Settings If your TV appears to turn off by itself, try disabling some of the TV's energy efficiency functions. See if Sleep Timer has been enabled. The Sleep Timer automatically turns the TV off after a specified period of time.
The problem Try this! The compression of video content may cause picture distortions, especially in fast moving pictures from sports programmes and action movies. The picture is distorted. If the signal reception is weak or poor, screen distortion may be visible but it is not a malfunction. Mobile phones used close to the TV (within 1 m) may cause noise on analogue and digital channels. The colour is wrong or missing.
I Can't Hear the Sound Clearly When the TV has difficulties with sound, these steps may help resolve the problem. Testing the sound Settings Support Self Diagnosis Start Sound Test Try Now If the TV plays the Start Sound Test melody without distortion, there may be a problem with an external device or the broadcast signal's strength. The problem There is no sound or the sound is too low at maximum volume.
There Is a Problem with the Broadcast When the TV has difficulties receiving broadcasts, these steps may help resolve the problem. The problem Try this! Make sure the antenna cable is connected securely to the TV. Select “Weak or No Signal” displayed in TV mode/cannot find channel. Source to confirm that the correct input source has been selected. If the TV is not connected to a cable box or satellite box, run Auto Tuning to search for channels.
My Computer / Game Console Won't Connect When the TV has difficulties connecting to a PC or game console, these steps may help resolve the problem. The problem The "Mode Not Supported" message appears. Try this! Set output resolution of your PC or game console so it matches a resolution supported by the TV. If you are using an HDMI connection, check the audio output setting on your PC. The video is OK but there is no audio. If you are using an HDMI-to-DVI cable, a separate audio cable is required.
The Schedule Recording/Timeshift Function Isn't Working When Timeshift or Schedule recording aren't working, these steps may help resolve the problem. The problem Try this! Check if there is a USB device connected to the TV. Schedule Recording cannot be used. Recording will automatically stop if the signal becomes too weak. Check the free space on the USB device. The function will not work if there isn't enough storage space on the USB device.
The problem Try this! The message "Connecting to Anynet+ device..." or "Disconnecting from Anynet+ device" appears on the screen. You cannot use the remote control when the TV is configuring Anynet+ or switching to a viewing mode. Use the remote control after the TV has completed the Anynet+ configuration or has switched to a viewing mode. The Anynet+ device won't play. You cannot use the play function when Start Setup is in progress. Check whether the device supports Anynet+.
My File Won't Play When files aren't playing, this may help resolve the problem. The problem Some files can't be played. Try this! This problem may occur with high-bitrate files. Most files can be played back, but you might experience problems with high-bitrate files. I Want to Reset the TV Initialise the settings to factory defaults.
Other Issues Use these procedures to resolve other issues that may occur. The problem The TV is hot. Try this! Watching TV for an extended period of time causes the panel to generate heat. The heat from the panel is dissipated through internal vents running along the top of the TV. The bottom, however, may feel hot to the touch after extended use. Children watching TV need constant adult supervision to prevent them from touching the TV.
The problem Try this! Broadcasting is only available when the Source is set to TV. The Broadcasting function has been deactivated. The settings are lost after 5 minutes or every time the TV is turned off. Broadcasting cannot be accessed while you watch TV using a cable box or satellite box. Broadcasting cannot be accessed while a recording is in progress or the Timeshift function is running. If Usage Mode is set to Retail Mode, the TV's audio and video settings are automatically reset every 5 minutes.
Precautions and Notes You can get instructions and information that you must read after installation. Before Using the Recording and Timeshift Functions Read these instructions before using Recording and Timeshift. "" This function may not be supported depending on the model or geographical area. Before using the recording and schedule recording functions "" Recording may not be supported depending on the model or geographical area. ●● To set up a Schedule Recording, you must first set the TV's clock.
●● Schedule Recording requires at least 100 MB of free space on the USB storage device. Recording will stop if the available storage space falls below 50 MB while recording is in progress. ●● If the available storage space falls below 500 MB while both the Schedule Recording and Timeshift functions are in progress, only the recording will stop. ●● The maximum recording time is 720 minutes. ●● Videos are played according to the TV settings.
Before using the timeshift function "" Timeshift may not be supported depending on the model or geographical area. ●● A USB hard drive with a speed of 5,400 rpm or above is recommended. However, RAID-type USB hard drives are not supported. ●● USB memory sticks or flash drives are not supported. ●● The total recording capacity may differ with the amount of available hard drive space and the recording quality level.
Read Before Using Apps Read this information before using Apps. ●● Due to the product characteristics featured on Samsung Smart Hub, as well as limitations in available content, certain features, applications, and services may not be available on all devices or in all territories. Visit http:// www.samsung.com for more information on specific device information and content availability. Services and content availability are subject to change without prior notice.
Read Before Using the Internet Read this information before using the Internet. ●● The Internet is not compatible with Java applications. ●● File download is not supported. ●● The Internet may not be able to access certain websites. ●● The TV does not support playback of flash videos. ●● E-commerce for online purchases is not supported. ●● With websites that have scrollable windows, scrolling a window can result in corrupted characters. ●● ActiveX is not supported.
●● The browsing history is saved from latest to oldest, with the oldest entries being overwritten first. ●● Depending on the types of video/audio codecs supported, it might not be possible to play certain video and audio files while playing HTML5 Video/Audio. ●● Video sources from PC-optimised streaming service providers may not play properly on our proprietary Internet. Read before setting up a wireless Internet connection Precautions for wireless Internet ●● This TV supports the IEEE 802.
Read Before Playing Photo, Video, or Music Files Read this information before playing media content. Limitations on use of photo, video, and music files Try Now ●● The TV supports MSC (Mass Storage Class) USB devices only. MSC is a class designation for mass storage devices. Types of MSC devices include external hard drives, flash card readers, and digital cameras. (USB hubs are not supported.) These kinds of devices must be connected directly to the USB port.
Supported external subtitles Name Format MPEG-4 Timed text .ttxt SAMI .smi SubRip .srt SubViewer .sub Micro DVD .sub or .txt SubStation Alpha .ssa Advanced SubStation Alpha .ass SMPTE-TT Text .
Supported image formats and resolutions File extension Format Resolution JPEG 15360 x 8640 *.png PNG 4096 x 4096 *.bmp BMP 4096 x 4096 *.mpo MPO 15360 x 8640 *.jpg *.jpeg "" The MPO format is supported partly. Supported music formats and codecs File extension Format Codec Note *.mp3 MPEG MPEG1 Audio Layer 3 MPEG4 AAC *.flac FLAC FLAC Supports up to 2 channels *.ogg OGG Vorbis Supports up to 2 channels *.wma WMA WMA *.wav wav wav *.m4a *.mpa *.aac *.mid *.midi *.ape *.
Video codecs supported by NU7100 model series or higher File format Container Video codecs Resolution 4096 x 2160: 30 H.264 BP/MP/HP 4096 x 2160 HEVC (H.265 - Main, Main10) *.avi Motion JPEG *.mkv *.asf Frame rate (fps) 3840 x 2160 3840 x 2160: 60 Bitrate (Mbps) 60 60 80 30 80 Dolby Digital MVC *.wmv *.mp4 AVI *.mov *.3gp MKV ASF *.vro *.mpg MP4 3GP *.mpeg MOV *.ts *.tp FLV VRO *.trp *.mov VOB PS *.flv *.vob TS SVAF *.svi *.
Video codecs supported by NU7090 model series or lower File format Container Video codecs Resolution 3840 x 2160: 30 H.264 BP/MP/HP 3840 x 2160 HEVC (H.265 - Main, Main10) *.avi Frame rate (fps) 1920 x 1080: 60 60 Bitrate (Mbps) Audio codecs 50 50 Motion JPEG *.mkv *.asf Dolby Digital MVC *.wmv *.mp4 AVI *.mov *.3gp MKV ASF *.vro *.mpg MP4 3GP *.mpeg MOV *.ts *.tp FLV VRO *.trp *.mov VOB PS *.flv TS *.
Other restrictions ●● Codecs may not function properly if there is a problem with the content. ●● Video content does not play or does not play correctly if there is an error in the content or container. ●● Sound or video may not work if they have standard bit rates/frame rates above the TV’s compatibility ratings. ●● If the Index Table is has an error, the Seek (Jump) function will not work.
Read After Installing the TV Read this information after installing the TV. Picture sizes and input signals The Picture Size settings are applied to the current source. The applied Picture Size Settings will remain in effect whenever you select that source unless you change them.
Supported Resolutions for UHD Input Signals Check the supported resolution for UHD input signals. ●● Resolution: 3840 x 2160p, 4096 x 2160p "" An HDMI connection with HDMI UHD Color set to Off supports up to UHD 50P/60P 4:2:0 input signals, while an HDMI connection with HDMI UHD Color set to On supports up to UHD 50P/60P 4:4:4 and 4:2:2 input signals.
Read Before Connecting a Computer (Supported Resolutions) Check the supported resolution for PC input signals. When you connect your TV to a computer, set the computer's video card to one of the standard resolutions listed in the tables below or on the next page. The TV will automatically adjust to the resolution you choose. Note that the optimal and recommended resolution is 3840 x 2160 at 60 Hz.
VESA DMT Resolution (Dots x lines) Display format Horizontal frequency Vertical frequency Clock frequency (Hz) (MHz) Polarity (horizontal / vertical) (KHz) 640 x 480 60 Hz 31.469 59.940 25.175 -/- 640 x 480 72 Hz 37.861 72.809 31.500 -/- 640 x 480 75 Hz 37.500 75.000 31.500 -/- 800 x 600 60 Hz 37.879 60.317 40.000 +/+ 800 x 600 72 Hz 48.077 72.188 50.000 +/+ 800 x 600 75 Hz 46.875 75.000 49.500 +/+ 1024 x 768 60 Hz 48.363 60.004 65.
VESA CVT Resolution (Dots x lines) 2560 x 1440 Display format Horizontal frequency Vertical frequency Clock frequency (Hz) (MHz) Polarity (horizontal / vertical) 119.998 497.750 +/- Vertical frequency Clock frequency (Hz) (MHz) Polarity (horizontal / vertical) (KHz) 120 Hz 182.996 "" The resolution may not be supported depending on the model. CTA-861 Resolution (Dots x lines) Display format Horizontal frequency (KHz) 3840 x 2160 30 Hz 67.500 30.000 297.
Supported Resolutions for Video Signals Check the supported resolution for video signals. CTA-861 Resolution (Dots x lines) Display format Horizontal frequency Vertical frequency Clock frequency (Hz) (MHz) Polarity (horizontal / vertical) (KHz) 720 (1440) x 576i 50 Hz 15.625 50.000 27.000 -/- 720 (1440) x 480i 60 Hz 15.734 59.940 27.000 -/- 720 x 576 50 Hz 31.250 50.000 27.000 -/- 720 x 480 60 Hz 31.469 59.940 27.000 -/- 1280 x 720 50 Hz 37.500 50.000 74.
Resolution (Dots x lines) Display format Horizontal frequency Vertical frequency Clock frequency (Hz) (MHz) Polarity (horizontal / vertical) (KHz) *3840 x 2160 50 Hz 112.500 50.000 594.000 +/+ *3840 x 2160 60 Hz 135.000 60.000 594.000 +/+ 4096 x 2160 24 Hz 54.000 24.000 297.000 +/+ 4096 x 2160 25 Hz 56.250 25.000 297.000 +/+ 4096 x 2160 30 Hz 67.500 30.000 297.000 +/+ *4096 x 2160 50 Hz 112.500 50.000 594.000 +/+ *4096 x 2160 60 Hz 135.000 60.000 594.
Read Before Using Bluetooth Devices Read this information before using a Bluetooth device. "" This function may not be supported depending on the model or geographical area. Restrictions on using Bluetooth ●● You can't use Bluetooth devices and the Wi-Fi Speaker Surround Setup feature simultaneously. ●● Compatibility issues may occur, depending on the Bluetooth device. (A Mobile exclusive headphone may not be available, depending on the environment.) ●● Lip-sync errors may occur.
Buttons and functions available while playing multimedia content Review available media playback, control, and record buttons and descriptions of how they are used. Press the Select button while playing any video, photo, or recorded content. The following buttons appear. "" The provided buttons and functions may not be supported depending on the model or geographical area. "" The available buttons and functions may differ with the content you are viewing or playing.
●● 360 Auto Rotation Automatically adjusts the video's viewing angle by analysing the amount of image changes during playback of a video file that provides a 360-degree view. When this function is started, the rotation starts in a short time. –– General –– Dynamic –– Natural "" The 360 Auto Rotation function does not work in General mode. "" This function may not be supported depending on the file format. "" Video files that use the mjpeg codec do not support a 360-degree view.
●● Fit to screen Fits a photo to the screen. ●● Zoom Zooms in a photo. ●● Rotate left / Rotate right Rotates a photo left or right. ●● Background Music During a slideshow, pauses or resumes the background music. ●● Options "" The available options may differ with the model and content. Function Description Slideshow Speed Sets the slideshow speed. Slideshow Effect Applies transition effects to the slide show. Plays background music while the TV displays photos.
Suffix : Parental Rating - Thailand only Alphabet Icon Description Allow All The broadcated rating value is not classified Preschool Content suitable for preschool aged children 3-5 years old Children Content suitable for children between 6–12 years old General Content suitable for general audiences PG 13 Content suitable for people aged 13 and above, but can be watched by those who are under the recommended age if parental guidance is provided (PG-13) PG 18 (PG-18) Content suitable for people
Licence Check the licence information and trademarks applied in your TV. Manufactured under license from Dolby Laboratories. Dolby, Dolby Audio, Pro Logic, and the double-D symbol are trademarks of Dolby Laboratories. The terms HDMI and HDMI High-Definition Multimedia Interface, and the HDMI Logo are trademarks or registered trademarks of HDMI Licensing LLC in the United States and other countries. Open Source License Notice Open Source used in this product can be found on the following webpage.
Accessibility Guidance Provides a menu and a remote control guide that aid the visually impaired. Menu Learning Screen Learn the menus on the TV screen. Once enabled, your TV will tell you the structure and features of the menus you select. Using the Remote control Guide for the Samsung Smart Remote. "" The Samsung Smart Remote may not be supported depending on the model or geographical area. Orientation of the Samsung Smart Remote Hold the remote control with the buttons facing towards you.
●● Underneath these two buttons is the directional button which consists of a large outer circle with a round button in the middle. ●● Underneath the directional button are two buttons on the left and right hand sides and another button at the centre. The one on the left is the button and the one on the right is the button. The round button in the middle is the button. ●● Underneath the button are two thin horizontal buttons. These are more protruded than the other buttons on the remote control.
Using the accessibility menu View descriptions of accessibility menu functions. "" This function may not be supported depending on the model or geographical area. Accessibility Shortcuts menu Press and hold the VOL button to display the Accessibility Shortcuts menu. The Accessibility Shortcuts menu allows you to turn Voice Guide on or off by changing the settings. Voice Guide speaks the menu items displayed on the screen so that people who cannot see the screen can easily use the TV.
Opening the Accessibility Shortcuts menu On the Samsung Smart Remote, there are two thin horizontal rocker buttons next to each other located slightly below the middle of the remote. The one on the left is the volume rocker button. Press and hold the volume rocker button to open the Accessibility Shortcuts menu. If you press and hold the VOL button while Voice Guide is turned off, the Accessibility Shortcuts menu appears and Voice Guide starts.
Turning on Audio Description 1. Press and hold the VOL button on the remote. The Accessibility Shortcuts menu appears. 2. Press the up or down directional buttons on the remote to move to and highlight the Audio Description option. 3. Press the Select button on the remote to turn Audio Description on or off. 4. Close the menu either by pressing on the remote or by pressing the right directional button to highlight Close, and then pressing the Select button.
Setting accessibility settings using Voice Interaction Voice Interaction lets you control your TV with voice commands spoken into the microphone built into the Samsung Smart Remote. To use Voice Interaction, the TV must be set up and tuned and must be connected to the Internet. You can connect the TV to the Internet during the initial setup or do it later through the settings menu. There are many commands you can say to control the TV.
Using the TV with Voice Guide on You can turn on Voice Guide that describe the menu options aloud to aid the visually impaired. Watching TV Turning the TV on Press the or button to turn the TV on. "" When the TV turns on in the TV mode, voice guide will speak the channel name. Changing channel You can change the channel in a number of ways. Every time you change channels, the new channel details will be announced. The ways to change the channel are below.
Using on-screen number entry via the Samsung Smart Remote: Use the virtual numeric pad to enter numbers e.g. to enter a channel number or to enter a PIN. Press the or button on the Samsung Smart Remote and the virtual numeric pad with 2 rows appears on screen. Voice Guide speaks “virtual numeric pad, 6” which indicates that the number strip is on screen and the focus is on the number 6.
Using the guide See an overview of each channel's programme lineup. When you want to know the programme information for each channel while watching a broadcast programme, press the CH button on the Samsung Smart Remote. Use the directional buttons to view the programme information. "" On standard remote control, press the GUIDE button. Live TV Guide You can see the daily programme schedules for each broadcaster and programme information in the Guide.
When you open the Guide, a table grid of channels and programmes is displayed. The top row displays Channel Filter then the day and times. Each row has a channel name on the left and programmes on that channel on the right. In the Guide, use the up and down directional buttons to move between channels and use the left and right directional buttons move to between programmes within a channel. You can also use the a channel number and go to that channel directly.
●● Schedule Recording You can schedule recording for a broadcast scheduled programme. ●● "" This function may not be supported depending on the model or geographical area. "" For more information on Schedule Recording, refer to "Recording". Edit Recording Time You can change the start and end times of scheduled programme recordings. "" ●● This function may not be supported depending on the model or geographical area. Stop You can stop the recording function that is currently running.
Setting Up a Schedule Viewing Configure the TV to show a specific channel or programme at a specific time and date. The icon appears next to programmes that have been configured for a schedule viewing. "" To set up a schedule viewing, you must first set the TV's clock ( Settings General System Manager Time Clock). Setting up a schedule viewing ●● The Guide Screen On the Guide screen, select a programme you would like to view, and then press and hold the Select button.
2. Cancelling a scheduled viewing from Smart Hub Live TV 1. Press Schedule Manager or Recordings Schedules Delete the button to open Smart Hub, and then press the left or right directional button to move to Live TV. Press the up directional button to move to the top row, and then press the left or right directional button to move to Schedule Manager or Recordings. 2. Press Select to open Schedule Manager or Recordings. 3. Press the up directional button to move to the Schedules menu. 4.
Press the right directional button in the Channel List to move to the Category list. Use the up and down directional buttons to move within this list. Press the Select button to choose a category you want from the Category list. The Category list contains All Channels and Favourites. Use the up and down directional buttons to move to a channel you want to view, and then press the Select button. ●● All Displays the channels that have been automatically searched.
Creating a Personal Favourites List Designate frequently watched channels as favourite channels. Favourite channels are highlighted in the Edit Channel and Channel List screens with the symbol . Registering channels as favourites Live TV Channel List 1. Press the right directional button to move to the Category list. 2. Select Favourites. 3. When you select a favourites list, the Edit Favourites screen appears. 4. Move to the channel you want to add, and then press the Select button. 5.
Deleting channels from a favourites list – Detail 1. Open the Channel List. 2. Press the right directional button to move to the Category list. 3. Use the up and down directional buttons to move to Favourites, and then press Select. You will see Favourites 1 to Favourites 5. Move to the list from which you want to delete channels, and then press the Select button. 4. Use the up directional button to move to Edit Favourites, and then press the Select button. 5.
Recording Recording a programme to an external hard drive connected via USB. "" This function may not be supported depending on the model or geographical area. "" Read all precautions before using the recording feature. For more information, refer to "Before Using the Recording and Timeshift Functions". Using the instant and schedule recording options from the guide screen: To record a programme that is on now, open the programme guide, move to the programme, and then press and hold the Select button.
Using the Instant and Schedule Recording options from the programme info window Recording the programme you are watching To display a menu for recording a programme or starting the Timeshift function, press the or button and then press the Select button while watching the programme. You can select the following functions on the menu: ●● Record: Immediately starts to record the programme you are watching. ●● Timeshift: Starts the Timeshift function.
Viewing recorded programmes Live TV Schedule Manager or Recordings Open the Smart Hub by pressing the Record button on the remote control. Use the left or right directional button to move the focus to Live TV. Press the up directional button to move to the top row, and then use the left or right directional button to move to Guide. Press the right directional button to move to Recordings and press select. This will open the Recording & Schedule Manager screen.
Using Smart Hub Learn how to open Smart Hub to access apps, games, movies, and more. Smart Hub After pressing the button on your remote control, you can surf the web and download apps with Smart Hub. "" Some Smart Hub services are for pay services. "" To use Smart Hub, the TV must be connected to the Internet. "" Some Smart Hub features may not be supported depending on the service provider, language, or geographical area.
When you open Smart Hub, move the focus to Live TV or TV PLUS. Press the up directional button to move to the top row. You will be on the Guide item. The items in this row are: ●● Guide: Select to go to the screen where you can view the programme guide to multiple channels. ●● Channel List: Select to open the channel list to view and move to programmes that are being broadcast on other channels.
Settings ●● When the focus is moved to the icon, a list of quick settings icons appears above the top of the menu. You can quickly set frequently used functions by clicking the icons. –– Picture Mode You can select the picture mode that provides the best viewing experience. To change the picture mode, press the Select button. To make fine adjustments, press the up directional button, and then select Picture Setup. –– Sound Mode You can select a sound mode to optimise your listening experience.
–– Subtitle You can watch TV broadcasts with subtitles. To activate/deactivate the Subtitle function, press the Select button. To run Accessibility Shortcuts, press the up directional button, and then select Accessibility Shortcuts. –– Sleep Timer You can automatically shut off the TV after a pre-set period of time. To set the sleep time to up to 180 minutes, press the select button. To make detail off timer, press the up directional button, and then select Set Up Off Timer.
Ambient mode ●● In Ambient mode, you can view beautiful screens, various visual information, and notifications. To enter Ambient mode, press the TV, press the button. If you press the "" button. To return to the TV mode, press the button. To shut off the button when the TV is turned off, the TV turns on in Ambient mode. If you use a remote control other than the Samsung Smart Remote, there may be restrictions to entering Ambient mode.
Launching the e-Manual Open the user manual embedded in your TV. Press the E-MANUAL button on the standard remote control to open the menu. Alternatively, press the to open Smart Hub, press the left directional button to move to button Settings, and then press the Select button. Use the up and down directional buttons to move to Support, and then select Open e-Manual to open the e-Manual.
Using Voice Interaction A guide to using Voice Interaction to control your TV. To use Voice Interaction, your TV must be connected to the Internet and you must use the microphone on your Samsung Smart Remote. To use Voice Interaction, press and hold the button on the Samsung Smart Remote, say a command into the microphone on the remote, and then release the button to run Voice Interaction. "" The existing functional specifications may be changed if Voice Interaction is updated.