SCX-5315F/5115 Digital Laser MFP SCX-5315F SCX-5115 User’s Guide Home Visit us at: www.samsungprinter.com JC68-01054ARev. 1.
This manual is provided for information purposes only. All information included herein is subject to change without notice. Samsung Electronics is not responsible for any changes, direct or indirect, arising from or related to use of this manual. © 2003 Samsung Electronics Co., Ltd. All rights reserved. • SCX-5315F, SCX-5115 and Samsung logo are trademarks of Samsung Electronics Co., Ltd. • Centronics is a trademark of Centronics Data Computer Corporation.
CONTENTS Chapter 1: GETTING STARTED Unpacking .......................................................... Component Location ............................................ Front View ..................................................... Rear View ...................................................... 1.2 1.4 1.4 1.5 Control Panel Functions ........................................ 1.6 SCX-5315F .................................................... 1.6 SCX-5115 ..............................................
Chapter 3: PAPER HANDLING Selecting Print Media ............................................ Paper Guidelines .................................................. TrayLoading Paper in the Tray ............................... Using the Multi-Purpose Tray ................................. Setting the Paper Size for Copying ......................... Chapter 4: 3.2 3.3 3.4 3.6 3.9 COPYING Loading Paper for Copy Output .............................. Selecting a Paper Tray ......................................
Chapter 6: SCANNING Scanning using the Samsung SmarThru .................. 6.2 Scanning Process with TWAIN-enabled Software ...... 6.4 Chapter 7: MAINTENANCE Cleaning the Scan Unit ......................................... 7.2 Expected Cartridge Life ........................................ 7.3 Replacing the Toner Cartridge ............................... 7.3 Setting to Notify Toner Low ................................... 7.7 Cleaning the Drum ............................................... 7.
Appendix A: INSTALLING A NETWORK OPTION Installing a Network Interface Card ........................ A.2 Configuring Network Parameters ............................ A.6 Supported Operating Systems .......................... A.7 Printing a Network Configuration Page ............... A.7 Configuring TCP/IP .......................................... A.8 Configuring Netware ...................................... A.10 Restoring the Network Configuration ................ A.
Important Precautions and Safety Information When using this product, these basic safety precautions should always be followed to reduce risk of fire, electric shock, and injury to persons: 1. Read and understand all instructions. 2. Use common sense whenever operating electrical appliances. 3. Follow all warnings and instructions marked on the product and in the literature accompanying the product. 4. If an operating instruction appears to conflict with safety information, heed the safety information.
• If liquid has been spilled into the product. • If the product has been exposed to rain or water. • If the product does not operate properly after instructions have been followed. • If the product has been dropped, or the cabinet appears damaged. • If the product exhibits a sudden and distinct change in performance. 15. Adjust only those controls covered by the operating instructions.
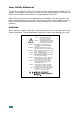
Laser Safety Statement The printer is certified in the U.S. to conform to the requirements of DHHS 21 CFR, chapter 1 Subchapter J for Class I(1) laser products, and elsewhere is certified as a Class I laser product conforming to the requirements of IEC 825. Class I laser products are not considered to be hazardous. The laser system and printer are designed so there is never any human access to laser radiation above a Class I level during normal operation, user maintenance, or prescribed service condition.
Ozone Safety During normal operation, this product produces ozone. The ozone produced does not present a hazard to the operator. However, it is advisable that the product be operated in a well ventilated area. If you need additional information about ozone, please request your nearest Samsung dealer. Power Saver This product contains advanced energy conservation technology that reduces power consumption when it is not in active use.
Radio Frequency Emissions FCC Information to the User This equipment has been tested and found to comply with the limits for a Class A digital device, pursuant to Part 15 of the FCC Rules. These limits are designed to provide reasonable protection against harmful interference when the equipment is operated in a commercial environment.
Ringer Equivalence Number The Ringer Equivalence Number and FCC Registration Number for this product may be found on the label located on the bottom or rear of the product. In some instances you may need to provide these numbers to the telephone company. The Ringer Equivalence Number (REN) is a measure of the electrical load placed on the telephone line, and is useful for determining whether you have “overloaded” the line.
Declaration of Conformity (European Countries) Approvals and Certifications The CE marking applied to this product symbolises Samsung Electronics Co., Ltd. Declaration of Conformity with the following applicable 93/68/EEC Directives of the European Union as of the dates indicated: January 1, 1995: Council Directive 73/23/EEC Approximation of the laws of the member states related to low voltage equipment.
Replacing the Fitted Plug (for UK Only) IMPORTANT The mains lead for this machine is fitted with a standard (BS 1363) 13 amp plug and has a 13 amp fuse. When you change or examine the fuse, you must re-fit the correct 13 amp fuse. You then need to replace the fuse cover. If you have lost the fuse cover, do not use the plug until you have another fuse cover. Please contact the outlet you purchased the machine from. The 13 amp plug is the most widely used type in the UK and should be suitable.
NOTE: Any queries, problems or requests for accessories/Information as well as service should be directed at the address shown in your warranty paperwork.
1 GETTING STARTED Thank you for purchasing Samsung multifunctional product. This machine provides printing, copying, scanning, and faxing (SCX-5315F only) functions! This chapter provides step-by-step instructions on setting up the machine, and installing the software.
Unpacking 1 Remove the shipping tape from the front, back, and sides of the machine. Tape 2 Remove the label completely from the scanner module by pulling it straight out, away from the unit. The scan unlock switch automatically moves to the unlock position ( ). Scanner module NOTE: To scan or copy a document, the switch must be on that position. When you are moving the machine or do not intend to use it for a long time, push the switch to the lock position ( ).
4 Ensure that you have the following: 1 USB Cable AC Power Cord* Telephone Line Cord* TAM Lead (For SCX-5315F only) (For SCX-5315F UK only) This User’s Guide, Facsimile User’s Guide (SCX-5315F only), Quick install Guide CD-ROM† Starter Toner Cartridge Drum Cartridge *. The appearance of the power cord and the telephone line cord vary according to countries. †. The CD-ROM contains the MFP driver, SmarThru software, the SmarThru user’s guides and the Adobe Acrobat Reader program.
Component Location Take a moment to familiarise yourself with the main components of your machine. Front View Automatic Document Feeder Control Panel (See page 1.6 for SCX-5315F. Document Guides Document Input Tray See page 1.9 for SCX-5115.) Document Output Tray Paper Guides Multi-Purpose Tray Scanner Module Paper Tray Release lever Front Cover 1.
Rear View 1 Document Cover ADF (Automatic Document Feeder) Connector Document Glass Telephone Connections (available in SCX-5315F only) Paper Tray AC Power Cord Connector Parallel Connector USB Connector Power Switch Paper Exit Extension GETTING STARTED 1.
Control Panel Functions SCX-5315F 1 2 4 3 5 6 7 13 8 01 21 System Data 06 26 Delay TX 11 31 System ID 07 27 Memory TX 12 32 03 23 04 24 05 25 Date & Time System Setup Memory Clear 08 28 Priority TX 09 29 10 30 Polling Add/Cancel 13 33 14 34 Tx Confirm Schedule Job 16 36 17 37 18 38 19 39 20 40 Phone Book System List Tx Journal Rx Journal Help List Group Dial 1 02 22 Maintenance 15 35 9 10 11 12 Used to store frequently dialled fax numbers and dial them wi
When an error occurs, the light on the corresponding location on the Status map turns on, as well as the error indicator, and the error message appears on the display so that you can locate the error. For details on the meaning of the error messages, see page 8.11. (status map) ex) The paper is jammed in the exit area. 3 Turns on when a paper jam occurs. To clear the jam, see page 8.4. Turns on when the toner or drum has almost run out. To replace the toner or drum cartridge, see page 7.3 and page 7.8.
7 S A V E 8 Allows you to save toner by using less toner to print a document. Allows you to save power by reducing power consumption when not printing. Allows you to save paper by printing 2 pages on a single sheet of paper (available in the Copy mode only). Enters the menu functions in conjunction with the one-touch buttons. Also backs you up to the previous menu level or exits the menu. Scrolls though the menu items.
SCX-5115 2 1 3 4 5 1 10 7 6 8 9 When an error occurs, the light on the corresponding location on the Status map turns on, as well as the error indicator, and the error message appears on the display so that you can locate the error. For details on the meaning of the error messages, see page 8.11. (status map) ex) The paper is jammed in the exit area. 1 Turns on when a paper jam occurs. To clear the jam, see page 8.4. Turns on when the toner or drum almost runs out.
Used to adjust the contrast of the current copy job. Used to select the text type for the current copy job. 3 C O P Y Used to specify the paper tray you want to use in Copy mode. Used to collate the copied documents. Used to print the original image to fit the page (Auto Fit) or to print multiple copies on a single page (Clone). The current copy job will use both sides of the paper when printed. 4 5 S A V E 6 Used to enter numbers. Allows you to save toner by using less toner to print a document.
Making Connections 1 Connect the ADF (Automatic Document Feeder) cord to this port and fasten the side screws. NOTE: Without connecting the cord to the port, you cannot use the ADF. 2 If you have SCX-5115: Skip this step and proceed to step 3. If you have SCX-5315F: Connect the supplied telephone line to the LINE jack and the other end to the wall jack. GETTING STARTED 1.
If you want to use your machine for receiving both faxes and voice calls, you will need to connect a telephone and/or answering machine to your machine. Plug the cord of your extension phone or answering machine into the EXT jack. UK users should plug the cord of the extension phone into the supplied TAM lead and plug the cord of the TAM lead into the EXT jack on the back of your machine.
3 Connect the USB cable which came with your machine. 1 If you want to use a parallel printer cable, only use a IEEE1284 compliant cable and connect it to the parallel connector on your machine. NOTE: • To connect the machine to the parallel port of the computer requires a certified parallel cable. You will need to buy the a IEEE1284 compliant cable. • You only need to connect one of the above cables. • If you are using a USB cable, you must be running Windows 98/ Me/2000/XP.
Installing the Drum and Toner Cartridges 1 Pull the release lever to open the side cover. CAUTION: Ensure that the side cover is always open before opening the front cover. 2 Open the front cover. 3 If the cartridge locking lever is on the lower position, turn the lever upward until it locks into place. 1.
4 Remove the drum cartridge from its bag and slide it into the machine firmly until it locks into place completely. 1 5 Remove the starter toner cartridge from its bag. Gently shake the cartridge to loosen the toner. Thoroughly shaking the cartridge will assure maximum copies per cartridge. 6 Slide the toner cartridge into the machine aligning the cartridge to the left of the slot until it locks into place completely. GETTING STARTED 1.
7 Turn the cartridge locking lever downwards until it locks into place. 8 Close the front cover 1 and then side cover 2 . 2 1 NOTE: When the drum or toner cartridge need to be replaced, the display indicates the corresponding message with the error indicator. Refer to the list of error messages on page 8.11. To replace the drum and toner cartridges, see page 7.8 and page 7.3 respectively. 1.
Turning the Machine On 1 Plug one end of the supplied three-wire electrical grounding type cord into the AC socket on the machine and the other end into a properly grounded AC outlet. 2 Turn on the power switch. “WARMING UP PLEASE WAIT” appears on the display indicating that the machine now is on. To view your display text in another language, see page 1.20. Note: Power cord must be plugged into a grounded power socket. Loading Paper The paper Tray can hold a maximum of 550 sheets of 20lb plain paper.
2 Push down on the pressure plate until it locks in position. 3 Adjust the rear paper guide to the desired paper length. It is preset to Letter or A4 size depending on the country. To load another size, lift and insert the rear guide into the corresponding position. LG L FO LIO A4 LT R Rear guide 4 Fan the paper and insert it into the Tray. 1.
5 Ensure that the paper corners are under the corner snubbers. 1 Corner snubber Do not fill above the max fill line. Max Fill Line 6 While pinching the side guide as shown, move it toward the stack of paper until it lightly touches the side of the stack. Do not press the guide too tightly to the edge of the paper; the guide may bend the paper. 7 Close the paper Tray. GETTING STARTED 1.
Tray Setting the Paper Size After loading paper in the paper Tray, you need to set the paper size using the control panel buttons. These settings will apply to the Copy mode only. In the PC printing mode, you have to select the paper size in the application program you use. 1 Press Menu/Exit and then System Data from the onetouch dial keypad. SCX-5115 users should press Menu and then Enter. The display shows “CASSETTE PAPER” on the top line and the available options on the bottom line.
Using Save Modes 1 Toner Save The Toner Save feature allows the printer to use less toner on each page. Activating this mode extends the life of the toner cartridges up to twice as long as in normal mode, but reduces the print quality. To turn the Toner Save mode on, take the following steps: 1 Press SAVE Toner. The display shows the current setting on the bottom line. 2 Press SAVE Toner or use the navigation buttons to change the setting. To enable the Toner Save mode on, select “ON.
Power Save The Power Save mode allows the printer to reduce power consumption when it is not in actual use. To turn the Power Save mode on, take the following steps: 1 Press SAVE Power. The display shows the current setting on the bottom line. 2 Press SAVE Power or use the navigation buttons to change the setting. To enable the Power Save mode, select “ON.” Or select “OFF” to disable the mode. 3 Press Mode/Enter (Enter for SCX-5115) to save the selection.
2 INSTALLING SOFTWARE This chapter provides information about installing the supplied Samsung software. You must install the Samsung software to use your machine as a printer and scanner.
About Samsung Software You must install software using the supplied CD-ROM after you have set up your machine and connected it to your computer. The CD-ROM includes: • Samsung software • User’s Guides • Adobe Acrobat Reader The CD-ROM provides you with the following software: Windows MFP Driver To use your machine as a printer and scanner in Windows, you must install the MFP driver. For information about installing the MFP driver in Windows, see page 2.4.
System Requirements Before you begin, ensure that your system meets the minimum requirements. Supported Operating System Windows 95 OSR2/Windows 98/Windows 98 SE/Windows Me/ Windows NT 4 Workstation or Server with Service Pack 3/ Windows 2000 Professional or Advanced Server/Windows XP Home edition or Professional. Minimal Requirements • Disk space: 120 MB for installation • Memory: 64 MB • CPU: Pentium II 233 or higher • Required software: Internet Explorer 4.01.
Installing Samsung Software NOTES: • For Windows 95/98/Me/NT 4.0/2000/XP users, cancel the “New Hardware Found” screen when the computer boots up. • Make sure that your machine is plugged in and connected to your computer’s parallel port or USB port before installing software from the CD. Windows 95 and Windows NT 4.0 do not support USB connection. 1 Insert the supplied SmarThru CD-ROM into your CD-ROM drive. The SmarThru CD-ROM should automatically run and the opening window appear.
5 The SmarThru installation supports three types of setup: •Typical: Program will be installed with the most common options and is recommended for most users. •Compact: Only the MFP driver will be installed. •Custom: You may choose the options you want to install. Recommended for advanced users. 2 If you select the Custom installation, you may choose the options you want to install. • SmarThru Software: to scan and edit images and to work with electronic documents.
7 Choosing SmarThru networking option allows you to share the modems on other computers in your network, and your machine as a scan device or to access similar shared devices. Stand-alone configuration does not allow you to use any networking features such as Remote Fax or Remote Scan service. If you selected SmarThru networking, you can select to install it as a Server, a Client, or both. The Server option allows you to share a local fax modem and/or a scanner over a LAN.
8 Click Next. 2 9 When the installation is completed, shut down and restart your computer. If your computer does not shut down and restart automatically, you must shut it down manually and restart it before the changes will be saved. NOTE: When you install the software, the Digital Signature Not Found window appears in Windows 2000 and Windows XP. Click OK in Windows 2000 and click Continue Anyway in Windows XP. INSTALLING SOFTWARE 2.
Uninstalling Samsung Software Uninstall is required if you are upgrading the software or if your installation fails. You can uninstall all software including SmarThru and MFP drivers, using the SmarThru CD or uninstall the desired item using the Window unInstallShield. Note: Before beginning uninstallation, ensure that all applications are closed on your PC. A system reboot is required after the software is uninstalled.
3 When your computer confirms your selection, click Yes. The selected printer driver and all its components are removed from your computer. 2 4 When the uninstallation is done, click OK. 5 The message box recommends you restart your computer. Click OK, then restart Windows. NOTE: If you want to install the printer driver or the scan driver using the SmarThru CD-ROM, make sure that you select the Setup Type to Compact. Or select Custom then select MFP Driver. For details, see page 2.5.
Uninstalling Samsung SmarThru 1 From the Start menu, select Programs. 2 Select Samsung SmarThru, then select SmarThru 3 Uninstall. 3 When your computer asks you to confirm your selection, click Yes. The Uninstall Options dialogue box appears. Uninstall options are: •Backup and delete: Backs up all your data and options to a safe place. It then removes the SmarThru system, including the data. •Delete: Deletes all the SmarThru data and options. No backup or copying takes place.
5 Follow the on-screen instructions to complete the uninstallation. The SmarThru software and all components will be removed. 2 6 When the uninstallation is done, click OK. The message box recommends restarting your computer. 7 Click OK. Shut down and restart your computer to complete the uninstallation process and save your changes. INSTALLING SOFTWARE 2.
Using the SmarThru CD-ROM You can uninstall both the MFP driver and the SmarThru software with the CD-ROM you have used to install the software. 1 Insert the SmarThru CD-ROM into your CD-ROM drive. The SmarThru CD-ROM should automatically run and the installation window appear. If the installation window does not appear, select Run from the Start menu, then type X:Autorun.exe, replacing “X” with the letter of your drive and click OK. 2 If you are asked to select the language, choose the desired language.
3 PAPER HANDLING This chapter introduces you to the basics of selecting print media and loading print media into your machine.
Selecting Print Media Always use print media that meets the guidelines for use with this machine. Using a print media that is not recommended may cause paper jams or print quality problems. Media Size Input Sources and Capacities Input Source/Capacitya Media Size Paper Tray MultiPurpose Tray Plain paper Letter (8.5 x 11 in.) Folio (8.5 x 13 in.) Legal (8.5 x 14 in.) Executive (7.25 x 10.5 in.
Paper Guidelines When selecting or loading paper, envelopes, or other special media, keep these guidelines in mind: • Attempting to print on damp, curled, wrinkled, or torn paper can cause paper jams and poor print quality. • Use only high quality copier grade paper. Avoid paper with embossed lettering, perforations, or texture that is too smooth or too rough. • Store paper in its ream wrapper until ready to use. Place cartons on pallets or shelves, not on the floor.
• Store unused media at temperatures between 59oF and 86oF (15oC to 30oC). The relative humidity should be between 10% and 70%. • Do not load more than 10 sheets of special media into the Multi-Purpose Tray at a time. • Verify that your labels’ adhesive material can tolerate fusing temperature of 200oC (392oF) for 0.1 second. • Make sure that there is no exposed adhesive material between labels. Exposed areas can cause labels to peel off during printing, which can cause paper jams.
You can load letterhead paper with the design side facing up. The top edge of the sheet with the logo should be placed at the right side. 3 For details on loading paper in the Tray, see page 1.17. After loading paper in the Tray, you need to set the correct paper size using the control panel buttons. See page 1.20.
Using the Multi-Purpose Tray Multi-Purpose Tray is located at the right side of your machine. It can be closed when you are not using it, making the machine more compact. Use the Multi-Purpose Tray to print transparencies, labels, envelopes or postcards in addition to making quick runs of paper types or sizes that are not currently loaded in the paper Tray. Acceptable print media are plain paper with sizes ranging from 98 x 148 mm (3.9 x 5.8 in.) to Legal 216 x 356 mm (8.5 x 14 in.
To load print media in the Multi-Purpose Tray: 1 Lower the Multi-Purpose Tray, located on the right side of the machine. Unfold the paper support extension as shown. Paper support Multi-Purpose Tray 2 Prepare a stack of paper or envelopes for loading by flexing or fanning them back and forth. Straighten the edges on a level surface. For transparencies, hold the transparencies by the edges and avoid touching the print side.
4 Adjust the paper guide to the width of the stack of print material. Make sure that you have not loaded too much print media. The stack should be under the Max. fill line. The print media buckles if you load a stack that is too deep or if you push it in too far. Max. fill line NOTES: When printing on previously used paper via the Multi-Purpose Tray, the printed side should be facing up with the uncurled edge at the left side. If you experience problems with paper feed, turn the paper around. 3.
Setting the Paper Size for Copying After loading paper in the paper Tray or the Multi-Purpose Tray, you need to set the correct paper size using the control panel buttons. These settings will apply to the Copy mode, and the Fax mode (SCX-5315F only). In PC printing mode, you have to select the paper size in the application program you use. To set the paper size for Tray, take the following steps: 1 Press Menu/Exit and then System Data from the onetouch dial keypad.
NOTE 3.
4 COPYING This chapter provides step-by-step instructions for copying documents.
Loading Paper for Copy Output You can copy to a size of media as small as an index card 98 x 148 mm (3.9 x 5.8 in.) or as large as a sheet of legal-sized 216 x 356 mm (8.5 x 14 in.) paper. The instructions for loading the print media are the same whether you are printing, faxing, or copying. For details, see page 1.17 and page 3.6. Selecting a Paper Tray After loading the print media for use when copying, you have to select the paper tray you will use for both copy and fax jobs (SCX-5315F only).
Making Copies from the Automatic Document Feeder Using the ADF (Automatic Document Feeder), you can load up to 30 documents (20lb, 75 g/m2) in one job. Ensure that documents are in good condition, that they have the same thickness and weight, and that all of the staples and paper clips have been removed. 1 Feed the documents (up to 30 pages) face up into the ADF and adjust the document guides to the document size. Make sure that the bottom of the document stack matches the paper size marked on the ADF.
6 Press Copy/Start to begin copying. The display shows the copy processing. NOTE: Dust on the ADF glass may cause black lines on the printout, so always keep it clean. Making Copies using the Document Glass If you want to make copies from booklet, pamphlet, transparencies, or documents having other unusual characteristics, use the document glass to load documents. 1 Lift the document cover.
NOTE: Make sure that no other documents are in the ADF. If a document is detected in the ADF, this document has the priority rather than the document on the scan glass. 3 Close the scanner cover. NOTES: • Leaving the cover open while copying will affect the copy quality and toner consumption. • If you are copying a page from a book or magazine, close the cover flat. The slanted cover may cause heavy exposure of the light when scanning. 4 SCX-5315F users should verify that the machine is in the Copy mode.
Setting Copy Options The following buttons on the control panel let you set all the basic copy options; contrast, image type, number of copies and copy size. When making a copy, use these buttons before pressing Copy/Start. Image The Image setting is used to improve the copy quality. To select the image type, take the following steps: 1 Press Image. You can see the current setting on the bottom line of the display. 2 Press Image or the navigation buttons until the desired mode appears.
Contrast If you have an original document containing faint markings or dark images, you can adjust the brightness to make a copy that is easier to read. To adjust the contrast, take the following steps: 1 Press Contrast. 2 Press Contrast or the navigation buttons to select an option and press Mode/Enter (Enter on SCX-5115). MANUAL: You can adjust the contrast manually. Continue to the next step.
Zoom Using the Zoom ( ) button, you can reduce or enlarge the size of a copied image by 25% to 400% when you copy the original from the document scanner glass, and by 25% to 100% using the ADF. Note that the zoom rate available is different according to the document loading method. 1 Press Zoom ( ). The triangle symbol on the middle of the top line points to the zoom rate. 2 Enter the size using the number keypad. The selected number appears on the display.
Auto Fit Copying This feature automatically reduces or enlarges the original image to fit on the paper currently loaded in the machine, so you don’t need to adjust the copy size. This special copy mode is only available when using document scanner glass. If a document is detected in the ADF, the auto-fit will not work. 1 Load the document to be copied on the document glass, and close the cover. 2 Make sure that you have selected the required paper tray. See page 4.2.
Clone Copying The Clone feature prints multiple image copies on a single page. The number of images is automatically determined by the original image size, so you are unable to adjust the copy size. This special copy mode is available only when using the document scanner glass. If a document is detected on the ADF, the Clone option will not work. 1 Load the document to be copied on the document glass, and close the cover. 2 Make sure that you have selected the required paper tray. See page 4.2.
Duplex Copying Duplex copying allows you to print on both sides of the paper. Before printing in the duplex mode, decide on which edge you will bind your finished document. The binding options are: LONG EDGE, which is the conventional layout used in book binding. SHORT EDGE, which is the type often used with calendars. Long Edge Short Edge 1 Load the documents to be copied in the ADF. 4 Make sure that the original document is single sided.
8 When the document is fed from the document glass, the display shows “SCAN SIDE 2?” on the top line after the page is scanned into the memory. To scan another page, remove the scanned page and load the next page on the glass. Select “YES” and press Mode/Enter. After scanning, the machine starts printing automatically. Then the display shows "SCAN ANOTHER?". To scan another page, select "YES" and press Mode/Enter. When the display shows "SCAN SIDE2?" again, repeat as necessary.
4 Press Mode/Enter (Enter on SCX-5115) to save the selection. 5 If necessary, customise the copy settings including the number of copies, copy size, contrast and image type using the control panel buttons. See “Setting Copy Options” on page 4.6. 6 Press Copy/Start to begin copying. NOTE: In duplex copy mode, the PHOTO setting using the Image button is disabled. 7 When the document is fed from the document glass, the display shows “SCAN ANOTHER?” on the top line after the page is scanned into the memory.
MEMO 4.
5 PRINTING Read this chapter to learn how to select and load print media and how to use the print settings.
Printing a Document This procedure describes the general steps required for printing from various Windows applications. The exact steps for printing a document may vary depending on the application program you are using. Refer to the user’s guide of your software application for the exact printing procedure.
5 Click OK to close the Properties dialogue box. 6 After making any necessary changes to the printing parameters, click OK to start the print job. Printer Settings You can use the machine with all your Windows 95/98/Me/2000/ XP or Windows NT 4.0 applications. Be sure to set Samsung SCX-5x15 Series PCL 6 as the default printer for all of your Windows operations. Most Windows software applications allow you to make changes to the printer settings.
Windows NT 4.0 • Select the File > Print > Properties or File > Print Setup command from within any Windows application. Or • Select Samsung SCX-5x15 Series PCL 6 printer from the Printers folder, click the right mouse button, then select Document Defaults from the drop-down list. Windows 2000 • Select the File > Print command from within any Windows application.
Paper Tab Use the Paper tab to select the size of paper you have in your printer, the orientation, the number of copies to print, etc. 1 2 3 4 1 2 Click on the box to put a check mark to use the different paper source for the first page. Select the desired paper source for the first page and other pages independently. 5 Select the desired paper source. Select Tray if you load media in the paper Tray, Multi-Purpose Tray if you load in the Multi-Purpose Tray. Select the size of paper you are using.
Select the type of paper you are using. 4 Graphic Tab The Graphic tab allows you to adjust the print quality for your specific printing needs. 1 3 2 4 5.6 PRINTING 1 You can select the printing resolution. The higher the setting, the sharpen the clarity of printed image. Higher settings may increase the time it takes to print a document. 2 When you print with the resolution of 300, 600, 1200 dpi, some printed characters or images can appear to have jagged or uneven edges.
3 With this option checked all text in your document will be printed in solid black. When it is not checked, colored text is printed in shades of gray. 4 Toner Save Mode allows the printer to use less toner on each page. Using this mode will extend the life of your toner cartridge and reduce your cost per page, but will reduce print quality. Click to put a check mark and enable this mode. Output Tab The Output tab provides options for you to adjust how the document will appear on the printed page.
Booklet Printing The Booklet Printing option allows you to print a document out as a booklet. 7 Once your document prints, fold the pages in half and staple the pages. Booklet printing is available only when you select Plain Paper for Paper Type in the Paper tab. Fit to Page Choose this option to scale your print job to any selected paper size regardless of the logical document size. 5.
Poster Choose the Poster option to enlarge the printed document. 1 To determine the scaling factor, select the style. You can choose from: 2x2, 3x3, or 4x4. 1 For example, if you select 2x2, the output will be automatically stretched to cover 4 physical pages. PRINTING 5 5.
Duplex Printing Choose the Duplex option from the Output tab to print the document on both sides of the paper. 1 Choosing Long Edge lets you have the binding orientation along the long edge of the paper as in a magazine. 1 Choosing Short Edge lets you have the binding orientation along the short edge of the paper as in a calendar. Duplex printing is available only when you select Plain Paper for Paper Type in the Paper tab. 5.
Watermark Tab The Watermark tab allows you to create a background image of text to print on each page of your document. Watermarks are useful for printing identifying information on a document, information such as “DRAFT” or “CONFIDENTIAL”, or perhaps the name of your company or department. By changing the watermark settings, you can create faint watermarks that are not intrusive to a document, or bold watermarks to call attention to specific information.
About Tab The About tab gives you the programme version number. If you click on the globe image on the window, you will be connected to the Samsung web site provided you have access to the Internet. Printer Properties Buttons & Icons • Click OK when you finish reviewing or making changes. • Click Cancel if you want to exit the tab menus without applying any changes. • Click Help to view the online Help feature and tab menu details.
4 Click Start and select Printers from Settings. Double-click your printer name. 5 Select Properties in the Printer menu. 6 Click the Sharing tab and check the Shared As box. Fill in the Shared Name field and then click OK. Setting Up the Client Computer 1 Right-click Start and select Explorer. 2 Open your network folder in the left column. 3 Right-click the shared name and select Capture Printer Port. 4 Select the port you want, check the Reconnect at log on box and then click OK.
For Windows XP, check the Share this printer box. 6 For Windows NT 4.0, fill in the Share Name field and click OK. For Windows 2000/XP, fill in the Shared Name field and click OK. Setting Up the Client Computer 1 Right-click Start and select Explorer. 2 Open your network folder in the left column. 3 Click the shared name. 4 For Windows NT 4.0/2000, from the Start menu, select Settings and Printers. For Windows XP, from the Start menu, select Printers and Faxes. 5 Double-click your printer icon.
6 SCANNING Scanning with your machine lets you turn pictures and text into digital files on your computer. Then you can fax or e-mail the files, display them on your web site, or use them to create projects that you can print out using Samsung SmarThru software which came with your machine.
Scanning using the Samsung SmarThru SmarThru is the accompanying software for your machine. With SmarThru, scanning becomes a pleasure. Take the following steps to start scanning using SmarThru: 1 Feed the document(s) to be scanned face up into the ADF. Or Place a single document on the document glass face down then close the cover. 2 Once you have installed the Samsung software, you will see the SmarThru icon on the desktop window. Double-click the SmarThru 3 icon. Double click.
3 To open the Scan Wizard, click the Scan Wizard icon in the plugin bar on the left of the SmarThru 3 window. Scan Wizard icon. The Scan Wizard lets you use the following services: •Scan Lets you scan the original documents and save them in the Image Manager of the Samsung SmarThru system. The Image Manager is an image database manager and image editing program. •Copy Lets you use your machine to produce professional quality copies. You can adjust the image size and select advanced settings.
4 Click the desired service. 5 The Samsung Scan Manager opens for the selected service. Adjust the scan settings. You can use the Help button to receive on-line help. 6 To begin scanning, click Scan. For further information, please refer to the SmarThru User’s Guide which came with your machine. Scanning Process with TWAINenabled Software If you want to scan documents using other software, you will need to use TWAIN-compliant software, such as Adobe PhotoDeluxe or Adobe Photoshop.
7 MAINTENANCE This chapter provides information for maintaining the cartridge and your machine.
Cleaning the Scan Unit Keeping the scan unit clean helps ensure the best possible copies. We suggests that you clean the scan unit at the start of each day and during the day as needed. CAUTIONS: Cleaning the cabinet of the printer with surfactants containing large amounts of alcohol, solvent or other strong substances can discolor or crack the cabinet. NOTE: Clean the cabinet of the printer with a soft, lint-free cloth.
Expected Cartridge Life The life of your toner cartridge depends on the amount of toner used in each print job. For instance, when you print a typical business letter with about 5% page coverage, you can expect a toner cartridge life of approximately 6,000 pages. The actual number may vary according to the print density of the page you print. If you print a lot of graphics, you may need to change the cartridge more often.
2 Open the front cover. 3 Turn the cartridge locking lever upwards to release the toner cartridge. 4 Pull the toner cartridge out and gently shake the cartridge to distribute the toner evenly inside the cartridge. NOTE: If the toner gets on your clothing, wipe it off with a dry cloth and wash clothing in cold water. Hot water sets the toner into fabric. 7.
5 Reinstall the cartridge and turn the cartridge locking lever downwards. 6 Close the front cover, then the side cover. The display shows “NEW TONER? 1.YES 2.NO.” 7 Select “NO” by pressing 2. The machine returns to Standby mode. This is typically successful only one time. When the toner eventually runs out, only blank pages will print when a print job is sent, or when a fax is received. At this stage, the toner cartridge needs to be replaced. The display shows the warning message “TONER EMPTY.
3 Pull the used cartridge out. NOTE: Help the environment by recycling your used toner cartridge. Refer to the recycling brochure packed with the toner cartridge for details. 4 Shake the new toner cartridge horizontally four or five times. Save the box and the cover for shipping. 5 Slide the new toner cartridge in until it locks in place. 6 Turn the cartridge locking lever downwards until it locks in place. 7 Close the front cover, then the side cover. The display shows “NEW TONER? 1.YES 2.NO”.
Setting to Notify Toner Low (Available in SCX-5315F only) If you have set this NOTIFY TONER LOW menu option to “ON,” your machine automatically sends a fax to your service company or the dealer to notify them that your machine requires a new toner cartridge when the toner cartridge needs to be replaced. The fax number is preset by your dealer when you bought your machine. 1 Press Menu/Exit and then Maintenance from the onetouch dial keypad.
Cleaning the Drum If there are streaks or spots on your print, the drum cartridge may require cleaning. 1 Before setting the cleaning procedure, make sure that paper is loaded in the machine. 2 SCX-5315F users should press Menu/Exit then Maintenance from the one-touch dial keypad. SCX-5115 users should press Menu then press “MAINTENANCE” appears on the top line. or until 3 “CLEAN DRUM” appears on the bottom line of the display. Press Mode/Enter (Enter on SCX-5115).
2 Turn the cartridge locking lever upwards to unlock the toner cartridge, then pull the toner cartridge out. NOTE: The toner cartridge must be removed to replace the drum cartridge. 3 Pull the used drum cartridge out. NOTE: Help the environment by recycling your used drum cartridge. Refer to the recycling brochure packed with the drum cartridge for details. 7 MAINTENANCE 7.
4 Unpack the new drum cartridge and slide it into place, making sure not to touch the surface of the drum. 5 Reinstall the toner cartridge, and then lock the lever. NOTE: If your machine automatically recognises the replaced cartridge, you can skip steps 6 and 7. 6 Close the front cover and the side cover. The LCD displays “NEW DRUM? 1.YES 2.NO”. 7 Select “YES” by pressing 1. The machine returns to Standby mode.
SCX-5115 users should press Menu then press “MAINTENANCE” appears on the top line. or until 2 Use or until “NEW DRUM” appears on the bottom line of the display, and press Mode/Enter (Enter on SCX5115). 3 “NEW DRUM UNIT?” appears on the top line and “1.YES 2.NO” appears on the bottom line. Press 1 to select “1.YES.” NOTE: If you do not reset the counter, “DRUM WARNING” or “DRUM ENPTY” may appear before the current drum cartridge’s time is up.
MEMO 7.
8 TROUBLESHOOTING This chapter gives helpful information for what to do if you encounter an error.
Document Jams If a document jams while it is feeding through the ADF, “DOCUMENT JAM” appears on the display. Details for clearing the three types of document misfeeds are given below. Input Misfeed 1 Open the ADF top cover. 2 Pull the document gently to the right and out of the ADF. 3 Close the ADF top cover. Then place the documents back into the ADF. NOTE: To prevent document jams, use the document scanner glass for thick, thin or mixed documents. 8.
Exit Misfeed 1 Open the document cover and turn the release knob to remove the misfed documents from the exit area. 2 Close the document cover. Then place the documents back into the ADF. Roller Misfeed 1 Open the document cover. 2 Turn the release knob so that you can easily seize the misfed document, and remove the document from the ADF or the feed area by carefully pulling it rightwards using both hands. 3 Close the document cover. Then place the documents back into the ADF. TROUBLESHOOTING 8.
Paper Jams If paper jams occur, “PAPER JAM” appears on the display. Follow the steps below to clear the jam. To avoid tearing the paper, pull the jammed paper out gently and slowly. Paper Feed Area If the paper jammed in the feed area, “PAPER JAM0” appears in the display. 1 Pull the paper Tray open. After you pull it out completely, lift the front part of the Tray slightly up to release the Tray from the machine. 2 Remove the jammed paper by gently pulling it straight out.
If there is any resistance, and the paper does not move immediately when you pull, stop pulling. Then: 3 Pull the release lever to open the side cover. NOTE: Do not touch the shiny drum cartridge surface. Scratches or smudges will result in poor copy quality. 4 Carefully remove the misfed paper in the direction shown. 5 Close the cover and insert the paper Tray. Lower the rear part of the Tray to align the rear edge to the corresponding slot of the machine, then insert it completely.
Fuser Area If the paper jammed in the fuser area, “PAPER JAM 1” appears on the display: NOTE: The fuser area is hot. Take care when removing paper from the machine. 1 Lift the release lever to open the side cover. 2 Pull down on the fuser lever as shown below. This will release pressure on the paper. If paper is not seen in this area, skip to the Exit Area. NOTE: Do not pull paper up through the fusing unit. Unfused toner may adhere in the area, resulting in smudged copies.
4 Push the fuser lever up, and then close the side cover. Paper Exit Area If the paper jammed in the exit area, “PAPER JAM 2” appears on the display. 1 Press the release lever to open the side cover. 2 Open the front cover. 8 TROUBLESHOOTING 8.
3 Pull down on the fuser lever. This will release pressure on the paper. 4 Turn the Jam Remove Lever in the direction of the arrow to move the paper to the exit area, then gently pull the paper out through the exit area. 5 Push the fuser lever up. 8.
6 Turn the Jam Remove Lever back to the original position. 7 Close the front cover 1 and the side cover 2 . 2 1 Duplex Jam If paper jam occurs in the duplexer, “DUPLEX JAM” appears on the display. 1 Press the release lever to open the side cover. 8 2 Remove the jammed paper. Then close the side cover. TROUBLESHOOTING 8.
Multi-Purpose Tray Jam “BYPASS JAM” appears on the display when you try to print using the Multi-Purpose Tray and the machine does not detect paper due to no paper or improper paper loading. “BYPASS JAM” also may occur when the paper is not properly fed into the machine through the Multi-Purpose Tray. In that case, pull the paper out of the machine. 8.
LCD Error Messages Display Meaning Solution BYPASS JAM The machine detects no feeding from the MultiPurpose Tray. Load paper in the Multi-Purpose Tray. DOCUMENT JAM The loaded document has jammed in the ADF. Clear the document jam. See page 8.2. DOOR OPEN The side cover is not securely latched. Close the side cover until it locks into place. DRUM WARNING The drum cartridge is near the end of its life. You should have a replacement cartridge in stock.
Display Meaning Solution The memory is full. Either delete unnecessary documents, retransmit after more memory becomes available, or split the transmission into more than one operation. The remote fax machine has not answered after several redial attempts. Try again. Make sure the remote machine is operational. The remote fax machine you want to poll is not ready to respond to your poll.
Display Meaning Solution TONER EMPTY The toner cartridge has run out. The machine stops. Replace with a new toner cartridge. See page 7.3. TONER LOW The toner is almost empty. Take out the toner cartridge and gently shake it. By doing this, you can temporarily re-establish printing operations. Solving Problems The following chart lists some conditions that may occur and the recommended solutions. Follow the suggested solutions until the problem is corrected.
Condition Copy image is skewed. Suggested solutions Ensure that original is positioned correctly on document glass. Check that the copy paper is loaded correctly. Blank copies. Image rubs off the copy easily. Ensure that the original is face down on the document glass or face up in the ADF. Replace the paper in the Tray with paper from a new package. In high humidity areas do not leave paper in the machine for extended periods of time. Fan the stack of paper, then turn it over in the Tray.
Printing Problem Solution Chart Condition Probable cause The IEEE-1284 parallel cable or USB cable is not connected properly. Your machine does not print. Your machine does not print. (continued) Half of the page is blank. The IEEE-1284 parallel cable or USB cable is defective. Suggested solutions Check the cable connection. Check the cable with a computer and printer that work. If printing is still not possible, replace the cable. The port setting is incorrect.
Condition Probable cause Suggested solutions Change the USB mode to “SLOW.” To do so, take the following steps: 1. Press Menu/Exit then System Setup from the onetouch dial keypad. SCX-5115 users should press Menu then Enter. When printing using the USB connection, an error occurs repeatedly. When the USB mode is set to “FAST” some PC users may experience poor USB communication. 2. Use or until “USB MODE” appears on the top line of the display. The current setting appears on the bottom line. 3.
Condition Probable cause Suggested solutions There is a paper quality problem. Use only paper that meets the specifications required by the machine. Toner may be unevenly distributed. Remove the toner cartridge and shake it gently to evenly distribute the toner. Then reinstall the toner cartridge. Black staining There is a paper quality problem. Use only paper that meets the specifications required by your machine. Character voids The paper may be too dry.
Fax Problem Solution Chart (Available in SCX-5315F only) Condition The machine is not working, there is no display and the buttons are not working. Suggested solutions Unplug the power cord and plug it in again. Check that your socket is Live. Check that the phone line is connected properly. No dial tone The numbers stored in the memory do not dial correctly. The document does not feed into the machine. Check that the phone socket on the wall is working by plugging in another phone.
Condition Suggested solutions The fax machine sending you the fax may be faulty. The incoming fax has blank spaces or you received a poor-quality copy. The fax machine sending you a fax may have a dirty document glass. Clean the document glass, referring to page 7.2. A noisy phone line can cause line errors. Check your machine by making a copy. The toner cartridge may be empty. Replace the toner cartridge, referring to page 7.3. Some of the words are stretched on the incoming fax.
NOTE 8.
A INSTALLING A NETWORK OPTION You can connect your machine to your network by installing an optional network interface card.
Installing a Network Interface Card To install an optional network interface card, take the following steps: CAUTIONS: • DISCONNECT THE POWER CORD. Never remove the control board while the printer is plugged in. To avoid the possibility of an electrical shock, always disconnect the power cord when installing or removing ANY printer options. • DISCHARGE STATIC ELECTRICITY. The control board and the interface card are sensitive to static electricity.
4 Pull the control board cover slightly towards you and slide it to the left. Remove the cover from the machine. 5 Remove the one screw from the port cover. A 6 Remove the port cover by using your finger or a screw driver from the machine. INSTALLING A NETWORK OPTION A.
7 Remove the plates covering the network port and LED slots from the port cover. 8 Insert the two teeth at the bottom of the port cover into the slots on the port panel and replace the cover, as shown. Fasten the screw removed in Step 5 to secure the cover. 9 Insert the network interface card, ensuring that the network cable connector and LEDs on the card align with the port and LED slots. A.
10 Align the connector of the network interface card with the network card port on the control board and press the card until it is securely seated on the board. 11 Insert the teeth at the bottom of the control board cover into the corresponding slots on your machine. A 12 Slide the cover to the right and align the connectors on top of the cover with those on the machine. Fasten the six screws to secure the cover. INSTALLING A NETWORK OPTION A.
13 Plug one end of the 10/100 Base-TX network cable into the network interface connector and the other end into the network connection. 14 Plug all of the cables and the power cord you removed in Step 2. 15 Turn your machine on. Configuring Network Parameters To use your machine as a network printer, you need to set up the desired network protocols on the machine. Setting protocols can be accomplished by using the supplied network programme. Please refer to SyncThru User’s Guide.
Supported Operating Systems Item • • • • • Requirements Network Interface 10/100 Base-TX Network Operating System • Novell NetWare 3.x, 4.x, 5.x • Windows 95/98/Me/XP, NT 4.0/2000 • Unix AT&T, BSD4.3, HP-UX, SUN OS, SOLARIS, SCO • Linux RedHat 6.
Configuring TCP/IP Your printer can be set up on a variety of TCP/IP networks. There are two ways that your printer can be assigned a TCP/IP address, depending on your network: • Static Addressing: TCP/IP address is assigned manually by the system administrator. • Dynamic Addressing BOOTP/DHCP (default): TCP/IP address is assigned automatically by the server.
10 Enter a number between 0 and 255 for each byte and press Mode/Enter (Enter for SCX-5115). You can move between each byte by pressing or . 11 Repeat steps 6 through 8 to configure the other TCP/IP parameters, such as subnet mask and gateway. 12 When you are finished, press Stop/Clear. Dynamic Addressing (BOOTP/DHCP) To allow the server to automatically assign the TCP/IP address, take the following steps: 1 Press Menu/Exit and then System Setup on the onetouch dial keypad.
Configuring Netware On IPX/SPX protocol networks (for example, Novell NetWare), the format of network communication frames must be specified on the printer. In most cases, you can keep the default setting on “AUTO.” However, you can manually set the frame type format if required. • AUTO (default): Automatically senses and limits the frame type to the first one detected. • IEEE802.3: Limits the frame type to IPX over IEEE 802.3 frames. All others are discarded.
Restoring the Network Configuration You can return the network configuration to its default settings. 1 Press Menu/Exit and then System Setup on the onetouch dial keypad. SCX-5115 users should press Menu and then Enter. 2 Press or to display “NETWORK SETUP” on the top line. 3 Press or to display “SET DEFAULT” on the bottom line. 4 Press Mode/Enter (Enter for SCX-5115) to access the menu. 5 Press or to select “YES” and press Mode/Enter (Enter for SCX-5115). To cancel restoring, select “NO.
Configuring the Samsung Network Printer Port The supplied network programme installation CD-ROM contains Samsung Network Printer Port for using Windows networks. You can install the port with the network administration programme. Before installing the Samsung Network Printer port, you need to install the MFP driver on your system if it is not already installed. See page page 2.4.
Selecting the Samsung Network Printer Port To print to the Samsung Network Printer port, you need to select it in the printer driver. 1 From the Windows Start menu, selecting Settings and then Printer to open the Printer folder. In Windows XP, select Start and then Printers and Faxes. 2 Right-click on the Samsung SCX-5x15 Series PCL 6 printer icon and select Properties from the pop-up menu. 3 In Windows 95/98/Me, click the Details tab. In Windows NT4.0/2000/XP, click the Ports tab. 4 Click Add Port.
MEMO A.
B SPECIFICATIONS This chapter includes: • General Specifications • Scanner and Copy Specifications • Printer Specifications • Facsimile Specifications (SCX-5315F only)
General Specifications Item Description Printing method Laser scanning unit Scanning method Sheet-fed and Flat-bed CCD(charge coupled device) module Effective scanning width 8.2 inches (208 mm) Width ADF Document size 6.9 to 8.
Item Description LCD 16 Characters x 2 lines Toner cartridge life 6,000 pages @ IDC 5% coverage Drum cartridge life 15,000 pages @ IDC 5% coverage SET Dimension (WxDxH) 22.0 x 17.0 x 18.1 inches (560 x 433 x 459 mm) Net: 22.5 Kg (including consumables) Weight Gross: 26.5 Kg (including consumables, accessories and package) Package Weight Paper: 2.7 Kg Plastic: 0.
Printer Specifications Item Description Printing method Laser Scanning Unit + Electro Photographic Printing speed 15 pages per minute/A4 Print resolution 1200 dpi class Emulation language PCL 6 Facsimile Specifications (SCX-5315F only) Item Description Printing method Laser Scanning Unit Compatibility ITU-T Group 3, ECM Applicable line Public Switched Telephone Network(PSTN) or behind PABX Data coding MH/MR/MMR (ECM Mode) and JPEG for color fax transmission Modem speed 33600/28800/21600
Item Description User Memory 4 MB (320 pages) Halftone 256 levels Auto dialer One-touch dialling (registration for 40 numbers) Speed dialling (registration for 80 numbers) B SPECIFICATIONS B.
INDEX A F ADF load 4.3 fit to page print in copy mode 4.9 in print mode 5.8 B booklet print 5.8 C cartridge locking lever 1.16 clone in copy mode 4.10 in print mode 5.7 collation for copying 4.12 consumables 7.11 contrast for copying 4.7 copy size 4.8 D default printer 5.2 display language 1.20 document jam, clear 8.2 load in ADF 4.3 load on document glass 4.4 document glass clean 7.2 load 4.4 drum clean 7.8 install 1.14 replace 7.8 E error 8.11 extension phone, connect 1.
in print mode 5.5 paper source in copy mode 4.2 in print mode 5.5 paper type 3.2 parallel, connect 1.13 poster print 5.9 power save 1.22 printer driver install 2.4 uninstall 2.8 printer driver window 5.3 R resolution, print 5.6 S scan driver install 2.4 uninstall 2.8 scanner lock 1.2 SmarThru install 2.4 uninstall 2.10 software install 2.4 uninstall 2.12 T tel line, connect 1.11 toner cartridge install 1.14 life 7.3 replace 7.5 toner save 1.21 two-sided print in copy mode 4.11 in print mode 5.