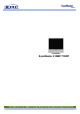
SyncMaster 510MP/710MP
Main Page Safety Instructions Notational Power Installation Cleaning Other Introduction Unpacking Front Rear Remote Control Setup Connecting Your Monitor Connecting to a Computer Connecting to Other Devices Installing the Monitor Driver Automatic Manual Installing a VESA Base Installing a VESA Base Adjusting Your LCD Monitor User Controls User control buttons Direct-Access Features On-Screen Display OSD Functions Screen Adjustment Animation Clips Troubleshooting Check before Calling for Service Problems an
Notational Power Installation Cleaning Other Failure to follow directions noted by this symbol could result in bodily harm or damage to equipment.
When not used for extended periods of time, set your PC to DPMS. If using a screen saver, set it to the active screen mode. Notational Power Do not use a damaged or loose plug. Installation Cleaning z This may cause an electric shock or fire. Other Do not pull the plug out by the wire nor touch the plug with wet hands. z This may cause an electric shock or fire. Use only a properly grounded plug and receptacle. z An improper ground may cause electric shock or equipment damage.
Put your monitor in a location with low humidity and a minimum of dust. z An electric shock or fire could result inside the monitor. Notational Power Installation Cleaning Do not drop the monitor when moving it. Other z This may cause damage to the product or human body. Place the monitor on a flat and stable surface. z The monitor can cause injury by falling. Set down the monitor carefully. z It could be damaged or broken. Do not place the monitor face down. z The TFT-LCD surface may be damaged.
When cleaning the monitor case or the surface of the TFT-LCD, wipe with a slightly moistened, soft fabric. Notational Power Installation Cleaning Do not spray water or detergent directly on the monitor. z This may cause damage, electric shock or a fire. Other Use the recommended detergent with a smooth cloth. If the connector between the plug and the pin is dusty or dirty, clean it properly with a dry cloth. z A dirty connector can cause an electric shock or fire.
Do not remove cover (or back). No user serviceable parts inside. z z This may cause an electric shock or a fire. Refer servicing to qualified service personnel. Notational Power Installation Cleaning Other If your monitor does not operate normally - in particular, if there are any unusual sounds or smells coming from it - unplug it immediately and contact an authorized dealer or service. z This may cause an electric shock or fire.
Notational Power Installation Do not place water containers, chemical products or small metal objects on the monitor. z z This may cause malfunction, an electric shock or a fire. If a foreign substance enters the monitor, unplug the power cord and contact the Service Center. Cleaning Other Do not use or store inflammable substances near the monitor. z This may cause an explosion or fire. Never insert anything metallic into the monitor openings. z This may cause an electric shock, fire or injury.
Notational Power Keep a proper distance between your eyes and the monitor screen. z Installation Sitting too close to the monitor on a continuous basis may damage eyesight. Cleaning Other When moving the monitor, turn the power switch off and unplug the power cord. Make sure that all cables, including the antenna cable and cables connecting to other devices, are disconnected before moving the monitor. z Failure to disconnect a cable may damage it and lead to a fire or an electric shock.
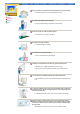
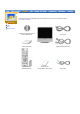
Please make sure the following items are included with your monitor. If any items are missing, contact your dealer.
For detailed information concerning the monitor functions, refer to User Controls under Adjusting Your Monitor. The monitor's front configuration may vary slightly depending on the monitor model. Unpacking Front Rear Remote Control 1. SOURCE 6. MENU 2. MagicBright™ 7. Power 3. AUTO / EXIT 8. Power indicator, 4. CH 5.
For detailed information concerning cable connections, refer to Connecting Cables under Setup. The monitor's rear configuration may vary slightly depending on the monitor model. Unpacking Front Rear Remote Control Remove the cover to connect the cables. (Pull the joining part to remove the cover.) A. EXT.(SCART) Connection Terminal EXT.(SCART) connection terminal. B. Power Connection Terminal This product may be used with 90 ~ 264. Connect the power source plug when all cables are connected. C.
Unpacking Front Rear Remote Control E. Video Connection Terminal 1. Headphone connection terminal 2. Audio R / L connection terminal 3. Video connection terminal 4.
For detailed information of the Remote Control Unit functions, refer to Adjusting Your Monitor > User Controls > User Control Buttons > Remote Control buttons. The remote control's configuration may vary slightly depending on the monitor model. Unpacking The Remote control may function within a range of 0.23 to 33 feet (7cm to 10m) and 30 degrees to the left and right of the monitor's Remote Control Reception sensor. Front Rear Button Names | Replacing Batteries | Usage Remote Control 1.
Connecting to a Computer Connecting to other devices Connecting Your Monitor Installing the Monitor Driver Installing a VESA base Turn on your computer and monitor. If your monitor displays an image, installation is complete. The configuration at the back of the monitor may vary from product to product. 1. Connecting to a Computer 1. Connect the power cord for your monitor to the power port on the back of the monitor. Plug the power cord for the monitor into a nearby outlet. 2.
Connecting to a Computer Connecting to other devices Connecting Your Monitor Installing the Monitor Driver Installing a VESA base This monitor allows the user to connect it to such input devices as a DVD player, a VCR or camcorder, or a DTV or TV without disconnecting the PC. For detailed information on connecting AV input devices, refer to User Controls under Adjusting Your Monitor. The configuration at the back of the monitor may vary from product to product.
Connecting Your Monitor Installing the Monitor Driver Installing a VESA base 2. Connecting TV You may view television programs on the monitor if it is connected to an antenna or CATV cable without installing any separate TV reception hardware or software on your computer. 1. Connect the CATV or antenna coaxial cable to the Antenna terminal on the rear of the monitor. You need to use a coaxial antenna cable. 2. Turn on the monitor. 3.
Connecting Your Monitor Installing the Monitor Driver Installing a VESA base 4. Connecting to a Macintosh 1. Connect the power cord for your monitor to the power port on the back of the monitor. Plug the power cord for the monitor into a nearby outlet. 2. Connect the signal cable to the D-SUB port on the Macintosh computer. 3. For older model Macintoshes, you need to adjust the resolution control DIP switch on the Macintosh adapter (optional) referring to the switch configuration table shown on its rear.
Automatic Manual Connecting Your Monitor Installing the Monitor Driver Installing a VESA base When prompted by the operating system for the monitor driver, insert the CD-ROM included with this monitor. Driver installation is slightly different from one operating system to another. Follow the directions as appropriate for the operating system you have. Prepare a blank disk and download the driver program file at the Internet web site shown here. z Internet web site : http://www.samsung-monitor.
2. Windows XP/2000 Connecting Your Monitor Installing the Monitor Driver Installing a VESA base Refer to "Installing the Monitor Driver and User Manual" CD-ROM supplied with the monitor. When inserted into the computer CD drive, the CD-ROM boots up automatically. If it fails to boot up automatically, click monsetup.exe twice in the CD-ROM drive folder of Windows Explorer. 1. Insert CD into the CD-ROM driver. 2. Click "Windows XP/2000 Driver". 3.
Automatic Manual Connecting Your Monitor Installing the Monitor Driver Installing a VESA base When prompted by the operating system for the monitor driver, insert the CD-ROM included with this monitor. Driver installation is slightly different from one operating system to another. Follow the directions as appropriate for the operating system you have. Prepare a blank disk and download the driver program file at the Internet web site shown here. z Internet web site : http://www.samsung-monitor.
5. Click "Update Driver.." and select "Install from a list or.." then click "Next" button. 6. Select "Don't search ,I will.." then click "Next" and then click "Have disk". 7. Click the "Browse" button then choose A:(D:\Driver)and choose your monitor model in the model list and click the "Next" button. 8. If you can see following "Message" window, then click the "Continue Anyway" button. Then click "OK" button.
This monitor driver is under a certified MS logo. This installation will not damage your system. The certified driver will be posted on Samsung Monitor Homepage http://www.samsung-monitor.com/ 9. Click the "Close" button then click "OK" button continually. 10. Monitor driver installation is completed. 2. Microsoft® Windows® 2000 Operating System * When you can see "Digital Signature Not Found" on your monitor, follow these steps. 1. Choose "OK" button on the "Insert disk" window. 2.
5. Click "Driver" and then click on "Update Driver.." then click on the "Next" button. 6. Choose "Display a list of the known drivers for this device so that I can choose a specific driver" then click "Next" and then click "Have disk". 7. Click the "Browse" button then choose A:(D:\Driver). 8. Click the "Open" button, then click "OK" button. 9. Choose your monitor model and click the "Next" button then click "Next" button. 10. Click the "Finish" button then the "Close" button.
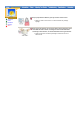
Fold the monitor base Installing a VESA base Connecting Your Monitor Installing the Monitor Driver Installing a VESA base The monitor may be reclined from 0 to 90 degrees. When fully folded (reclined), the base becomes a handy holder for moving the monitor around. Reclining the Monitor | Folding Base 1. Reclining Monitor 2. Folding Base You may install a VESA base when the monitor base is fully folded.
Fold the monitor base Installing a VESA base Connecting Your Monitor Installing the Monitor Driver Installing a VESA base The monitor supports VESA mounting standard for use with various VESA mounting devices. This monitor accepts a 75mm x 75mm VESA-compliant mounting interface pad. You need to fold the monitor base before installing a VESA base. Align the four bolt holes the base with the four bolts on the monitor base with the holes on the VESA base and then fasten supplied.
User control buttons Direct-Access Features User Controls On-Screen Display The control button configuration may vary slightly depending on the monitor model. Control Buttons | Remote Control Buttons | Monitor Buttons | For more information on the screen adjustment functions, refer to On-Screen Display. 1. SOURCE Every time you push the button, selects the PC, Video source. Performs the same function as the ENTER button on the remote while the OSD is active. 2.
| Remote Control Buttons | For more information on the screen adjustment functions, refer to On-Screen Display. 1. POWER User Controls On-Screen Display 2. Channel 3. -/-4. AUTO / PRE-CH 5. MUTE 6. + VOL 7. CH 8. SOURCE 9. MENU 10. MagicBright™ 11. INFO 12. EXIT 13. ENTER 14. Up-Down Left-Right Buttons 15. TTX/MIX 16. SLEEP 17. P.MODE 1. POWER Use this button to turn the monitor on and off. 2. CHANNEL Selects TV channels in the TV mode. 3.
User Controls On-Screen Display 7. CH In TV mode, selects TV channels. For more information, refer to Direct-Access Features > Channel. 8. SOURCE Press to display all of the available video sources. 9. MENU Use this button to open the on-screen menu, activate a highlighted menu item and exits from the menu screen. 10. MagicBright™ PC : MagicBright™ is a new feature providing the optimum viewing environment depending on the contents of the image you are watching.
User control buttons Direct-Access Features User Controls On-Screen Display Direct-Access Features let you display Monitor Adjustment Menu by simply pressing Auto button once. Or they are used to adjust monitor functions. You need to activate functions other than Auto Adjustment only when Auto-Access Features are off. Auto Adjustment | Volume | Channel | MagicBright™ 1.
3. Channel User Controls On-Screen Display When OSD is not on the screen, push the button to select channel number. 1. Push the 2. Push the or button to decrease the channel number. button to increase the channel number. This function is available in TV mode only. 4. MagicBright™ MagicBright™ is a new feature providing optimum viewing environment depending on the contents of the image you are watching. Currently three different modes are available: Internet, Entertain, text and Custom.
OSD Functions Screen Adjustment Animation Clips User Controls On-Screen Display Input | Picture | Channel | Setup 1. Input For detailed information on Screen Adjustment in the Input Control, refer to the Input Control Adjustment Animation Clips. OSD Description Source List Use to select PC, TV or other external input source connected to the Monitor. Use to select the screen of your choice. • PC • TV • EXT.
OSD Description MagicBright™ MagicBright™ is a new feature providing the optimum viewing environment depending on the contents of the image you are watching. Currently four different modes are available: Text, Internet, Entertain and Custom. Each mode has its own pre-configured brightness value. You can easily select one of four settings by simply pressing the MagicBright™ control button. 1) Entertain : High Brightness For watching motion pictures such as a DVD or VCD.
TV / EXT. / AV / S-Video For detailed information on Screen Adjustment in the Picture Control, refer to the Picture Control Adjustment Animation Clips. OSD Description Mode The Monitor has four automatic picture settings ("Custom", "Dynamic", "Standard", and "Movie") that are preset at the factory. You can activate either Custom, Dynamic, Standard, or Movie. You can select "Custom" which automatically recalls your personalized picture settings.
4. Setup For detailed information on Screen Adjustment in the Setup Control, refer to the Setup Control Adjustment Animation Clips. OSD Description Sleep Timer : Use to set the Monitor to turn off automatically a set number of minutes. (Off, 30 min, 60 min, 90 min, 120 min, 150 min, 180 min) Language You can choose one of 6 languages. • English, Deutsch, Frençais, Nederlansd, Español, Italiano, Sverige, Português Note : The language chosen affects only the language of the OSD.
Check the following items yourself before calling for service. Contact the service center for problems that you cannot solve by yourself. Check before calling for service Problems and Solutions Q&A Self-Test Feature Check | Video mode not supported | Not Optimum Mode | Display Adapter Driver | Maintenance and Cleaning | Symptoms & Recommended Actions 1. Self-Test Feature Check Your monitor provides a self test feature that allows you to check whether your monitor is functioning properly. 1.
3. Not Optimum Mode Check before calling for service Problems and Solutions Q&A 15", 1280 X 1024 @ 60Hz~75Hz 17", 1600 X 1200 @ 60Hz~75Hz When the resolution is set to any of the above 2 unsupported modes, the "Not optimum mode" message is displayed on the screen for 3 seconds . If this message is diaplayed, the monitor screen is not in its optimum status and the Auto Adjustment function may not work as normal. See the Preset Timing mode to set to the optimum resolution. 4.
Check before calling for service Problems and Solutions Q&A 6. Symptoms and Recommended Actions A monitor recreates visual signals received from the PC. Therefore, if there is trouble with the PC or the video card, this can cause the monitor to become blank, have poor coloring, noise, Video mode not supported, etc. In this case, first check the source of the problem, and then contact a service center or your dealer. 1. Check if the power cord and the cable are properly connected to the computer. 2.
The following table lists possible problems and their solutions. Before calling for service, check the information in this section to see if you can remedy any problems yourself. If you do need assistance, please call the phone number on the warranty card, the phone number on the Information section or contact your dealer. Check before calling for service Problems and Solutions Q&A Installation | Screen | Audio | Remote Control 1.
Check before calling for service Problems and Solutions Q&A The image is too light or too dark z Screen color is inconsistent. z Adjust the Brightness and Contrast. (Refer to the Brightness, Contrast) Adjust color using Custom under OSD Color Adjustment menu. Color image is distorted with dark shadows. White color is poor. Power Indicator blinks green. Screen is blank and power indicator light is steady green or blinks every 0.
Frequently asked questions are summarized here for your reference. Question Check before calling for service Problems and Solutions Q&A How can I change the frequency? Answer Frequency can be changed by reconfiguring the video card. Note that video card support can vary, depending on the version of the driver used. (Refer to the computer or the video card manual for details.) How can I adjust the resolution? Windows XP: Reset resolution by clicking Control Panel Theme Display Settings.
SyncMaster 510MP Design and specifications are subject to change without prior notice. General General PowerSaver Preset Timing Modes Model Name SyncMaster 510MP LCD Panel Size 15.0 inch (Diagonal) Display area 304.1 (H) x 228.1 (V) Pixel Pitch 0.297 (H) x 0.
SyncMaster 510MP Plug and Play Capability General PowerSaver Preset Timing Modes This monitor can be installed on any Plug & Play compatible system. Interaction of the monitor and computer systems will provide the best operating conditions and monitor settings. In most cases, monitor installation will proceed automatically, unless the user wishes to select alternate settings. Dot Acceptable TFT LCD panel manufactured by using advanced semiconductor technology with precision of 99.
SyncMaster 510MP General PowerSaver Preset Timing Modes This monitor has a built-in power management system called PowerSaver. This system saves energy by switching your monitor into a low-power mode when it has not been used for a certain amount of time. The monitor automatically returns to normal operation when you move the computer's mouse or press a key on the keyboard. For energy conservation, turn your monitor OFF when it is not needed, or when leaving it unattended for long periods.
SyncMaster 510MP If the signal transferred from the computer is the same as the following Preset Timing Modes, the screen will be adjusted automatically. However, if the signal differs, the screen may go blank while the power LED is on. Refer to the video card manual and adjust the screen as follows. General PowerSaver Preset Timing Modes Table 1. Preset Timing Modes Display Mode Horizontal Frequency (kHz) Vertical Frequency (Hz) Pixel Clock (MHz) Sync Polarity (H/V) MAC, 640 x 480 35.000 66.
SyncMaster 710MP Design and specifications are subject to change without prior notice. General General PowerSaver Preset Timing Modes Model Name SyncMaster 710MP LCD Panel Size 17.0 inch (Diagonal) Display area 337.92 (H) x 270.336 (V) Pixel Pitch 0.264 (H) x 0.264 (V) Type a-si TFT active matrix Synchronization Horizontal 31 ~ 81 kHz Vertical 56 ~ 75 Hz Display Color 16.194.
SyncMaster 710MP Plug and Play Capability General PowerSaver Preset Timing Modes This monitor can be installed on any Plug & Play compatible system. Interaction of the monitor and computer systems will provide the best operating conditions and monitor settings. In most cases, monitor installation will proceed automatically, unless the user wishes to select alternate settings. Dot Acceptable TFT LCD panel manufactured by using advanced semiconductor technology with precision of 99.
SyncMaster 710MP General PowerSaver Preset Timing Modes This monitor has a built-in power management system called PowerSaver. This system saves energy by switching your monitor into a low-power mode when it has not been used for a certain amount of time. The monitor automatically returns to normal operation when you move the computer's mouse or press a key on the keyboard. For energy conservation, turn your monitor OFF when it is not needed, or when leaving it unattended for long periods.
SyncMaster 710MP If the signal transferred from the computer is the same as the following Preset Timing Modes, the screen will be adjusted automatically. However, if the signal differs, the screen may go blank while the power LED is on. Refer to the video card manual and adjust the screen as follows. General PowerSaver Preset Timing Modes Table 1. Preset Timing Modes Display Mode Horizontal Frequency (kHz) Vertical Frequency (Hz) Pixel Clock (MHz) Sync Polarity (H/V) MAC, 640 x 480 35.000 66.
Service Center Terms Regulatory Natural Color For Better Display Authority U.S.A. : Samsung Computer Products Customer Service 400 Valley Road, Suite 201, Mt. Arlington, NJ 07856 Tel. : (973)601-6000, 1-800-SAMSUNG (1-800-726-7864) Fax. : (973)601-6001 http://www.samsungusa.com/monitor/ BRAZIL : Samsung Eletronica da Amazonia Ltda. R. Prof. Manoelito de Ornellas, 303, Terro B Chacara Sto. Antonio, CEP : 04719-040 Sao Paulo, SP SAC : 0800 124 421 http://www.samsung.com.
Service Center Terms Regulatory Natural Color For Better Display Authority United Kingdom : Samsung Electronics (UK) Ltd. Samsung House, 225 Hook Rise South Surbiton, Surrey KT6 7LD Tel. : (0208) 391 0168 Fax. : (0208) 397 9949 < European Service Center & National Service > Stafford Park 12 Telford, Shropshire, TF3 3BJ Tel. : (0870) 242 0303 Fax. : (01952) 292 033 http://samsungservice.co.
Service Center Terms Regulatory Natural Color For Better Display Authority NETHERLANDS/BELGIUM/LUXEMBOURG : Samsung Electronics Benelux B. V. Fleminglaan 12 2289 CP Rijiswijk, NEDERLANDS Service and informatielijn ; Belgium :0800-95214, http://www.samsung.be/ Netherlands : 0800-2295214, http://www.samsung.nl/ CHILE : SONDA S.A. Teatinos 550, Santiago Centro, Santiago, Chile Fono: 56-2-5605000 Fax: 56-2-5605353 56-2-800200211 http://www.sonda.com/ http://www.samsung.cl/ MEXICO : SAMSUNG ELECTRONICS MEXICO.
Sync Signal Service Center Terms Regulatory Natural Color For Better Display Authority Sync (Synchronized) Signals refer to the standard signals that are required to display desired colors on the monitor. They are divided into Vertical and Horizontal Sync Signals. These signals display normal color images by the set resolution and frequency. Types of Sync Signals Separate This is a scheme of transmitting individual vertical sync signals to the monitor.
S-Video Service Center Terms Short for "Super Video." S-Video allows up to 800 lines of horizontal resolution, enabling high-quality video. Regulatory VHF/UHF Natural Color VHF indicates TV channels 2 to 13, and UHF indicates channels 14 through 69. For Better Display Channel Fine Tuning Authority This feature allows the viewer to fine-tune the TV channel to obtain the best viewing conditions.
MPR II Compliance | European Notice (Europe only) | PCT Notice | VCCI | TCO'99-Ecological requirements for personal computers (TCO'99 applied model only) TCO'03-Ecological requirements for personal computers (TCO'03 applied model only) TCO'03 Recycling Information (TCO'03 applied model only) Service Center Terms Regulatory Natural Color MPR II Compliance This monitor complies with SWEDAC(MPR II) recommendations for reduced electric and magnetic fields.
and magnetic fields, energy consumption and electrical safety. Why do we have environmentally labelled computers? In many countries, environmental labelling has become an established method for encouraging the adaptation of goods and services to the environment. The main problem, as far as computers and other electronics equipment are concerned, is that environmentally harmful substances are used both in the products and during their manufacture.
TCO'03-Ecological requirements for personal computers (TCO'03 applied model only) Congratulations! The display you have just purchased carries the TCO'03 Displays label. This means that your display is designed, manufactured and tested according to some of the strictest quality and environmental requirements in the world. This makes for a high performance product, designed with the user in focus that also minimizes the impact on our natural environment.
Natural Color Software Program Service Center Terms Regulatory Natural Color For Better Display Authority One of the recent problems in using a computer is that the color of the images printed out by a printer or other images scanned by a scanner or a digital camera are not the same as those shown on the monitor. The Natural Color S/W is the very solution for this problem.
SyncMaster 510MP For Better Display Service 1. Adjust computer resolution and screen injection rate (refresh rate) in control panel of computer as described below to enjoy the best quality of picture. You can have an uneven quality of picture in the screen if the best quality of picture is not provided in TFT-LCD. Terms Regulatory Natural Color For Better Display Authority { { Resolution: 1024 x 768 Vertical frequency (refresh rate): 60 Hz 2.
SyncMaster 710MP For Better Display Service 1. Adjust computer resolution and screen injection rate (refresh rate) in control panel of computer as described below to enjoy the best quality of picture. You can have an uneven quality of picture in the screen if the best quality of picture is not provided in TFT-LCD. Terms Regulatory Natural Color For Better Display Authority { { Resolution: 1280 x 1024 Vertical frequency (refresh rate): 60 Hz 2.
Information in this document is subject to change without notice. © 2003 Samsung Electronics Co., Ltd. All rights reserved. Service Center Terms Regulatory Natural Color For Better Display Authority Reproduction in any manner whatsoever without the written permission of Samsung Electronics Co., Ltd. is strictly forbidden. Samsung Electronics Co., Ltd.