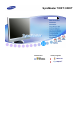
! ! ! ! SyncMaster 720XT/ 920XT Install drivers Install programs
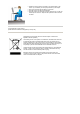
Notation Failure to follow directions noted by this symbol could result in bodily harm or damage to the equipment. Prohibited Important to read and understand at all times Do not disassemble Disconnect the plug from the outlet Do not touch Ground to prevent an electric shock Power When not used for extended period of time, set your computer to DPMS. If using a screen saver, set it to active screen mode. The images here are for reference only, and are not applicable in all cases (or countries).
Do not use a damaged or loose plug. This may cause electric shock or fire. Do not pull the plug out by the wire nor touch the plug with wet hands. This may cause electric shock or fire. Use only a properly grounded plug and receptacle. An improper ground may cause electric shock or equipment damage. (Class l Equipment only.) Insert the power plug firmly so that it does not come loose. A bad connection may cause fire.
This may cause an electric shock or fire. Installation Be sure to contact an authorized Service Center when installing your set in a location with heavy dust, high or low temperatures, high humidity, and chemical substances, or where it will be operated for 24 hours continuously such as an airport, train station or etc. Failure to do so may cause serious damage to your set. Place your monitor in a location with low humidity and a minimum of dust.
Keep any heating devices away from the power cable. A melted coating may cause electric shock or fire. Do not install the product in places with poor ventilation, for instance, a bookshelf, closet, etc. Any increase in the internal temperature may cause fire. Put down the monitor carefully. Failing to do so may damage the monitor. Do not place the monitor face down. This may damage the TFT-LCD surface. The installation of the bracket must be done by a qualified professional.
Cleaning and Using When cleaning the monitor case or the surface of the TFT-LCD screen, wipe with a slightly moistened, soft fabric. Do not spray water or detergent directly onto the monitor. This may cause damage, electric shock or fire. Use the recommended detergent with a smooth cloth. If the connector between the plug and the pin is dusty or dirty, clean it properly using a dry cloth. A dirty connector may cause electric shock or fire. Make sure to unplug the power cord before cleaning the product.
If your monitor does not operate normally - in particular, if there is any unusual sound or smell coming from the monitor - unplug it immediately and contact an authorized dealer or the Service Center. This may cause electric shock or fire. Keep the product away from places exposed to oil, smoke or moisture; do not install inside a vehicle. This may cause a malfunction, electric shock or fire. Especially avoid operating the monitor near water or outdoors where the monitor could be exposed to snow or rain.
This may cause a malfunction, electric shock or fire. If a foreign substance enters the monitor, unplug the power cord and contact the Service Center. Keep the product away from combustible chemical sprays or inflammable substances. This may cause an explosion or fire. Never insert anything metallic into the monitor openings. This may cause electric shock, fire or injury.
Do not install the product on an unstable, uneven surface or a location prone to vibrations. Dropping the product may cause damage to the product or the person carrying it. Using the product in a location prone to vibrations may shorten the lifetime of the product or may cause the product to catch fire. When moving the monitor, turn off and unplug the power cord. Make sure that all cables, including the antenna cable and cables connected to other devices, are disconnected before moving the monitor.
z z z z Adjust the monitor angle so that there is no reflected light on the screen.Try to maintain your arms perpendicular to your armpits. Keep your arms level with the back of your hands. Keep the angle of the elbow perpendicular. Keep the angle of the knees at more than 90 degree. Do not let your feet fall up from the floor. Adjust the arm position so that it is below the heart.
Features What is a network monitor? A network monitor can be used for the same purposes as a common monitor. It also provides the functionalities of most computers, such as an Internet connection, creating documents, editing images, via a connection to the host PC over the LAN. In addition, it allows you to connect an external device (DSC, MP3, external storage media) to the USB port and play music, movies and games. It is a new concept monitor.
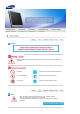
Package Contents Please make sure the following items are included with your monitor. If any items are missing, contact your dealer. Contact a local dealer to buy optional items.
MENU button [ ] Opens the OSD menu. Also use to exit the OSD menu or return to the previous menu. MagicBright™ button [ ] MagicBright™ is a new feature providing optimum viewing environment depending on the contents of the image you are watching. Currently six different modes are available : Custom, Text, Internet, Game, Sport and Movie. Each mode has its own pre-configured brightness value. You can easily select one of six settings by simply pressing MagicBright™ control button.
/ SOURCE button Push the 'SOURCE', then selects the video signal while the OSD is off. (When the SOURCE button is pressed to change the input mode, a message appears in the upper left of the screen displaying the current mode -- Analog or MagicNet input signal.) AUTO button Use this button for auto adjustment. >> Click here to see an animation clip Power button [ ] Use this button for turn the monitor on and off. Be careful as pressing the Power button in client mode will shut down Windows XPe.
Earphone jack [ ] Headphone connection terminal. The Microphone connection terminal (MIC) Connect a microphone to the MIC terminal. USB (USB Connection Terminal) Connect USB devices such as a mouse, keyboard and external storage devices (DSC, MP3, external storage, etc.). LAN (LAN Connection Terminal) Connect when using it as a monitor. AUDIO IN Connect the audio cable for your monitor to the audio port on the back of your computer.
Connecting Cables Connect to the host PC using a LAN cable Host PC Hub LAN Cable Monitor Connect the power cord to the power terminal at the back of the monitor. Connect the mouse and the keyboard to the USB ports. Connect the LAN port on the back of the monitor and the hub. Connect the hub and the LAN port of the host PC. The host PC must have an IP address. After connecting the LAN and setting the IP address, you can view the host PC screen on the monitor.
Connecting Cables (When used as a normal monitor) Connect the power cord for your monitor to the power port on the back of the monitor. Plug the power cord for the monitor into a nearby outlet. Use appropriate connection for your computer. Using the D-sub (Analog) connector on the video card. - Connect the D-Sub Cable to the VGA IN port on the back of your monitor. [VGA IN] Using Macintosh - Connect the monitor and the Macintosh computer using the computer connection cable.
[VGA OUT] (The picture of the main monitor is displayed on the connected monitor.) Using the Stand Tilt angle You can tilt the monitor screen forward to adjust the angle to a particular angle. Swivel stand You can easily adjust the position of the monitor screen from right to left using the rotating stand. Rubber stubs are attached at the bottom of the monitor to help fix it to the installation location.
Monitor Mounting interface pad ( Sold separately ) Turn off your monitor and unplug its power cord. Lay the LCD monitor face-down on a flat surface with a cushion beneath it to protect the screen. Remove four screws and then remove the stand from the LCD monitor. Align the mounting interface pad with the holes in the rear cover mounting Pad and secure it with four screws that came with the arm-type base, wall mount hanger or other base.
What is XPe Client? An Microsoft Windows XP Embedded(XPe) client uses the Microsoft Windows XP Embedded operating system. When an XPe client is connected to a Citrix ICA server or another server that can provide the Microsoft RDP service, data for the keyboard, mouse, audio/video and display are transmitted through the network between the client and the server.
Windows XP Embedded Desktop User When a user logs in, the User Desktop appears, as shown in the figure below. The default icons that appear on the User Desktop are Citrix Program Neighborhood, Remote Desktop Connection and Internet Explorer. You can also run this connection from the Start menu. The audio volume icon, VNC server icon and system time are displayed on the User Taskbar. When logged on as a user, there are many restrictions that protect the system from incorrent user actions.
Programs - XPe Client is a client/server-based computing platform. On this platform, the client accesses the server each time it needs a program and it only receives the user interface screens from the server. Hence, various programs, such as ICA, RDP, and VNC, which are installed on a XPe Client, are used to help the client access the server and perform user tasks.
2. Type the connection name and the server name (IP address or DNS name). 3. Configure the degree of compression for the data to be sent and received, and the degree of reliability for sessions. 4. To login to the server automatically, enter your username, password and domain. If you do not enter them now, you will be prompted to enter them whenever you connect to the server.
5. You can specify the color and size of the window to be displayed. 6. If a connection succeeds, the server’s desktop appears on the client. In this step, you can make an application run automatically. 7. Click Finish to complete creating the new connection.
For more information on the ICA Client Program, visit the Citrix web site. The Remote Desktop Connection You can control a running terminal server or another computer (Windows 95 or later) remotely through a remote desktop connection. Remote Desktop - Windows XP Professional or Windows 2000/2003 Server must be installed on the computer to be controlled remotely. This computer is called a host. A remote computer running on an operating system later than Windows 95 is required.
Start a Remote Desktop Session on the Client Once you have enabled your host computer to allow remote connections and installed the client software on a Windows-based client computer, you are ready to start a Remote Desktop session. You must first establish a virtual private network connection or remote access service connection from your client computer to your host computer. 1. Click Start, point to Programs, and then click Remote Desktop Connection. Or double-click the Remote Desktop Connection icon.
- Display: The Remote Desktop Connection sends and receives compressed screen data. If you set the resolution and color quality to the high option, the speed may become slow. - Local Resource: Specify whether to use the hard disks and ports.
- Programs: Specify whether to display the Desktop or run an application whenever you are connected. The default is ‘Desktop’. - Experience: You can select your connection speed, and select and share environmental options.
4. Click Connect. The Log On to Windows dialog box appears. 5. In the “Log On to Windows” dialog box, type your username, password, and domain (if required), and then click OK. The Remote Desktop window will open and you will see the desktop settings, files, and programs that are on the host computer. For more information on Remote Desktop Connections, visit the Microsoft web site.
Internet Explorer A XPe Client includes Internet Explorer. This program is permitted for all users. For more information on Internet Explorer, visit the Microsoft website. Enhanced Write Filter Enhanced Write Filter (EWF) protects a flash volume from write access and consequently, preserves the durability of the flash device. EWF provides read and write access through a cache to the client instead of allowing direct access to a flash volume. If EWF is activated, data is not stored to the flash.
enabled. After restarting your computer, the configurations and file system information for the client are written to a cache. You can also perform this operation by entering “ewfmgr.exe c: enable” at the command prompt and restarting your computer. Disable disk write protection and restart your computer - This item is activated when the EWF is running. If this item is selected, the current states of the client (saved in a cache) are saved to a flash volume and the EWF is disabled.
The C drive is used for the system. If there is less than 3MB of free space available, the client OS cannot operate. Therefore, always ensure that there is a sufficient amount of free space available. EWF can help maintain available space by preventing the C drive being written to directly. D Drive If the size of the flash memory is larger than 1 GB, the D drive (that is, the flash memory) is used as temporary file storage.
The XPe Client provides a recovery function which allows you to revert to a backed up system when encountering a serious problem. You can back up an OS image which is working normally to USB memory or the PXE server.
Monitor Driver When prompted by the operating system for the monitor driver, insert the CD-ROM included with this monitor. Driver installation is slightly different from one operating system to another. Follow the directions appropriate for the operating system you have. Prepare a blank disk and download the driver program file at the Internet web site shown here. Internet web site :http://www.samsung.com/ (Worldwide) http://www.samsung.com/monitor (U.S.A) http://www.sec.co.kr/monitor (Korea) http://www.
This monitor driver is under certifying MS logo, and this installation doesn't damage your system. The certified driver will be posted on Samsung Monitor homepage http://www.samsung.com/ Monitor driver installation is completed. Installing the Monitor Driver (Manual) Windows Vista | Windows XP | Windows 2000 | Windows ME | Windows NT | Linux Microsoft® Windows Vista™ Operating System Insert your Manual CD into your CD-ROM drive. Click (Start) and "Control Panel".
Click "Properties" in the "Monitor" tab. If the "Properties" button is deactivated, it means the configuration for your monitor is completed. The monitor can be used as is. If the message “Windows needs…” is displayed, as shown in the figure below, click "Continue". This monitor driver is under certifying MS logo, and this installation doesn't damage your system. The certified driver will be posted on Samsung Monitor homepage http://www.samsung.com/ Click "Update Driver…" in the "Driver" tab.
Select the model that matches your monitor from the list of monitor models on the screen, and click "Next". Click "Close"→ "Close" → "OK" → "OK" on the following screens displayed in sequence. Microsoft® Windows® XP Operating System Insert CD into the CD-ROM drive. Click "Start" → "Control Panel" then click the "Appearance and Themes" icon.
Click "Display" icon and choose the "Settings" tab then click "Advanced...". Click the "Properties" button on the "Monitor" tab and select "Driver" tab. Click "Update Driver..." and select "Install from a list or..." then click "Next" button. Select "Don't search ,I will..." then click "Next" and then click "Have disk".
Click the "Browse" button then choose A:(D:\Driver) and choose your monitor model in the model list and click the "Next" button. If you can see following "Message" window, then click the "Continue Anyway" button. Then click "OK" button. This monitor driver is under certifying MS logo, and this installation doesn't damage your system. The certified driver will be posted on Samsung Monitor homepage http://www.samsung.com/ Click the "Close" button then click "OK" button continually.
Monitor driver installation is completed. Microsoft® Windows® 2000 Operating System When you can see "Digital Signature Not Found" on your monitor, follow these steps. Choose "OK" button on the "Insert disk" window. Click the "Browse" button on the "File Needed" window. Choose A:(D:\Driver) then click the "Open" button and then click "OK" button. How to install Click "Start" , "Setting" , "Control Panel". Double click the "Display" icon. Select the "Settings" tab and click "Advanced Properties" button.
then click "OK". Click "Apply" button if you see the screen working normally after clicking "Test". If the screen is not normal, change to a different mode (lower mode of resolution, colors or frequency). If there is no Mode at All Display Modes, select the level of resolution and vertical frequency by referring to the Preset Timing Modes in the user guide. Linux Operating System To execute X-Window, you need to make the X86Config file, which is a type of system setting file.
(If the drive where the CD is inserted is not D:\, enter the applicable drive.) How to delete the Natural Color software program Select "Setting/Control Panel" on the "Start" menu and then double-click "Add/Delete a program". Select Natural Color from the list and then click the "Add/Delete" button. Installation 1. 2. 3. 4. 5. 6. 7. 8. 9. 10. Insert the installation CD into the CD-ROM drive. Click the MagicTune™ installation file. Select installation Language, Click "Next".
Uninstall The MagicTune™ program can be removed only by using the "Add or Remove Programs" option of the Windows® Control Panel. Perform the following steps remove MagicTune™. 1. Go to [Task Tray] ' [Start] ' [Settings] and select [Control Panel] in the menu. If the program runs on Windows® XP, go to [Control Panel] in the [Start] menu. 2. Click the "Add or Remove Programs" icon in Control Panel. 3. In the "Add or Remove Programs" screen, scroll down to find "MagicTune™." Click on it to highlight it. 4.
Control Buttons [ ] Opens the OSD menu. Also use to exit the OSD menu or return to the previous menu. [ ] These buttons allow you to adjust items in the menu. [ ] Press this button to Activates a highlighted menu item. [AUTO] When the 'AUTO' button is pressed, the Auto Adjustment screen appears as shown in the animated screen on the center.
AUTO Menu Description When the 'AUTO' button is pressed, the Auto Adjustment screen appears as shown in the animated screen on the center. The values of fine, coarse and position are adjusted automatically. To make the automatic adjustment function sharper, execute the 'AUTO' function while the AUTO PATTERN is on. AUTO Available in analog Mode Only If auto adjustment does not work properly, press 'AUTO' button again to adjust picture with more accuracy.
MENU button Menu Description This is the function that locks the OSD in order to keep the current states of settings or prevent others from adjusting the current settings. Lock : Hold down the menu button for more than five (5) seconds to activate the OSD adjustment lock function. OSD Lock & Unlock Unlock : Hold down the menu button for more than five (5) seconds to deactivate the OSD adjustment lock function.
Menu MagicBright™ Description Push the MagicBright™ button to circle through available preconfigured modes. - Six different modes (Custom/Text/Internet/Game/Sport/Movie) Volume Menu Volume SOURCE Description When OSD is not on the screen, push [▲/ ] the button to adjust volume.
Menu Description SOURCE Selects the Video signal while the OSD is off.
Menu Brightness Description You can use the on-screen menus to change the brightness according to personal preference. MENU → Contrast Play/Stop → → , → MENU You can use the on-screen menus to change the contrast according to personal preference. ( Not available in MagicColor mode of Full and Intelligent.
MagicColor is a new technology that Samsung has exclusively developed to improve digital image and to display natural color more clearly without disturbing image quality. Off Demo Returns to the original mode. The screen before applying MagicColor appears on the right and the screen after applying MagicColor appears on the left. Full Displays not only vivid natural color but also more realistic natural skin color with clearness. Intelligent Displays vivid natural color with clearness.
( Not available in MagicColor mode of Full and Intelligent. ) Menu Coarse Description Removes noise such as vertical stripes. Coarse adjustment may move the screen image area. You may relocate it to the center using the horizontal control menu. Available in analog Mode Only MENU → , → → → , → MENU Removes noise such as horizontal stripes. If the noise persists even after fine tuning, repeat it after adjusting the frequency (clock speed).
Menu Description You can choose one of eight languages. Language The language chosen affects only the language of the OSD. It has no effect on any software running on the computer. MENU → H-Position , → MENU , → → , → → , → MENU , → → , → → , → MENU , → → , → → , → MENU The menu will be automatically turned off if no adjustments are made for a certain time period. You can set the amount of time the menu will wait before it is turned off.
Menu Image Reset Description Image parameters are replaced with the factory default values. MENU → Color Reset , → → → , → MENU Color parameters are replaced with the factory default values.
Information Shows a video source, display mode on the OSD screen.
Check List Before calling for service, check the information in this section to see if you can remedy any problems yourself. If you do need assistance, please call the phone number on the Information section or contact your dealer. Symptom Check List Solutions No images on the screen. I cannot turn on the monitor. Is the power cord connected properly? Check the power cord connection and supply. Can you see "Check Signal Cable" on the screen? Check the signal cable connection.
monitor blinking at 1 second intervals? If there is still no image, press the 'SOURCE' button. Then press any key on the keyboard again to activate the monitor and restore the image on the screen. I cannot see the On Screen Display. Have you locked the On Screen Display (OSD) Menu to prevent changes? Unlock the OSD by pressing the [ ] button for at least 5 seconds. The screen shows strange colors or just black and white.
Check when MagicTune™ does not function properly. MagicTune™ feature is found only on PC (VGA) with Window OS that supports Plug and Play. * To check whether your PC is available for MagicTune™ feature, follow the steps below (When Windows™ is XP); Control Panel → Performance and Maintenance → System → Hardware → Device Manager → Monitors → After deleting Plug and Play monitor, find 'Plug and Play monitor' by searching new Hardware. MagicTune™ is an additional software for the monitor.
memory to the USB port, but they do not work. The file list does not appear. 1) Check the files on the card. If only abnormal files (e.g. 0KByte, broken JPEG) exist, the files do not appear on the screen. 2) The time required to display is determined by the size of the file. Wait a moment. 3) Check if the format of the file is supported by the Client Monitor. If the extension of the file has been changed, the file will not be played. Check the following items if there is trouble with the monitor.
monitor with a soft cloth, using either a cleaning solution or plain water. Do not leave any remains of the detergent nor scratch the case. Do not allow any water to go inside the monitor. Self-Test Self-Test Feature Check | Warning Messages | Environment | Useful Tips Your monitor provides a self test feature that allows you to check whether your monitor is functioning properly. Self-Test Feature Check Turn off both your computer and the monitor. Unplug the video cable from the back of the computer.
A monitor recreates visual signals received from the computer. Therefore, if there is trouble with the computer or the video card, this can cause the monitor to become blank, have poor coloring, noise, Video mode not supported, etc. In this case, first check the source of the problem, and then contact the Service Center or your dealer.
Specifications General Model Name SyncMaster 720XT LCD Panel Size 17 " Diagonal (43 cm ) Display area 337.92 mm (H) x 270.336 mm (V) Pixel Pitch 0.264 mm (H) x 0.264 mm (V) Synchronization Horizontal 30 ~ 81 kHz Vertical 56 ~ 75 Hz Display Color 16.2 M Colors Resolution Optimum resolution 1280 x 1024@60 Hz Maximum resolution 1280 x 1024@75 Hz Input Signal, Terminated RGB Analog 0.7 Vp-p ± 5% TTL level (V high ≥ 2.0V, V low ≤ 0.
Power Consumption AC 100 - 240V~ (+/- 10%), 50/60Hz Signal Cable 15pin to 15pin D-sub cable, Detachable Dimensions (W x H x D) / Weight 370.0 x 342.3 x 69 mm / 14.6 x 13.5 x 2.7 inch (Without Stand) 370.0 x 404.3 x 200 mm / 14.6 x 15.9 x 7.9 inch (With Basic Stand), 6.45 Kg / 14.
Server Requirement Connect Client No CPU RAM Ethernet OS Minimum SPEC Just can load Server Program P3 400MHz 64Mbyte 100Mbps windows 2003 Server Recommend SPEC 1 P4 1.0GHz 256Mbyte 2~4 P4 2.4GHz 512Mbyte 100Mbps windows 2003 Server 5~7 P4 3.0GHz 1Gbyte 8~10 P4 3.2GHz 2Gbyte The content presented above is the result of testing a specific server. The information may change as the server may be different. For some products, the OS may not be supported.
Power Consumption Less than 70 W Less than 4 W Less than 4 W PowerSaver (When used as a Network monitor) This monitor has a built-in power management system called PowerSaver. This system saves energy by switching your monitor into a low-power mode when it has not been used for a certain amount of time. The monitor automatically returns to normal operation when you press a key on the keyboard.
VESA, 1280 x 1024 79.976 75.025 135.000 +/+ Horizontal Frequency The time to scan one line connecting the right edge to the left edge of the screen horizontally is called Horizontal Cycle and the inverse number of the Horizontal Cycle is called Horizontal Frequency. Unit : kHz Vertical Frequency Like a fluorescent lamp, the screen has to repeat the same image many times per second to display an image to the user. The frequency of this repetition is called Vertical Frequency or Refresh Rate.
Specifications General Model Name SyncMaster 920XT LCD Panel Size 19 inch(48cm) Display area 376.32mm(H) x 301.056mm(V) Pixel Pitch 0.294(H) x 0.294(V) Synchronization Horizontal 30 ~ 81 kHz Vertical 56 ~ 75Hz Display Color 16.7M Resolution Optimum resolution 1280x1024@60Hz Maximum resolution 1280x1024@75Hz Input Signal, Terminated RGB Analog 0.7 Vp-p ± 5% separate H/V sync, Composite, TTL level (V high ≥ 2.0V, V low ≤ 0.
Power Consumption AC 100 - 240V~ (+/- 10%), 50/60Hz Signal Cable 15pin-to-15pin D-sub cable, Detachable Dimensions (W x H x D) / Weight 416.6 X 375.2 X 74.7 mm / 16.4 x 14.8 x 2.9 inch (Without Stand) 416.6 X 420.9 X 200.0 mm / 16.4 x 16.6 x 7.9 inch (With Stand) / 6.9 Kg / 15.2 (lbs) VESA Mounting Interface 100 mm x 100 mm (For use with Specialty(Arm) Mounting hardware.
Server Requirement Connect Client No CPU RAM Ethernet OS Minimum SPEC Just can load Server Program P3 400MHz 64Mbyte 100Mbps windows 2003 Server Recommend SPEC 1 P4 1.0GHz 256Mbyte 2~4 P4 2.4GHz 512Mbyte 100Mbps windows 2003 Server 5~7 P4 3.0GHz 1Gbyte 8~10 P4 3.2GHz 2Gbyte The content presented above is the result of testing a specific server. The information may change as the server may be different. For some products, the OS may not be supported.
PowerSaver (When used as a Network monitor) This monitor has a built-in power management system called PowerSaver. This system saves energy by switching your monitor into a low-power mode when it has not been used for a certain amount of time. The monitor automatically returns to normal operation when you press a key on the keyboard. For energy conservation, turn your monitor OFF when it is not needed, or when leaving it unattended for long periods.
VESA, 1152 x 864 67.500 75.000 108.000 +/+ VESA, 1280 x 960 60.000 60.000 108.000 +/+ VESA, 1280 x 1024 63.981 60.020 108.000 +/+ VESA, 1280 x 1024 79.976 75.025 135.000 +/+ Horizontal Frequency The time to scan one line connecting the right edge to the left edge of the screen horizontally is called Horizontal Cycle and the inverse number of the Horizontal Cycle is called Horizontal Frequency.
Contact SAMSUNG WORLDWIDE If you have any questions or comments relating to Samsung products, please contact the SAMSUNG customer care center. North America U.S.A 1-800-SAMSUNG (7267864) http://www.samsung.com CANADA 1-800-SAMSUNG (7267864) http://www.samsung.com/ca MEXICO 01-800-SAMSUNG (7267864) http://www.samsung.com/mx ARGENTINE 0800-333-3733 http://www.samsung.com/ar BRAZIL 4004-0000 http://www.samsung.com/br CHILE 800-726-7864 (SAMSUNG) http://www.samsung.
VENEZUELA 0-800-100-5303 http://www.samsung.com/latin BELGIUM 02 201 2418 http://www.samsung.com/be CZECH REPUBLIC 844 000 844 http://www.samsung.com/cz DENMARK 70 70 19 70 http://www.samsung.com/dk FINLAND 030-6227 515 http://www.samsung.com/fi FRANCE 3260 SAMSUNG(7267864) (€ 0,15/min) http://www.samsung.com/fr GERMANY 01805 - 121213 (€ 0,14/Min) http://www.samsung.de HUNGARY 06-80-SAMSUNG (7267864) http://www.samsung.com/hu ITALIA 800 SAMSUNG (7267864) http://www.samsung.
CHINA 800-810-5858, 010- 6475 1880 http://www.samsung.com.cn HONG KONG 3698-4698 http://www.samsung.com/hk INDIA 3030 8282, 1800 1100 11 http://www.samsung.com/in INDONESIA 0800-112-8888 http://www.samsung.com/id JAPAN 0120-327-527 http://www.samsung.com/jp MALAYSIA 1800-88-9999 http://www.samsung.com/my PHILIPPINES 1800-10-SAMSUNG (7267864) http://www.samsung.com/ph SINGAPORE 1800-SAMSUNG (7267864) http://www.samsung.com/sg THAILAND 1800-29-3232, 02-689-3232 http://www.samsung.
Resolution The number of horizontal and vertical dots used to compose the screen image is called 'resolution'. This number shows the accuracy of the display. High resolution is good for performing multiple tasks as more image information can be shown on the screen. Example :If the resolution is 1280 x 1024 , this means the screen is composed of 1280 horizontal dots (horizontal resolution) and 1024 vertical lines (vertical resolution).
PRODUCT INFORMATION (Image Retention Free) LCD Monitors and TVs may have image retention when switching from one image to another especially after displaying a stationary image for a long time. This guide is to demonstrate correct usage of LCD products in order to protect them from Image retention. Warranty Warranty does not cover any damage caused by image retention. Burn-in is not covered by the warranty.
Ex) The best way to protect your monitor from Image retention is to set your PC or System to operate a Screen Saver program when you are not using it. Image retention may not occur when a LCD panel is operated under normal conditions. Normal conditions are defined as continuously changing video patterns. When the LCD panel is operated for a long time with a fixed pattern (-over 12 Hours-), there may be slight difference in voltage between electrodes that work the liquid crystal (LC) in a pixel.