SyncMaster 971P
Model SyncMaster 971P Notational Failure to follow directions noted by this symbol could result in bodily harm or damage to the equipment. Prohibited Important to read and understand at all times Do not disassemble Disconnect the plug from the outlet Do not touch Ground to prevent an electric shock Power When not used for an extended period of time, set your computer to DPMS. If using a screen saver, set it to active screen mode.
Do not use a damaged or loose plug. z This may cause electric shock or fire. Do not pull the plug out by the wire nor touch the plug with wet hands. z This may cause electric shock or fire. Use only a properly grounded plug and receptacle. z An improper ground may cause electric shock or equipment damage. Insert the power plug firmly so that it does not come loose. z A bad connection may cause fire.
Installation Be sure to contact an authorized Service Center, when installing your monitor in a location with heavy dust, high or low temperatures, high humidity, and exposed to chemical substances and where it operates for 24 hours such as at airports, train stations etc. Failure to do so may cause serious damage to your monitor. Place your monitor in a location with low humidity and a minimum of dust. z Failure to do so may cause electric shock or fire inside the monitor.
bookshelf, closet, etc. z Any increase in the internal temperature may cause fire. Put down the monitor carefully. z Failing to do so may damage the monitor. Do not place the monitor face down. z This may damage the TFT-LCD surface. The installation of the bracket must be done by a qualified professional. z z Installing the bracket by unqualified personnel may result in injury. Always use the mounting device specified in the owner's manual.
Use the recommended detergent with a smooth cloth. If the connector between the plug and the pin is dusty or dirty, clean it properly using a dry cloth. z A dirty connector may cause electric shock or fire. Make sure to unplug the power cord before cleaning the product. z Otherwise, this may cause electric shock or fire. Unplug the power cord from the power outlet and wipe the product using a soft, dry cloth.
the monitor could be exposed to snow or rain. If the monitor is dropped or the casing is damaged, turn the monitor off and unplug the power cord. Then contact a Service Center . z The monitor may malfunction, causing electric shock or fire. Disconnect the plug from the outlet during storms or lightning or if it is not used for a long period of time. z Failure to do so may cause electric shock or fire. Do not try to move the monitor by pulling only the wire or the signal cable.
Do not insert metal objects such as chopsticks, wire and tools or inflammable objects such as paper or matches into the vent, headphone port or AV ports or etc. z This may cause electric shock or fire. If an alien substances or water enters the product, turn the product off, unplug the power connector from the wall outlet and contact the Service Center. When viewing a fixed screen for an extended period of time, residual image or blurriness may appear.
z Otherwise, this may cause heat emission from the accumulated dirt or degraded insulation, causing electric shock or fire. Do not place your children's favorite toys or any other objects of interest on the product. z Children may try to climb on the product to retrieve an object. The product could fall, causing injury or even fatality. When lifting up or moving the monitor, do not lift the monitor upside down while holding only the stand.
Model SyncMaster 971P List of Features z z z z Magic Contrast: Implements a deep color contrast of 4000:1 ratio. Magic Speed: Provides a clear screen without afterimages with fast response speed of 6ms. Magic Stand: Provides a high availability to fit your environmental needs with a height adjustable stand (up to 60mm). Magic Rotation: Adjusts screen automatically to fit to monitor angle when it is changed with the Rotation function. Please make sure the following items are included with your monitor.
Manual Quick Setup Guide Warranty Card (Not available in all locations) User's Guide, Monitor Driver, Natural Color software, AutoRotation software 'DVI to D-SUB' Cable Power Cord DC-Adapter Cable USB Cable (A-B Type cable) Others Cleaning Cloth Sold separately DVI Cable Do not use other cables except the dedicated cables, such as DVI/D-Sub and DVI cables, for the product. To purchase DVI/D-Sub or DVI cable additionally, contact your local product distributor.
Customized Key [ ] You can customize key assignment for the Custom button according to your preferences. (Custom Key functionality) How to Adjust : MagicTune → Optional → Custom Key → MagicBright, MagicColor, Auto Setup, Source Select, Color Tone 1) MagicBright MagicBright is a new feature providing optimum viewing environment depending on the contents of the image you are watching. Currently seven different modes are available: Custom, Text, Internet, Game, Sport, Movie and Dynamic Contrast.
When you press the power button, the monitor is on/off. >>Click here to see an animation clip 2) Input Source When you press the power button, the input source may be changed to Analog or Digital, blinking once with blue lihgt. >>Click here to see an animation clip 3) Auto adjustment When you press the power button, the Auto Adjustment function is activate, blinking twice with blue light. (Analog only) >>Click here to see an animation clip The buttons to the right of the monitor are touch-sensitive buttons.
DVI : Connect the DVI terminal of your monitor to your computer using a DVI/D-Sub cable. DC 12V : Connect a power line to a direct current power supply and then plug it into the relevant power port. UP (USB upstream port): Connect the UP port of the monitor and the USB port of the computer with the USB cable. DOWN (USB downstream port): Connect the DOWN port of the USB monitor and a USB device with the USB cable. z z To use DOWN (Downstream Port), you have to connect the UP (Upstream Cable ) to the PC.
Model SyncMaster 971P Connecting the Monitor 1. Connect a power line to a direct current power supply and then plug it into the relevant power port. 2. Use a connection appropriate for your computer. 2-1. Using the D-Sub (analog) connector on the video card. Connect the DVI terminal of your monitor to the D-Sub terminal of your computer using a DVI/D-Sub cable. 2-2. Connected to a Macintosh. Connect the monitor to the Macintosh computer using the 'DVI to D-SUB' connection cable.
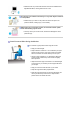
Rotating the monitor Rotating the monitor (When pivoting the monitor, rotation angle is displayed on screen of the monitor.) 0° 90° When rotating the screen, make sure to tilt the monitor 45 to 65 degrees so that it does not touch the floor. When tilting the screen backwards, do not tilt it more than 65 degrees. Installing the Monitor Driver (Automatic) When prompted by the operating system for the monitor driver, insert the CD-ROM included with this monitor.
4. If you can see following message window, then click the "Continue Anyway" button. Then click "OK" button. (Microsoft® Windows® XP Operating System) This monitor driver is under certifying MS logo, and this installation don't damage your system. The certified driver will be posted on Samsung Monitor homepage. http://www.samsung.com/. 5. Monitor driver installation is completed.
3. Click "Personalization" and then "Display Settings". 4. Click "Advanced Settings…". 5. Click "Properties" in the "Monitor" tab. If the "Properties" button is deactivated, it means the configuration for your monitor is completed. The monitor can be used as is. If the message “Windows needs…” is displayed, as shown in the figure below, click "Continue". This monitor driver is under certifying MS logo, and this installation doesn't damage your system.
7. Check the "Browse my computer for driver software" checkbox and click "Let me pick from a list of device drivers on my computer". 8. Click "Have Disk…" and select the folder (for example, D:\Drive) where the driver setup file is located, and click "OK". 9. Select the model that matches your monitor from the list of monitor models on the screen, and click "Next". 10. Click "Close"→ "Close" → "OK" → "OK" on the following screens displayed in sequence.
Microsoft® Windows® XP Operating System 1. Insert CD into the CD-ROM driver. 2. Click "Start" —> "Control Panel" then click the "Appearance and Themes" icon. 3. Click "Display" icon and choose the "Settings" tab then click "Advanced..". 4. Click the "Properties" button on the "Monitor" tab and select "Driver" tab.
5. Click "Update Driver.." and select "Install from a list or.." then click "Next" button. 6. Select "Don't search ,I will.." then click "Next" and then click "Have disk". 7. Click the "Browse" button then choose A:(D:\Driver) and choose your monitor model in the model list and click the "Next" button. 8. If you can see following message window, then click the "Continue Anyway" button. Then click "OK" button.
This monitor driver is under certifying MS logo, and this installation don't damage your system. The certified driver will be posted on Samsung Monitor homepage.http://www.samsung.com/ 9. Click the "Close" button then click "OK" button continually. 10. Monitor driver installation is completed. Microsoft® Windows® 2000 Operating System When you can see "Digital Signature Not Found" on your monitor, follow these steps. 1. Choose "OK" button on the "Insert disk" window. 2.
If you can see the "Digital Signature Not Found" window then click the "Yes"button. And click the "Finish" button then the "Close" button. Microsoft® Windows® Millennium Operating System 1. 2. 3. 4. 5. 6. 7. 8. 9. 10. Click "Start" , "Setting" , "Control Panel". Double click "Display" icon. Select the "Settings" tab and click "Advanced Properties" button. Select the "Monitor" tab. Click the "Change" button in the "Monitor Type" area. Choose "Specify the location of the driver".
One of the recent problems in using a computer is that the color of the images printed out by a printer or other images scanned by a scanner or a digital camera are not the same as those shown on the monitor. The Natural Color S/W is the very solution for this problem. It is a color administration system developed by Samsung Electronics in association with Korea Electronics & Telecommunications Research Institute (ETRI).
Model SyncMaster 971P Installation 1. 2. 3. 4. 5. 6. 7. 8. 9. 10. Insert the installation CD into the CD-ROM drive. Click the AutoRotation installation file. Select installation Language, Click "Next". When the Installation Shield Wizard window appears, click "Next." Select "I agree to the terms of the license agreement" to accept the terms of use. Choose a folder to install the AutoRotation program. Click "Install." The "Installation Status" window appears. Click "Finish.
or later. Hardware z z 32MB Memory above 60MB Hard disk space above * For more information, visit the MagicTune™ website. Installation Problems (MagicRotation) The installation of MagicRotation can be affected by such factors as the video card, motherboard and the network environment. See "Troubleshooting" if you have trouble during installation. Limitation 1. The "Display Driver" should be properly loaded for the MagicRotation to work properly.
Active Desktop component. * For more information, visit the MagicRotation website. * Windows® is registered trademark of Microsoft Corporation,Inc. Uninstall The AutoRotation program can be removed only by using the "Add or Remove Programs" option of the Windows® Control Panel. Perform the following steps remove AutoRotation. 1. Go to [Task Tray] ' [Start] ' [Settings] and select [Control Panel] in the menu. If the program runs on Windows® XP, go to [Control Panel] in the [Start] menu. 2.
In most cases even simple adjustments to Brightness, or Contrast require navigation of the multilevel, on-screen display (OSD) menus that are not easy to understand. Furthermore, there is no feedback to assist in correctly setting the controls of the monitor. MagicTune™ is a software utility that guides you through the tuning process with easy to understand instructions and back ground patterns designed for each monitor control.
Button Tab Definition OK Applies any changes made and exits MagicTune™ . Reset Restores the display settings to the factory settings. Picture Tab Definition Allows the user to adjust the screen settings to the desired values. Brightness Makes the entire screen brighter or darker. The detailed data of the images in the dark areas can be lost if the brightness is not adjusted to the proper level. Adjust the brightness for best viewing conditions.
The tone of the color can be changed. z z Warm2 - Warm1 - Cool 1 - Cool 2 - Cool 3 - Cool 4 - Cool 5 Cool 6 - Cool 7 Off ColorTone ColorTone mode will be different according to monitor models. Some monitor will only support Four modes( Warm, Normal, Cool, Custom) Color Control Adjusts of the monitor image color. You can change the monitor color to your desired color. z R- G - B The process through which the colors of your choice are optimized and maintained.
and darkest areas of the display. Zone Off Turn off the zone that you have captured. Reset Returns to the the default setting that vendor has set. z z z Depending on the monitor models Color Control, Sharpness, Contrast, ColorTone will not be adjustable in MagicColor mode of Full and Intelligent. MagicTune™ will be disappear if you excute MagicZone, and closing the MagicZone after adjusting, will show the MagicTune™ again.
z Image Setup z Coarse : Removes noise such as vertical stripes. Coarse adjustment may move the screen image area. You may relocate it to the center using the Horizontal Control menu. Auto Setup : Auto adjustment allows the monitor to self-adjust to the incoming video signal. The values of fine, coarse and position are adjusted automatically. Position Adjusts the screen location horizontally and vertically. Sharpness Changes the clearance of image.
Key MagicColor Auto Setup Set Customized Key to MagicColor. Set Customized Key to Auto Setup. Source Select Set Customized Key to Source Select ColorTone Set Customized Key to ColorTone Support Tab Definition Shows the Asset ID and the version number of the program, and allows you to use the Help feature. Visit the MagicTune™ website or click to open the Help files (User Manual) if you need any help installing or running MagicTune™ . The User Manual opens within a basic browser window.
1. Control "Brightness control bar" for matching the brightness of control patch and the brightness of background pattern 2. When you detect specific color tone on "Control patch", move the control cursor toward to the direction of the color tone referring to "Color reference Circle". => Adjustment is finished properly, you won't detect any color tone on Control patch. 3. When you finish adjustment for step1,Click "Next" button . 4. Repeat 1), 2), 3) procedures for remaining step2 ~ step5. 5.
An error occurs when no information on EDID (Extended Display Identification Data) exists for the current monitor. This happens when from your desktop, Start → Setup → Control Panel → System → Hardware → Device Manager → Monitor is selected, the current "Plug-and-play monitor" is removed and new hardware is searched for but the system couldn't find any "Plug-and-play monitor". Please visit our homepage to see the Troubleshooting section.
z MagicTune™ may not work in case monitor is replaced or driver of graphic card is updated while MagicTune™ is operating. If so, please restart the system. Symptom Check List Check when MagicTune™ does not function properly. MagicTune™ feature is found only on PC (VGA) with Window OS that supports Plug and Play.
What is MagicRotation? Traditionally, computer displays allowed the user to view only in landscape mode. In today's information age, more users need to view documents, web pages, emails, etc. in there day to day life. These types of applications can be better viewed in portrait mode where the entire contents are available on the screen. This greatly improves the user's productivity allowing him the flexibility to switch between landscape and portrait modes.
Rotate : Display will get rotated by the unit of 90 degree Rotate to 0 : Display will get rotated to 0 degree from the current angle of rotation. Rotate to 90 : Display will get rotated to 90 degree from the current angle of rotation.
Rotate to 180 : Display will get rotated to 180 degree from the current angle of rotation. Rotate to 270 : Display will get rotated to 270 degree from the current angle of rotation.
Hot key : Hot Keys are available by default and can be changed by user. It can be assigned by user directly with keyboard after changing the existing HotKey. User can create the hot key with the combination of Shift, Ctrl, Alt and general keys. In case only general key is pressed, it will be assigned in the form of Alt+general key. Help : It shows the HELP of MagicRotation program. About : It shows the version and copyright of MagicRotation program. Exit : It exits from MagicRotation program.
2. Check if the problem occurs with different color depths (8/16/32 bits per pixel) and different resolution modes (800 x 600, 1024 x 768). 3. Check if the problem occurs without installing MagicRotation Software. If the problem is repeating in any/all of the following scenarios then it may be the problem with your installed "Display Driver" : In order to correct the problem you need to perform the following steps : 1. Uninstall MagicRotation Software. 2.
Model SyncMaster 971P Check List Before calling for service, check the information in this section to see if you can remedy any problems yourself. If you do need assistance, please call the phone number on the Information section or contact your dealer. Symptom No images on the screen. I cannot turn on the monitor. Check List Solutions Is the power cord connected properly? Check the power cord connection and supply.
Is the monitor connected using the DVI cable? The screen shows strange colors or just black and white. The screen suddenly has become unbalanced. You may get a blank screen if you boot the system before you connect the DVI cable, or disconnect and then reconnect the DVI cable while the system is running as certain types of graphic cards do not send out video signals. Connect the DVI cable and then reboot the system. Is the screen displaying Check the signal cable connection.
graphic card? http://www.samsung.com/monitor/magictune Did you install the program? Reboot the computer after installing the program for the first time. If a copy of the program is already installed, remove it, reboot the computer, and then install the program again. You need to reboot the computer for it to operate normally after installing or removing the program. Visit our website and download the installation software for MagicTune™ MAC.
functioning properly. Self-Test Feature Check 1. Turn off both your computer and the monitor. 2. Unplug the video cable from the back of the computer. 3. Turn on the monitor. If the monitor is functioning properly, you will see a box in the illustration below. This box appears during normal operation if the video cable becomes disconnected or damaged. 4. Turn off your monitor and reconnect the video cable; then turn on both your computer and the monitor.
Model SyncMaster 971P General General Model Name SyncMaster 971P LCD Panel Size 19" Diagonal (48 cm) Display area 376.32 mm (H) x 301.056 mm (V) Pixel Pitch 0.294 mm (H) x 0.294 mm (V) Synchronization Horizontal 30 ~ 81 kHz Vertical 56 ~ 75 Hz Display Color 16.7 M Colors Resolution Optimum resolution 1280 x 1024@60 Hz Maximum resolution 1280 x 1024@75 Hz Input Signal, Terminated RGB Analog, DVI(Digital Visual Interface) Compliant Digital RGB 0.
Environmental considerations Operating Temperature: 50 °F ~ 104 °F(10 °C ~ 40 °C) Humidity: 10 % ~ 80 %, non-condensing Storage Temperature: -4 °F ~ 113 °F (-20 °C ~ 45 °C) Humidity: 5 % ~ 95 %, non-condensing Plug and Play Capability This monitor can be installed on any Plug & Play compatible system. Interaction of the monitor and computer systems will provide the best operating conditions and monitor settings.
Preset Timing Modes If the signal transferred from the computer is the same as the following Preset Timing Modes, the screen will be adjusted automatically (Exception : 640 x 480/60 Hz, 720 x 400/70Hz, 800 x 600/60 Hz) However, if the signal differs, the screen may go blank while the power LED is on. Refer to the video card manual and adjust the screen as follows. Table 1.
Model SyncMaster 971P Contact SAMSUNG WORLDWIDE If you have any questions or comments relating to Samsung products, please contact the SAMSUNG customer care center. North America U.S.A 1-800-SAMSUNG (7267864) http://www.samsung.com CANADA 1-800-SAMSUNG (7267864) http://www.samsung.com/ca MEXICO 01-800-SAMSUNG (7267864) http://www.samsung.com/mx Latin America ARGENTINE 0800-333-3733 http://www.samsung.com/ar BRAZIL 4004-0000 http://www.samsung.
BELGIUM 02 201 2418 http://www.samsung.com/be CZECH REPUBLIC 844 000 844 http://www.samsung.com/cz DENMARK 70 70 19 70 http://www.samsung.com/dk FINLAND 030-6227 515 http://www.samsung.com/fi FRANCE 3260 SAMSUNG(7267864) (€ 0,15/min) http://www.samsung.com/fr GERMANY 01805-121213 (€ 0,14/Min) http://www.samsung.de HUNGARY 06-80-SAMSUNG (7267864) http://www.samsung.com/hu ITALIA 800 SAMSUNG (7267864) http://www.samsung.com/it LUXEMBURG 0032 (0)2 201 24 18 http://www.samsung.
PHILIPPINES 1800-10-SAMSUNG (7267864) http://www.samsung.com/ph SINGAPORE 1800-SAMSUNG (7267864) http://www.samsung.com/sg THAILAND 1800-29-3232, 02-689-3232 http://www.samsung.com/th TAIWAN 0800-329-999 http://www.samsung.com/tw VIETNAM 1 800 588 889 http://www.samsung.com/vn Middle East & Africa SOUTH AFRICA 0860 7267864 (SAMSUNG) http://www.samsung.com/za U.A.E 800SAMSUNG (7267864) 8000-4726 http://www.samsung.
1. Adjust computer resolution and screen injection rate (refresh rate) oncomputer as described below to enjoy the best quality of picture. You can have an uneven quality of picture in the screen if the best quality of picture is not provided in TFT-LCD. { { Resolution: 1280 x 1024 Vertical frequency (refresh rate): 60 Hz 2. TFT LCD panel manufactured by using advanced semiconductor technology with precision of 1ppm (one millionth) above is used for this product.
IMPORTADO POR: SAMSUNG ELECTRONICS MÉXICO. S.A. de C.V. Vía Lopez Portillo No. 6, Col. San Fco. Chilpan Tultitlán, Estado de México, C.P. 54940 Tel: 01-55-5747-5100 / 01-800-726-7864 EXPORTADO POR: Samsung Electronics CO.,LTD.
PRODUCT INFORMATION (Image Retention Free) LCD Monitors and TVs may have image retention when switching from one image to another especially after displaying a stationary image for a long time. This guide is to demonstrate correct usage of LCD products in order to protect them from Image retention. Warranty Warranty does not cover any damage caused by image retention. Burn-in is not covered by the warranty.
Ex) The best way to protect your monitor from Image retention is to set your PC or System to operate a Screen Saver program when you are not using it. Image retention may not occur when a LCD panel is operated under normal conditions. Normal conditions are defined as continuously changing video patterns. When the LCD panel is operated for a long time with a fixed pattern (-over 12 hours-), there may be slight difference in voltage between electrodes that work the liquid crystal (LC) in a pixel.
Correct Disposal of This Product (Waste Electrical & Electronic Equipment) - Europe only (Applicable in the European Union and other European countries with separate collection systems) This marking shown on the product or its literature, indicates that it should not be disposed with other household wastes at the end of its working life.