
Use and Care Guide
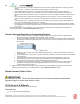


Table Of Contents
- TOC-Important-Installation-Guidelines
- TOC-Model-Differences
- TOC-Check-Contents-of-Box
- TOC-Do-Not-Remove-Paper-Mat
- TOC-Important-Notices
- TOC-Ready-to-Go-
- TOC-90-Bends-in-Vent
- TOC-1.-Position-Toilet
- TOC-1
- TOC-2.-Cut-Vent-Hole-in-Roof-Ceiling
- TOC-2
- TOC-3.-Vent-Roof-Stack-Installation
- TOC-3
- TOC-4.-Insert-Vent-Pipe-into-System
- TOC-4
- TOC-5.-Attach-Union-Coupling-Optional-
- TOC-5
- TOC-6.-Connect-Remaining-Vent-Pipe
- TOC-7.-Install-Drain
- TOC-8.-Seal-All-Vent-Connections
- TOC-9.-Insulate-Exposed-Pipe
- TOC-6
- TOC-10.-Attach-Rain-Cap-or-Wind-Turbine
- TOC-Protect-from-the-Elements
- TOC-Install-Rigid-Vent-Pipe-not-supplie
- TOC-Connect-Flexible-Vent-and-Rigid-Pip
- TOC-Attach-Wind-Turbine-Ventilator-
- TOC-Seal-All-Vent-Connections
- TOC-Install-Vacuum-Toilet
- TOC-Install-Drain
- TOC-Connect-Three-Components-of-System
- TOC-Start-Here
- TOC-Position-the-System
- TOC-Connect-Vacuum-Toilet-to-Vacuum-Gen
- TOC-Connect-Vacuum-Generator-to-Compost
- TOC-Fasten-Vacuum-Generator-Unit-and-Co
- TOC-Connect-Vacuum-Generator-to-12v-Pow
- TOC-Connect-Composting-System-to-AC-Ele
- TOC-Plug-Play-Wiring-Connection
- TOC_Do_Not_Add__3175881415145758
- TOC_Rated_Capacity_4164048674046512
- TOC_Operation_is_Easy_8826685531918387
- 1_System_Operation_09638061436967571
- TOC_1_Initial_System_Start_Up_1095042459
- TOC-1.-Initial-System-Start-Up
- TOC_2_Power_Control_42472747931111743
- TOC-2.-Power-Control
- Non_Electric_SystemsNot_applic_933833838
- FlushSmart_VF_models_Always_tu_554945394
- TOC_12VDC_Systems_12964841970897056
- TOC-12VDC-Systems
- FlushSmart_VF_models_Always_tu
- 5_Weekly_Operation_5923775715714038
- TOC-Typical-Emptying-Times
- TOC-Indications-of-Emptying-Required
- TOC-Before-you-Empty
- TOC_Introduction_3353822634090_525738961
- Proper_System_Operation_1312612757753413
- TOC_Outside_Odour_901114465392_444162368
Use as directed. To ensure proper performance, please be sure to contact us if you have installation or operation questions.
ENVIROLET®/SG INSTALLATION & OPERATION MANUAL (7MINS11D 12.15) • Envirolet® is a registered trademark. ©2016, Sancor Industries Ltd.
48
• Or, connect to a 10+ gallon plastic container (will require periodic emptying to proper disposal site).
A drain pit is ideal where possible.
A. In order to allow for proper flow the drain line must be gravity connected its entire path from toilet system to drain
site.
B. Ensure that Quick Connect “T” is used with the breather tube pointing upwards to prevent “air lock” or drain
blockage. See image above in Waterless section.
Important
* Be sure to check local regulations regarding acceptable drain pits/sites in your area.
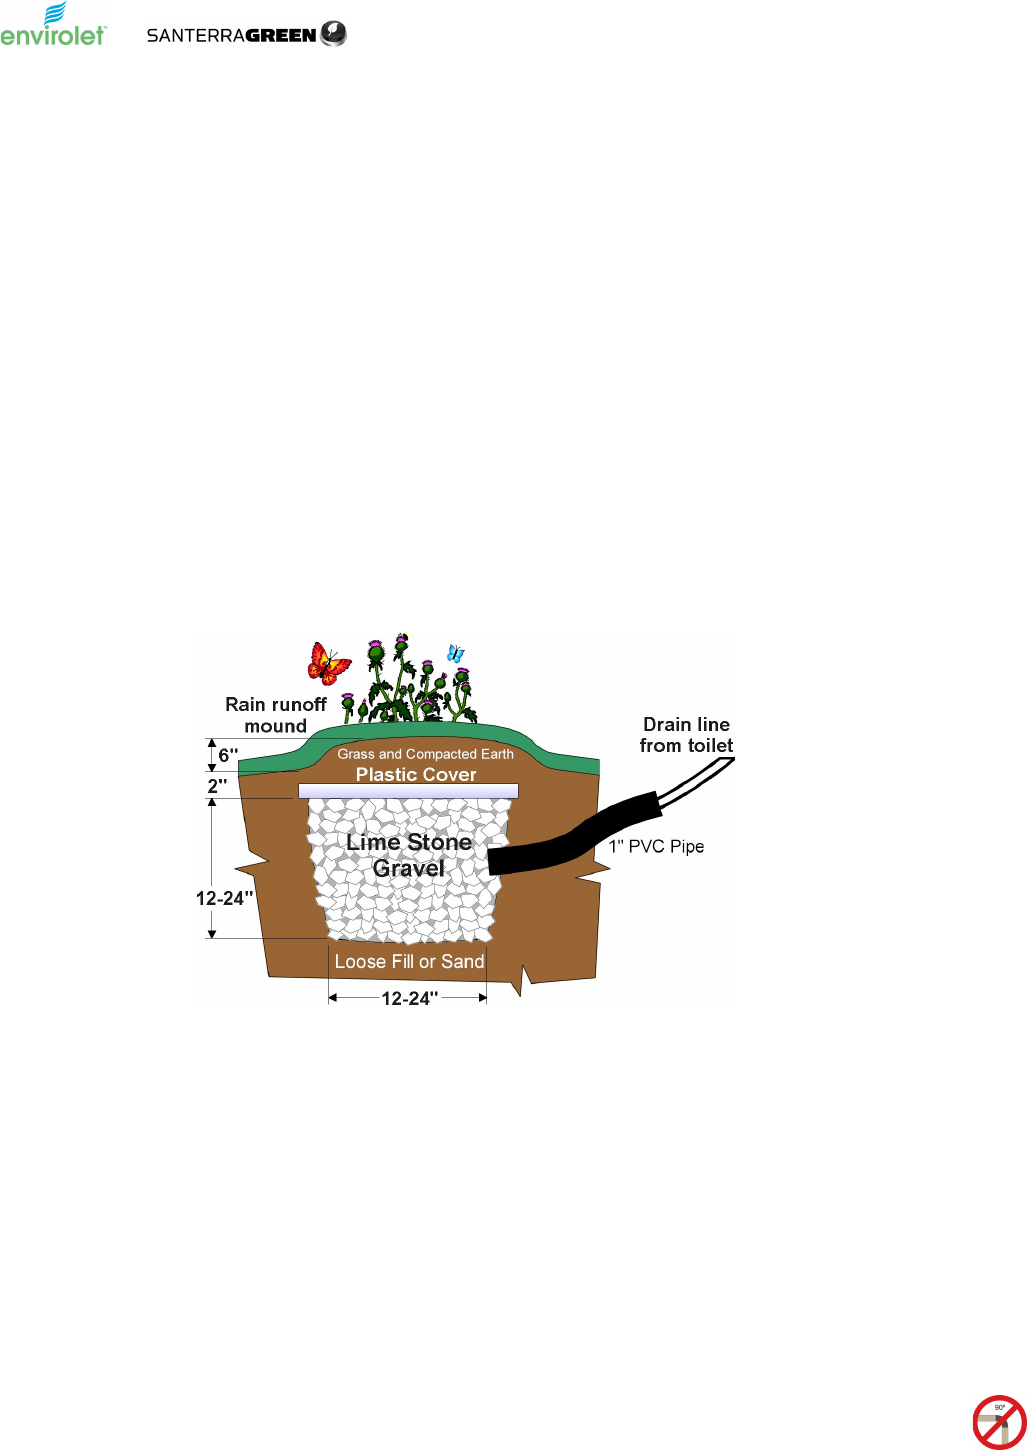
TYPICAL DRAIN PIT DIRECTIONS:
These are instructions for the creation of a typical drain pit. Check local regulations.
• Dig a drain pit approximately 1’/0.3m to 3’/1m in depth and 1’/0.3m to 3’/1m in diameter with 2’/0.6m or more of loose fill
below (earth, sand and/or crushed rock).
• Fill the drain pit with lime stone gravel.
• Gravity feed a length of 1”/25mm PVC pipe to the center layer (1/3 depth) of the lime stone gravel.
• Now gravity feed the Drain Line provided with the toilet system and insert the end (about 6”/15cm) into the 1”/25mm (or more)
wide PVC pipe.
• Cover the top of the lime stone pit with a plastic cover and 2”/50mm of earth.
• For rain protection, create a 6”/15cm mound (compacted earth and/or grass) to allow for rain run off.
• Make sure you install the drain pit approximately 50’/15m or more away from any water source, 60’/18m or more away from
any drinking or other water source or well and away from any high water table. Please check local regulations.
Similar drain pits are commonly referred to as leaching pits, cesspools, dry wells, gray (or grey) water fields (for sink/shower waste
water), filter beds or French drains depending on your location.