
User's Manual


11
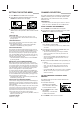
AUTO POWER SHUT-OFF FUNCTION
This feature is especially helpful when you finish watching
a tape. Press STOP, REW, and POWER. The VCR will
rewind the tape and turn itself off automatically.
1. Press STOP when you finish watching a tape.
2. Press REW to rewind the tape.
3.
Press POWER during the REWIND mode, the VCR will
enter the AUTO POWER SHUT-OFF mode.
4. The POWER indicator will flash on the VCR indicator
panel.
5. After the tape is rewound, the VCR will turn off auto-
matically.
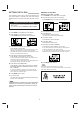
NORMAL RECORDING
PREPARATION
• Turn on the power of both the VCR and TV.
• Be sure the TV is set to the VCR Output Channel (CH 3 or 4).
• If a direct VIDEO/AUDIO connection is made between the
VCR and the TV, set the TV’s source selector to VIDEO.
1 Insert a video cassette with the safety tab in place.
2 Select the desired channel by using CH/TRACK (▲/▼).
• If you are recording from another source via audio/video
input jacks (at the Rear or Front panel), select LINE1 or
LINE2 by pressing INPUT.
3
Set the desired speed (SP or SLP) by pressing SP/SLP.
• This VCR is not designed to record in LP mode.
4 Set the MTS mode as desired (see pages 7 and 14).
5 Press REC once.
Recording will start. (The REC indicator will light on the VCR
indicator panel.)
• If a cassette with no safety tab is loaded, the cassette will
be ejected automatically.
6 Press STOP to stop recording.
• If the tape reaches the end before STOP is pressed, the
VCR will automatically stop, rewind, eject, and turn itself off.
To PAUSE the recording
During RECORDING mode:
1 Press PAUSE or PAUSE/STILL on the front panel to
pause the tape.
The REC indicator will flash on the VCR indicator panel.
2 When you want to continue recording, press PAUSE or
PAUSE/STILL on the front panel again or press REC.
• After 5 minutes in pause mode, the tape will be stopped
automatically to protect the tape and the video heads.
To record one TV program while watching
another
1
Press TV/VCR to select the TV mode during recording.
The VCR indicator disappears.
2 Using the TV, select the channel to be viewed.
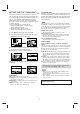
This VCR can be programmed to record up to 8 programs
within a period of 1 year. For unattended recording, the
timer needs to know the channels to be recorded and the
starting and ending times.
PREPARATION
• Turn on the power of both the VCR and the TV.
• Be sure the TV is set to the VCR Output Channel (CH 3 or 4).
• Make sure the TUNING BAND in the TUNING menu is set
appropriately (TV or CATV). (See “CHANNEL SELECTION”,
on page 7.)
1 Press MENU and the MAIN menu will appear.
2 Press v or V to choose the PROGRAM menu.
3 Press ENTER to enter the PROGRAM menu.
The PROGRAM menu will appear.
• If all programs have already been entered, the message
FULLY PROGRAMMED appears for a moment and then
PROGRAM 1 will appear on the TV screen.
4 Press b or B to choose the PROGRAM No. (1-8).
5 Press V for MONTH.
Press b or B to choose the desired month.
Example: JULY
6 Press V for DAY.
Press b or B to choose the desired day.
Example: 6 TUE
7 Press V for START.
Press b or B to choose the desired start time.
Example: 6:00 PM
8 Press V for STOP.
Press b or B to choose the desired stop time.
Example: 7:30 PM
9 Press V for CHANNEL.
Press b or B to choose the desired channel (Channel,
LINE1 or LINE2).
Example: CH 3
Cable Users: If you have CABLE TV and used a Cable Box
for Antenna to VCR Connections (page 5), using a cable box
converter, you must set the channel in this step to match the
cable box output channel (usually CH 3). Change channels
on the cable box instead of with the VCR.
Always use PAUSE for best results when making changes
during recording.
For example: To change channels during recording, first press
PAUSE to put the unit in pause mode. Then select the desired
channel on the VCR, and press PAUSE again to resume
recording.
TIMER RECORDING
• If you try to set the program timer before setting the clock,
PLEASE SET THE CLOCK appears for a moment and then
the CLOCK menu appears on the TV screen. Set the time
and date before proceeding.
• Make sure a tape is in the VCR and the safety tab is in place
or the tape will be automatically ejected.
Things to know before starting