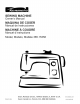
® SEWING MACHINE Owner's Manual MAQUINA DE COSER Manual de lnstrucciones MACHINE A, COUDRE Manuel d'instructions Model, Modelo, Modele 385.15358 ! Sears, 743-801-324 Sears Roebuck Canada and Co., Hoffrnan Inc., Toronto, Ont., Estates, IL 60179 MSB 2B8 CANADA U.S.A. www.sears.com www.sears.
iMPORTANT SAFETY iNSTRUCTiONS This machine is designed and manufactured for House Hold use only. When using an electrical appliance, basic safety precautions should always be followed, including the following: Read all instructions before using this appliance. DANG E R1. 2. _o reduce the risk of electric shock: An appliance should never be left unattended when plugged in. Always unplug this sewing machine from the electric outlet immediately after using and before cleaning.
INSTRUCCIONES IMPORTANTES Cuando se utiliza un aparato el6ctrico es necesario tomar ciertas precauciones siguientes: Lea todas las instrucciones antes de utilizar este aparato. PELIGRO - DE SEGURIDAD b_sicas de seguridad, como las Para reducir el riesgo de choque el6ctrico: 1. No deje nunca el aparato sin vigilancia mientras est6 enchufado. Desenchufe siempre la m_quina de la toma el6ctrica inmediatamente despu6s de utilizarla y antes de limpiarla. 2.
CONSIGNES IMPORTANTES DE SECURITE Pour utiliser un appareil 61ectrique, il faut toujours respecter les consignes de s6curit6 fondamentales, consignes suivantes: Avant d'utiliser cet appareil, lisez toutes ces instructions. DANG E R - notamment les r6duire ,es risques d'61ectrocution. 1. II ne faut jamais laisser un appareil sans surveillance Iorsqu'il est branch6. II faut toujours d6branchercette machine coudre de la prise 61ectrique murale, apres son utilisation ou avant de la nettoyer. 2.
Kenmore Sewing Machine Warranty 25Year Limited Warranty on Sewing Machine Die-Cast Metal Internal Frame For 25 years from the date of purchase, Sears will provide free repair for the die-cast metal internal frame of this sewing machine if it is defective in material or workmanship.
Garantia de la maquina de coser Kenmore Garantia limitada de 25 aSos para la estructura intema de metal moldeado de la maquina de coser A partir de la fecha de compra, Sears le ofrece una garantia de 25 aSos que te permitir reparar de forma gratuita la estructura intema de metal moldeado de su maquina de coser, en caso de que haya algQn tipo de defecto en et material o en la mano de obra.
Garantie pour machine coudre Kenmore Garantie limitee de 25 ans pour t'armature interne en metal moul de ta machine coudre Pendant tes 25 ans suivant ta date d'achat, Sears prendra sa charge la reparation de l'armature machine coudre en cas de defaut materiet ou de fabrication.
Machine Specifications (15358) f Item Sewing Specification speed (Maximum) Over 760 s.p.m Stitch length: 4 mm (Maximum) Stitch width: 5 mm (Maximum) Stitch package (Stitch functions): 58 (Built-in 16 stitches): Buttonhole: Machine Weight 1-step built-in dimensions: buttonhole W 15.5" (388 mm) x D 6.1" (152 mm) x H 11.8" (295 mm) (Net): 13.2 Ibs (6.
PROTECTION AGREEMENTS in the U.S.A. in Canada Master Protection Agreements Congratulations on making a smart purchase. Your new Kenmore® product is designed and manufactured for years of dependable operation. But like all products, it may require preventive maintenance or repair from time to time. That's when having a Master Protection Agreement can save you money and aggravation. Maintenance Agreements Your purchase has added value because you can depend on Sears HomeCentrat® for service.
SERViCIO En Estados Le contrat d'entretien Unidos Au Canada Contratos de Protecci6n Experta Felicidades por haber hecho una compra intetigente. Su nuevo aparato Kenmore® ha sido dise_ado y fabricado para darte largos a_os de funcionamiento confiable. Sin embargo, al igual que todos los productos, en ocasiones puede requerir mantenimiento preventivo o reparaciones. En estos casos, un Contrato de Protecci6n Experta (Master Protection Agreement) puede ahorrarle tiempo y molestias.
TABLE OF CONTENTS SECTION l. NAMES OF PARTS SECTION Cabinets and Sewing Machine Tote Bag ........................ 2 Names of Parts .............................................................. 2 Available Accessories and Attachments ........................ 4 SECTION II. GETTING Ill. STRAIGHT STITCH SEWING Straight Stitch ............................................................... 36 • Starting to sew ........................................................... 36 • Finishing sewing ...........
INDICE SECCION I. NOMBRE DE LAS PARTES SECCION Gabinete y bolsa de mano .................................................. Nombre de las partes .......................................................... Accesorios y refacciones disponibles ................................. SECClON II. PREPARAClON DE LA MAQUINA PARA COSER 3 3 5 Conexi6n de la maquina a la red electrica .......................... Cuando utitice pot primera vez su maquina de coser ......... Para su seguridad ...............................
TABLE PARTIE I. iDENTiFiCATiON LA MACHINE DES MATIERES DES PIC:CES DE PARTIE Mallette et sac de transport ...................................................... Identification des pieces ........................................................... Accessoires et pieces disponibles ........................................... PARTIE II. PRC:PAREZ=VOUS 3 3 5 A COUDRE Branchez ta machine ...............................................................
SECTION I. NAMES Cabinets and Sewing (RSOS # 97611) OF PARTS Machine Tote Bag Sewing Machine cabinets and Tote bag are available through the RSOS (Retail Special Order System) catalog at your nearest Sears retail store (U.S.A. only), Names of Parts f f_ .!_ Stitch pattern selector ,_2"Reverse stitch control ,_3",, _ Stitch length control (4., Bobbin winder spindle f_ ,5_,Spool pins _6j:Bobbin winding tension disc ,.77Upper needle thread guide (8. Thread take-up lever />, .
SECCION l. NOMBRE Gabinete y bolsa (RSOS #97611 ) DE LAS PARTES de mano PARTIE !. IDENTIFiCATiON LA MACHINE DES PIE_CES DE Mallette et sac de transport (RSOS #97611 ) Usted encontrara una tinea completa de gabinetes y bolsa de mano para su maquina de coser en et catalogo RSOS que esta disponible en las tiendas Sears. Vous trouverez dans tes magasins Sears, ainsi que dans notre catalogue une gamme complete de meubles et de sac de transport pour les machines a coudre.
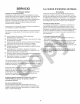
Available Accessories and Attachments 1 To order parts and accessories listed below, call: 1-800-4-MY-HOME ®(1-800-469-4663) call any time, day or night. When ordering parts and accessories, provide the following information: 1. Part Number 2. Part Name 3. Model Number of Machine Ref. No. Part No. 1 532096007 Shuttle hook 647515006 Bobbin case 3 *102869107 4 647018004 5 639804000 6 *993001100 5 x No.11 stretch fabric needle (BLUE) *993011100 *993011400 5 x No. 11 needle (ORANGE) 5 x No.
Accesorios y refacciones disponibles Para ordenar las partes y accesorios tistados abajo, ltame al: 1-800-4=MY-HOME ® (1-800-469-4663) de 6 AM a 11 PM, hora det centro, los siete dias de la semana AI ordenar partes y accesorios, proporcione informaci6n: 1. NQmero de parte 2. Nombre de ta parte 3. Modeto de la maquina la siguiente Accessoires 24h/24, 7j/7 Pour commander des pieces et les accesoires, veuitlez preparer les informations suivantes: 1. Numero de ta piece 2. Nom de la piece 3.
SECTION II. GETTING Connecting Machine READY TO SEW to Power Supply _1_Power supply plug _2_Power switch '_3_Outlet _4_Machine socket @ Machine plug _6_Sewing light Before connecting the power cord, make sure the voltage and frequency shown on the machine conform to your electrical power. 1. 2. 3. 4. Turn off the power switch ,_2_. Insert the machine plug@ into the machine socket (4_. Insert the power supply plug _l_ into the outlet _3_.
SECCION Conexi6n ll. PARTIE !!. PREPAREZ-VOUS PREPARACION DE LA MAQUINA PARA COSER de la m_quina Branchez a la red el_ctrica _1_Ctavija de toma de corriente _2_Interruptor de corriente _3_Red et@trica _.4_Enchufe de la maquina _5_Ctavija de ta maquina _6_,Bombitta Antes de enchufar et cable de conexi6n a ta red de corriente asegQrese de que el voltaje y la frecuencia de la maquina, mostrados en la placa de identificaci6n, coincidan con los de la red de suministro en su hogar. 1.
Setting Spool Pins \!.J'Spool pin The spool pins are used for holding the spools of thread when feeding the thread to the machine. To use, pull up the spool pins. Push down for storage. Presser Foot Lifter (!_ Presser foot lifter _2_Normal up position (3_,Highest position The presser foot lifter raises and lowers the presser foot. You can raise it about 1/4" (0.6 cm) higher than the normal up position for easy removal of the presser foot, or to help place heavy fabric under the foot.
'_i_ Portacarrete Pose de ia broche _1_Broche a bobine Los portacarretes se utitizan para sostener los carretes de hito y alimentar asia la maquina con et hito. Para usarse, hale hacia arriba los portacarretes. Para guardarlos oprimalos hacia abajo. Les broches a bobines servent a retenir les bobines de fit en vue de proceder a l'enfitage du fil superieur. Pour ce faire, it suffit de faire remonter la broche de la t6te. Enfoncez la broche lorsque vous rangez la machine.
Extension Table \ • Detaching the table Pull the table away from the machine, as illustrated, for "flee-arm" sewing of cuffs and sleeves. The extension table can be used as accessory box. • Attaching the table Push the extension table until it snaps into the machine. /\ L!; Extension table :12)Pin _3) Holes \ \\\\ (4) Tab (&',Free-arm Changing Needle Flat side f_ ,!/Needle clamp screw (2) Needle clamp [] Turn off the power switch.
Ampliaci6n m6vii de la superficie Rallonge de costura * Desmontaje de la ampliacion m6vil Tire de ta ampliaci6n m6vit hacia afuera de la maquina tal como se ve en ta itustraci6n. , Instalacion de la ampliacion rnovil Empuje la ampliaci6n m6vit hacia que entre completamente en la maquina produciendo un chasquido. sur _1_ Raltonge de plateau _2_' Patte _3_ Trou _4_' Patte ,_5_' Bras libre _1_Amptiaci6n m6vit de la superficie de costura _2_ Pasador (:_ Atojamiento _.
Changing Presser Foot _l_Lever (2_,Groove , 3 Pin • To remove Turn the handwheel toward you to raise the needle to its highest position. Raise the presser foot. Press the lever _l_on the back of the foot holder. The presser foot will drop off. • To attach Place the presser foot so that the pin _3_on the foot lines up directly below the groove Y2_ofthe foot holder. Lower the foot holder to lock the foot in place.
Cambio de prensatelas Changement de pied presseur /\ _i_ Patanca '_2_Ranura _3_Passador Para remover Girar manualmente, hacia uno mismo, el volante que la aguja alcance su posici6n mas etevada. Suba et prensatetas. Mediante la palanca (i_, etevadora det prensatetas subirto. Presionar ta palanca situada en la posterior det soporte det prensatetas.
Selecting Needle and Fabric For general sewing, use needle sizes 11 or 14. Afine thread and needle should be used for sewing lightweight fabrics, so the fabric will not be marred. Heavy fabrics require a needle large enough to pierce the fabric without fraying the needle thread. In the needle set, there is one each of sizes 11, 14, 16, and 18, and a blue needle. Use the blue needle to eliminate skipped stitches when sewing knits and synthetic fabrics. Special needles should be used on certain fabrics.
Selecci6n de hiio y tela Para et cosido general se utitizan agujas det tama_o 11 o 14. Los hitos y agujas detgados deberan utitizarse para coser tejidos ligeros evitando asi que estos se puedan echar a perder. Cosa tejidos gruesos con una aguja to suficientemente gruesa como para que pueda penetrar et tejido sin que et hito de ta aguja se deshilache. En la caja de agujas hay una aguja de cada tamafio 11, 14, 16, 18, y una de tal6n azul del tamafio 11.
Choix de i'aiguille et tissu Pour tes coutures normales, utitisez une aiguitte n°l I ou 14. On devrait utitiser du fit fin et une aiguitle fine avec tes tissus tegers pour ne pas les endommager. Les tissus lourds necessitent une aiguitte assez grosse pour percer le tissu sans effitocher le fit de l'aiguitle. Dans un jeu d'aiguitles, it y a une aiguitle de chaque grosseur 11, 14, 16, 18 et une aiguitle a bout bleu.
(blank (pagina (pac 17
Bobbin Winding o Removing bobbin case Remove the extension table from the machine by pulling it to the left. Open the shuttle cover_,_l)by pulling down the embossed part on the left of the cover. Raise the needle to its highest position by rotating the handwheel toward you. ,,"13Shuttle cover _2_, Bobbin case /,>, To remove the bobbin case _2_from the shuttle, pull open the latch of the bobbin case. Pull the bobbin case straight out of the shuttle.
Embobinado de la canilla Rernplir la canette , Como sacar el portacanillas Retire la extensi6n deslizandola hacia la izquierda. Abra la tapa lanzadera,_l_jalando hacia abajo la parte hueca del lado izquierdo de la tapa. Levante ta aguja hasta la posici6n mas alta, girando et volante hacia usted. ,_1_' Tapa ,_2_ Portacanittas , Retrait de la porte=canette Retirez l'emboTture du socte en ta tirant vers ta gauche.
Bobbin winding (continued) [] Push the bobbin to the right. [] With the free end of the thread held in your hand, depress the foot control. Stop the machine when the bobbin has made a few turns, and cut the thread close to the hole in the bobbin. [] [] [] Depress the foot control again. When the bobbin is fully wound, it stops automatically. Return the bobbin winder to its original position by moving the spindle to the left, and cut the thread. [] Push in the handwheel to engage the clutch.
Embobinado de la canilla (Continuaci6n) Remplir la canette (suite) [] Empuje la canitla a la derecha. [] Poussez la canette vers la droite. [] Sujete el final det hilo con los dedos y pise el pedal de control. Cuando haya dado unas cuantas vuettas, pare la maquina y corte et hito que sale de la canitla. [] En tenant l'extremit6 tibre du fit a ta main, appuyez sur la pedale de contr61e. Arr6tez ta machine apres quetques tours, et coupez le fit auras du trou dans la canette.
• Inserting bobbin [] Place a bobbin in the bobbin case, making sure the thread feeds clockwise from the bobbin. [] J [] Draw the thread through the slot of the case. J [] Continue to draw the thread under the tension spring _1_:" and through the opening. Pull out about 4" (10 cm) of thread. t_l_'Tension spring [] J [] Holding the latch shuttle, and then the latch. [] J []The case should lock into the place when the latch is released.
, Colocaci6n de la canilla , Insertion de la canette [] Coloque la canitta en et portacanitlas asegurandose que el hilo se alimente en et sentido alas agujas det retoj y salga de la bobina [] Introduisez la canette dans te portecanette en prenant soin que le fit se deroule vers la droite et qu'it sorte de la canette. [] Tire det hito a traves de la ranura. [] Tirez le fit par la fente du porte-canette. [] ContinUe tirando det hito debajo det resorte tensor y a traves de la abertura.
Threading the Machine • Threading the machine • Raise the thread take-up lever to its highest position by turning the handwheel counterclockwise. • Raise the presser foot lifter. • Place a spool on the spool pin, with thread coming off as shown. [] ,E C [] / I J ] ........... - \ [] Draw the end of thread around the upper thread guide.
Enhebrado del hilo de la aguja Enfilage de la machine * Enhebrado del hilo de la aguja * Suba et tirahilos hasta su posici6n mas alta girando et volante en et sentido contrario a tas agujas det retoj. * Levante ta palanca de etevaci6n det prensatelas. * Coloque un carrete en et portacarretes con et hito saliendo, tal como se muestra. , Enfilage de la machine * Faites monter te tevier reteveur tendeur de fit le plus haut possible en tournant le volant a main en sens antihoraire.
NeedleThreader [] % [] Raisetheneedleto its highestposition. Pulldowntheneedlethreaderknobasfarasit willgo. $ Turn the knob in the direction of the arrow in the % illustration, then insert Hook into the needle eye. Lead the thread around Guide and under Hook. % Turn the knob in the direction of the arrow in the illustration, drawing the thread loop through the needle. [] %[] Pull the thread through the needle eye. The needle threader can be used with a #11 to #16 needle or a blue tipped needle.
Enhebrador Enfile-aiguille de la agujas [_ Levante la aguja a su posici6n m_s alta. Tire hacia debajo de la perilla del enhebrador de agujas todo Io que se pueda [iiJ Relevez I'aiguille jusqu'& sa position la plus haute. Appuyez a fond sur le bouton d'enfilage de I'aiguille. % Gire la perilla en la direcci6n de la flecha indicada en la ilustracidn. A continuaci6n, introduzca el Gancho en el ojo de la aguja. Conduzca el hilo alrededor de la Guia y pot debajo del Gancho.
f Adjust the Needle Thread Tension for a Straight Stitch • Correct tension _1_Needle thread (Top thread) _2_Bobbin thread (Bottom thread) (3_.To loosen _4_To tighten The ideal straight stitch has threads locked between two layers of fabric, as illustrated (magnified to show detail). If you look at the top and bottom of a seam, notice that there are no gaps. Each stitch is smooth and even. When adjusting the needle thread tension, the higher the number, the tighter the needle thread tension.
Ajuste de ia tensi6n puntada recta del hilo de la aguja para R_glage de la tension point droit , Tensi6n correcta _1_Hito de la aguja (Hito superior) _2_Hito de la canitta (Hito inferior) _3_Para afiojar _4_Para apretar pour le , Tension correcte (13 Fit de t'aiguitle (Fit superieur) _2_Fil de la canette (Fit inferieur) @ Pour ret&cher la tension @ Pour augmenter la tension La puntada recta ideal cierra los hitos entre tas dos tetas tal como se ve en la figura (ampliada).
Adjust the Needle Thread Tension Zigzag Stitch for a For an ideal zigzag stitch, the bobbin thread does not show on the right side (Top side) of the fabric and needle thread shows slightly on the wrong side (Bottom side) of the fabric. See the illustrations for correct appearance. To match this appearance, adjust the needle tension. • Correct tension _1_Right side (Top side) of fabric ,% .
Ajuste de la tensi6n puntada zig=zag del hilo de la aguja para R_glage de la tension point zig=zag du fil de I'aiguille pour le En ta puntada zig-zag ideal, el hito de ta canitla no aparecera en la parte de arriba de la teta y et hito de la aguja se vera ligeramente en la parte de abajo de la tela. Vea el aspecto correcto en las itustraciones. Para igualar esta apariencia, ajuste la tensi6n det hito de la aguja.
Stitch Pattern Selector (C Setting mark ,2-Stitch selector ,_3',, _ Stitch length BH 1 2 3 4 5 6 7 8 9 control Raise the needle above the fabric. Turn the dial to select the desired pattern. NOTE: To avoid needle or fabric damage, make sure the needle is up and out of the fabric while selecting a stitch. Stitch Length Control Turn the stitch length control to the setting mark at the desired "\ I stitch length. I i I i I i I The higher the number, the longer the stitch length.
Selector de patr6n ,FI_Marca de ajuste _2_Selector de patr6n ,_:3_Peritta de longitud de puntada S_lecteur de point (_ Repere de reglage (2_ Selecteur de point F3"_Cadran de regtage de la longueur du point Levante la aguja hasta la posici6n mas alta. Seleccione et patr6n deseado girando et selector de patr6n. Levez l'aiguitle au-dessaus du tissu. Toumez le setecteur de point pour choisir le motif desiree.
Reverse Stitch Control Press the stitch control to sew in reverse, [] To Drop or Raise the Feed Dog [] Open the hook cover. Hook cover [] To drop the feed dog, pull down the drop lever and move it to the right, as illustrated. (_ Drop lever [] To raise the feed dog, pull down the drop lever and move it to the left, as illustrated. * The feed dog must be up for normal sewing. * The feed dog will return to the up position when the machine starts running.
Control de puntada Bouton reversa de marehe arri_re La maquina cosera hacia atras hasta que suette et bot6n. La machine coud en marche arriere tant que l'on appuie sur le bouton de marche arriere. C6mo Comment bajar / subir los dientes del transporte [] Abra la cubierta del gancho. Cubierta det gancho [] [] Para bajar las dientes transportadores, ou monter ......... Couvercte eu boftier [] la itustraci6n.
SECTION Straight ill. STRAIGHT STITCH SEWING ,:Ji Stitch '_1_'Stitch pattern selector: '(2_'Presser foot: ,_3_Needle thread tension: _:4_Stitch length: _\3_ _ \\\\\\\ 1-2 I I Zigzag foot 2to6 1.5 - 4 J • Starting to sew Raise the presser foot and position the fabric next to a seam guide line on the needle plate (518" [1.6 cm] is most common). Lower the needle to the point where you want to start. Lower the presser foot and pull the threads toward the back. Depress the foot control.
SECCION Puntada ill. COSTURA DE PUNTADA PARTIE ill. COUTURE 1-2 Prensatetas para zig-zag 2a6 1.5-4 '_ Selector de patr6n: _2_Prensatetas: ,_3_, Tensi6n del hilo de la aguja: ,_4_Longitud de puntada: o Par8 RECTA empezsr Point droit _1_Setecteur de point: '_2_Pied presseur: _' Tension du fit de t'aiguitle: (47 Longueur du point: CUIDADO: No coloque los dedos cerca det prensatetas mientras que dirige ta teta. Et tomitto de sujeci6n de ta aguja podria golpear y tastimar los dedos.
Topstitching _(1_Stitch pattern selector: '@ Presser foot: _ Needle thread tension: _4_,Stitch length: ':J9 1-2 Zigzag foot 2 to 6 1.5 - 4 \\ \\\\\ I I cl_ 4D _\4_ _ J f Topstitching emphasizes lines of garments and keeps seams and edges flat and crisp. Accent suits or blouses with one or two rows of topstitching around the outer edges of cuffs, lapels or collars. Lower the presser foot and keep the edge of the fabric next to the right edge of the presser foot.
Costura a la vista '_1_Selector de patr6n: _2_Prensatetas: (3) Tensi6n del hilo de la aguja: kF4_, Longitud de puntada: SurpiqQre 1-2 Prensatetas para zig-zag 2a6 1.5-4 '_i) Setecteur de point: _.2_" Pied presseur: (3_ Tension du fit de t'aiguitle: (4_ Longueur du point: Les surpiqOres permettent de faire des coutures decoratives et de garder les bords plats et rigides. Vous pouvez orner les ensembles et les blouses avec une ou deux surpiqQres autour des poignets, revers et cols.
Zipper Sewing • To sew (Continued) [] _1_1/8" (0.4cm) fabric margin ,_2 _Z , ipper teeth IXt 1)_ _3_Zipper tape @_Forward edge of zipper foot /-\ ,5, Sewing direction [] Fold back the upper layer seam allowance. Fold back the lower layer seam allowance to leave a 1/8" (0.4 cm) margin of fabric _1_,. Place zipper teeth next to margin edge and pin margin to zipper tape. • f_, , Align forward edge of zipper foot _4j'.wlthmargin edge. Return thread tension and stitch length to original settings.
Costura de cremalleras 6 cierres (continuaci6n) La couture , Para coser F-\ L!,' Margen de 0.4 cm (1/8") de teta _2_Dientes de la cremaltera ._3_Cinta de ta cremaltera Borde detantero det pie de ta cremallera Direcci6n de confecci6n [] Dobte hacia atras el sobrante de ta costura de la capa superior. Doble hacia atras et sobrante de la costura de ta capa inferior para dejar un margen de tela de 0.4cm (1/8")'_1_'.
Darning :_l_Stitch pattern selector: _2_Presser foot: _3_Needle thread tension: _4_Stitch length: @ Feed dogs f_ 1-2 Removed 1 to 4 Any Dropped I I I I ,\ S_ ,_4_ J Drop the feed dogs (see page 34) and remove the presser foot. Center the hole in the fabric on an embroidery hoop, as shown. Lower the presser bar and sew at a slow speed. Move the fabric back and forth slowly until the darning area is covered. Turn the fabric a 1/4 turn (90°), and sew another layer of stitching over the first layer.
Zurcido ','..1_ Selector de patr6n: _.2_Prensatetas: ,_3_Tensi6n det hito de la aguja: _4_ Longitud de puntada: _5_Los dientes de transporte: Reprisage s_ 1-2 NingOn prensatetas la4 Cualesquiera Bajados ,1/, Setecteur de point: :_2_Pied presseur: _3_Tension du fit de t'aiguitte: _4_Longueur du point: :_5_Griffes d'entrafnement: Baje las ufias (vea ta pagina 34) y quite el prensatelas. Centre et agujero de la teta en un aro de bordado, tal como se itustra.
SECTION Basic IV. ZIGZAG STITCH SEWING Zigzag ,_1_ Stitch pattern selector: _2_Presser foot: ,_3_, Needle thread tension: (4_Stitch length: \\\ \x 2-3 Zigzag foot 2to5 0.5-4 @ Set the stitch pattern selector between 2 and 3 for the zigzag stitch. This stitch is one of the most common and versatile stitches. It can be a utility stitch for button sewing, buttonhole making, hemming, overcasting, mending and darning.
SECCION Puntada IV. PUNTADAS DE ZIG=ZAG PARTIE IV. POINTS Zig-zag de zig-zag (]_, Selector de patr6n: /;,_\ _2) Prensatetas: _3) Tensi6n del hilo de la aguja: ,4_' Longitud de puntada: simple (.1_Setecteur de point: _2_Pied presseur: '_3_Tension du fit de t'aiguitle: _4_Longueur du point: 2-3 Prensatetas para zig-zag 2a5 0.5-4 La puntada de zig-zag es una de las puntadas mas comunes y mas versatites.
Monogramming _1_Stitch pattern selector: _2_,Presser foot: _3_Needle thread tension: _(4_ Stitch length: 3 Satin stitch foot 1 to4 0.5-1 t_ \¸, J f Attach a piece of stabilizer on the wrong side (Bottom side) of the fabric. Draw letters on the fabric with tailor's chalk. Form each pattern with a satin stitch. Applique _1_Stitch pattern selector: _ Presser foot: _ Needle thread tension: _4_Stitch length: 3 Satin stitch foot 1 to4 0.
Monogramas Monograrnmes (1_,Selector de patr6n: _,2;,Prensatetas: (3_=Tensi6n del hilo de la aguja: (41 Longitud de puntada: "J 3 Prensatetas para puntada decorativa la4 0.5-1 Yl"j Setecteur de point: _2_ Pied )resseur: {,3_Tension du fit de l'aiguitle: _4_ Longueur du point: '\ 3 Pied a point lance la4 0.5-1 Fixez un tissu stabitisateur sur t'envers du tissu. Dessinez les lettres sur te tissu avec uB craie de taitleur.
Bar Tacking _1_Stitch pattern selector: _2_,Presser foot: _3_Needle thread tension: _(4_ Stitch length: 3 Zigzag foot 1 to 4 0.5- 1 $1 )I_, i\ F_ 0 This is similar to a very short satin stitch, and is used to reinforce points of strain, such as corners, pockets and straps of lingerie. Sew four (4) to six (6) stitches. _(1}Bartacking Button Sewing _1}Stitch pattern selector: _2} Presser foot: _._ Needle thread tension: _4_Stitch length: _5} Feed dog: 3 Zigzag foot 1 to 3 Any Dro 1.
Puntada Brides de refuerzo (1_,Selector de patr6n: (2_ Prensatetas: (3_ Tensi6n del hito de la aguja: (:4_Longitud de la puntada: 3 Prensatetas para zig-zag la4 0.5-1 Esta puntada es similar a una puntada de saten muy corta y se utitiza para reforzar los puntos que reciben et mayor esfuerzo, como esquinas o bolsitlos y las tiras en ropa interior. Cosa de cuatro(4) a seis(6) puntadas de zig-zag.
Overcasting Stitch _1_Stitch pattern selector: _2_,Presser foot: _ Needle thread tension: :4_Stitch length: 3 Zigzag foot 1 to 4 1-2 x J s'\ J f This stitch is useful in garment construction, and in finishing the raw edges of any sewing project. Start overcasting about 1/8"(0.3 cm) inside the raw corner of a fabric. The right tip of the stitch should just clear the row edge.
Puntada de sobrehilado Surfilage 0 remate '_1_Selector de patr6n: _2_Prensatetas: _3_Tensi6n del hilo de la aguja: 3 Prensatetas pare zig-zag 1a4 _4_Longitud de puntada: 1-2 _1_Setecteur de point: _2_,Pied presseur: _3_Tension du fit de t'aiguitle: _.4_Longueur du point: 3 Pied zig-zag 1a4 1-2 Esta puntada es muy Qtit en ta construcci6n de prendas y pare sobrehitar o rematar bordes brutos en cualquier proyecto de costura. Empiece a rematar un 0.3 cm (1/8") dentro det borde bruto.
SECTION Blind V. UTiLiTY AND DECORATIVE STITCHES \ J Hem Stitch _1_Stitch pattern selector: _2_Presser foot: (3_ Needle thread tension: _4_Stitch length: 5 or 6 Zigzag foot 2 to 4 1-3 Ix j' ',,:!JLightweight fabric _._,,,_2_ Heavyweight fabric _3j,Wrong side (Bottom side) of fabric f t\lj On heavyweight fabrics that ravel, the raw edge should be overcast first. Then fold the hem, as illustrated, leaving 1/4"(0.7 cm) of the hem edge showing.
SECCION V. PUNTADAS UTILESY PU NTADAS D ECORATIVAS Dobladillo invisible PARTIE V. POINTS Ourlet _1_Selector de patr6n: _', Prensatetas: _3_Tensi6n del hilo de la aguja: '_4_Longitud de puntada: 566 Prensatetas para zig-zag 2a4 1-3 POINTS UTILITAIRES ET DE_CORATIFS invisible '_1_Setecteur de point: (2_ Pied presseur: (3_ Tension du fit de t'aiguitle: (4_ Longueur du point: f ,_I) Tetas tigeras (2_,Telas gruesas L3_'Parte de abajo la teta \ 5 ou 6 Pied zig-zag 2 a4 1-3 .
Shell Tuck Stitch pattern selector: 7 _) Presser foot: Satin stitch foot (:_ Needle thread tension: 6-8 Stitch length: ® 2-3 Fold the fabric in bias. Sew along the folded edge so that the needle on the right swing just clear the fold to form tucks. Open the fold and press the tucks to one side. Bias fold NOTE: You may need to adjust the needle thread tension to achieve the best result.
Alforza tipo concha marina Selector de patr6n: _) Prensatetas: Tensi6n det hito: Le point 7 Prensatetas para puntada decorativa 6-8 Longitud de puntada: de coquille Cadran de selection du point : (:_ Pied presseur : (:_ Tension du ill: 2-3 Pied a point lance 6-8 Longueur du point : Doble ta teta en sesgo. Cosa a lo largo det borde dobtado de Plier te tissu en biais.
Knit Stitch Stitch pattern selector: (_ Presser foot: (_ Needle thread tension: 7 Zigzag foot 1-4 Stitch length: ® This knit stitch is ideal for sewing swimwear 1iiiiii!!!_iiiiiiiiiiiiiiiiiiiiiiiiiiiiiiiiiiiiiiiiiiiiiiiiiiiiiiiiiiiiiiiiiiiiiiiiiii_i_i!i! and stretch velour because it provides the greatest amount of elasticity and strength. Place your fabric to allow a 1.6 cm (5/8") seam. Trim the seam allowance after sewing. NOTE: Be careful not to cut the stitches.
Tejido Le point de surfil de punto Selector de patr6n: (:_ Prensatetas: (_ Tensi6n det hito: Cadran de selection du point: 7 Prensatetas de zigzag 1-4 7 (:_ Pied presseur: Pied zigzag (:_ Tension du ill: 1-4 Longueur du point: Longitud de puntada: Et tejido de punto es ideal para trajes de bafio y velour etastico, Le point de surfit est ideal pour col porque proporciona gran etasticidad y resistencia. velours extensibte car it laisse ta Coloque ta teta y deje un borde de 1.
Smocking Stitch pattern selector: 4 _) Presser foot: Satin stitch foot (:_ Needle thread tension: 1-4 Stitch length: ® _' NOTE: Loosen the needle thread tension to make gathering easier. Smocking is a delicate decorative treatment used on children's clothes or women's blouses. Choose a soft and lightweight fabric such as batiste, gingham or challis. Cut the fabric three times wider than the projected width. Set stitch length at "4" and sew rows of straight stitches 3/8" (1.
Fruncido decorativo Selector de patr6n: (_ Prensatetas: (_ Tensi6n det hito: Longitud de puntada: Le point 4 smocks Cadran de selection du point: Prensatetas para puntada decorativa 1-4 4 (_ Pied presseur: Pied a point lance (_ Tension du ill: 1-4 Longueur du point: T NOTA: Afloje la tensi6n det hito de la aguja para facititar et fruncido. REMARQUE: Ret_chez la tension du fit de l'aiguitte pour facititer les fronces.
Decorative Satin Stitch Stitch pattern selector: (:_ Presser foot: (:_ Needle thread tension: Stitch length: For a delicate appearance Pattern 9 Satin stitch foot 1-4 ® 0.5-1 on fabric such as chiffon, use a single layer with a tear-away backing, if necessary.
Patrones decorativos Selector de patr6n: _) Prensatetas: Tensi6n det hito: Longitud de puntada: de puntadas Mod¢les de raso de points d_coratifs Cadran de selection du point: 9 Prensatetas para puntada decorativa 1-4 Pied a point lance (_ Tension du ill: 1-4 0.5-1 Para una apariencia deticada en tetas como chif6n, use una Pour une apparence sola capa con un forro removible, si es necesario. utitiser une seule rangee avec un si necessaire. 61 9 (_ Pied presseur: Longueur du point: 0.
Twin Needle Stitches (Option) _1_Stitch selector: _2_Presser foot: _3_Needle thread tension: _4_Needle: (_.!J) 2 to 2.5 Zigzag foot 1 to 4 Twin needle (optional item) S"X 2 NOTE: Do not set the stitch pattern selector at any position higher than the middle of 2 and 3, otherwise the needle may hit the needle plate or presser foot and could possibly break. I
Puntadas de doble aguja (Opci6n) _.1_Selector de patr6n: ,/2_:Prensatetas: _.3_Tensi6n de hito de la aguja: _4_Aguja: Aiguilles 2 a 2.5 Prensatetas para zig-zag 1a4 Doble aguja (objeto optional) jumel_es (Option) _1_Setecteur de point: _2_Pied presseur: _3_Tension du fit de l'aiguitle: _/4_Aiguitte: NOTA: No ilje el selector det patr6n de la puntada en ninguna 1 posici6n mas alta que et centro de 2 y 3. De 1o contrario, ta I aguja chocara contra et prensatetas y posibtemente se romper&J 2 a 2.
SECTION Vl. BUTTONHOLE _\1 jJ Buttonhole _i_ Pattern selector: _2_Presser foot: _3_Thread tension: _4_Stitch length: [! (BH) Automatic buttonhole foot 1 to5 (0.25-1) * The size of buttonhole is automatically set by placing the * The button holder of the foot takes a button size up to BH II button in the automatic buttonhole foot. 2.5 cm (1") in diameter. * Make a test buttonhole on a sample duplicating the fabric, interfacing and seams of the actual garment.
SECCION Ojales Boutonniere m=m Selector de patr6n: (_ Prensatetas: (_ Tensi6n del hito: _4_Longitud de puntada: * PARTIE Vl. BOUTONNIERE Vl. OJELES !1 (BH) _ Prensatetas para ojales automaticos (_ Pied presseur: 1a5 (_ Tension du ill: _ (0.25-1) Cadran de selection du point: Et tama_o det ojal se fija automaticamente at colocar et * Et portabotones Le support a bouton du pied convient a des boutons d'une * taitle inferieure ou egale a 2,5 cm (1 pouces ) de diametre.
[] Sew slowly and stop the machine when a buttonhole is % completed. * The front bartack and left row sews first, then the back bartack and right row. [] Cut both needle and bobbin threads leaving about 10 cm (4") thread ends. Draw the needle thread to wrong side of fabric by pulling the bobbin thread. Then, knot the threads. [] Insert a pin inside the bartack. Then cut the opening with seam ripper. Take care not to cut the stitches.
[] Cosa lentamente y detenga la maquina al terminar un [] ojal. * Coudre doucement, puis arr6ter la machine lorsque la boutonniere est terminee. Primero et remate frontal y la ilia izquierda, * Commencer par la barrette de renfort avant et la couture despues et remate posterior y la fita derecha. [] de gauche, puis terminer par ta barrette de renfort arriere et ta couture de droite. Corte et hito de ta aguja y et hito de ta bobina, dejando extremos de 10 cm (4").
SECTION Vii.CARE OF YOUR MACHINE NOTE: * Unplug the machine. * Do not dismantle the machine other than as explained in this section. * Do not store the machine in a high-humidity area, near a heat radiator or in direct sunlight. * Clean the outside of the machine with a soft cloth and mild soap. Replacing the Light Bulb WARNING: As the light bulb could be NOT, protect your fingers when you handle it. Unplug the machine and remove the face cover.
SECCION MAQUINA Vii. MANTENIMIENTO DE LA PARTIE Vii. MACHINE la bombiiia Remplacement CUIDADO: La bombitla puede estar CALIENTE. cuando la cambie. de los dientes de I'ampoule ATTENTION: Uampoule peut 6tre CNAUDE, donc protegez vos doigts avant d'y toucher. Proteja sus dedos Debranchez la machine et retirer te soulevant l'ampoule, tournez-ta antihoraire) pour la retirer. Installez poussant vers la haut et horaire). Desenchufe la maquina y quite la tapa.
Cleaning the Shuttle Race This area must be kept free of dust, lint and tangled thread. Clean the shuttle race area every three months. • Cleaning _ Bobbin _2_Levers _3_Shuttle ,_4_Shuttle ,_5_Shuttle ,_6_Center the shuttle case area race cover race pin on the shuttle 1. Raise the needle bar to its highest point, then and remove the bobbin case _i_,. 2. Push the shuttle race levers ,_2_aside. Lift out the shuttle race cover_3_ and take the shuttle _4_out. 3.
Limpieza de la corredera de la lanzadera Nettoyage Esta area debera mantenerse tibre de polvo, petusa y de ocasionales hitos atorados. Limpie la area de ta corredera de la lanzadera. Limpie ta area de la corredera de la lanzadera cada tres meses aproximadamente. de la coursi_re La navette dolt etre gardee exempte de poussiere, de charpie et de bouts de fit emm61es. Nettoyez la navette a tousles trois mois. Nettoyage de la navette _1_Porte-canette _2_Patte de retenue _3_Couvercte de coursiere /--\ '_4/
Oiling the Machine NOTE: Unplug the machine before oiling, Oil behind the face cover Remove the face cover and oil the two points, as shown, at least once a year. One or two drops of oil is sufficient. Remove excess oil, otherwise it may stain the fabric. In case the machine has not been used for a long period, oil it before sewing. Use quality sewing machine oil. J o Oil the shuttle area Open the shuttle cover by pulling down part on the left side of the cover.
Engrasando Lubrification la m_quina de la machine NOTA: Desconecte la maquina antes de lubricar. REMARQUE: Debranchez la machine a coudre avant de la huiter. Aceite atras de la plancha cubierta frontal Quite la tapa frontal y a_ada aceite como es mostrado en ta itustraci6n, al menos una vez al a_o. Una o dos gotas de aceite seran suflciente. Limpie et exceso de aceite o de otra forma manchara tas tetas. Si no usa la maquina por un largo periodo de tiempo, a_ada aceite antes de usarla.
Troubleshooting \ f Condition The needle thread breaks. The bobbin thread breaks. The needle breaks. Reference Cause 1. 2. 3. 4. 5. The needle thread is not threaded properly. The needle thread tension is too tight. The needle is bent or blunt. The needle is incorrectly inserted. The needle thread and the bobbin thread are not set properly under the presser foot at the beginning of sewing. 6. The threads are not drawn to the rear after previous sewing. 7.
Soluci6n para problemas de funcionamiento Causa Probable Condici6n Se rompe el hilo de la aguja. Referencia 1. 2. 3. 4. 5. Et hito de la aguja no se ha enhebrado correctamente. La tensi6n del hito de ta aguja es excesiva. La aguja esta despuntada o doblada. La aguja no esta bien colocada. Los hitos de ta aguja y la canilla no estan bien colocados debajo det prensatetas al empezar a coser. 6. La teta no se ha extraido hacia atras al terminar la costura. 7.
En cas de probl_me f Probleme Reference Cause Le fil d'aiguille se casse, Le fil de canette se casse, 1. Le fit d'aiguitte n'est pas passe correctement. 2. La tension du fit d'aiguille est trop forte. 3. Eaiguitte est tordue ou emouss6e. 4. Eaiguitle est mai installee. 5. Le fit d'aiguitle et celui de la canette ne sont pas passes correctement sous le pied presseur au debut de ta couture. 6. On ne tire pas te tissu vers l'arriere a ta fin de la couture. 7.
Your Home For repair-in your home-of all major brand appliances, lawn and garden equipment, or heating and cooling systems, no matter who made it, no matter who sold it! For the replacement parts, accessories and owner's manuals that you need to do-it-yourself. For Sears professional installation of home appliances and items like garage door openers and water heaters. 1-800-4-MY-HOME Call anytime, ® (1-800-469-4663) day or night (U.S.A. www.sears.com and Canada) www.sears.